Back with a "New" project, 1966 Coupe
 03-22-2013, 08:47 AM
#11
2nd Gear Member
Thread Starter
Join Date: Nov 2008
Location: Ca
Posts: 245
Down in tire size, did he just say go DOWN? in Tire size, lol. No I will do what I have to do to get the man tire in there, I want to keep it as close to stock as I can, we will fab a new fender like the ones on Frankenstang,
Oak
Oak
 03-22-2013, 01:10 PM
#12
2nd Gear Member
Join Date: Jul 2011
Location: Virginia
Posts: 207
:-) I know how you feel. Was just a suggestion. I've got a beat up old S-10 with some wide tires and wish I could get them as wide on my S197 without running into issues. I'm actually thinking I'll need to go down a width on that car with my current setup.
 03-23-2013, 09:07 AM
#14
2nd Gear Member
Thread Starter
Join Date: Nov 2008
Location: Ca
Posts: 245
This is what i was referring to in case you havent seen this link before
http://www.jefflilly.com/current-pro...es/flares.html
Oak
http://www.jefflilly.com/current-pro...es/flares.html
Oak
03-23-2013, 03:14 PM
#15
2nd Gear Member
Join Date: Jul 2011
Location: Virginia
Posts: 207
This is what i was referring to in case you havent seen this link before
http://www.jefflilly.com/current-pro...es/flares.html
Oak
http://www.jefflilly.com/current-pro...es/flares.html
Oak
 03-24-2013, 07:40 PM
#17
2nd Gear Member
Thread Starter
Join Date: Nov 2008
Location: Ca
Posts: 245
I did get a god deal, the guy who sold it to me wanted to see it built, and I think he wanted his garage space back, really nice guy and gave me a lot of accessories!!! Good deal aside I will probably end up with 30k into it???? Stay tuned
Oak
Oak
03-26-2013, 10:08 PM
#18
2nd Gear Member
Thread Starter
Join Date: Nov 2008
Location: Ca
Posts: 245
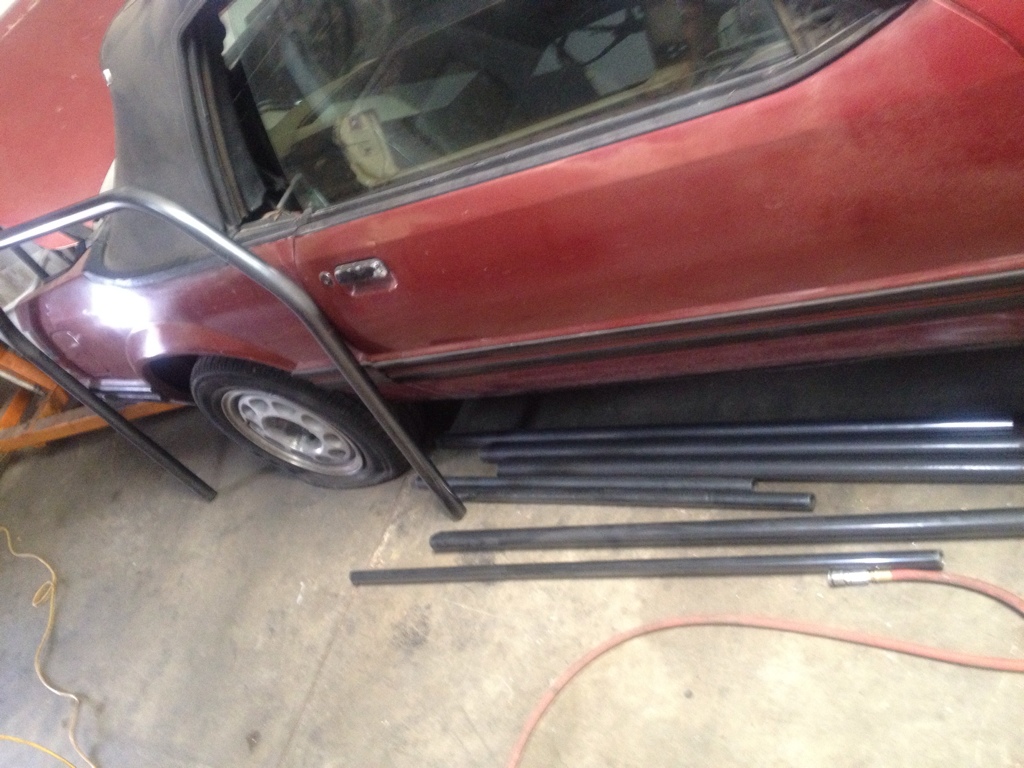
Took the stang to mikes (fab guy) to have some rust repair done and to do a few odds n ends. We put the stang up on some special jack stands, about 3 foot tall. No lift at the shop so this really helps with all that we are doing.
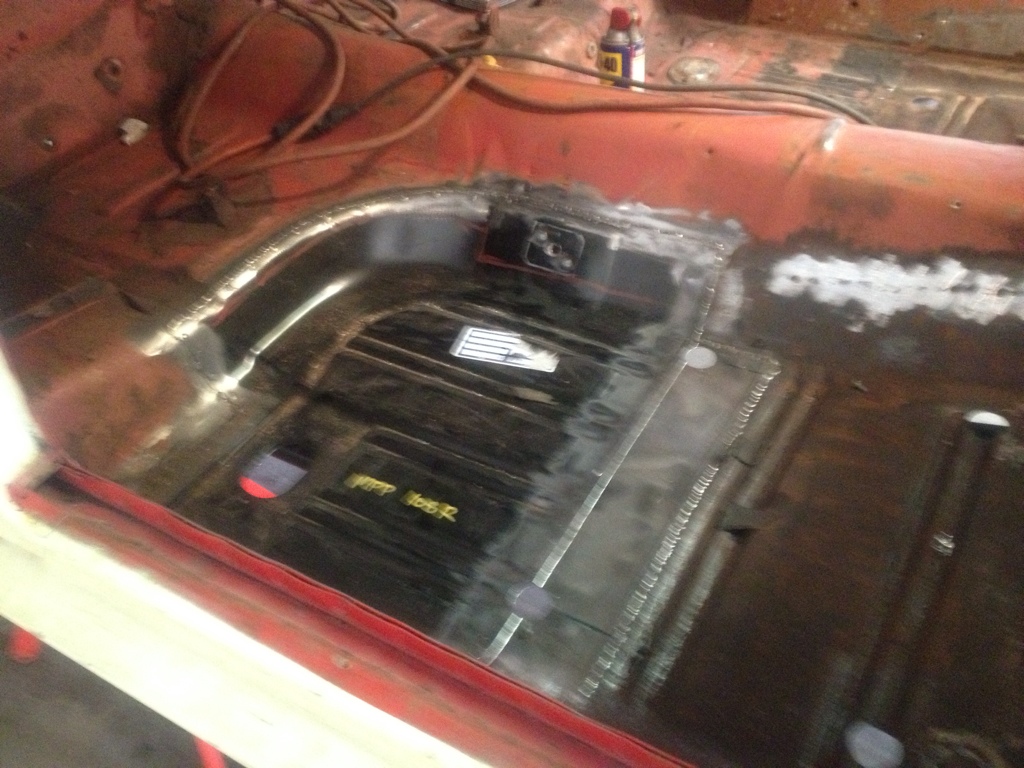
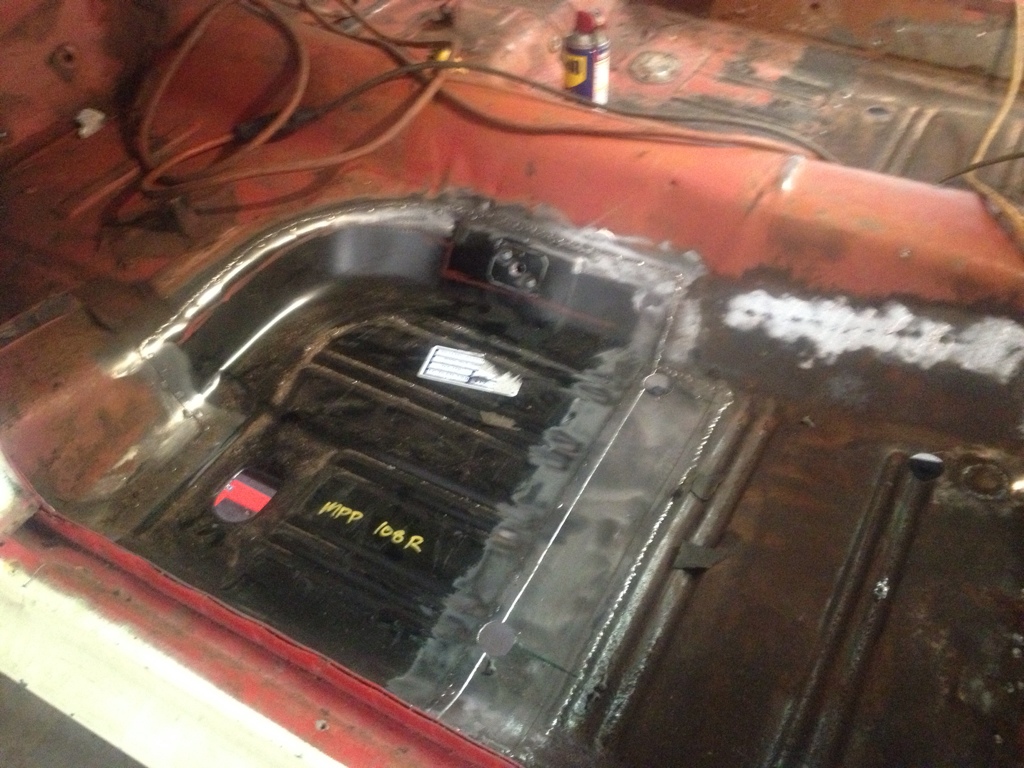
First job at hand is to repair the rust in the passenger side floor, really weird as the only rust is on that spot. Even after we took out the seat risers the rust didn't go underneath the riser?
The reason we are taking out the seat risers is to lower the riser by one inch and scoot them back two inches. Both risers will be treated and coated with POR 15, my motto is is if you have it apart you might as well POR 15 it so that it will NEVER rust again. The entire interior of the coupe will be POR15 before it is covered in sound deadener.
The roll cage kit came in from JEGS so as soon as the floor repair is done we will put that in.
Today I brought a seat and its track to Mike so we could confirm where the seat riser as well as the roll bar will be placed. Going to go with FLO FIT seats.
Here are some pics for your enjoyment
Here is the section we cut out, only surface rust under where the seat riser was

Up on the big *** jackstands


Roll Cage kit from Jegs
Seat riser removed and the new floor pan installed
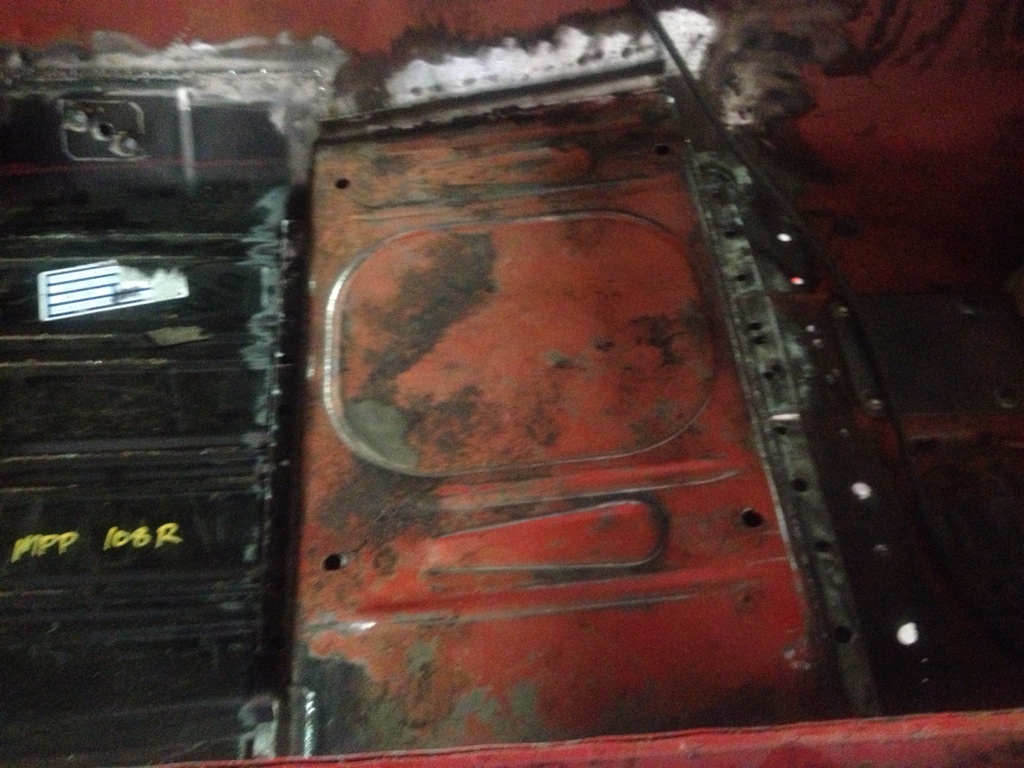
Seat risers removed and modified (shortened one inch front and back)

And the riser back in not tacked but in position, two inches back
Next plans hopefully Sat or Sunday I can get in teh inside and the underside of the unibody with a wire wheel. Plans are to POR15 top and bottom after I get the suspension off and sent to powdercoating.
Stay tuned
Ryan
First job at hand is to repair the rust in the passenger side floor, really weird as the only rust is on that spot. Even after we took out the seat risers the rust didn't go underneath the riser?
The reason we are taking out the seat risers is to lower the riser by one inch and scoot them back two inches. Both risers will be treated and coated with POR 15, my motto is is if you have it apart you might as well POR 15 it so that it will NEVER rust again. The entire interior of the coupe will be POR15 before it is covered in sound deadener.
The roll cage kit came in from JEGS so as soon as the floor repair is done we will put that in.
Today I brought a seat and its track to Mike so we could confirm where the seat riser as well as the roll bar will be placed. Going to go with FLO FIT seats.
Here are some pics for your enjoyment
Here is the section we cut out, only surface rust under where the seat riser was
Up on the big *** jackstands
Roll Cage kit from Jegs
Seat riser removed and the new floor pan installed
Seat risers removed and modified (shortened one inch front and back)
And the riser back in not tacked but in position, two inches back
Next plans hopefully Sat or Sunday I can get in teh inside and the underside of the unibody with a wire wheel. Plans are to POR15 top and bottom after I get the suspension off and sent to powdercoating.
Stay tuned
Ryan
Last edited by Oak; 03-26-2013 at 10:12 PM.
03-30-2013, 07:39 PM
#19
2nd Gear Member
Thread Starter
Join Date: Nov 2008
Location: Ca
Posts: 245
Got an new toy yesterday, ordered from JMR engineering
See how many pics it takes before you can guess what it is, I bought it for the truck project but now I am goin wild makin stuff just to make it, lol
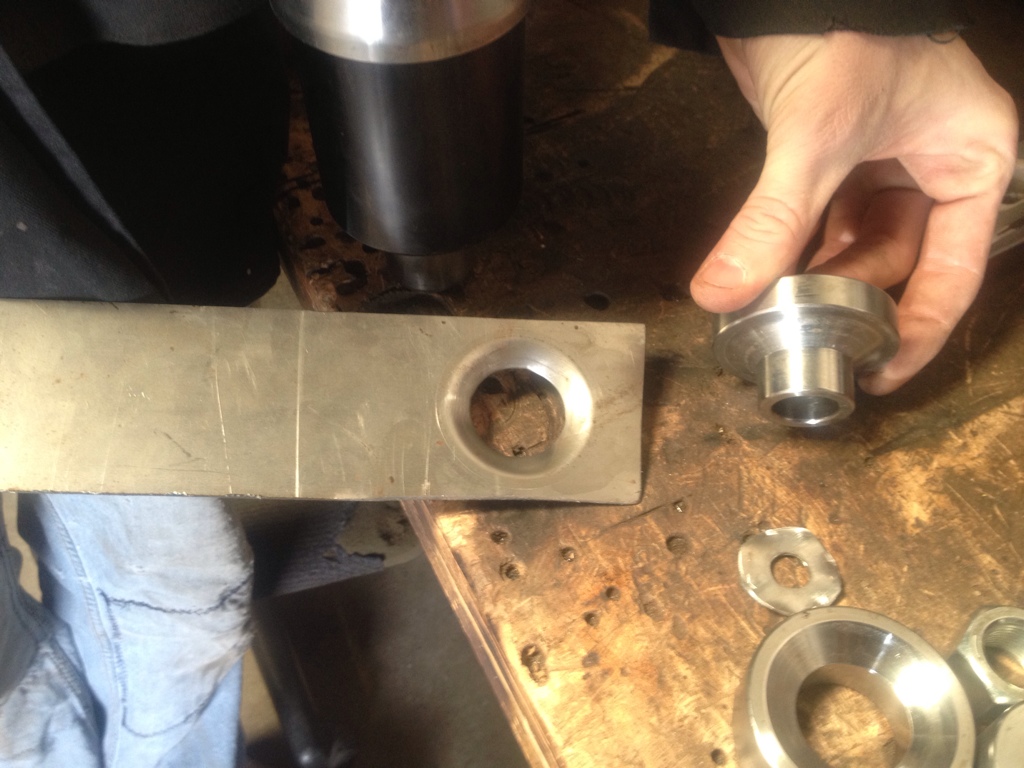
Drill a hole in your sheet metal
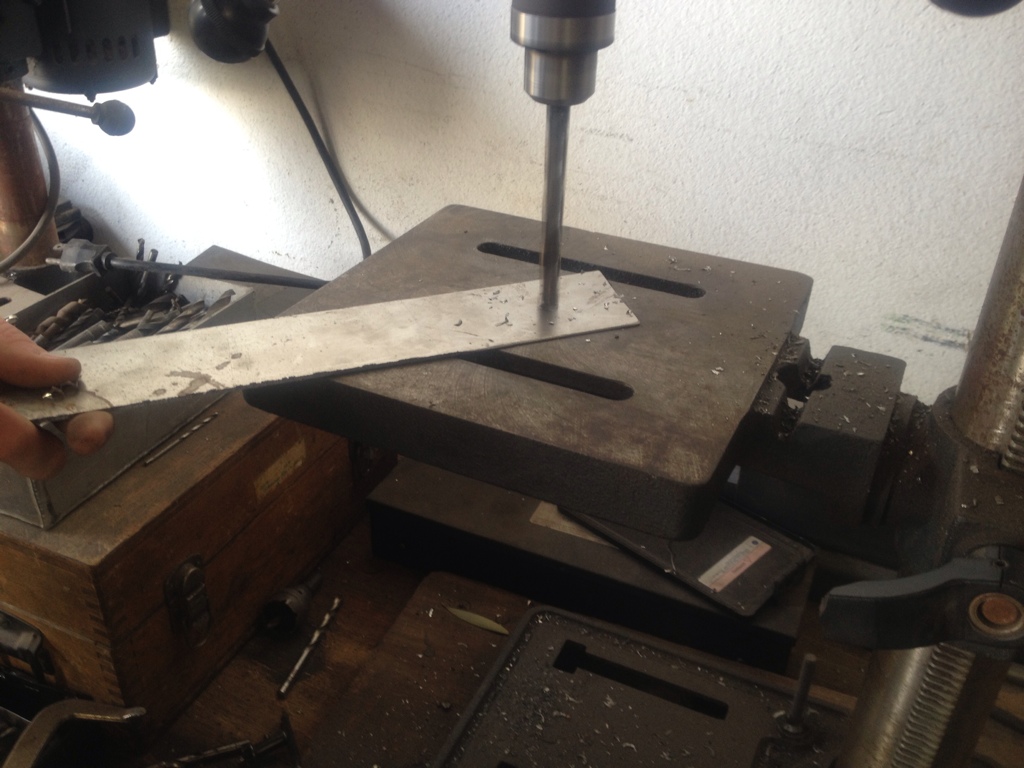
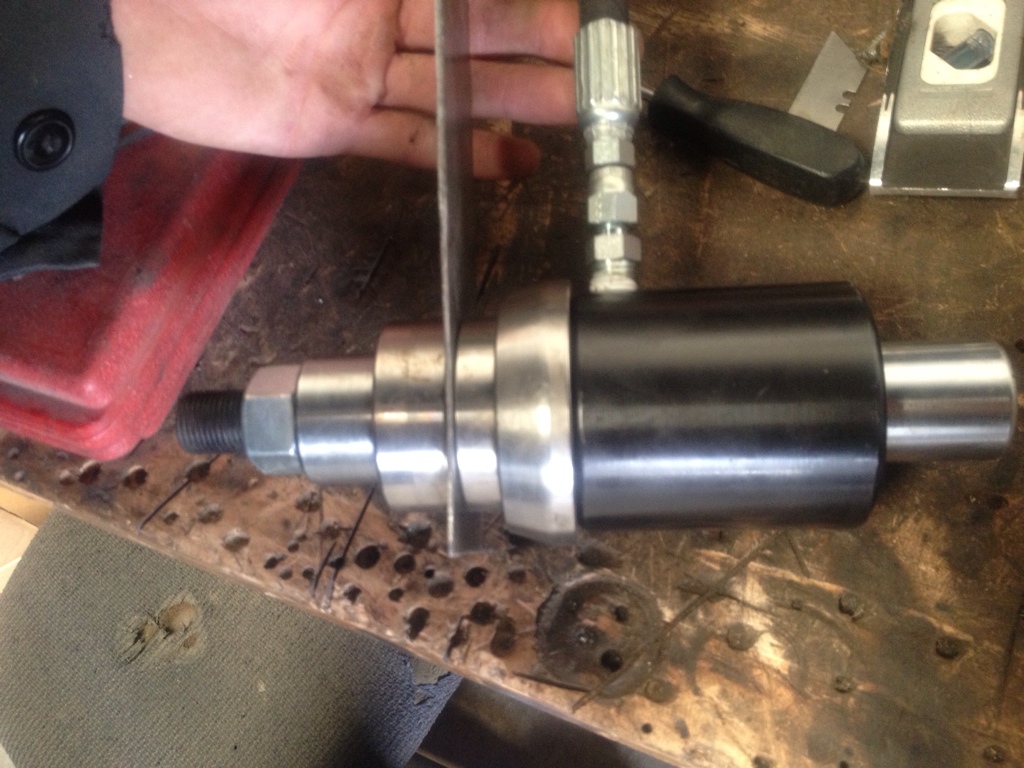
Cut the hole with your new toy "press"
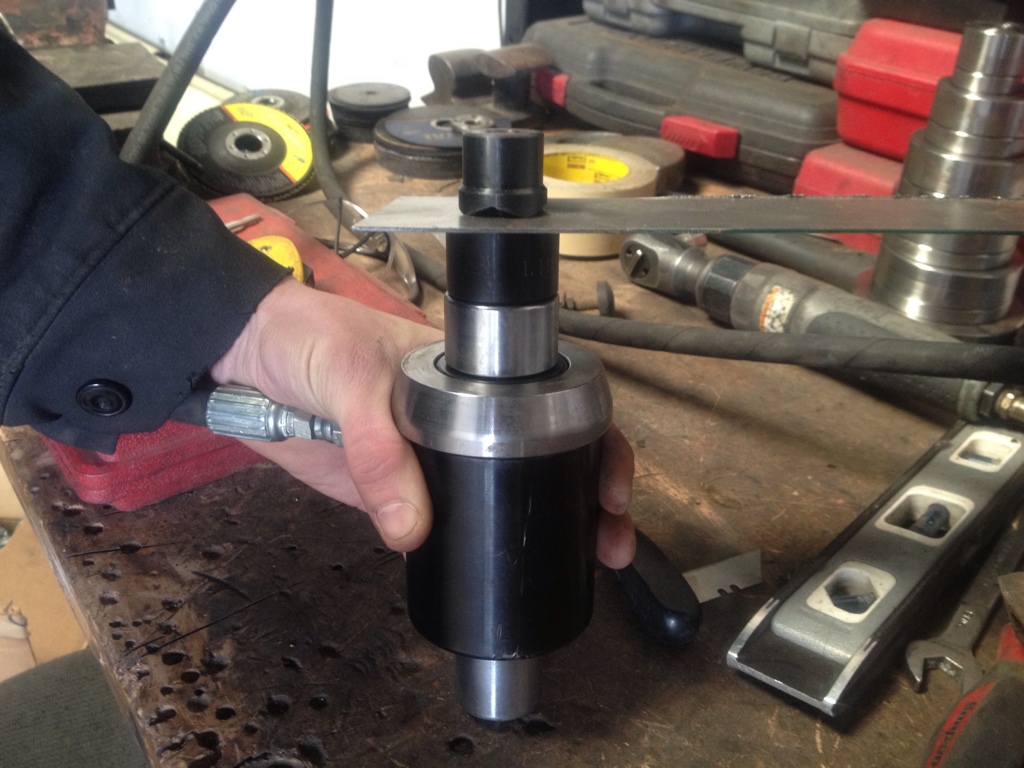
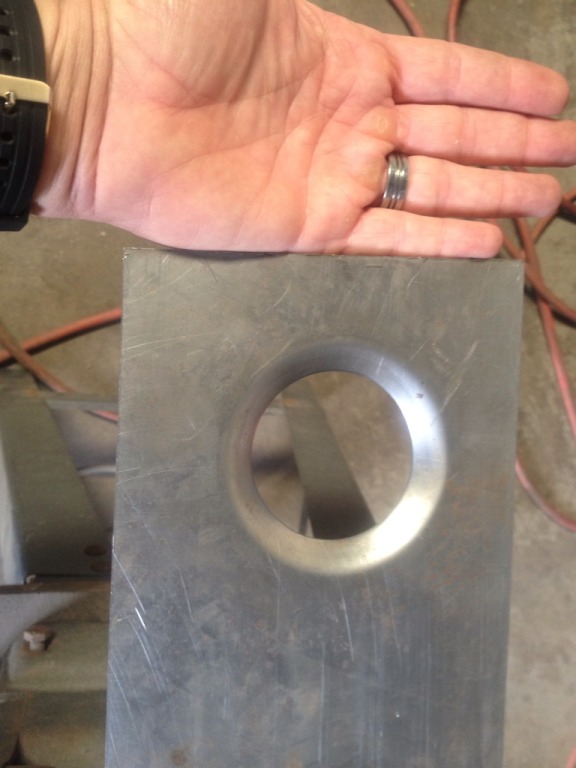
Perfect hole cut with new toy

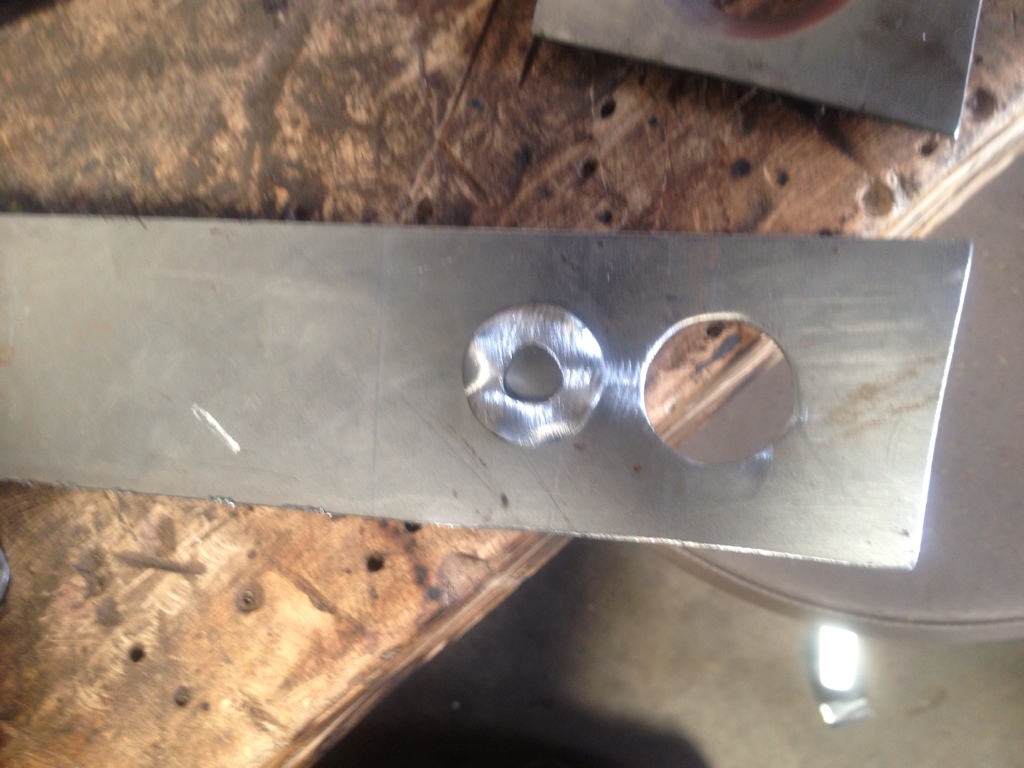
Put "DIE" on top and bottom
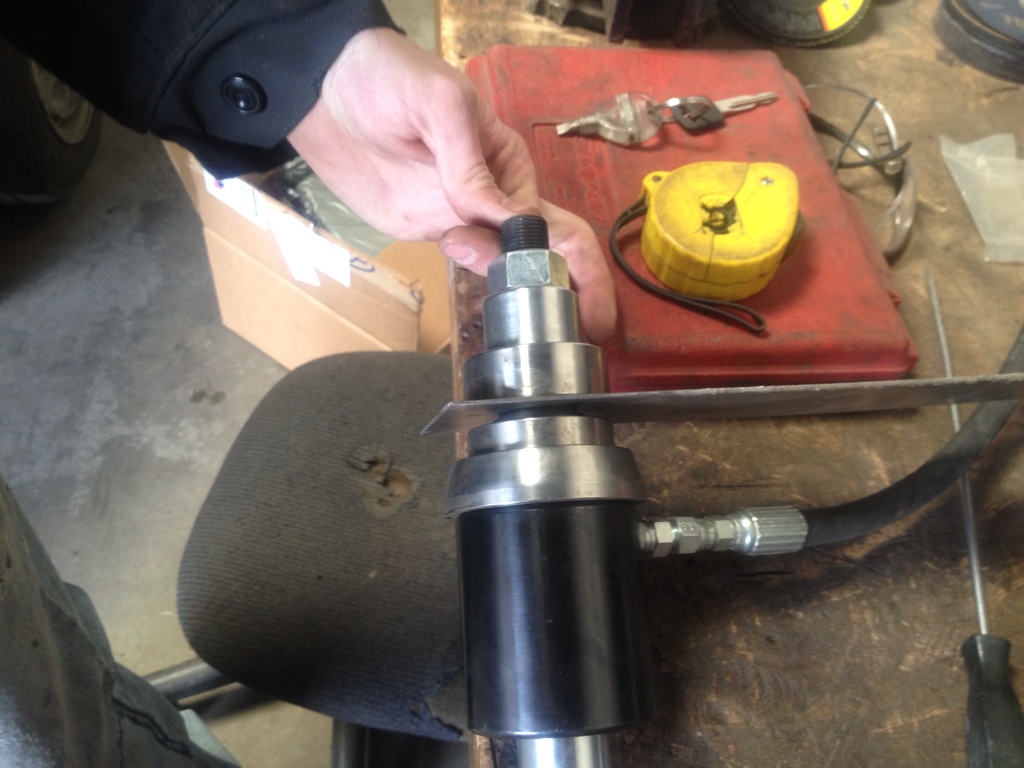
Pull the trigger "foot pedal actually" until both sides meet
TADA
You guessed it Dimple die machine, always wanted one, I will make the radiator cover for the truck with this, I will use in it on the wheel tus on the stang and many more projects.
If you want some done give me a call
All of these sizes
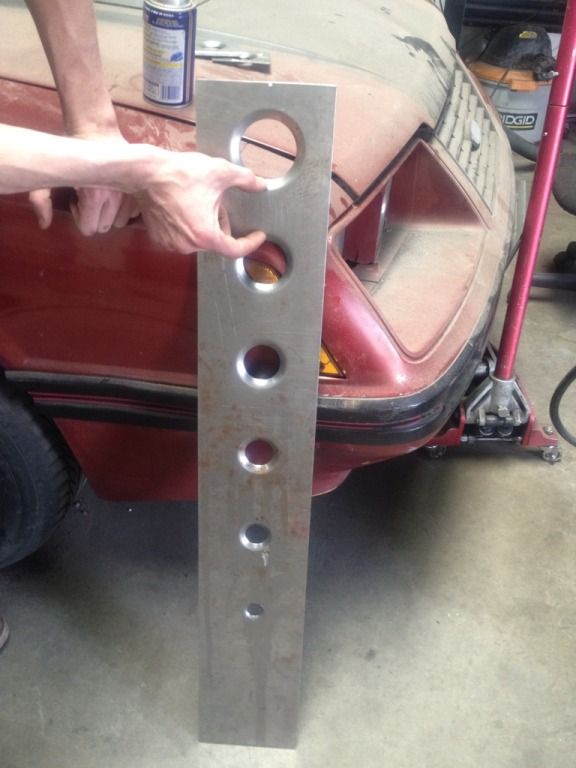
Oak
See how many pics it takes before you can guess what it is, I bought it for the truck project but now I am goin wild makin stuff just to make it, lol
Drill a hole in your sheet metal
Cut the hole with your new toy "press"
Perfect hole cut with new toy
Put "DIE" on top and bottom
Pull the trigger "foot pedal actually" until both sides meet
TADA
You guessed it Dimple die machine, always wanted one, I will make the radiator cover for the truck with this, I will use in it on the wheel tus on the stang and many more projects.
If you want some done give me a call
All of these sizes
Oak
