A woman's project: 68 Fastback


 12-30-2011, 04:59 PM
#602
3rd Gear Member
Thread Starter
Join Date: Sep 2009
Location: Ohio
Posts: 756
Okay, if you want pictures I'll give them from now on.
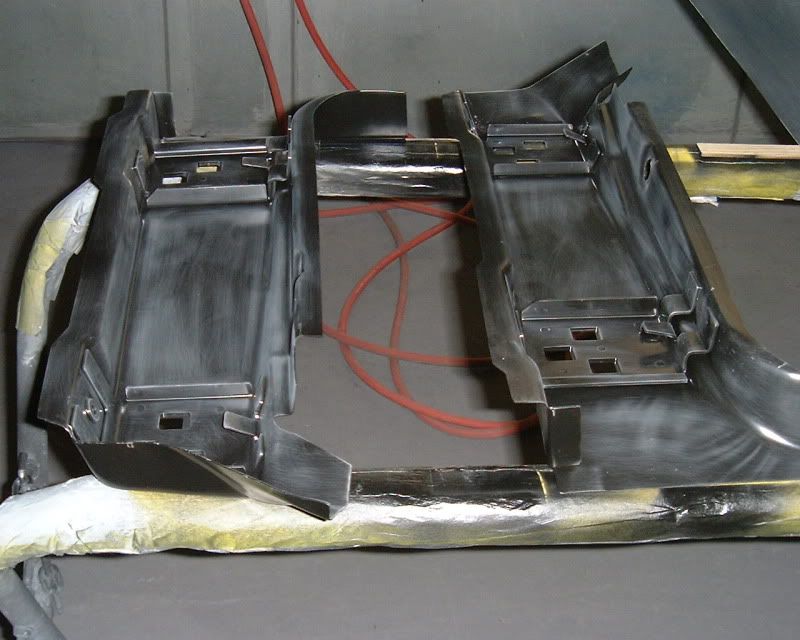
I don't have any from Rusty, but here is what Aaron and I did today. This past week we had our front seat frames sandblasted by a good friend. Then today I sprayed them with 2 heavy coats of SPI epoxy. This weekend we will start to reassemble them.
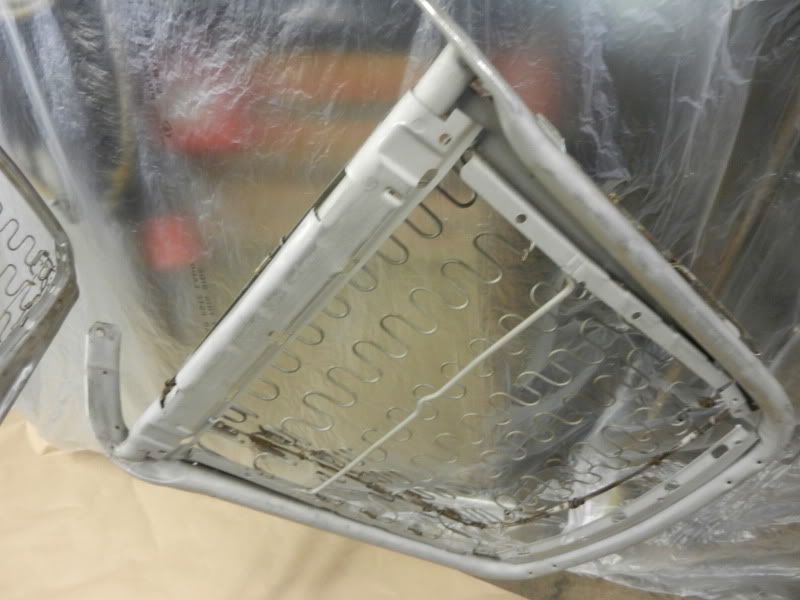
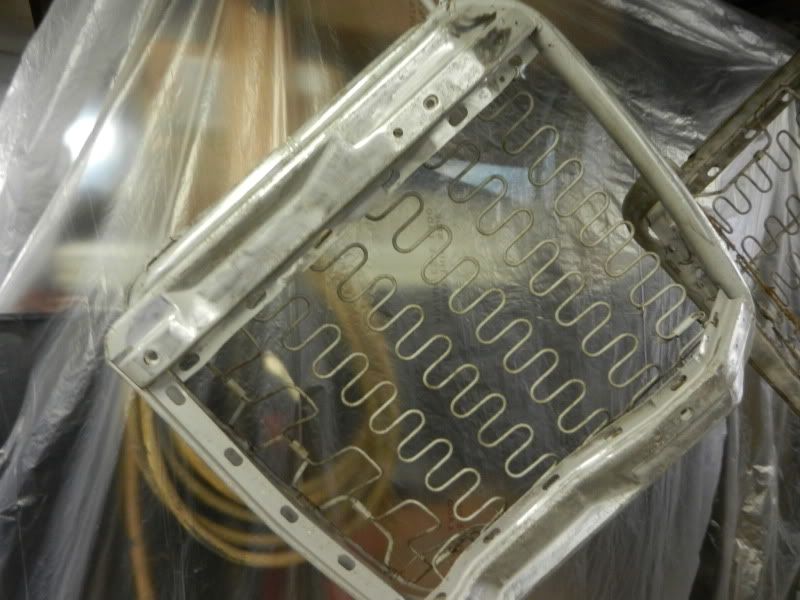
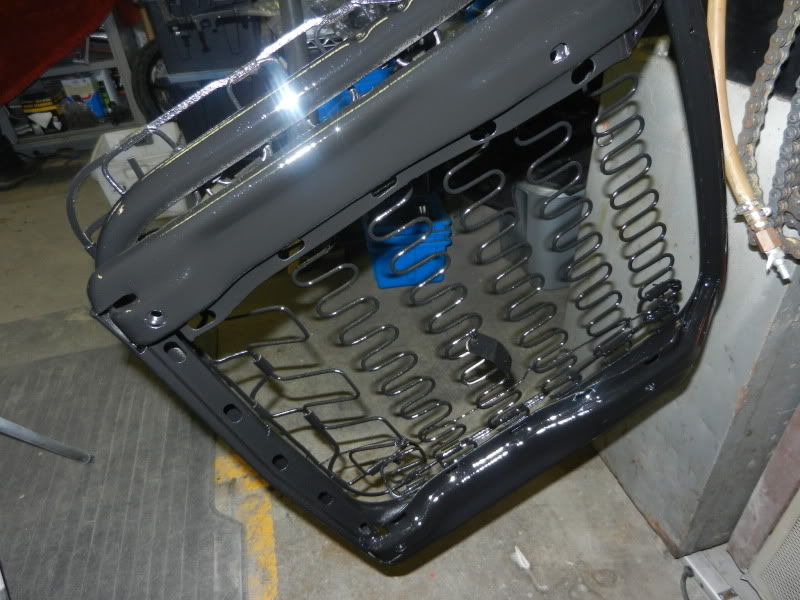
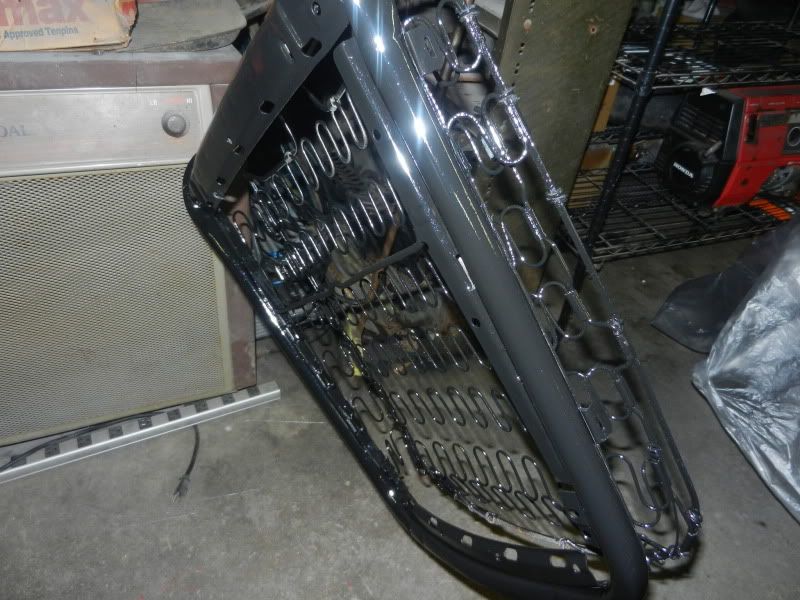
I don't have any from Rusty, but here is what Aaron and I did today. This past week we had our front seat frames sandblasted by a good friend. Then today I sprayed them with 2 heavy coats of SPI epoxy. This weekend we will start to reassemble them.
01-11-2012, 10:05 PM
#603
1st Gear Member

Join Date: Jun 2007
Location:
Posts: 50
Wow great thread, sorry that if you have already addressed this but I am wondering how you managed to mold the quarter extensions to the panel??? I have always wanted to do this but i have been weary of potential separation/cracks... Thanks!
01-12-2012, 05:36 AM
#604
3rd Gear Member
Thread Starter
Join Date: Sep 2009
Location: Ohio
Posts: 756
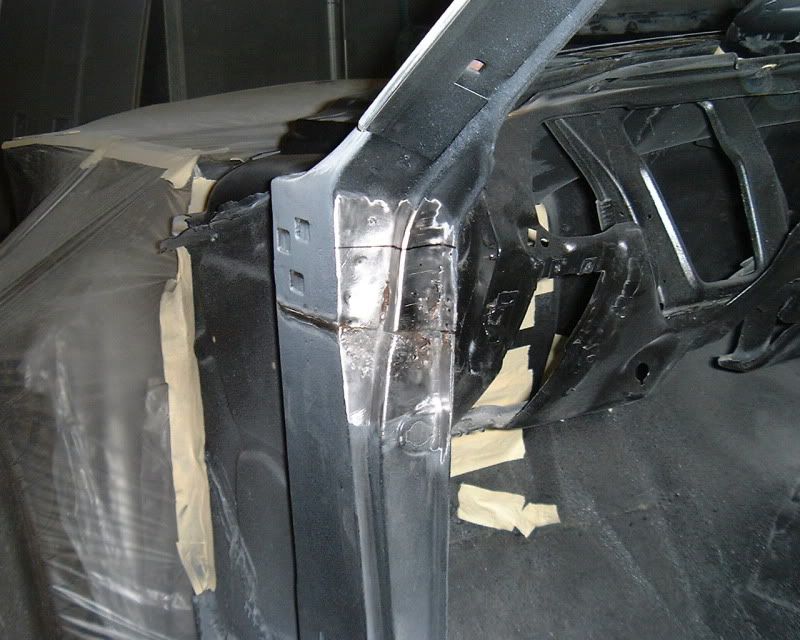
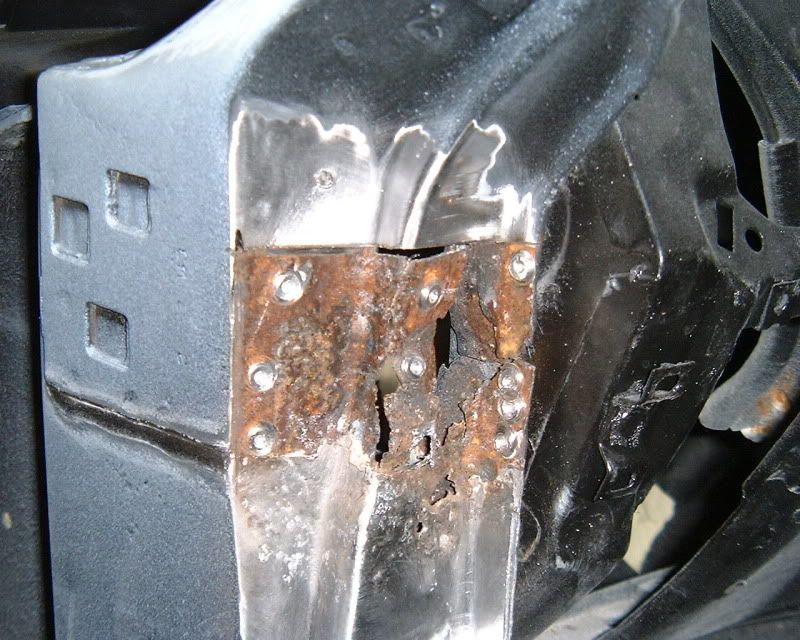
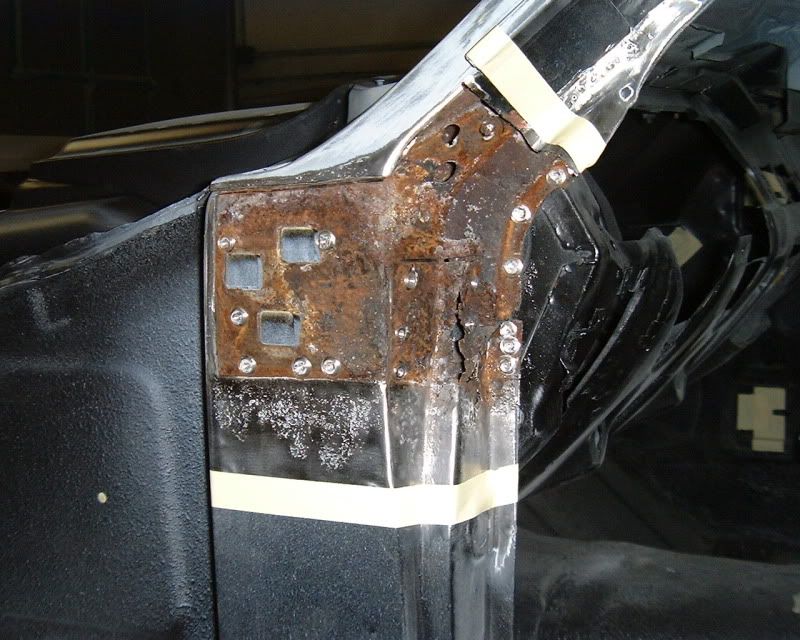
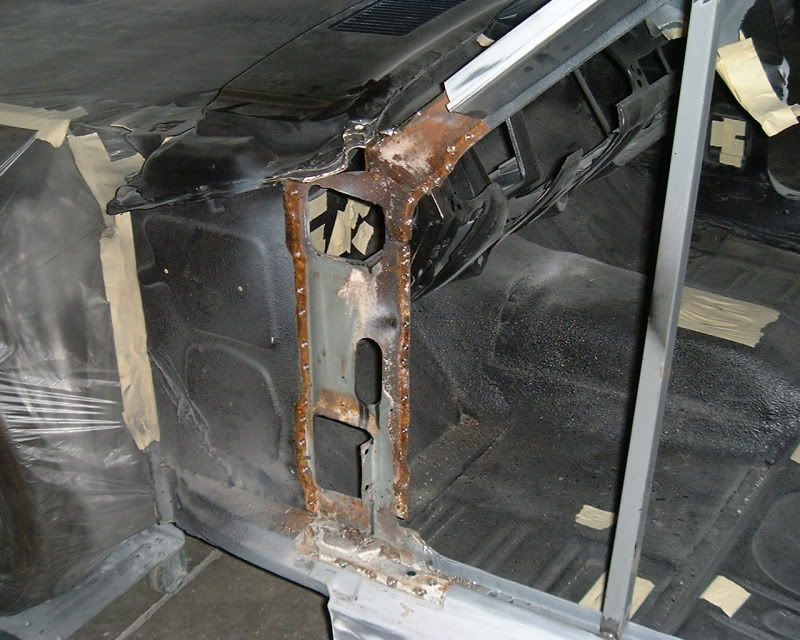
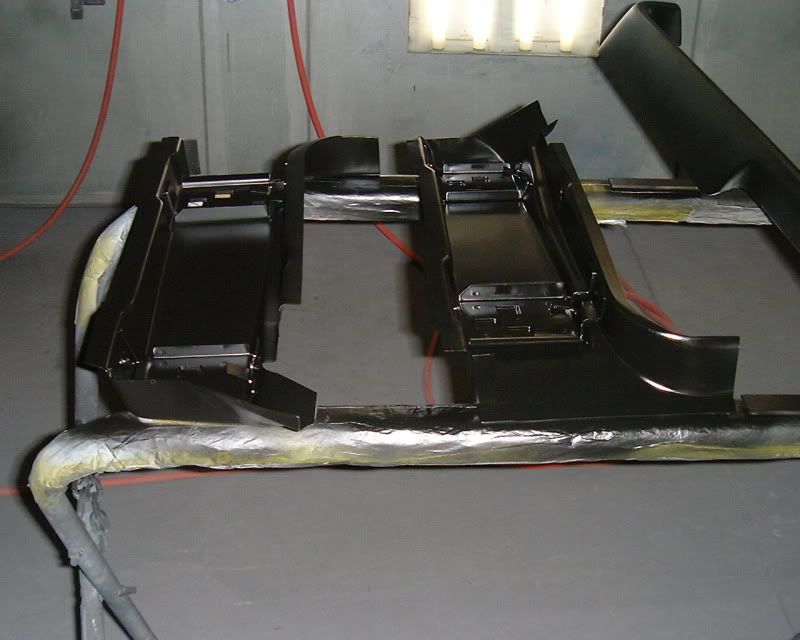
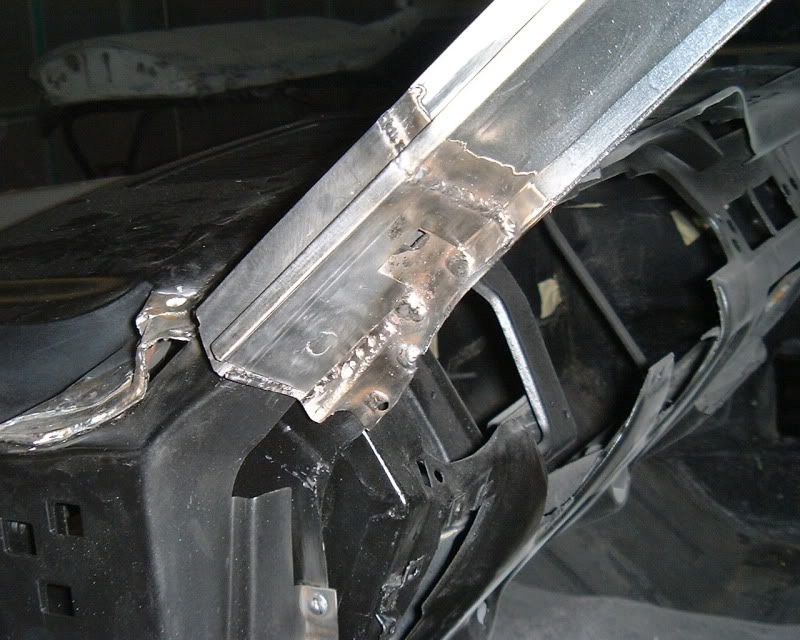
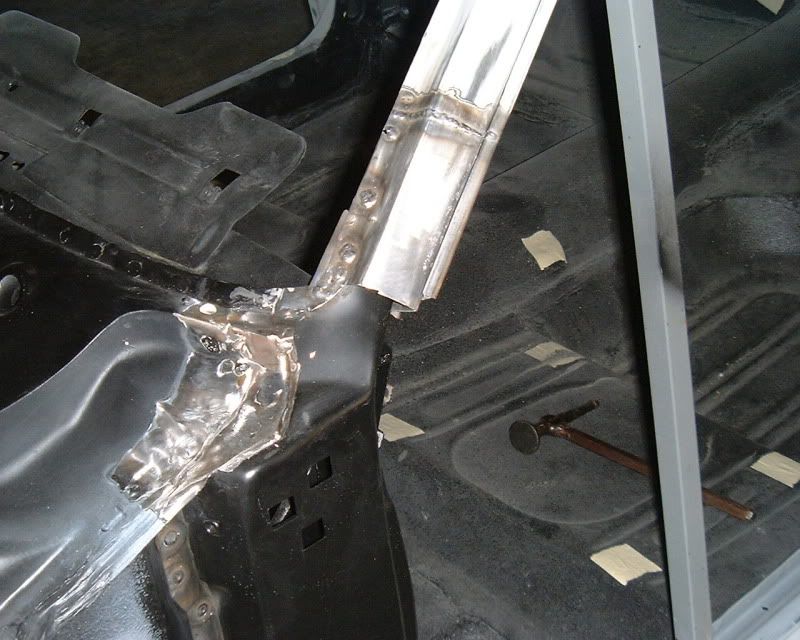
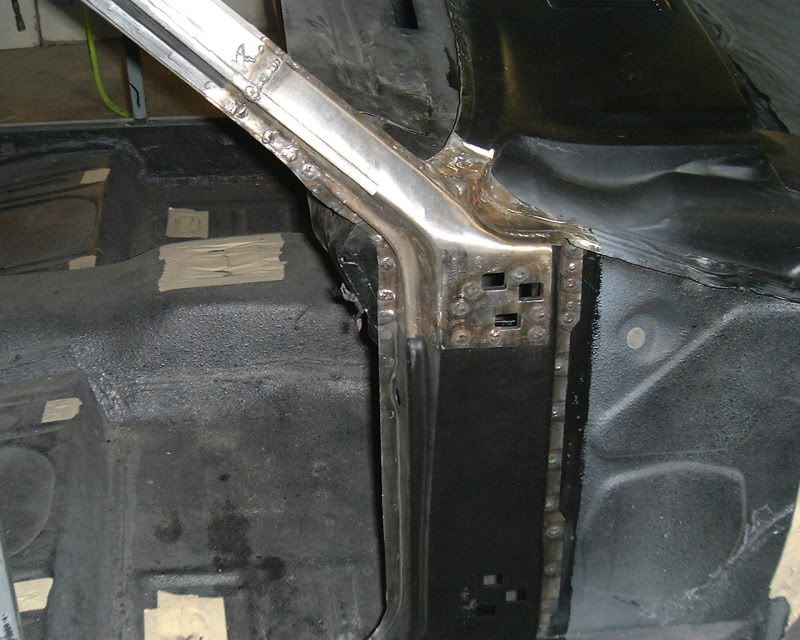
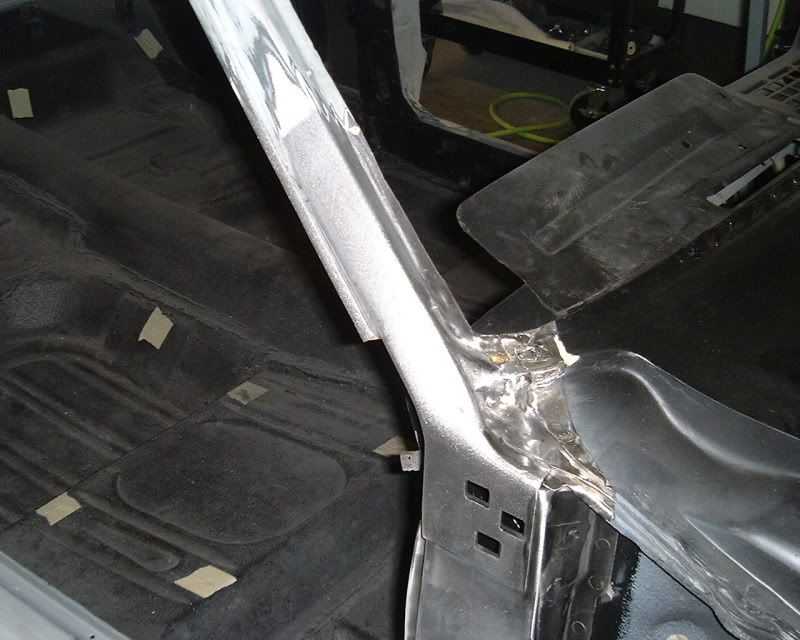
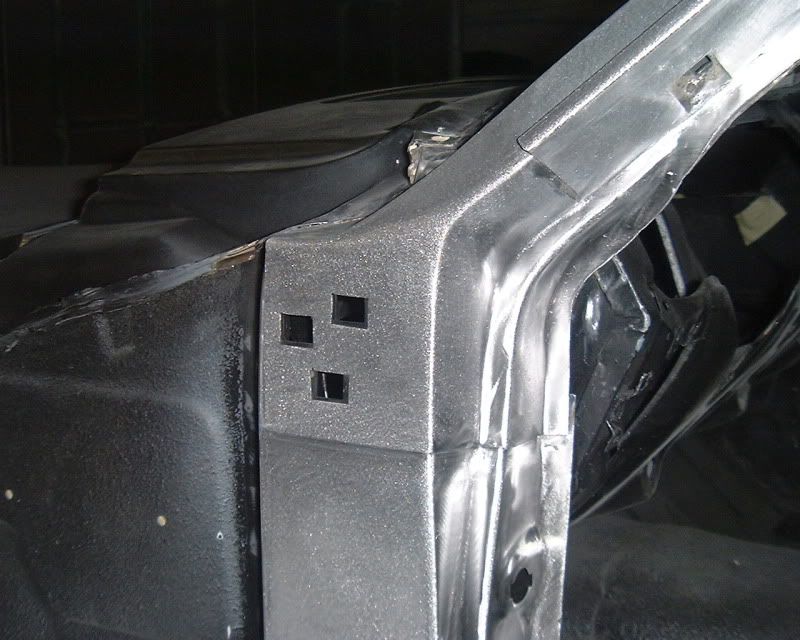
I was waiting until the repairs had totally been done before updating on what has gone on over the past few days. The one original area of the car that we thought was solid and were excited about, turned out to be exactly the opposite. From the outside metal of the pillars, everything looked fine. Brian and Rusty have replaced this area on 5 cars so he knew he needed to dig deeper. We're glad he knew what to look for, because we would have had no idea that it was like this.
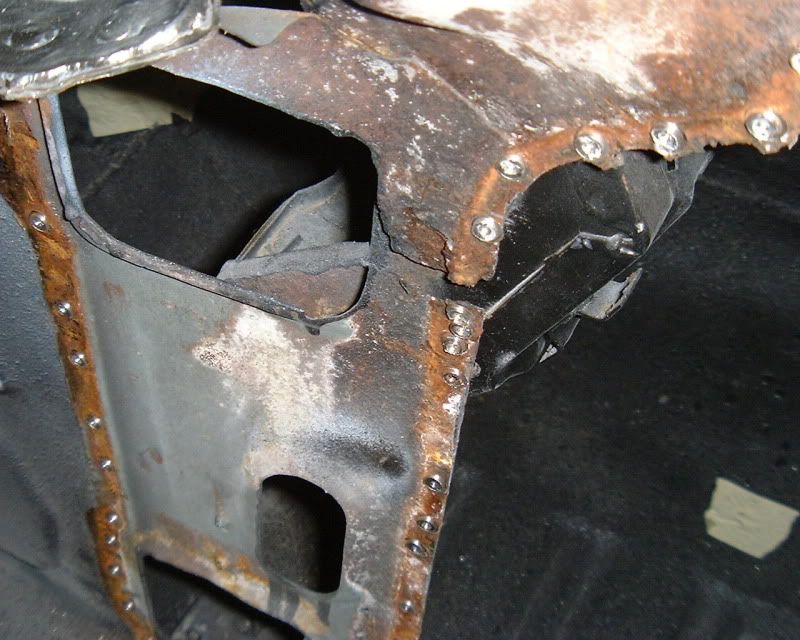
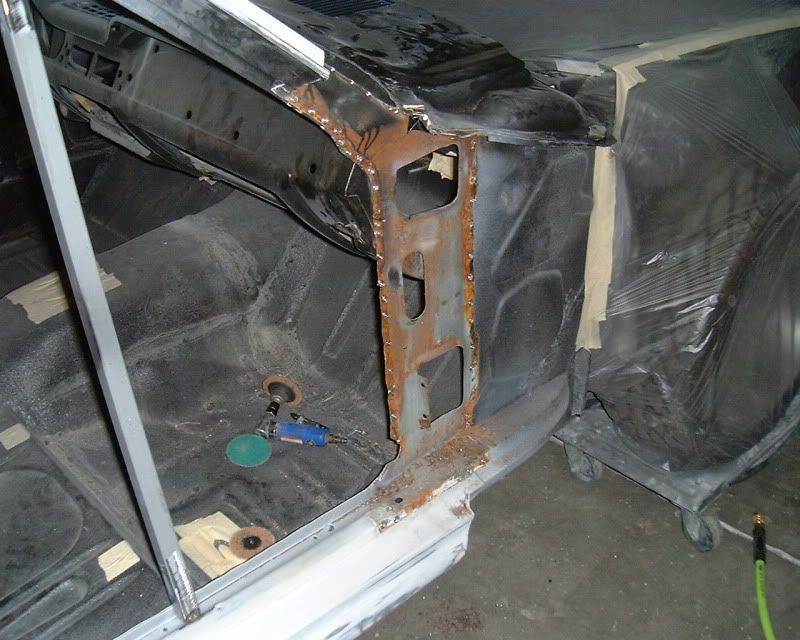
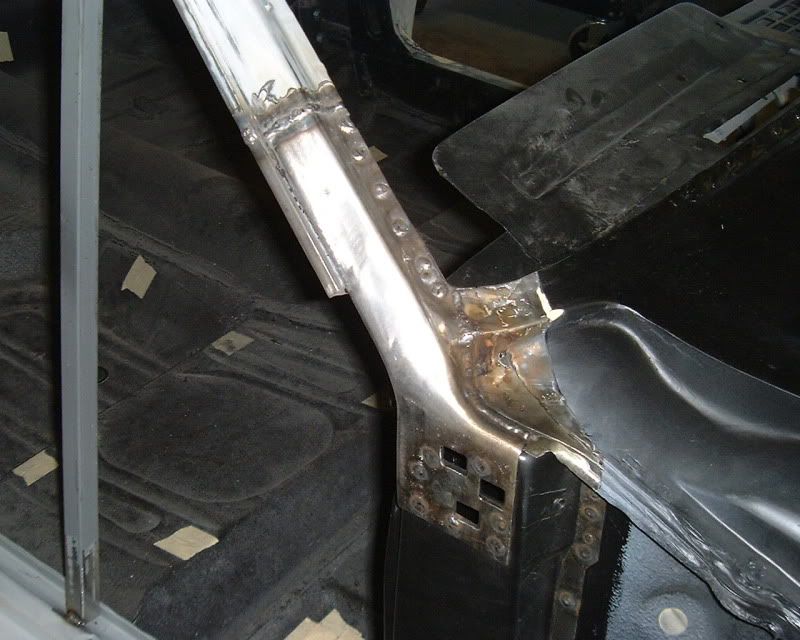
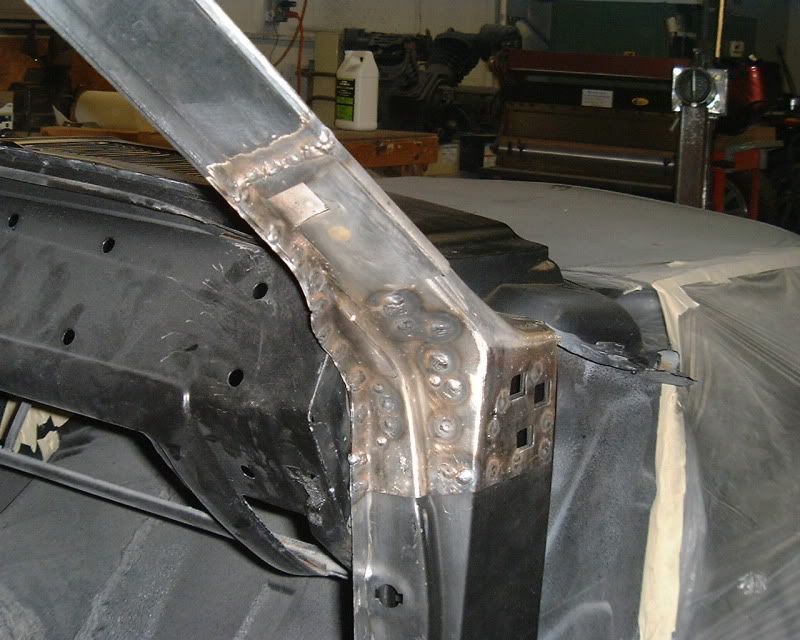
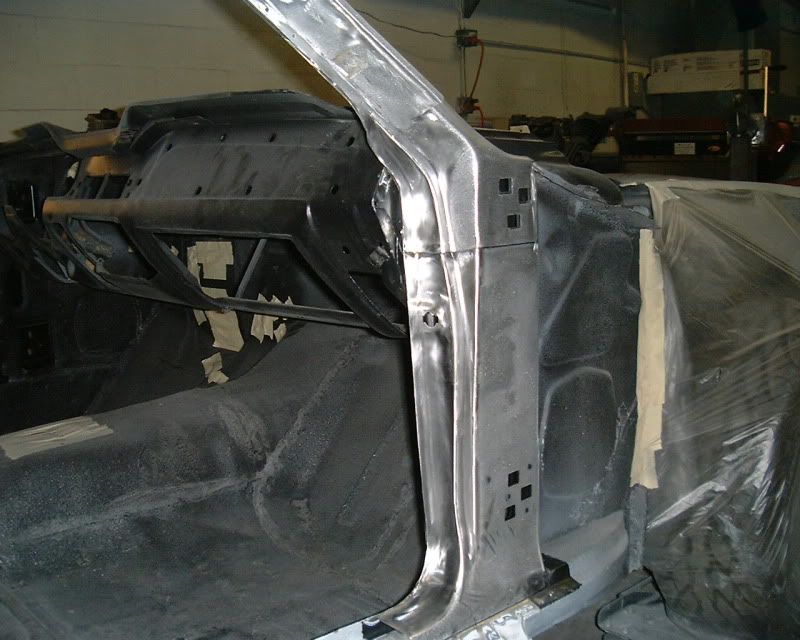
I'm not going to comment step by step but you can follow the procedure and see the different layers of metal that are in this area. Again, none of the rust was on the outer layer, it was all hidden underneath. Fortunately they now remake the pillars, however towards the end of the pictures you can see how Brian had to remake a lot of the rusted out puzzle pieces on the driver's side. He is an incredible metal fabricator and to be honest even though it sucked it had to be done, we are blessed they found this and did the repair, and not us. Okay now you can go run out and check yours
He poked around with an awl here, that's how he knew to dig deeper.
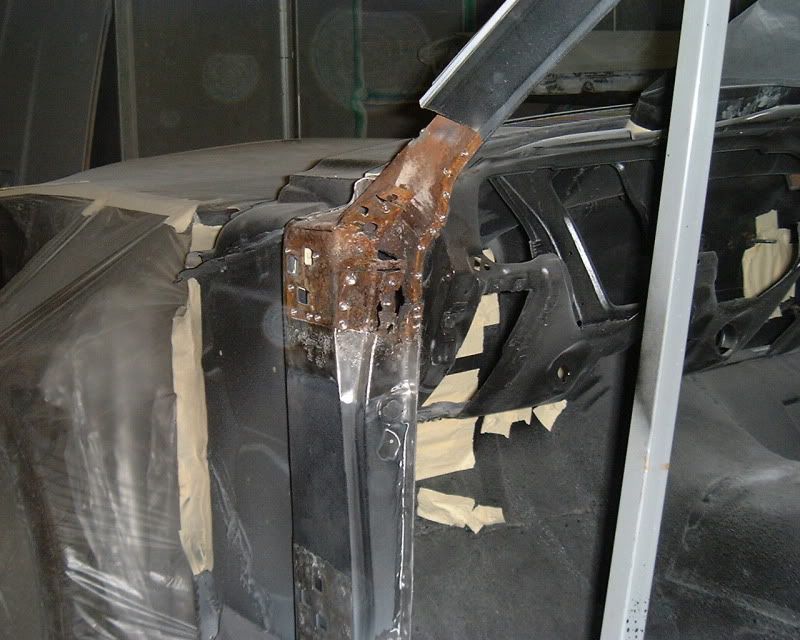
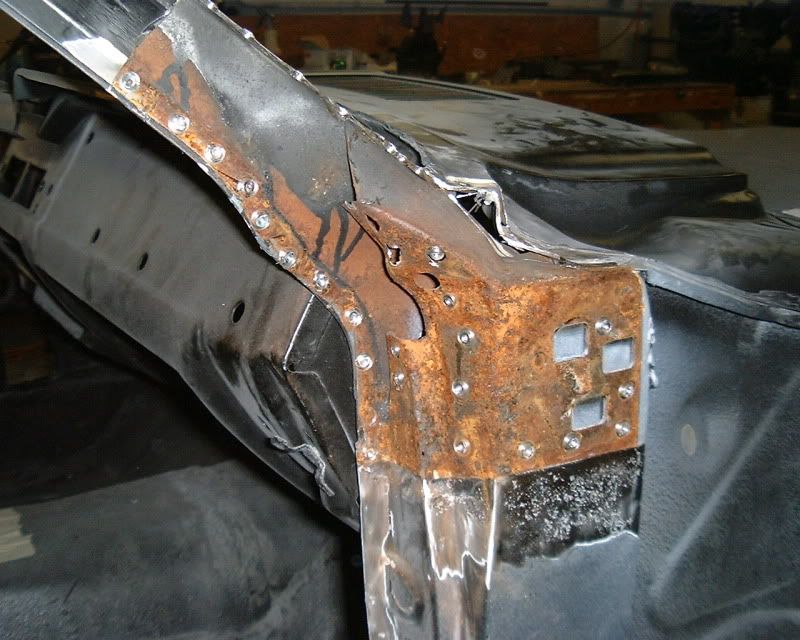
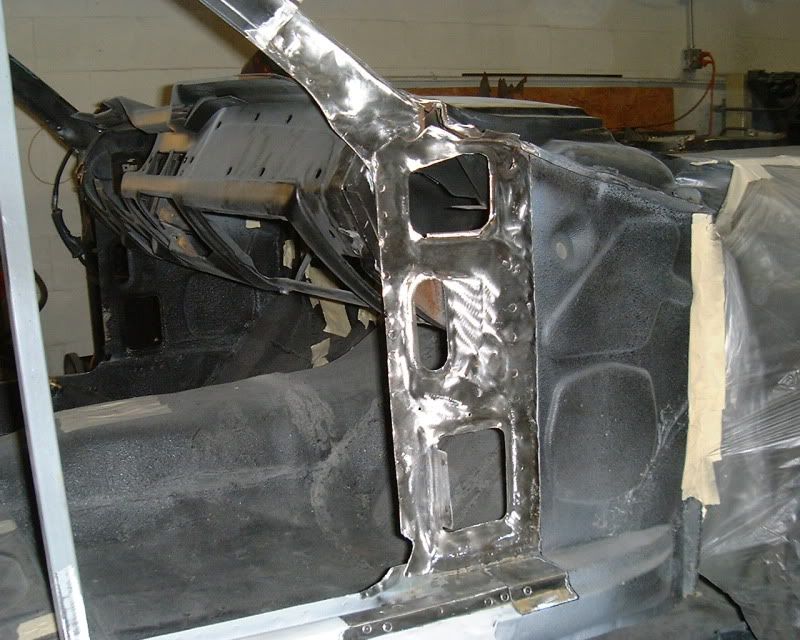
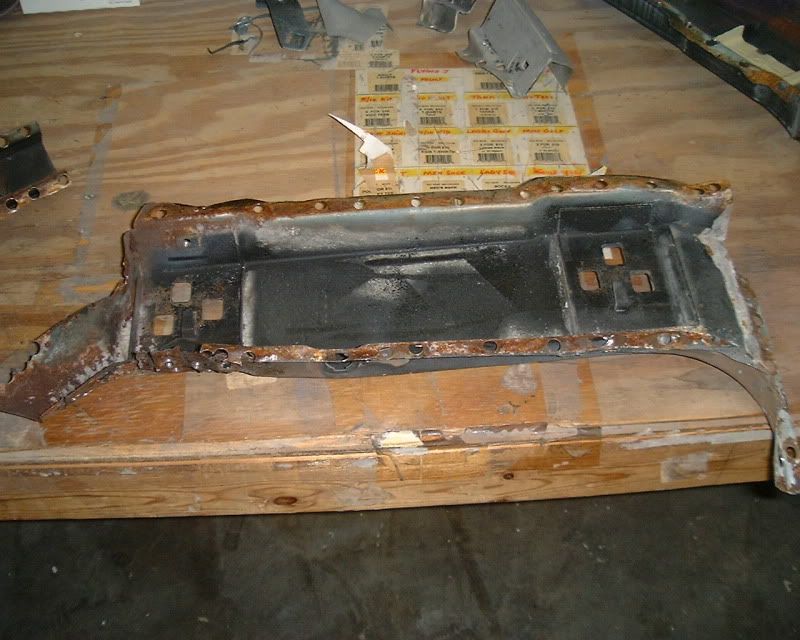
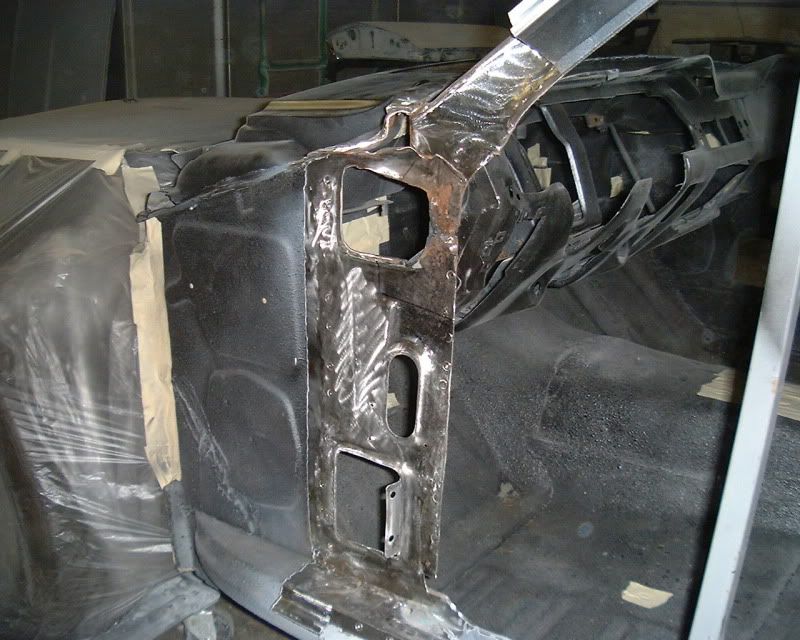
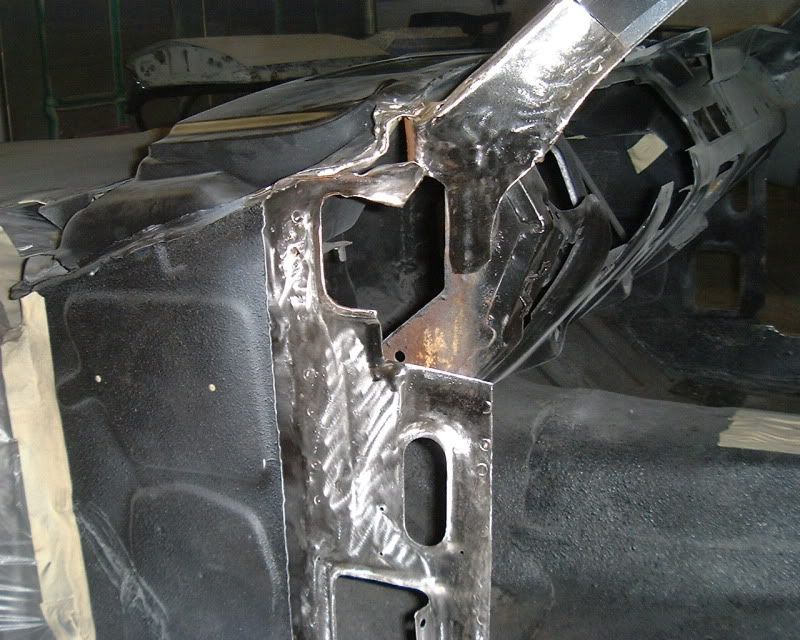
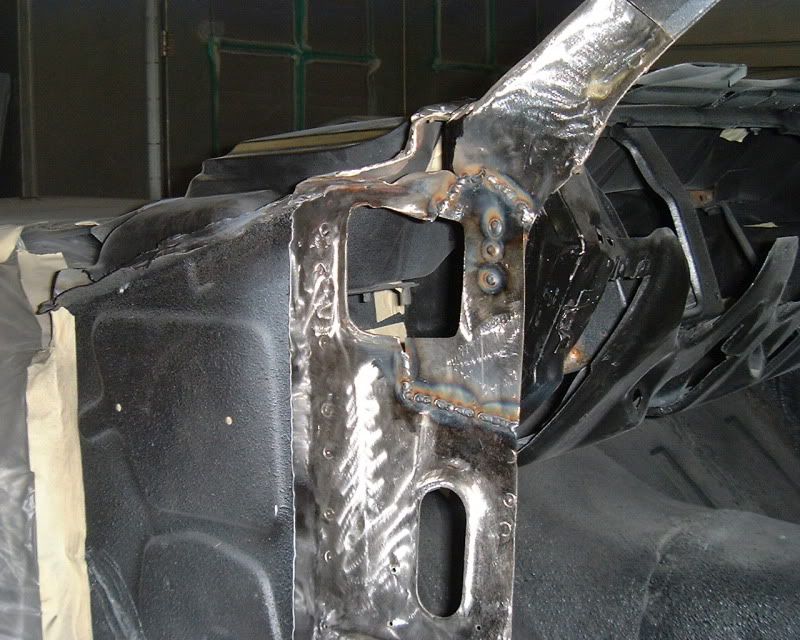
New Pillars...
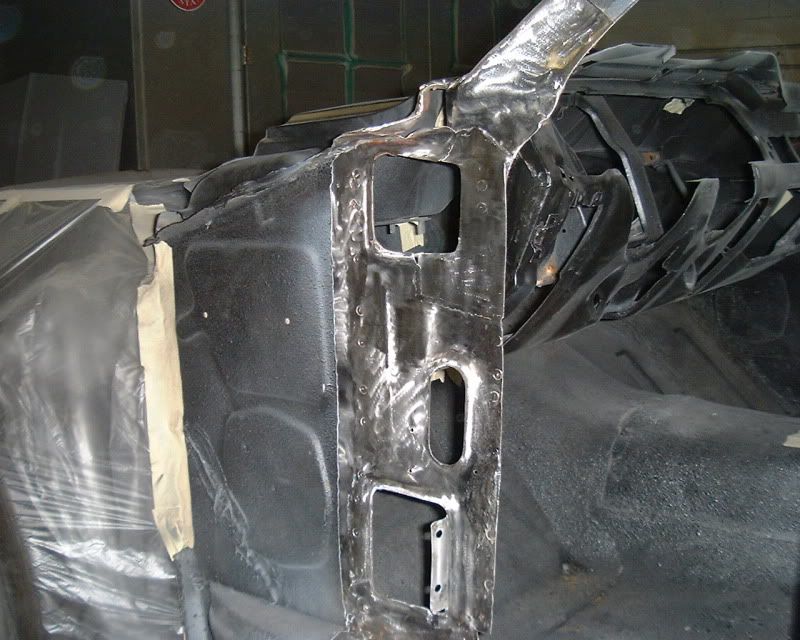
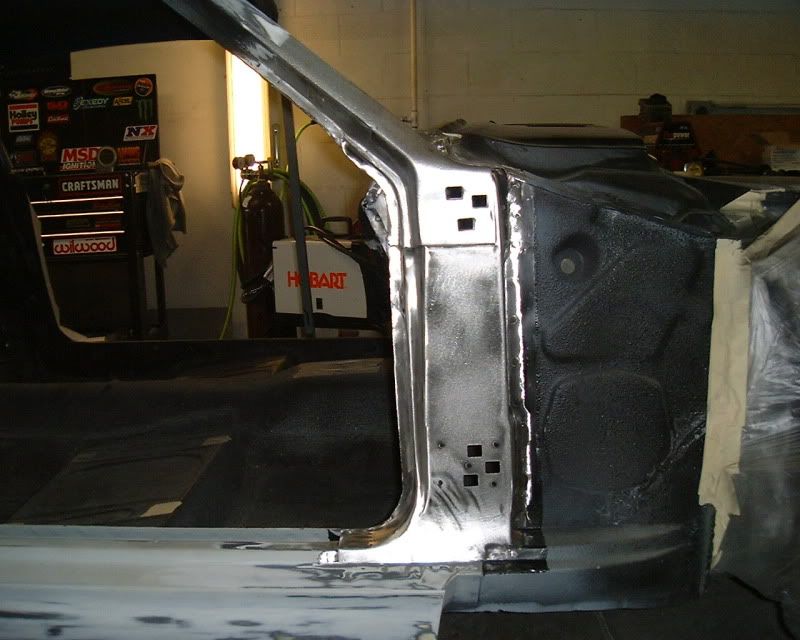
Epoxy primer...
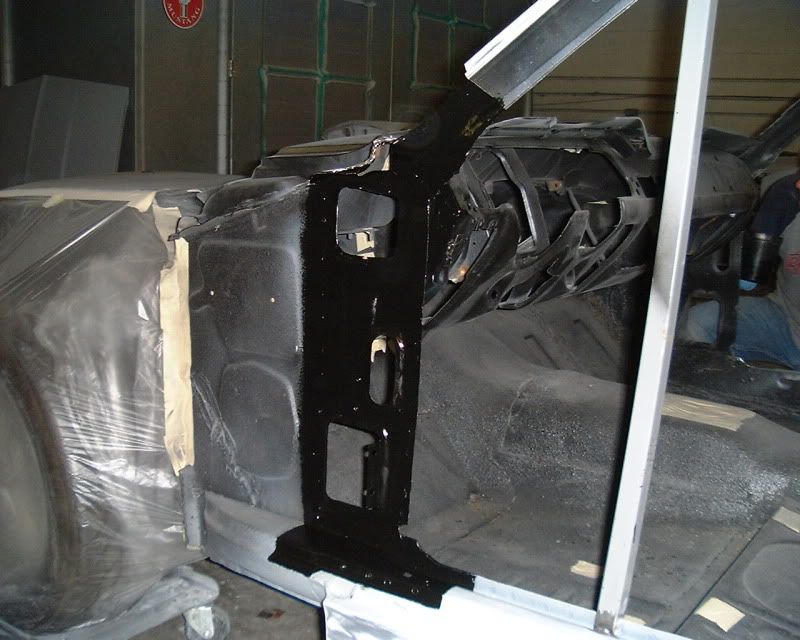
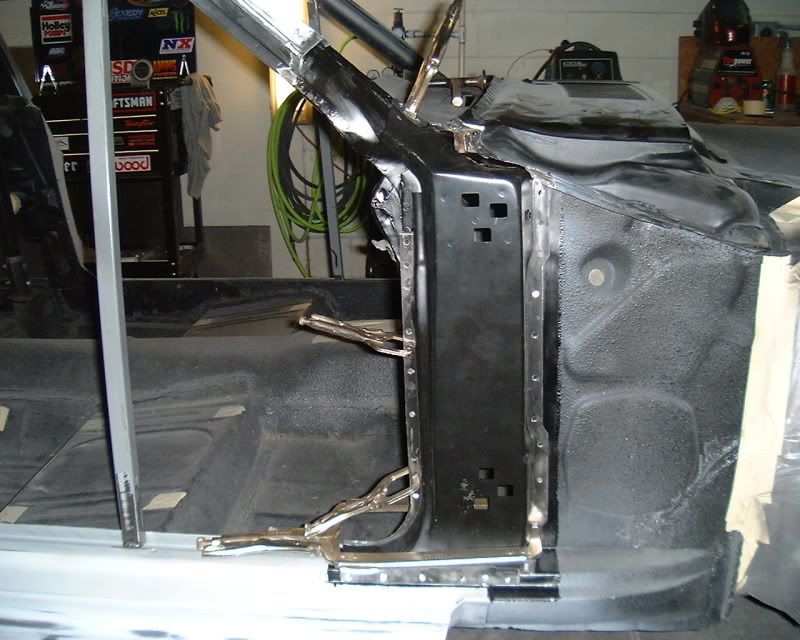
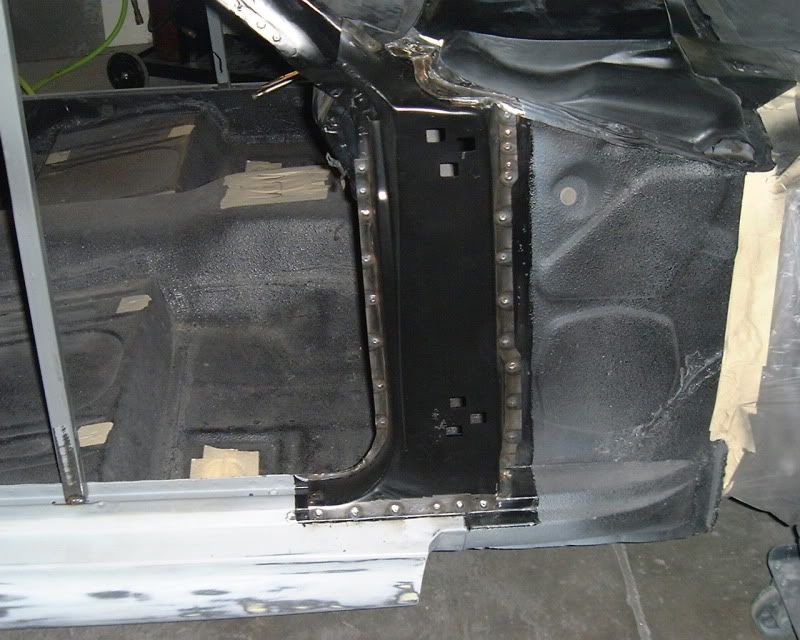
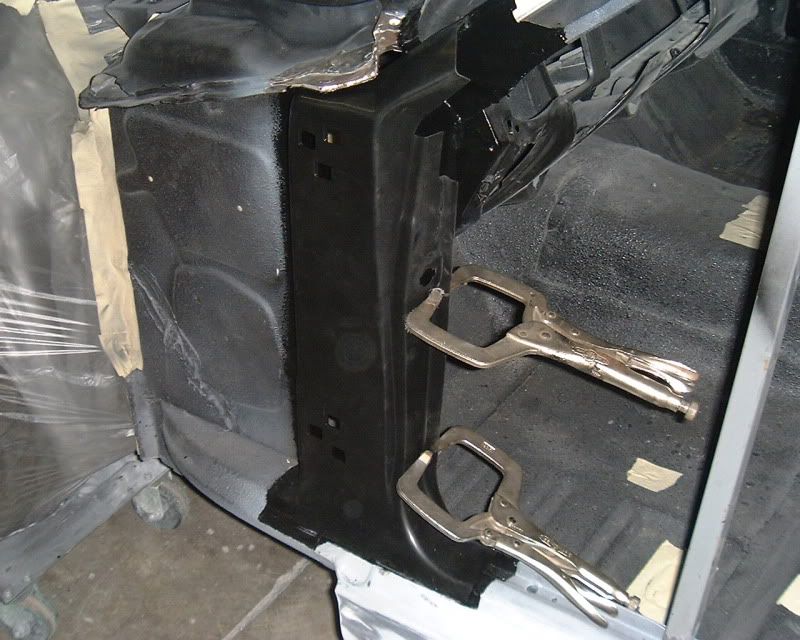

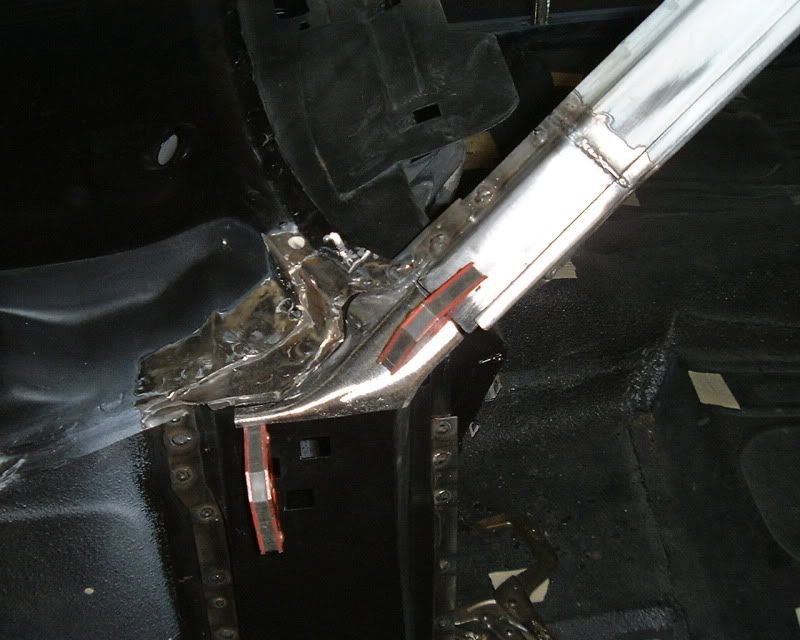
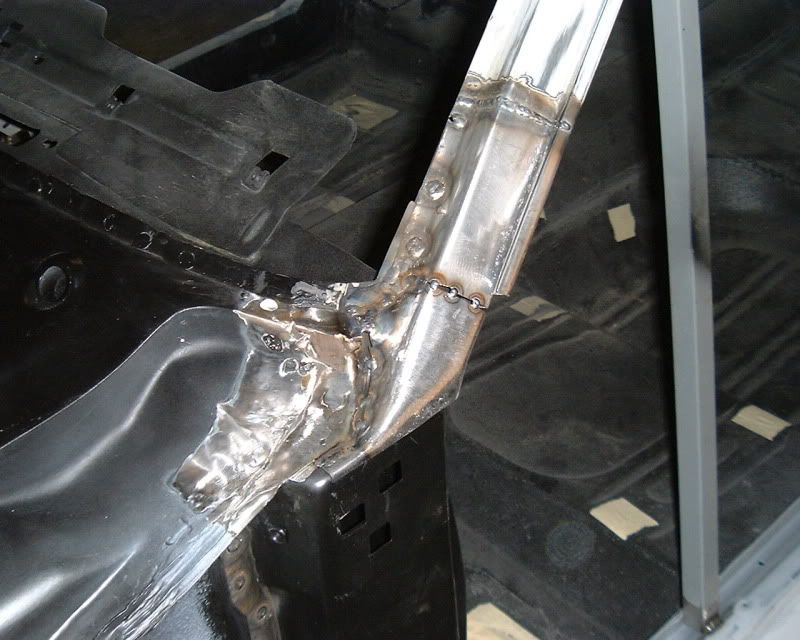
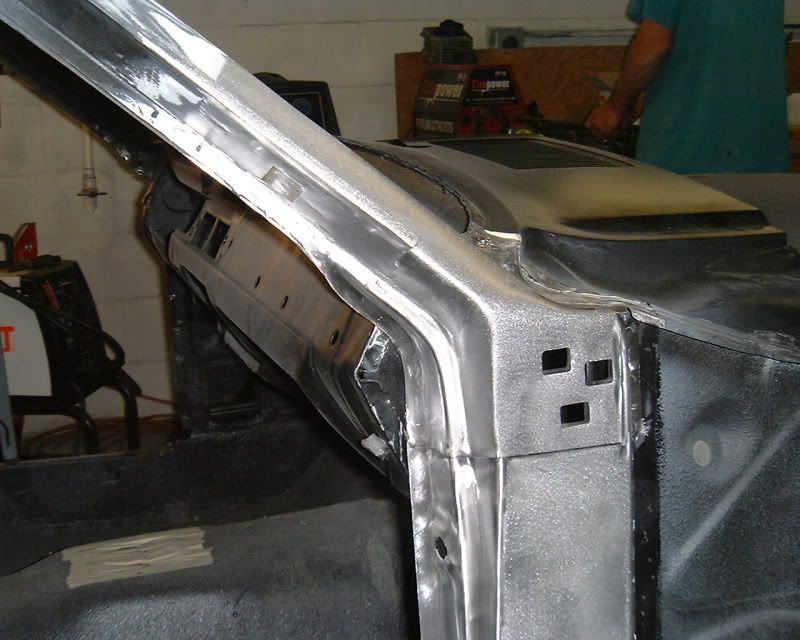


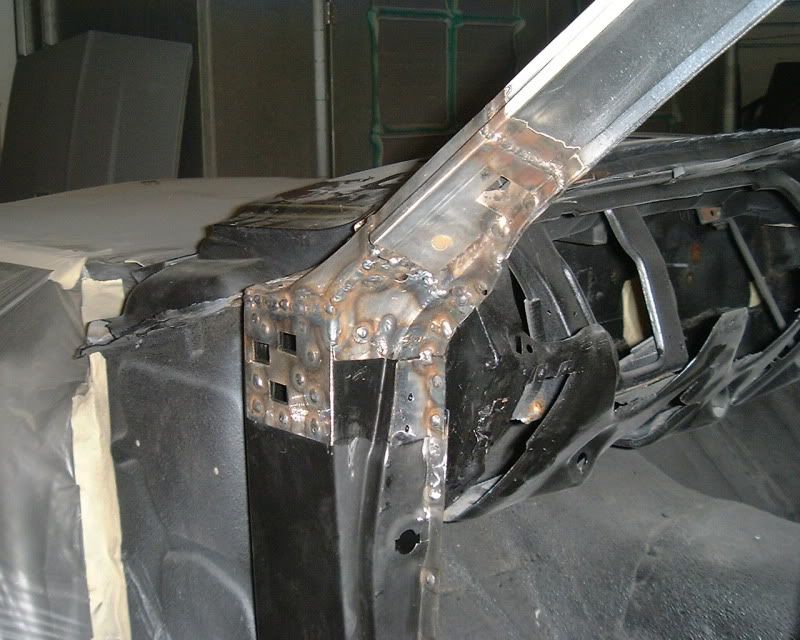
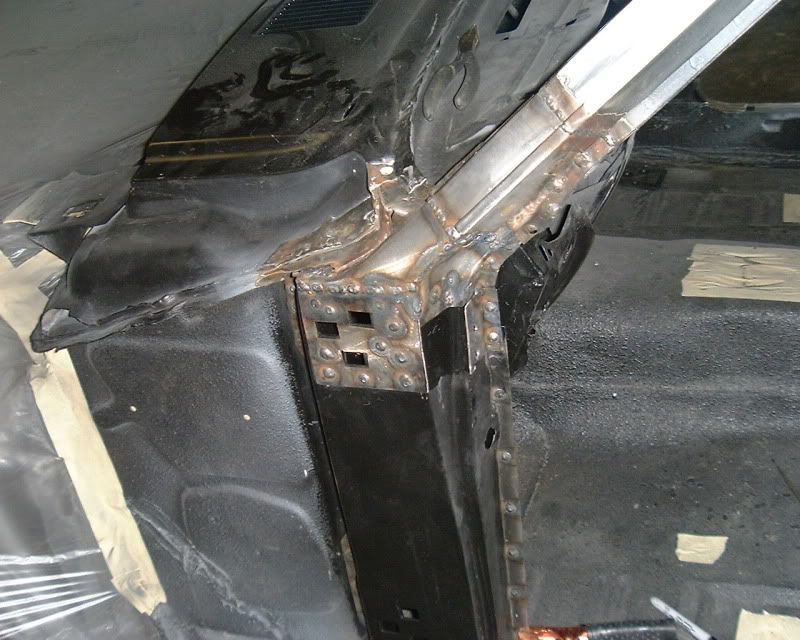

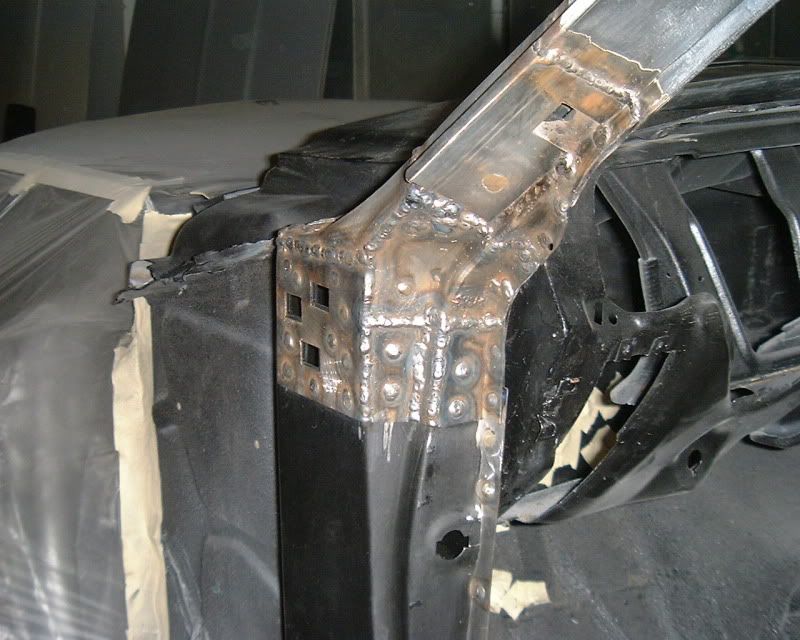
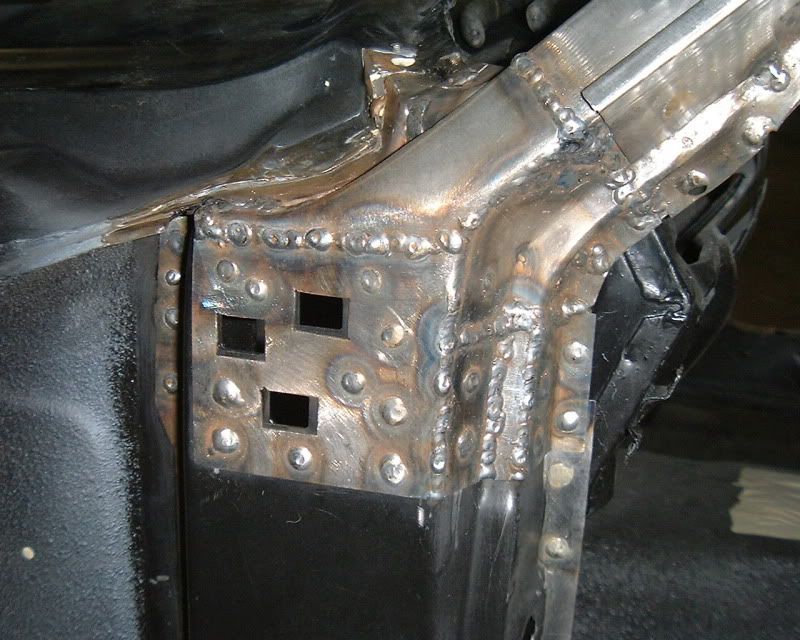
And...DONE! Don't ask me how he grinds those welds, I have no idea - but it truly is... amazing.
I'm not going to comment step by step but you can follow the procedure and see the different layers of metal that are in this area. Again, none of the rust was on the outer layer, it was all hidden underneath. Fortunately they now remake the pillars, however towards the end of the pictures you can see how Brian had to remake a lot of the rusted out puzzle pieces on the driver's side. He is an incredible metal fabricator and to be honest even though it sucked it had to be done, we are blessed they found this and did the repair, and not us. Okay now you can go run out and check yours
He poked around with an awl here, that's how he knew to dig deeper.
New Pillars...
Epoxy primer...
And...DONE! Don't ask me how he grinds those welds, I have no idea - but it truly is... amazing.
01-12-2012, 05:50 AM
#605
3rd Gear Member
Thread Starter
Join Date: Sep 2009
Location: Ohio
Posts: 756
Yes, there is a risk of potential separation when bonding two different surfaces (steel-fiberglass) however, if done properly you should not have an issue.

 02-07-2012, 07:16 PM
#608
How about some rough budget numbers for this project? It would help anyone else pondering one.
Great job on the project! It is nice to see a job well done. I have done a couple like these & they can be addictive.
Great job on the project! It is nice to see a job well done. I have done a couple like these & they can be addictive.
02-08-2012, 06:42 AM
#609
3rd Gear Member
Thread Starter
Join Date: Sep 2009
Location: Ohio
Posts: 756
I really cannot even give you a rough estimate because I have no idea. All I know is that I have a huge folder upstairs with receipts, and I will not dare go near it until the car is finished (so I can stare at it and smile) and I have a good couple of strong drinks in me. The one that sold at BJ the guy had 85k in it, and it looked like it was nicely built.
02-08-2012, 06:49 AM
#610
3rd Gear Member
Thread Starter
Join Date: Sep 2009
Location: Ohio
Posts: 756
I don't have too many updates on my car at the moment but here are a couple pictures of a 67 Shelby that they almost have finished up. We were in Florida last week to visit, and got to see this stunner in person. Aaron had to wipe the drool off my face. There is a reason my car is here!!!
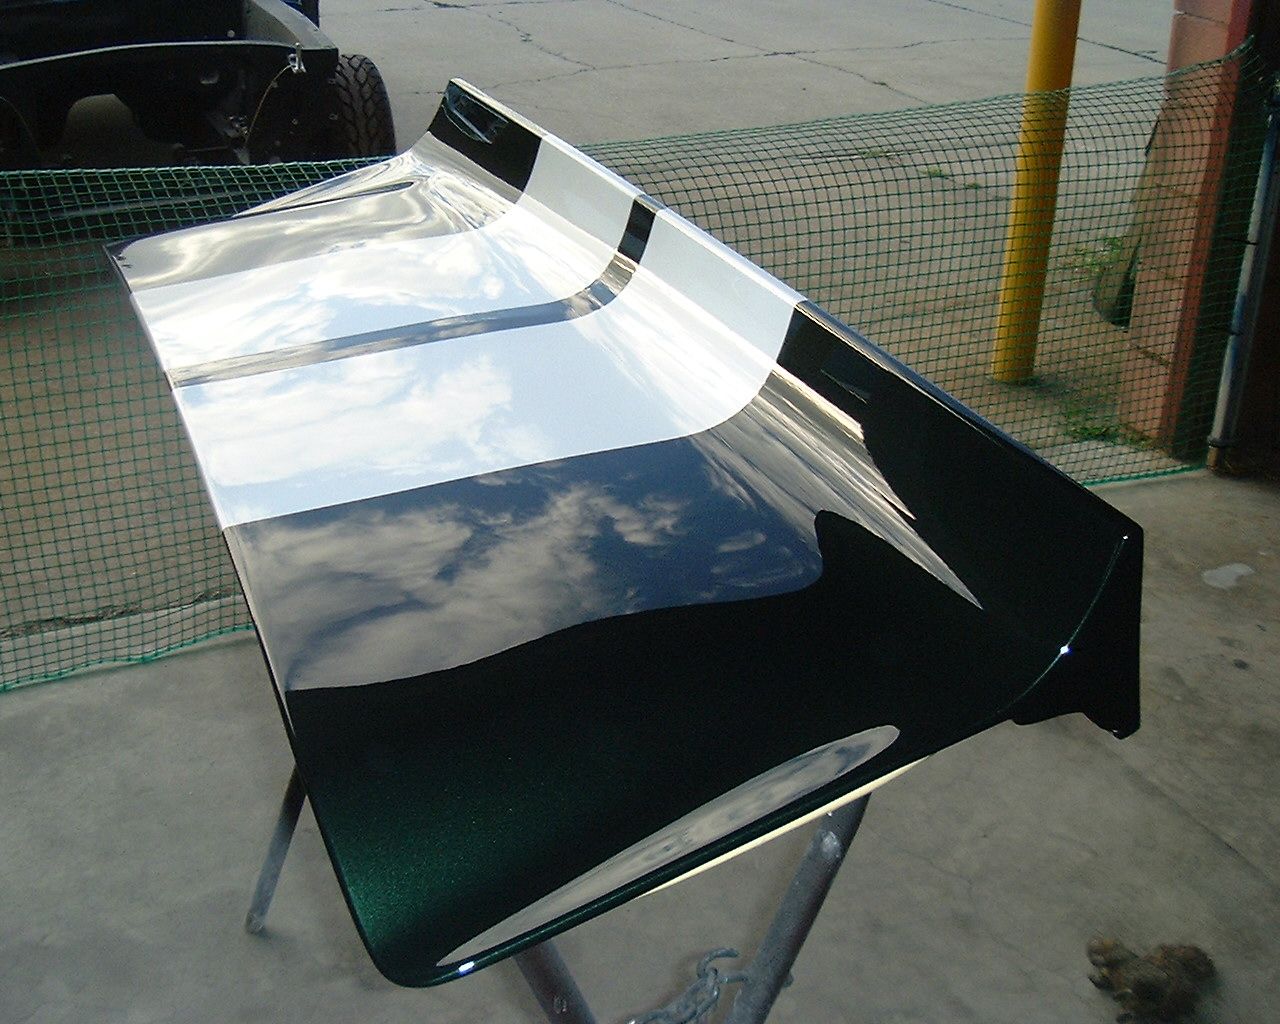
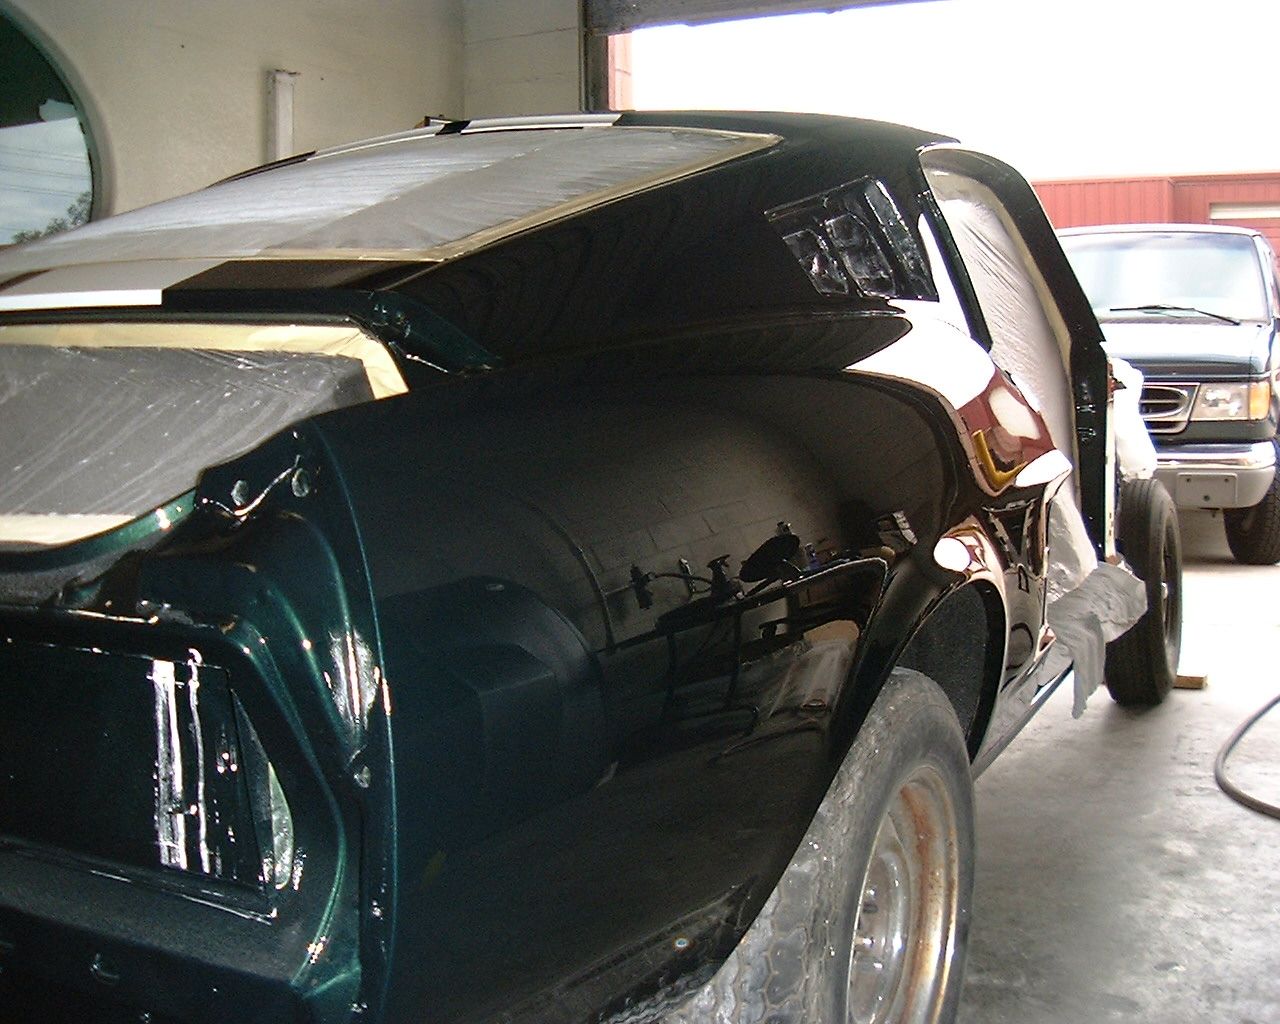
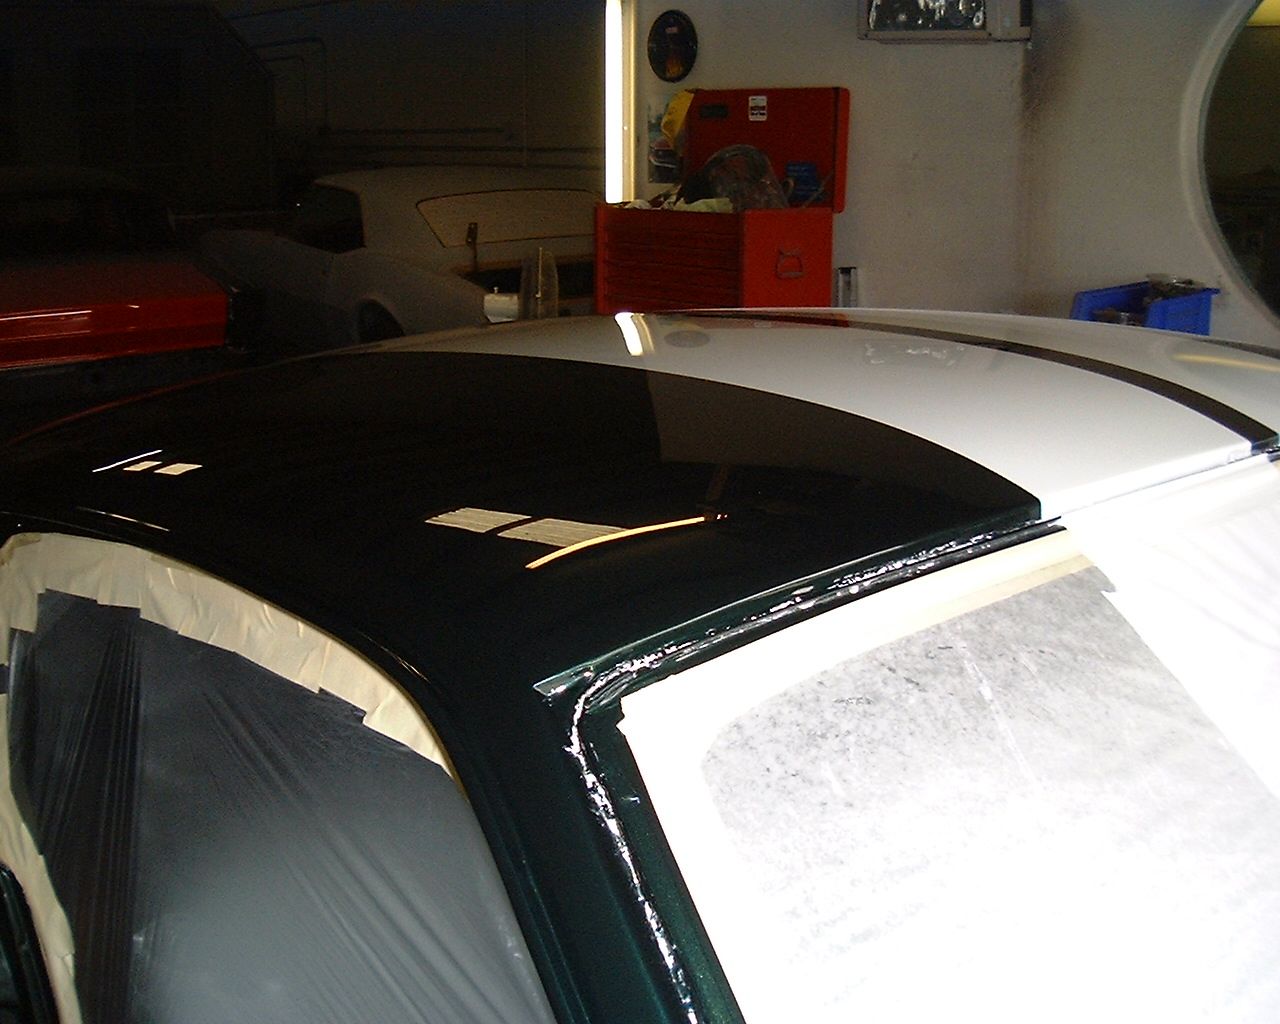
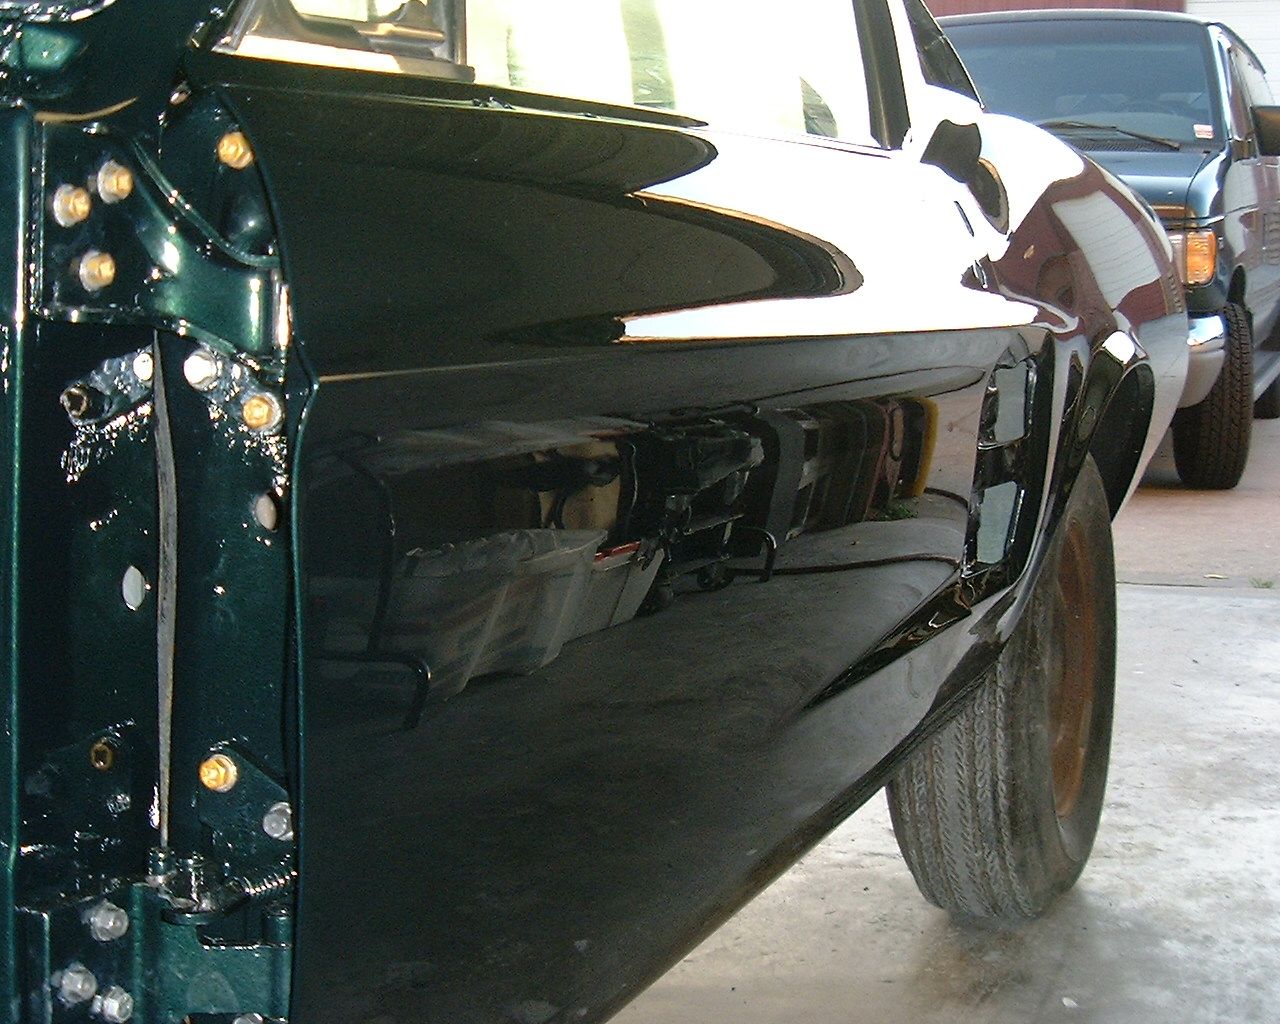
This is one that we took while we were there, the car was pretty dusty but you can still see the awesome reflection.
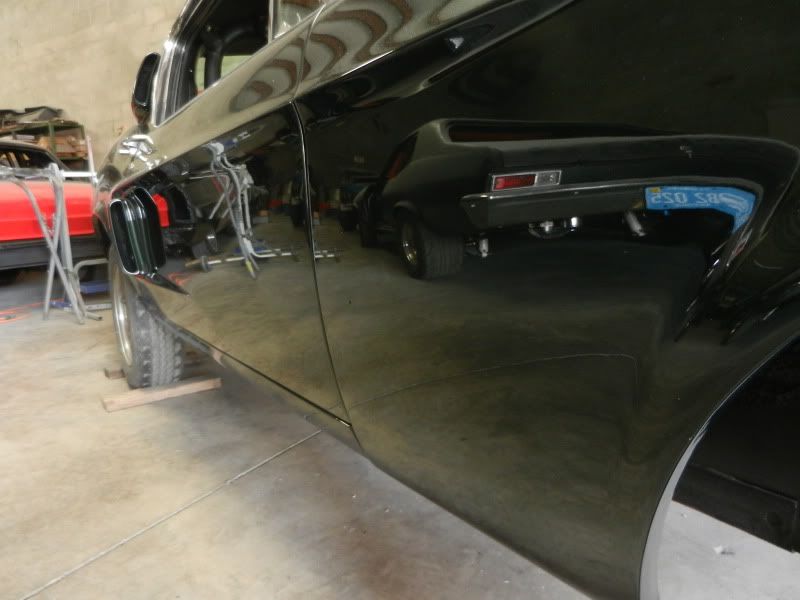
This is one that we took while we were there, the car was pretty dusty but you can still see the awesome reflection.