Brian's 67 Resto-Mod Project
 09-12-2010, 12:21 AM
#21
4th Gear Member
Join Date: Apr 2010
Location: Madison, Georgia
Posts: 1,643
 09-12-2010, 10:22 PM
#22
1st Gear Member
Thread Starter
Join Date: Jun 2010
Location: Manteca, California
Posts: 80
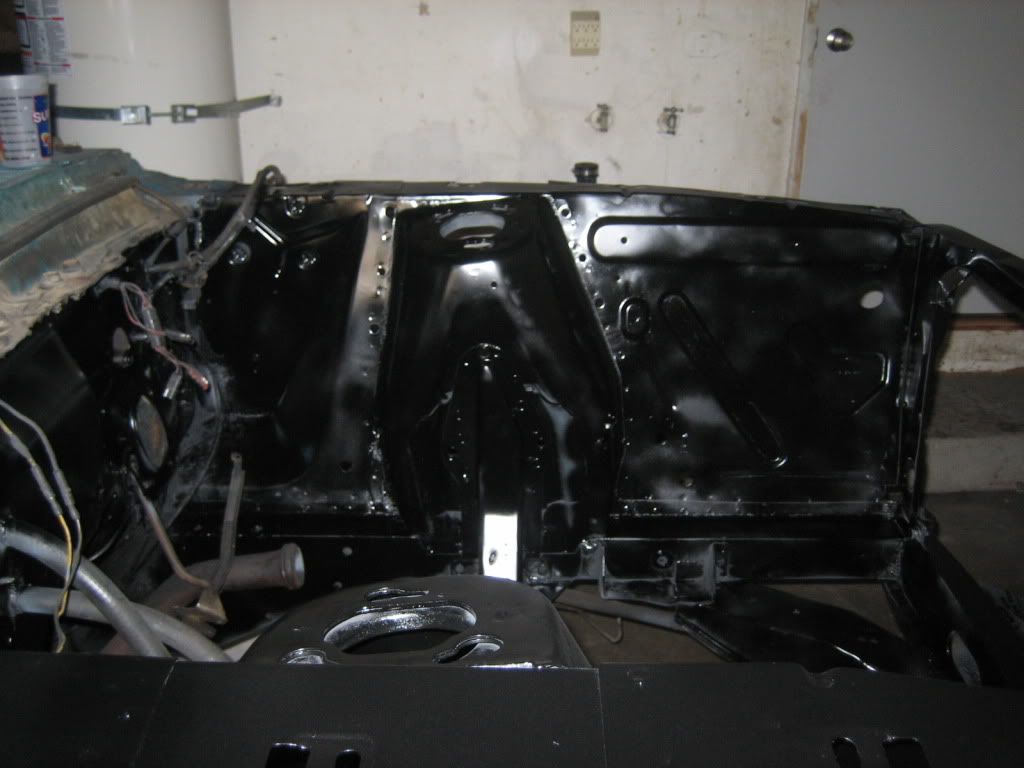
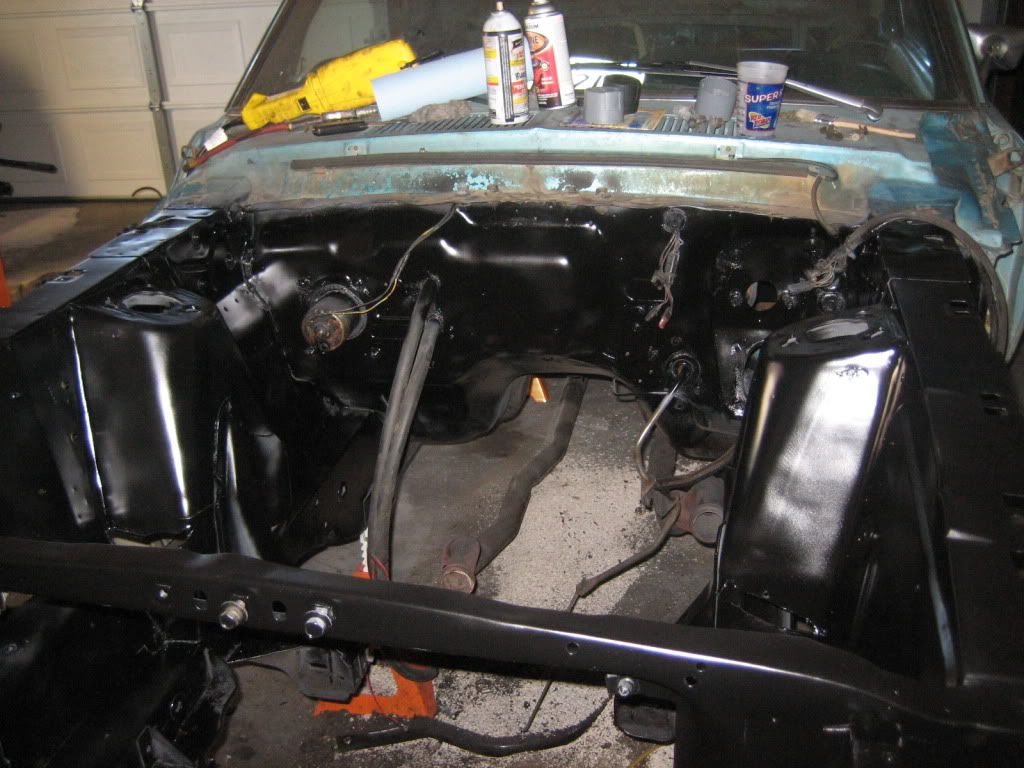
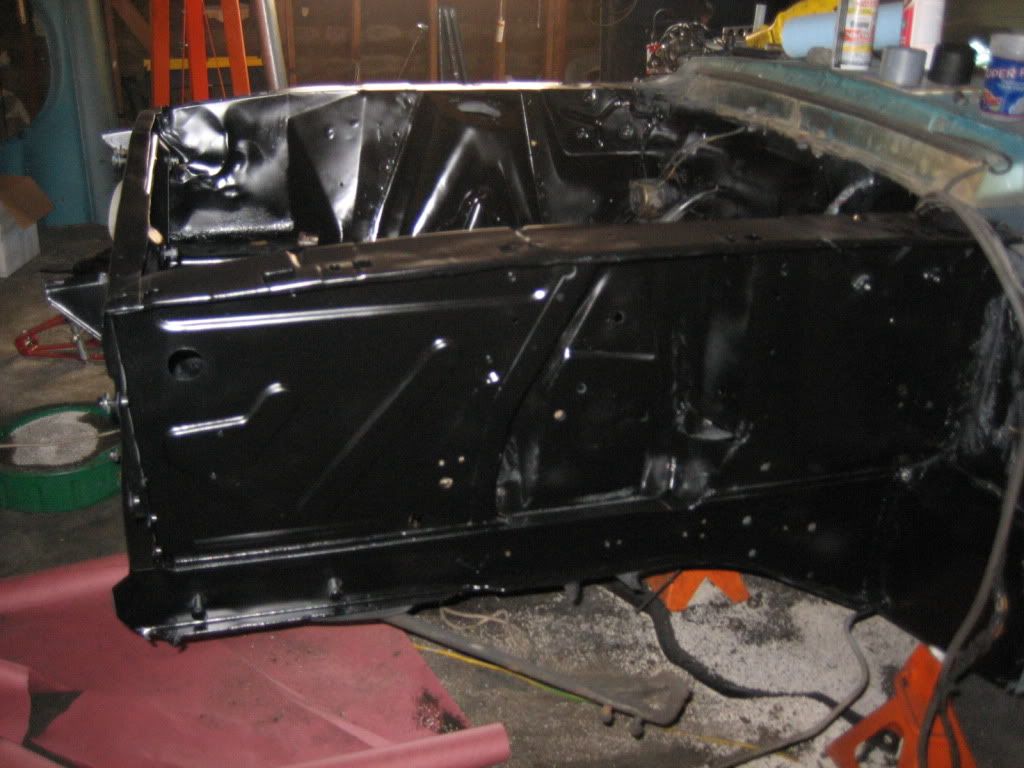
Well I finished painting the entire apron and engine bay of the car. I would have to say I am very disappointed with the final results. As you can see from the pictures the black did not come out smooth like the primer did.... I feel as if all my hard work was for nothing :-(


09-12-2010, 10:47 PM
#23
1st Gear Member

Join Date: Aug 2009
Location: California
Posts: 119
NICE WORK HEADACHEZ!
We're nearly in the same boat.
I rippd out both fender aprons and radiator support and welded in new ones
Grinded down and cleaned the entire front engine bay, primed and paint
Rebuilt entire front suspension with shelby drop
New steering
Converted to fron disc brakes
Will eventually restore the entire interior as well
Currently working on the rear.
Ripped out gas tank, just ordered my new one
cleaned and primed/undercoated wheel wells
New rear suspension as been sitting around with mid eye leaf springs
Going to install tank / prime paint all around and work on the trunk next. This is my first project car ever, so it's been taking me a while, a long while....you seem to be soaring through this!
09-12-2010, 10:49 PM
#24
4th Gear Member
Join Date: Apr 2010
Location: Madison, Georgia
Posts: 1,643
It looks great in some places!
Is that roughness near the bottom the paint bubbling? Maybe just some sanding and a respray will fix it up.
Sorry to hear it isn't going perfect, but like I said it looks great in some places.
Is that roughness near the bottom the paint bubbling? Maybe just some sanding and a respray will fix it up.
Sorry to hear it isn't going perfect, but like I said it looks great in some places.
09-13-2010, 08:02 AM
#25
3rd Gear Member
Join Date: Jul 2010
Location: Indianapolis
Posts: 710
I would suggest trying a high build primer in a gun, this sill fill the voids in the rough spots near the battery tray. Just dont overdo it and cover the spot weld details.
Once sprayed you can sand it smooth or make it "flat" as they say, then paint over it with a product with hardener in it.
I use a lot of rattle can myself but for larger areas that need to be durable I use a gun. Even a cheap gun will do a better job than the best rattle can for larger areas. If that is rattle can paint it has no hardener in it and if you try to spray serious primer or paint over top of it the hardener in the new product could cause the can based products to lift and peel.
My suggestion would be to remove that down to metal again and try it with better products, you wont have that much invested but the long term durability & quality will be much better.
09-13-2010, 09:39 AM
#26
2nd Gear Member

Join Date: Jan 2009
Location: NC
Posts: 307
what happened to the area behind the battery?
the roughness looks like dirt and rust pitting. the paint looks thin in places as well (but that might just be reflections). IMO, you need to decide how much you care about the engine bay. once you get everything back in there, you won't see 90% of the rough areas. or you can spend another 10-20 hrs stripping the paint, smoothing out the rust (or replacing metal) and cleaning out the dirt.
the roughness looks like dirt and rust pitting. the paint looks thin in places as well (but that might just be reflections). IMO, you need to decide how much you care about the engine bay. once you get everything back in there, you won't see 90% of the rough areas. or you can spend another 10-20 hrs stripping the paint, smoothing out the rust (or replacing metal) and cleaning out the dirt.
09-13-2010, 04:42 PM
#27
1st Gear Member
Thread Starter
Join Date: Jun 2010
Location: Manteca, California
Posts: 80
NICE WORK HEADACHEZ!
We're nearly in the same boat.
I rippd out both fender aprons and radiator support and welded in new ones
Grinded down and cleaned the entire front engine bay, primed and paint
Rebuilt entire front suspension with shelby drop
New steering
Converted to fron disc brakes
Will eventually restore the entire interior as well
Currently working on the rear.
Ripped out gas tank, just ordered my new one
cleaned and primed/undercoated wheel wells
New rear suspension as been sitting around with mid eye leaf springs
Going to install tank / prime paint all around and work on the trunk next. This is my first project car ever, so it's been taking me a while, a long while....you seem to be soaring through this!
We're nearly in the same boat.
I rippd out both fender aprons and radiator support and welded in new ones
Grinded down and cleaned the entire front engine bay, primed and paint
Rebuilt entire front suspension with shelby drop
New steering
Converted to fron disc brakes
Will eventually restore the entire interior as well
Currently working on the rear.
Ripped out gas tank, just ordered my new one
cleaned and primed/undercoated wheel wells
New rear suspension as been sitting around with mid eye leaf springs
Going to install tank / prime paint all around and work on the trunk next. This is my first project car ever, so it's been taking me a while, a long while....you seem to be soaring through this!
I would suggest trying a high build primer in a gun, this sill fill the voids in the rough spots near the battery tray. Just dont overdo it and cover the spot weld details.
Once sprayed you can sand it smooth or make it "flat" as they say, then paint over it with a product with hardener in it.
I use a lot of rattle can myself but for larger areas that need to be durable I use a gun. Even a cheap gun will do a better job than the best rattle can for larger areas. If that is rattle can paint it has no hardener in it and if you try to spray serious primer or paint over top of it the hardener in the new product could cause the can based products to lift and peel.
My suggestion would be to remove that down to metal again and try it with better products, you wont have that much invested but the long term durability & quality will be much better.
Once sprayed you can sand it smooth or make it "flat" as they say, then paint over it with a product with hardener in it.
I use a lot of rattle can myself but for larger areas that need to be durable I use a gun. Even a cheap gun will do a better job than the best rattle can for larger areas. If that is rattle can paint it has no hardener in it and if you try to spray serious primer or paint over top of it the hardener in the new product could cause the can based products to lift and peel.
My suggestion would be to remove that down to metal again and try it with better products, you wont have that much invested but the long term durability & quality will be much better.
what happened to the area behind the battery?
the roughness looks like dirt and rust pitting. the paint looks thin in places as well (but that might just be reflections). IMO, you need to decide how much you care about the engine bay. once you get everything back in there, you won't see 90% of the rough areas. or you can spend another 10-20 hrs stripping the paint, smoothing out the rust (or replacing metal) and cleaning out the dirt.
the roughness looks like dirt and rust pitting. the paint looks thin in places as well (but that might just be reflections). IMO, you need to decide how much you care about the engine bay. once you get everything back in there, you won't see 90% of the rough areas. or you can spend another 10-20 hrs stripping the paint, smoothing out the rust (or replacing metal) and cleaning out the dirt.
Thanks everyone for all the support and invaluable help so far!
09-13-2010, 04:55 PM
#28
4th Gear Member

Join Date: Apr 2010
Location: NJ
Posts: 1,027
I did the same with mine however I "primed" with por15 and then topcoat with chassis black. Had the same issue as you but only in a couple of places, the por15 did a great job hiding things.
Overall it looks pretty good, just touch up the couple of places that need it.
Overall it looks pretty good, just touch up the couple of places that need it.
 it looks like it was hit really hard there?
09-13-2010, 10:03 PM
it looks like it was hit really hard there?
09-13-2010, 10:03 PM
#30
1st Gear Member
Thread Starter
Join Date: Jun 2010
Location: Manteca, California
Posts: 80
Yeah your right it must have taken a hit there at some time in its life. When the fenders where on it was straight, also the car drove and stopped straight. However it definitely took a hit at one time.