1970 Mach 1 restoration on a tight budget

 01-27-2012, 09:34 PM
#22
2nd Gear Member
Thread Starter
Join Date: Oct 2009
Location: texas
Posts: 190
I believe the rims in back are 8" but not sure on the offset since they came with the car. The tires are 245/60/15" TA radials. I know they are not the best gripping rubber by a long shot but they just look right to me on mustangs and they can hold up to a good amount of burning rubber which is what I intend to do with them soon as I get the 351C all dialed in.
I still have alot of panel adjustment to do but have been focusing on the major issues first and figured I would tweak all the panels after I get the big issues sorted out. I am still hoping I can have it up and running by summer and finished by end of November which will be the one year mark. Don't know if I will make the totally finished part but should have no problem at least having it running by summer. I am hoping to actully do its maiden drive by end of april although that is assuming I don't run into major cost issues rebuilding the motor which might slow things down since cost is a major factor in the rebuild.
Edited to add: love the look of that red mustang! Is it one of yours? I like that paint except if I go red, I will probably go with black stripes and hood.
Last edited by oldrock; 01-27-2012 at 09:36 PM.
02-07-2012, 09:19 PM
#24
2nd Gear Member
Thread Starter
Join Date: Oct 2009
Location: texas
Posts: 190
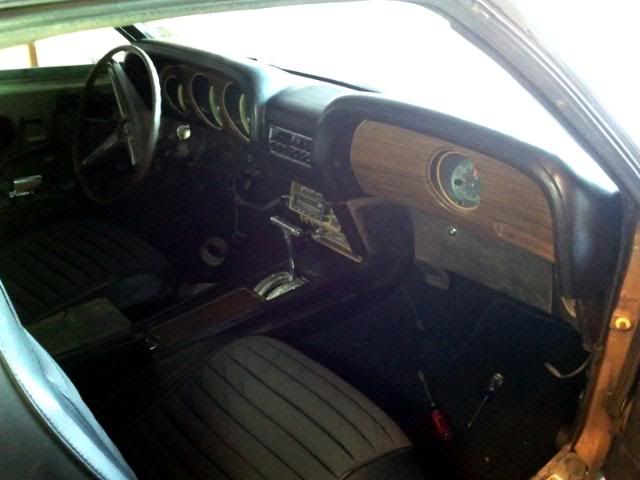
been doing alot of little things on the mustang lately so not alot of show for my work but every little step gets it one step closer. Started doing some work on the 351c motor. Picked up a used holley street dominator 4 barrel intake and holley 650 double pumper to upgrade the motor. Also got a felpro gasket kit and HEI distributer. PLan to tear into the motor this weekend and see what I can get done there. Also got the instrument panel all cleaned up and the new circuit board all installed plus redid the wiring in areas where it showed signs of heat damage. The interior is starting to look more like a Mach 1 now although it still has alot of work to go before it hits the street
02-19-2012, 11:52 AM
#25
2nd Gear Member
Thread Starter
Join Date: Oct 2009
Location: texas
Posts: 190
been focusing on the engine this week and got the aluminum street dominator intake installed and the 650 double pumper rebuilt plus installed the new long tube headers installed and fired up the 351 for the first time just jury rigged up on stands. Other than the crummy mr gasket dual intake fuel line for the double pumper giving me lots of trouble with leaks, went well and the engine is about ready to shoehorn back into the car!
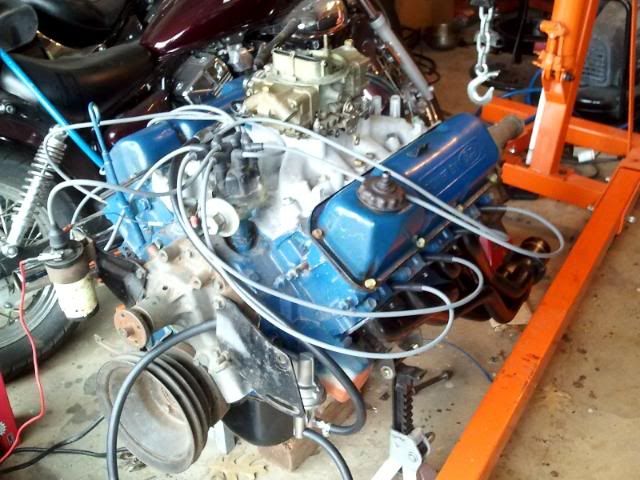
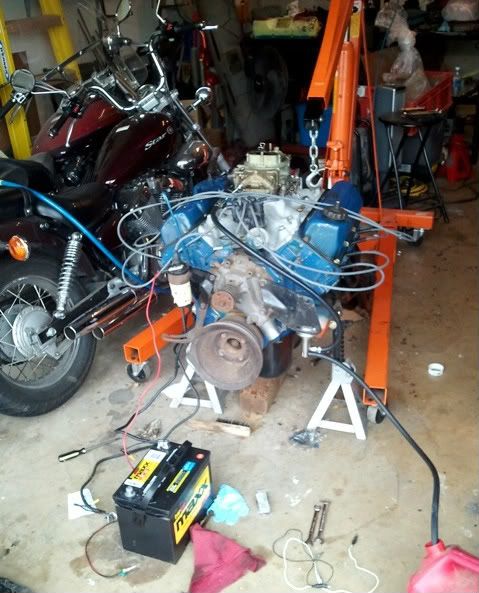
my redneck engine test setup HAHA!
my redneck engine test setup HAHA!
03-02-2012, 11:17 PM
#26
2nd Gear Member
Thread Starter
Join Date: Oct 2009
Location: texas
Posts: 190
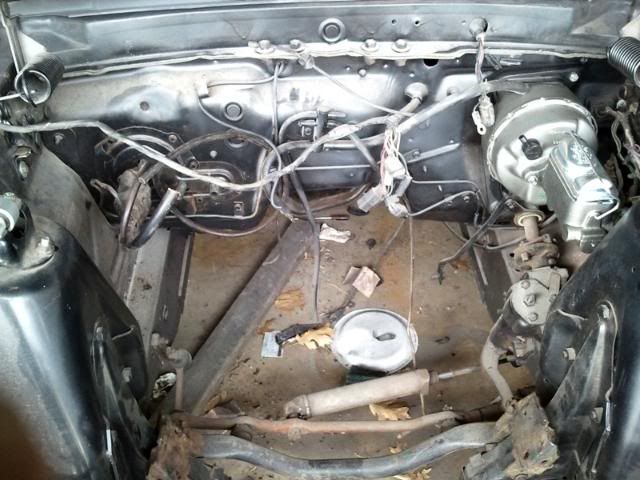
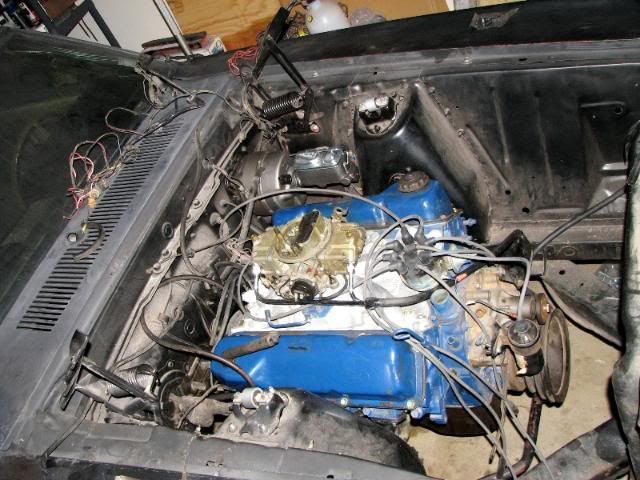
thought i would do an update on the mustang today. This week I installed new calipers for the front disc brakes and also installed a rebuilt bendix brake booster and master cylinder. The big project for this week was that i finally got the 351 cleveland installed back where it belongs 
The engine install wasn't without some headaches (always seems to happen). After a couple of false starts, the engine finally bolted in the engine mounts and looks really good. I still have an issue with the tranny crossmember not lining up with the the two bolts coming down off the tranny. Since the engine wasn't in the car when I got it, rather than worry too much about that, I plan to just weld up an adapter plate so I don't get too bogged down on that part.
One thing that turned out really nice was the hedman long tube headers. Even though the cleveland is a pretty wide engine for a small block, the headmens bolted right in with no problems. I am looking forward to firing it up with the headers but still have lots of things to do before I will be ready for that.
I am hoping to get the radiator installed this weekend so I can do a leak test and then start tuning the 650 dbl pumper which is always fun.
Last edited by oldrock; 03-02-2012 at 11:21 PM.
03-03-2012, 07:02 AM
#27
2nd Gear Member

Join Date: Mar 2006
Location: 03246
Posts: 477
I know your doing this build on a budget but patience is cheap. Myself, I hate doing things twice. Take your time and you'll find you have a better finished product, just my 2 cents FWIW. Enjoy the ride!
Last edited by chillininnh; 03-03-2012 at 07:58 AM.
03-03-2012, 07:56 AM
#28
2nd Gear Member
Thread Starter
Join Date: Oct 2009
Location: texas
Posts: 190
totally agree with you. It doesn't look like fresh paint in that pic but I laid down a fresh coat of high heat black earlier in the project. What you see is just the dust from sanding the body filler. It will wipe right off and look good.
03-04-2012, 09:37 PM
#29
2nd Gear Member
Thread Starter
Join Date: Oct 2009
Location: texas
Posts: 190
got the radiator installed and did a short video of it running today. Looking forward to getting it back on the street!
http://www.youtube.com/watch?v=b51kFCSK8lc
http://www.youtube.com/watch?v=b51kFCSK8lc
07-17-2012, 12:53 PM
#30

Join Date: Jul 2012
Location: Tx
Posts: 1
Hello, I too have a 70 Mach 1 I plan on restoring and would just like to know about how much it cost to restore yours. I know it is a case by case basis but by looking at your pictures and mine I can use it as a basis point to know what I'm looking forward to. I plan on doing as much of the work I can myself along with 2 other friends who also own several classic mustangs. Thanks

Thread
Thread Starter
Forum
Replies
Last Post
breaking
Audio/Visual Electronics
5
10-02-2015 01:27 PM