Fixing bad scratches (pic and link heavy)
 07-27-2013, 08:49 PM
#1
5th Gear Member
Thread Starter
Join Date: Mar 2006
Location: Colorado
Posts: 2,652
The '07GT 'vert that we bought a few months back has some pretty severe scratches all over the hood and a couple of other places. They do not appear to be through the clear into the color, but they are bad. My pickup is a 2009 and about the same color blue and it has some major scratches on it near the bed, so it became the guinea pig. Well, I'm cheap and I don't want to pay someone a ton of money to fix them. After a great deal of research, I decided it was time to put up or shutup. I had a porter cable on order, but decided that I was going to take the chance with my '09 and see if I could do this junkyard style on the cheap with off the shelf junk. I know this is going to fly in the face of most of the stuff I've read here on the forums, but I'll let the results speak for themselves. Most threads and videos advise high end products and while I didnt skimp on the chemicals, I definitely was budget with my tools. I spent a lot of time watching junkman2000's videos on youtube and time and again he stresses technique trumps tools. I believe him now.
I am sharing this information and am not condoning nor recommending that you do this at home or anywhere else. If you choose to do this, the risk is 100% yours alone.
I used a Craftsman 10" buffer/polisher, terry cloth bonnets and Meguiars professional line chemicals. Also, I couldn't find a full pack of 2500 grit sandpaper, so I started with the 3000 grit sandpaper similar to the stuff junkman used on that blue lamborghini on youtube. I of course didnt have a sanding block, so I rolled and folded the 3000 grit so it essentially ended up feeling like it had a block behind it with even pressure.
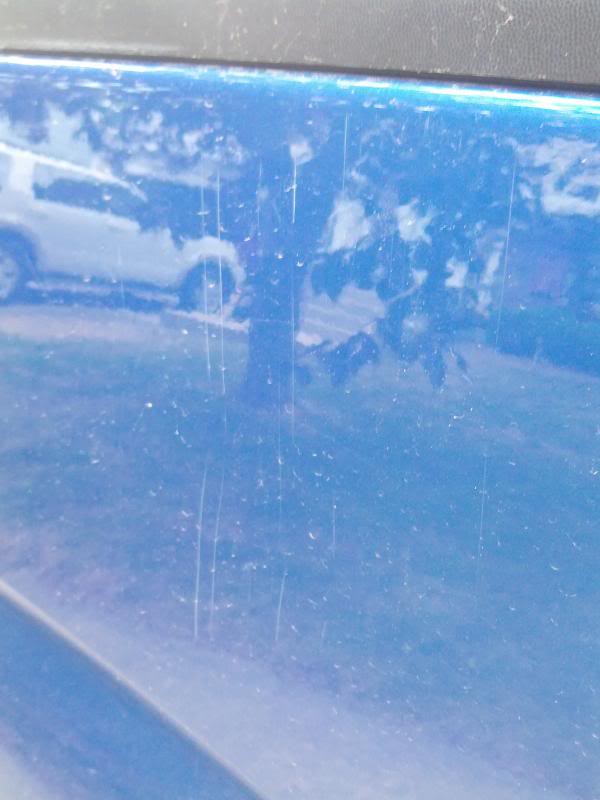
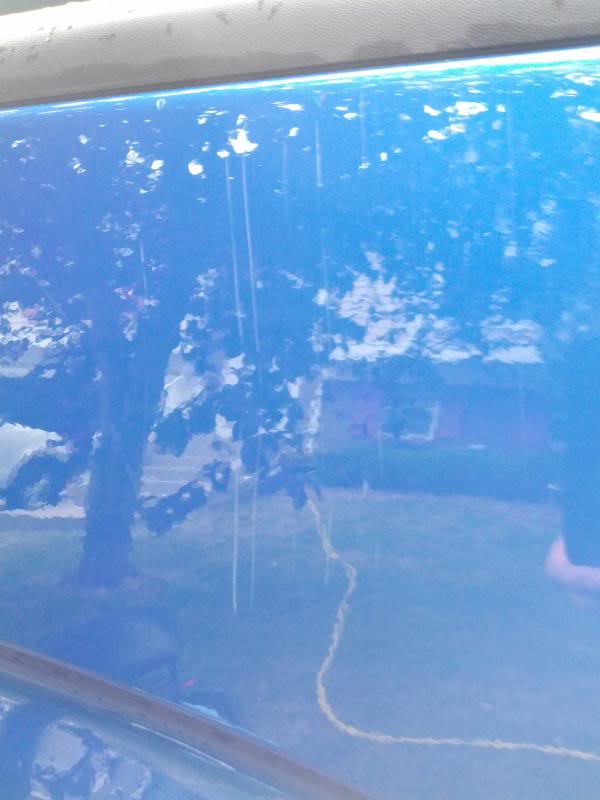
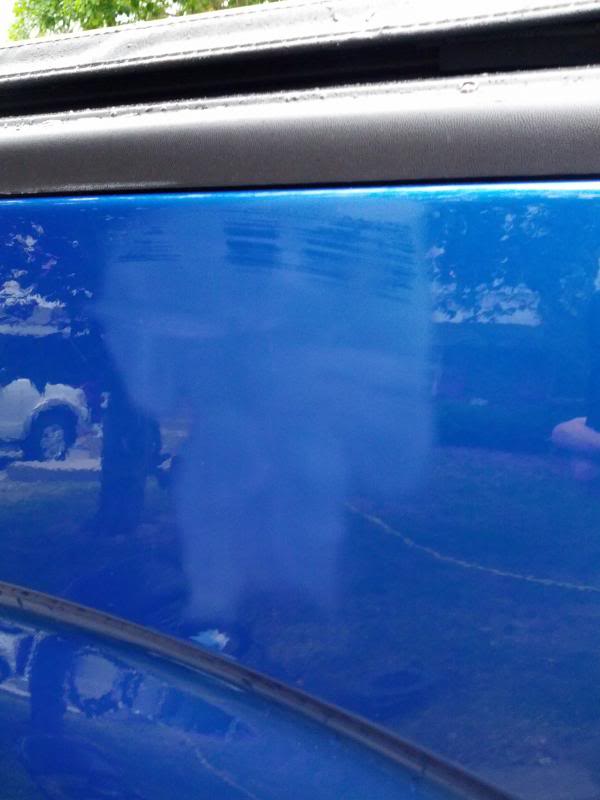
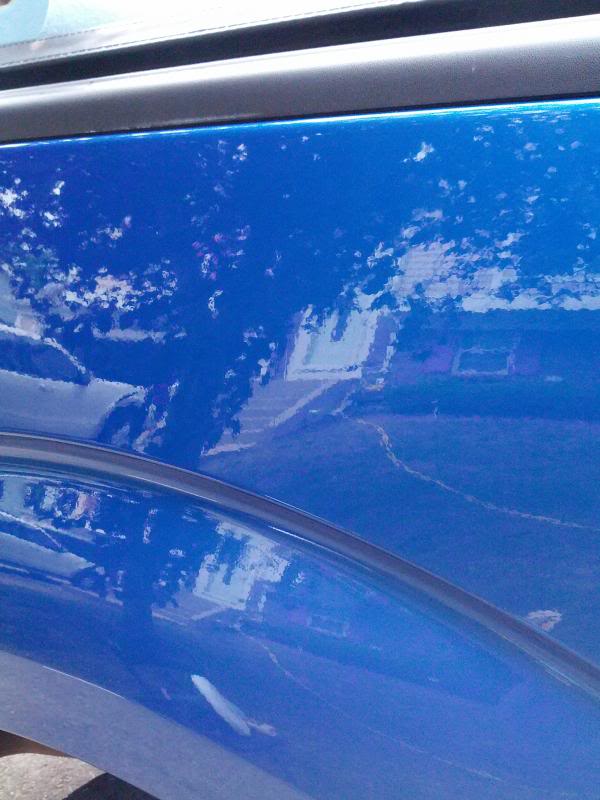
Here's the first two pics of the scratches on the passenger side of the bed above the wheel well. This is before washing the area.
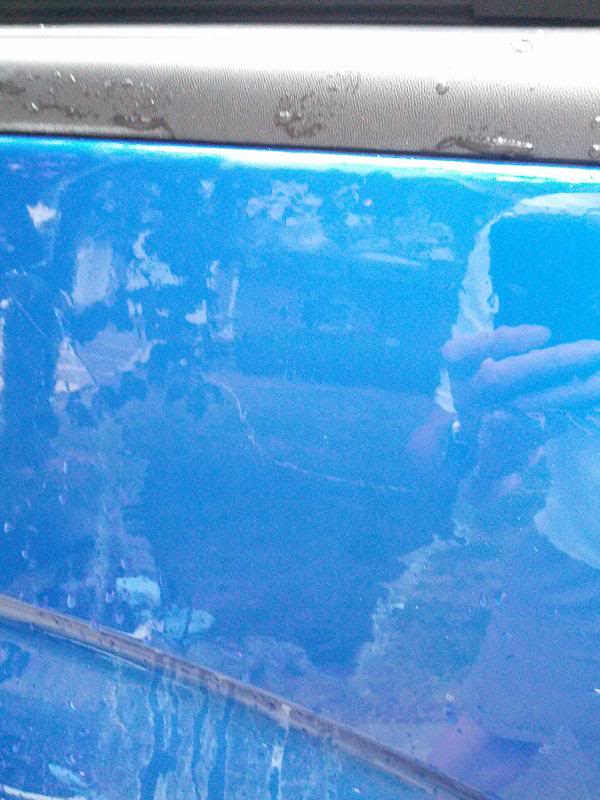
Area washed clean
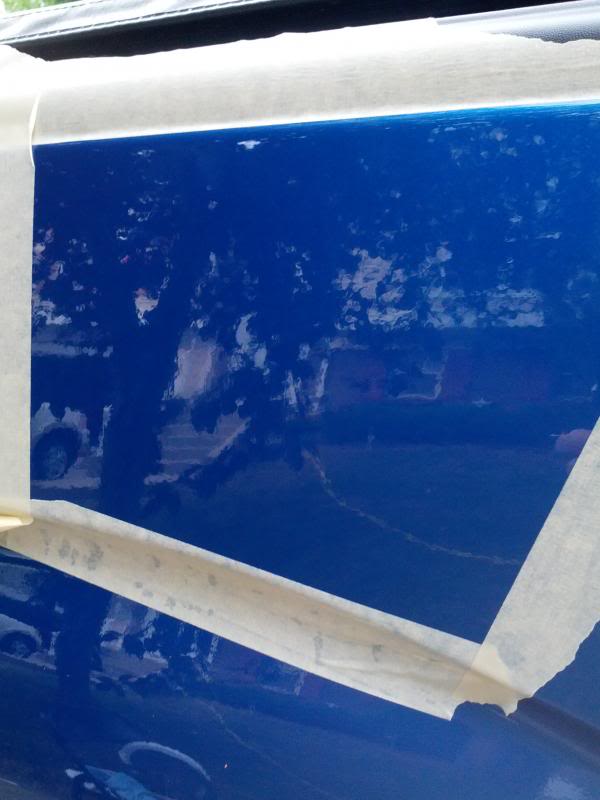
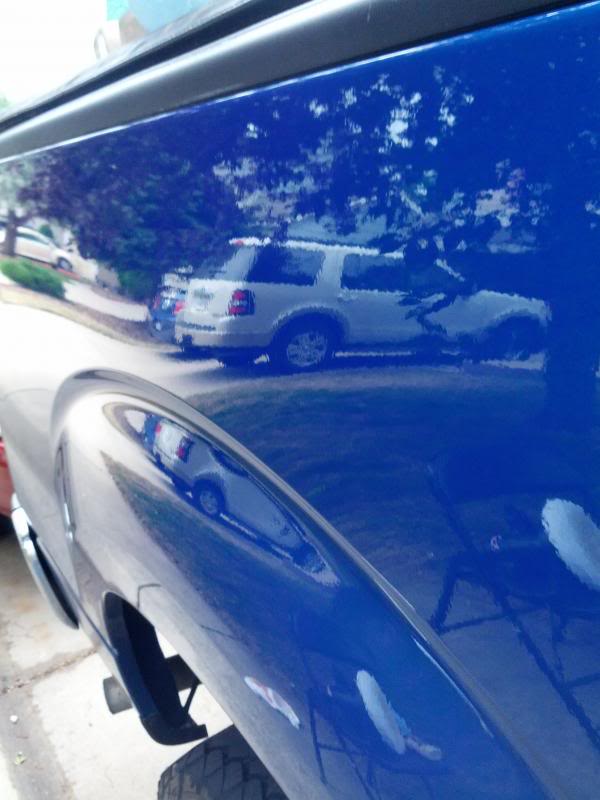
Same area, after having been thoroughly washed and after having wet sanded out the scratches with the 3000 grit and area is wet. I've filled the bucket with cold water and have been soaking the 3000 grit for about 5 mins, then I used the sandpaper, keeping it very very wet (like washing/wringing in bucket) about every 10-15 strokes. Using light pressure and as even as possible, I went across the scratches horizontally since they were vertical. If you watch junkman's video on the lambo, you'll see it...you end up with milky looking water coming off. That's the clear coat. Being gentle, I kept at it until I could see no trace of the scratches anymore (the white against the blue paint.) (by hand)
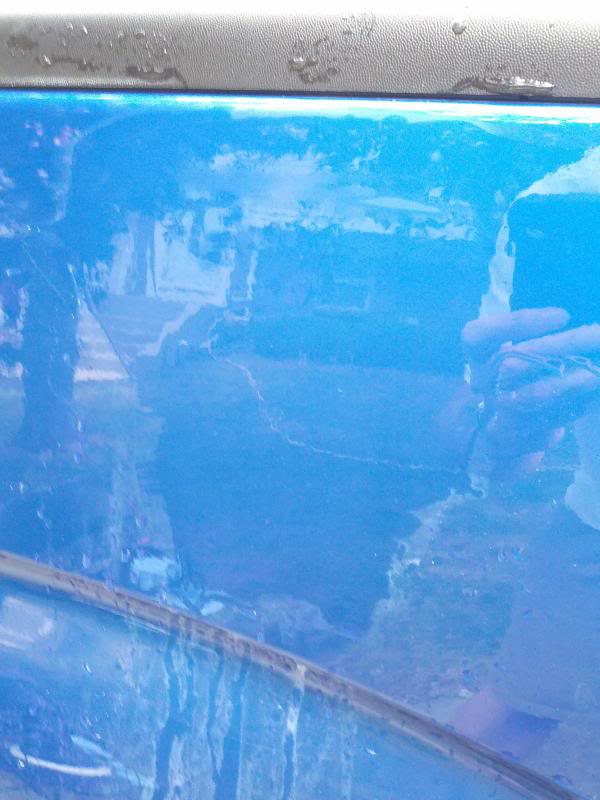
Then I wiped it off and was left with this. (by hand)
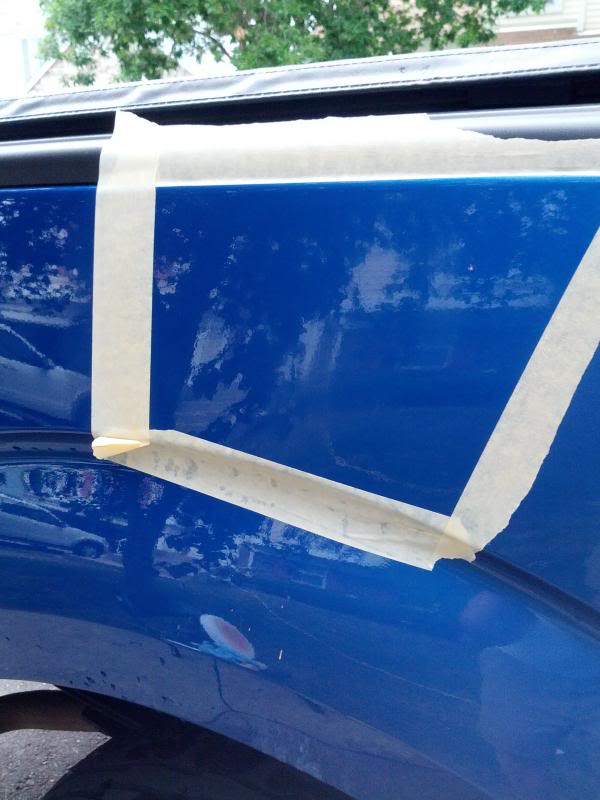
Now at this point...I am literally about to crap myself thinking "what in the holy mother of god am I doing????" I mean...I'm scared. Like, I am going to have to have this repainted at great expense and rear chewing from my wife. Then I took a deep breath, masked the area off so I knew where the damage was hoping it would magically disappear.
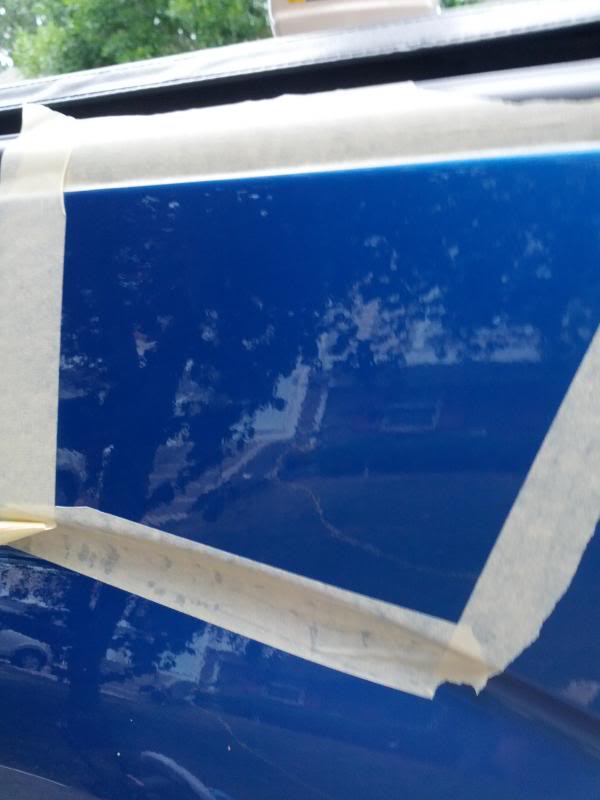
This is after the first time I hit it with the medium cut Meguiars. (with buffer)
Then a second time... (with buffer)
Now the fine cut (2 passes) (with buffer)
Then machine polish (with buffer)
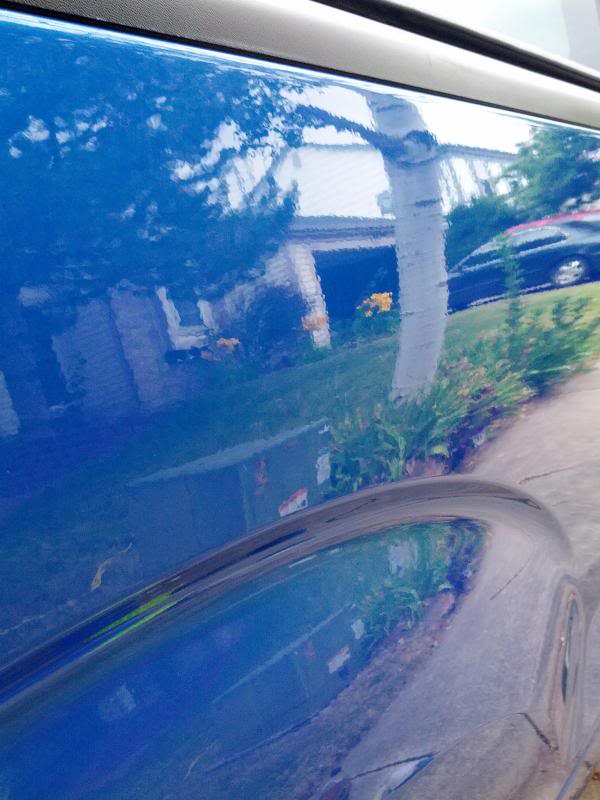
Pulled the masking tape, hit it with hand type polish and then carnuba wax (by hand) and I gotta say, I am completely satisfied.
I have some more scratches I can practice on with the pickup and my sister in law is bringing her F150 over for me to work on her tailgate so I should be getting pretty good at fixing scratches like this. It was nerve racking at times, but I really enjoyed doing it and totally love the results. I did it on the cheap which also makes me pretty happy.
I'm really thankful to junkman2000 on youtube for his sharing of knowledge and thank you to all the guys here on the forums willing to share as well.
I am sharing this information and am not condoning nor recommending that you do this at home or anywhere else. If you choose to do this, the risk is 100% yours alone.
I used a Craftsman 10" buffer/polisher, terry cloth bonnets and Meguiars professional line chemicals. Also, I couldn't find a full pack of 2500 grit sandpaper, so I started with the 3000 grit sandpaper similar to the stuff junkman used on that blue lamborghini on youtube. I of course didnt have a sanding block, so I rolled and folded the 3000 grit so it essentially ended up feeling like it had a block behind it with even pressure.
Here's the first two pics of the scratches on the passenger side of the bed above the wheel well. This is before washing the area.

Area washed clean

Same area, after having been thoroughly washed and after having wet sanded out the scratches with the 3000 grit and area is wet. I've filled the bucket with cold water and have been soaking the 3000 grit for about 5 mins, then I used the sandpaper, keeping it very very wet (like washing/wringing in bucket) about every 10-15 strokes. Using light pressure and as even as possible, I went across the scratches horizontally since they were vertical. If you watch junkman's video on the lambo, you'll see it...you end up with milky looking water coming off. That's the clear coat. Being gentle, I kept at it until I could see no trace of the scratches anymore (the white against the blue paint.) (by hand)


Then I wiped it off and was left with this. (by hand)

Now at this point...I am literally about to crap myself thinking "what in the holy mother of god am I doing????" I mean...I'm scared. Like, I am going to have to have this repainted at great expense and rear chewing from my wife. Then I took a deep breath, masked the area off so I knew where the damage was hoping it would magically disappear.
This is after the first time I hit it with the medium cut Meguiars. (with buffer)

Then a second time... (with buffer)

Now the fine cut (2 passes) (with buffer)
Then machine polish (with buffer)

Pulled the masking tape, hit it with hand type polish and then carnuba wax (by hand) and I gotta say, I am completely satisfied.


I have some more scratches I can practice on with the pickup and my sister in law is bringing her F150 over for me to work on her tailgate so I should be getting pretty good at fixing scratches like this. It was nerve racking at times, but I really enjoyed doing it and totally love the results. I did it on the cheap which also makes me pretty happy.
I'm really thankful to junkman2000 on youtube for his sharing of knowledge and thank you to all the guys here on the forums willing to share as well.
Last edited by wcgman; 07-27-2013 at 09:23 PM.
 07-27-2013, 09:15 PM
#3
5th Gear Member
Thread Starter
Join Date: Mar 2006
Location: Colorado
Posts: 2,652
Craftsman orbital el-cheapo. I paid even less for it than this. I think I gave 30 for mine.
http://www.sears.com/craftsman-10-in...p-00910723000P
I did the last 2 stages by hand of a polish and wax. The hand polish was probably overkill considering I used a machine polish right before that.
I'm sure that trying this by hand would have been a waste of time and energy. I dont think I would have been able to cut this by hand well enough to make it work. If I had a real POS to test on - even a panel or old hood, I wouldnt mind trying though.
Last edited by wcgman; 07-27-2013 at 09:17 PM.
07-28-2013, 07:29 PM
#4
4th Gear Member
Join Date: Sep 2010
Location: California
Posts: 1,125
Thanks for sharing Wcgman. Excellent results! I want to detail my car with a cheap 6 in. Craftsman orbital buffer my dad bought years ago and this thread definitely makes me feel better about using that instead of spending money I don't have at this moment on an expensive piece as is always suggested on these forums. I also have deep scratches on my car, and although I'd be terrified of trying this, I may be willing to try one of the smaller scratches just above my rear wheel well.
Last edited by Antonio323; 07-28-2013 at 07:36 PM.
07-28-2013, 08:22 PM
#7
5th Gear Member
Thread Starter
Join Date: Mar 2006
Location: Colorado
Posts: 2,652
Definitely agree about watching junkmans video about the newb stuff...and check this one out too. This is the one that inspired me to finally give it a shot.
I used the Mequiers Mirror Glaze products.
Started with the medium cut cleaner, then fine cut, then machine polish, then hand polish, then waxed it.
I'd definitely recommend that you watch not just junkmans videos but check out ammonydotcom on youtube too...
(watch the second one too!)
You've got to be super careful. I would highly recommend if you can, practice on a piece of junk first. Find an old door panel, practice on a frenemies car...before moving onto the mustang. I personally ordered the porter cable 7424xp and all the stuff that junkman recommends after he and I went back and forth a lot over the last 24 hours. He can inspire great confidence, but if you follow his recommendations you will very likely do a great job and do it with minimal risk.
But you can do like I did and throw some caution to the wind! Just remember that if you mess your stuff up, it's your fault not mine lol
lol
I used the Mequiers Mirror Glaze products.
Started with the medium cut cleaner, then fine cut, then machine polish, then hand polish, then waxed it.
I'd definitely recommend that you watch not just junkmans videos but check out ammonydotcom on youtube too...
You've got to be super careful. I would highly recommend if you can, practice on a piece of junk first. Find an old door panel, practice on a frenemies car...before moving onto the mustang. I personally ordered the porter cable 7424xp and all the stuff that junkman recommends after he and I went back and forth a lot over the last 24 hours. He can inspire great confidence, but if you follow his recommendations you will very likely do a great job and do it with minimal risk.
But you can do like I did and throw some caution to the wind! Just remember that if you mess your stuff up, it's your fault not mine
lol
07-28-2013, 08:24 PM
#8
5th Gear Member
Thread Starter
Join Date: Mar 2006
Location: Colorado
Posts: 2,652
Last thing, if you can catch your fingernail on the scratch, its beyond this type of repair. Both junkman and ammonydotcom show you what I mean in the videos I posted.
Really do take the time to watch the junkman videos. He walks you through the whole process. Although he used Adam's products on the blue lambo, he told me he still prefers Meguiers Mirror Glaze products and was limited to what the customer had on hand.
If you do upgrade your orbital, do not buy the Flex. Buy the Porter Cable. The Flex is a pretty hard core machine and n00bs like you and I can quickly destroy paint with it.
Last edited by wcgman; 07-28-2013 at 08:28 PM.
08-18-2013, 04:17 PM
#10
4th Gear Member
Join Date: Sep 2010
Location: California
Posts: 1,125
Hey, wcgman! I wanted to ask, were the terry cloths the only ones you used on your buffer? Or did you alternate between the applicator bonnet and terry cloths? Also, I purchased Meguiar's Ultimate Compound, would you recommend that I also buy their Ultimate Polish to hit it with that after the compound? Thanks in advance!

