My 1995 Ford Ranger "Delayed Daily"
 06-20-2013, 09:39 AM
#1
Thread Starter

Join Date: Jun 2013
Location: Kansas
Posts: 20
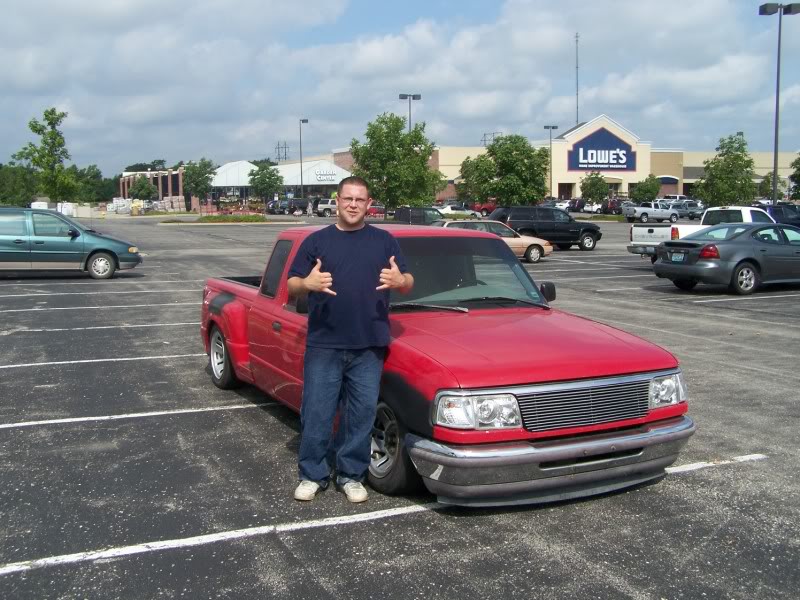
Figured I would throw a build thread together on here for people to see. Have been building her for 3 years now, and still going at it. Started with a basic 95 Ranger that had been bagged by the previous owner with a simple bag on bar 2-link setup. Had a 5 gallon chrome tank with a single compressor mounted under the bed. The compressor got flooded out one day while running errands in the rain. This was my only vehicle to drive for about a year and half. Once the compressor went out I decided it was time to invest in something cheap to daily, that way I could make some changes.
When I first parked the truck in my buddies shop, the plan was to do a simple 4 link bag on bar. Nothing fancy, just something to change the ride quality and more lift. That quickly turned into a full backhalf, which turned into a Toyota front clip swap to do away with the I-beams these Rangers loved so much. Which almost immediately turned into a body drop. So I figured since I was gonna do all this work, I might as well do the entire truck over once. That way when I was pulled out of the shop, it would only have to go back for minor things.
We built everything strong for a healthy V8 conversion and will lay out on a 22" rim and tire. So, with the basics of the build out there, let the pics begin.
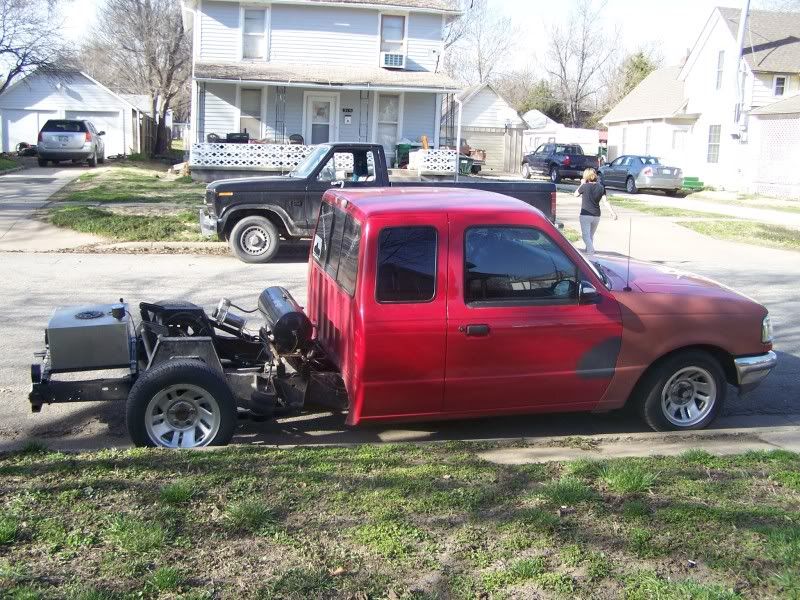
This is the day I picked it up. Met the guy in Lee's Summit, so I had a nice 2 1/2 hr cruise home, with plenty of dragging going on down I-70.
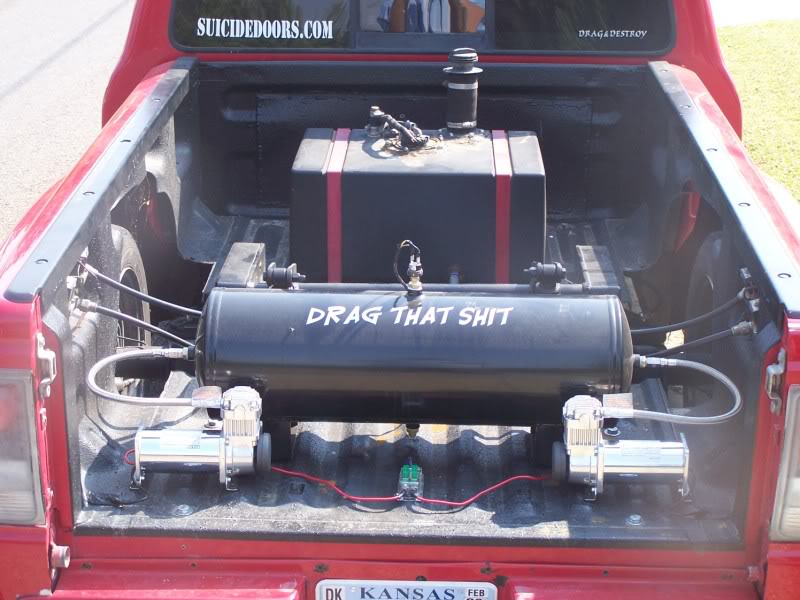
Some simple mods came first. When the compressor got water logged, I picked up 2 new Viair 380c compressors and an 8 gallon tank.
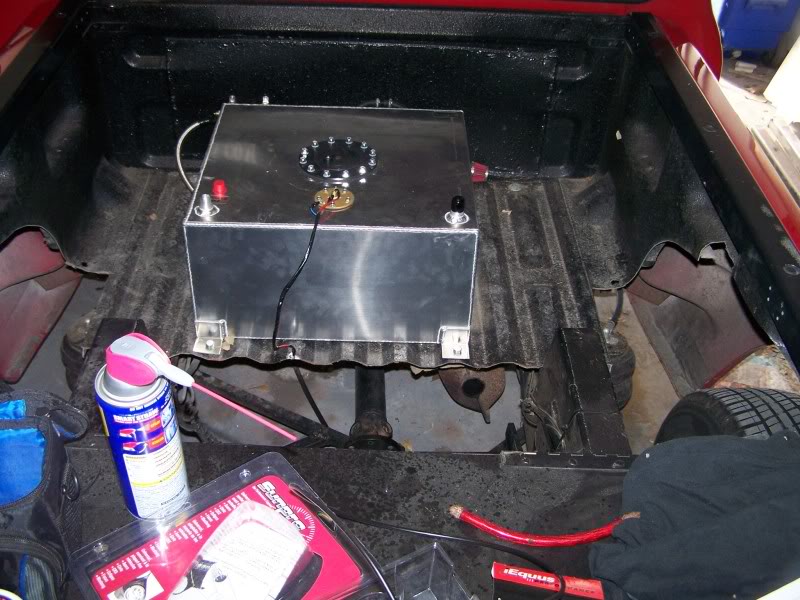
Ditched the plastic fuel cell for an aluminum one.
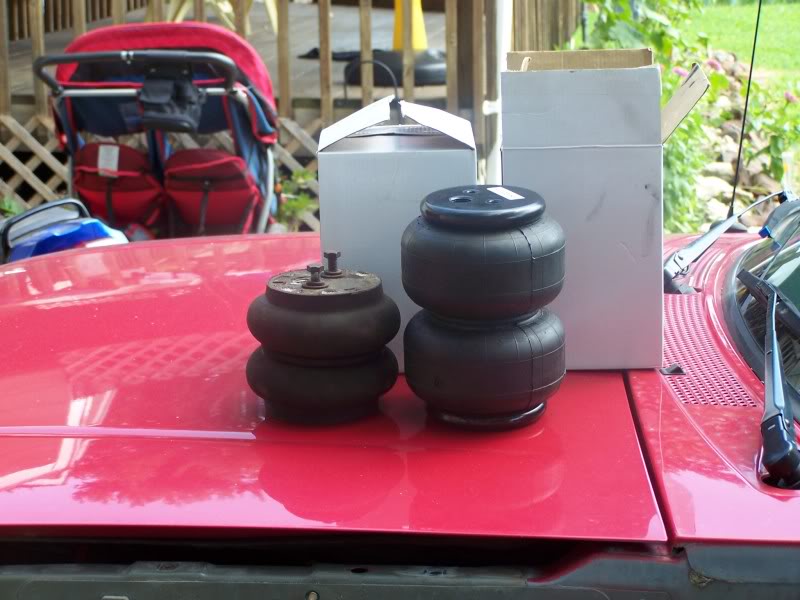
Had to replace the front bags. The ones that were on it were way to small, and was killing me on camber issues. Went through front tires every couple of months. The old on the left, new on the right.
More on its way......
When I first parked the truck in my buddies shop, the plan was to do a simple 4 link bag on bar. Nothing fancy, just something to change the ride quality and more lift. That quickly turned into a full backhalf, which turned into a Toyota front clip swap to do away with the I-beams these Rangers loved so much. Which almost immediately turned into a body drop. So I figured since I was gonna do all this work, I might as well do the entire truck over once. That way when I was pulled out of the shop, it would only have to go back for minor things.
We built everything strong for a healthy V8 conversion and will lay out on a 22" rim and tire. So, with the basics of the build out there, let the pics begin.
This is the day I picked it up. Met the guy in Lee's Summit, so I had a nice 2 1/2 hr cruise home, with plenty of dragging going on down I-70.
Some simple mods came first. When the compressor got water logged, I picked up 2 new Viair 380c compressors and an 8 gallon tank.
Ditched the plastic fuel cell for an aluminum one.
Had to replace the front bags. The ones that were on it were way to small, and was killing me on camber issues. Went through front tires every couple of months. The old on the left, new on the right.
More on its way......
 06-20-2013, 09:46 AM
#2
Thread Starter
Join Date: Jun 2013
Location: Kansas
Posts: 20
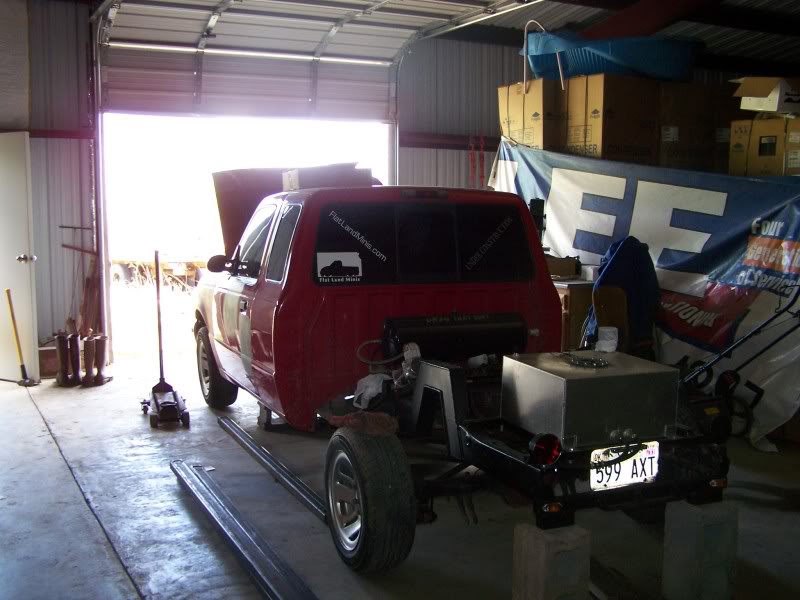
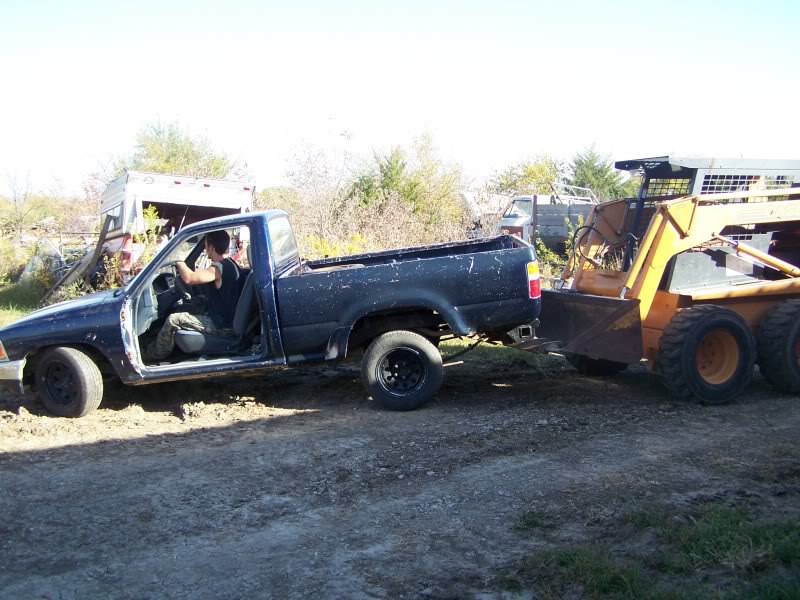
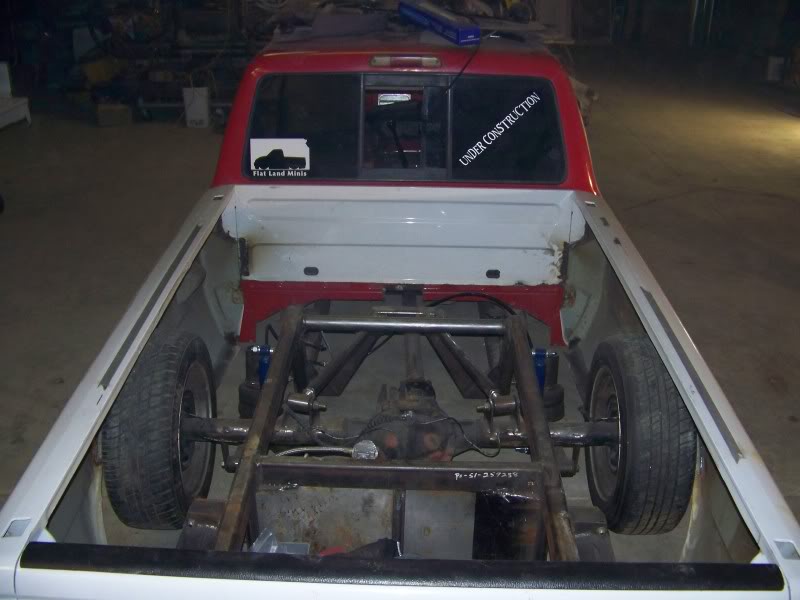
After those minor changes, it was time to get her ready to hit the shop for some real work. The bed was crappy, and all torn up so I decided to tear the bed off, literally, and cruise for a little bit with out before it headed to the shop.
This shows the literal ripping off the bed. -clicky-

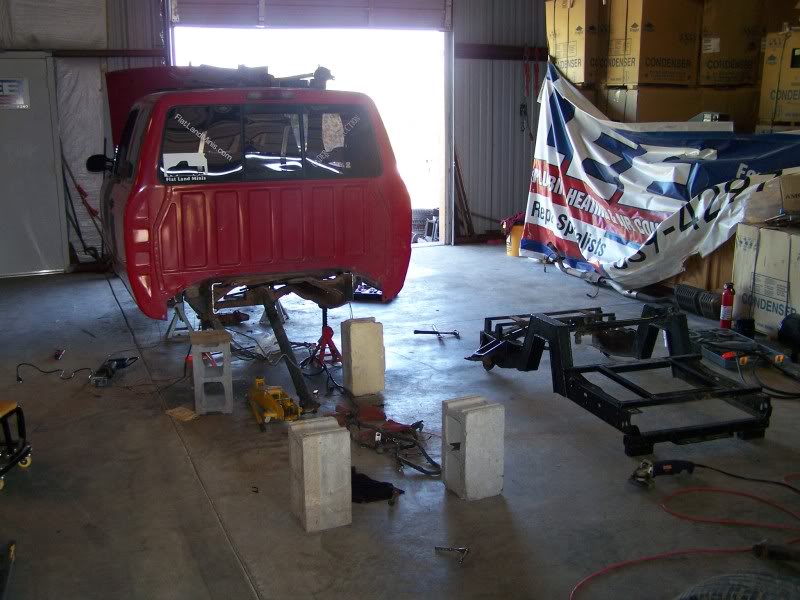
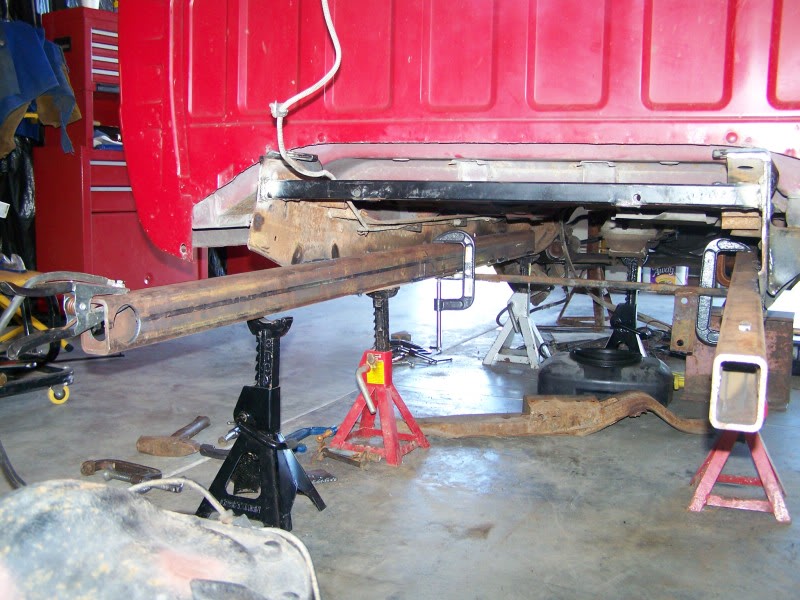
With the truck firmly on blocks and everything measured for the build, it was time for tear down.
If you know anyone that needs a Ranger backhalf, we still got it somewhere....lol
This shows the literal ripping off the bed. -clicky-
With the truck firmly on blocks and everything measured for the build, it was time for tear down.
If you know anyone that needs a Ranger backhalf, we still got it somewhere....lol
06-20-2013, 09:55 AM
#3
Thread Starter
Join Date: Jun 2013
Location: Kansas
Posts: 20
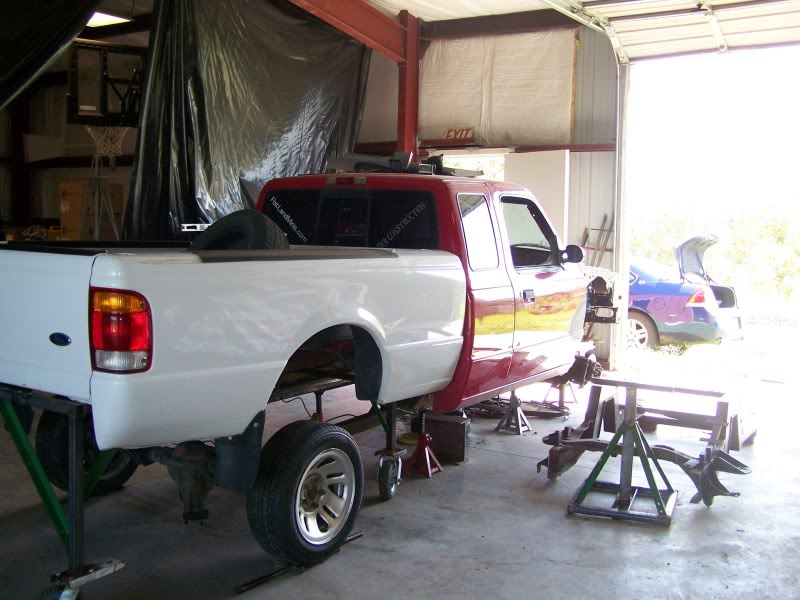
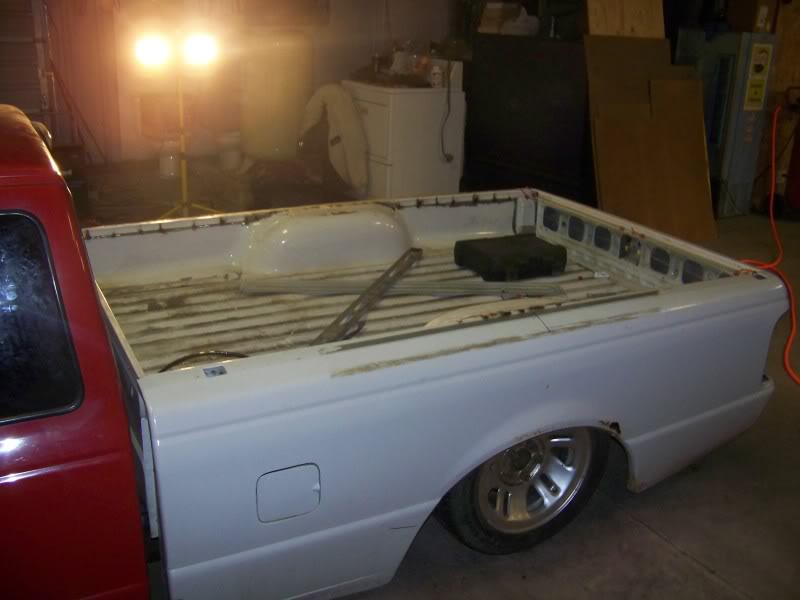
Ford never made an extended cab long bed Ranger, so I accidentally decided to do one. I bought a newer bed for it, not measuring and come to find out it is a long bed. I said what the hell, lets do it. So we had to move the bed on it's rack somewhat into place to take some more measurements. We literally spent half a day making sure our measurements were exact.
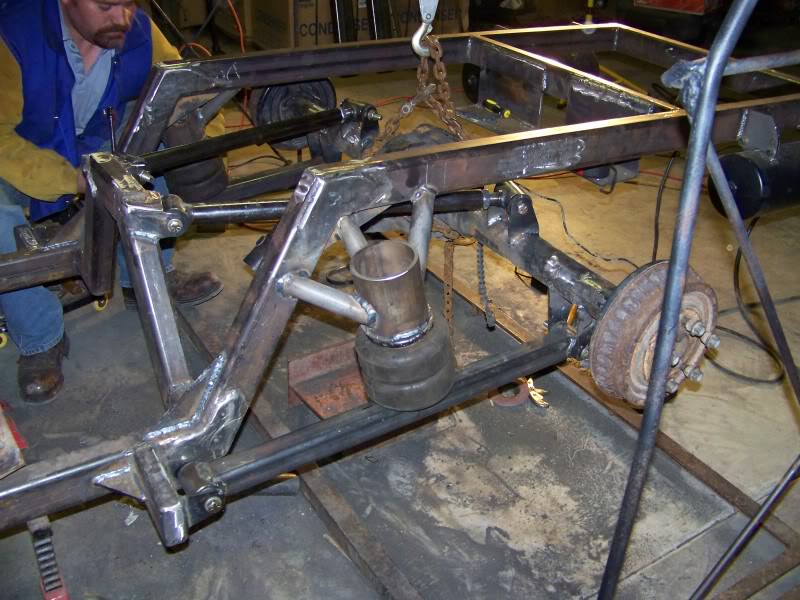
Once all measurements were correct, it was time to start on the new frame. We didn't have material to make a frame table, so we went with the next best thing. Using the original frame as a guide for the main frame rails.
From there, the backhalf took its shape.
Link bars, mounts, air tanks, and fuel cell area were all fabbed up and welded on.
06-20-2013, 10:02 AM
#4
Thread Starter
Join Date: Jun 2013
Location: Kansas
Posts: 20
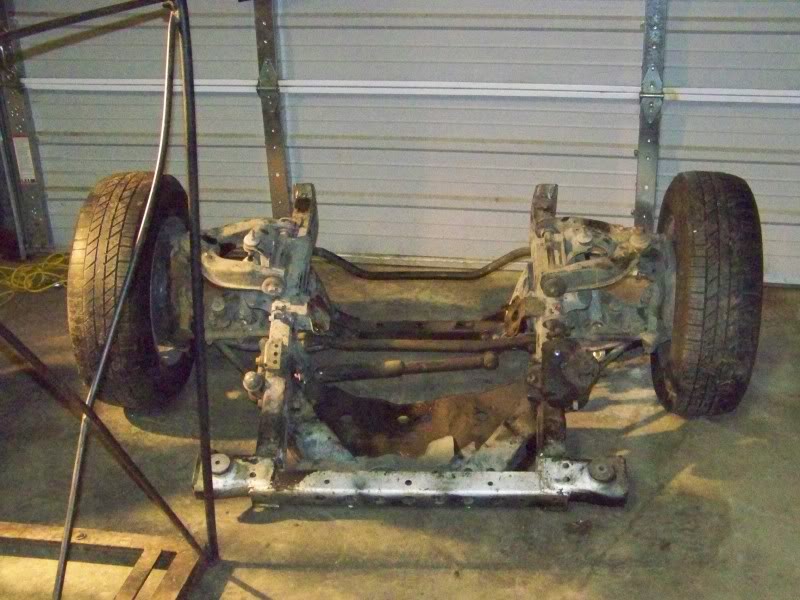
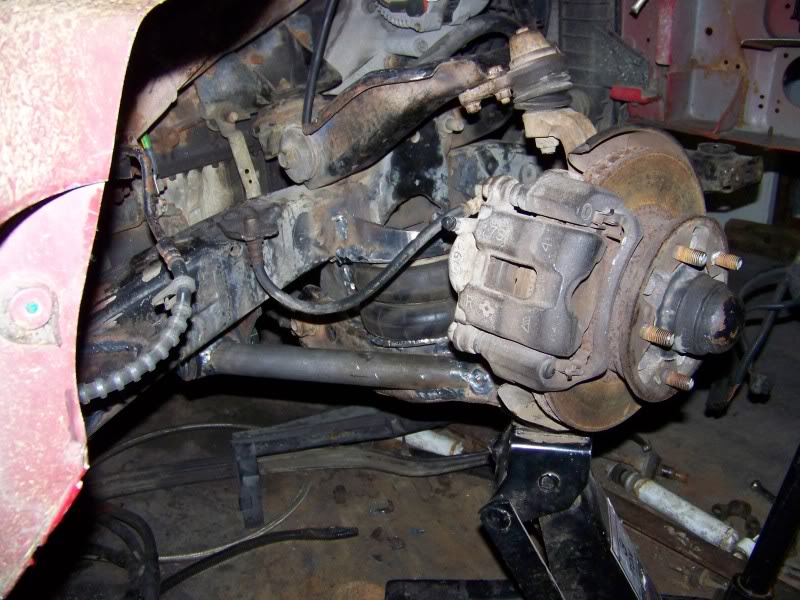
With the rear suspension buttoned up it was time to start the front. So in came a parts Toyota for the control arm suspension. Bought the whole truck for $100. Parted some things out on it and came out making $200 out of it to put back into other parts.
Out with the old.
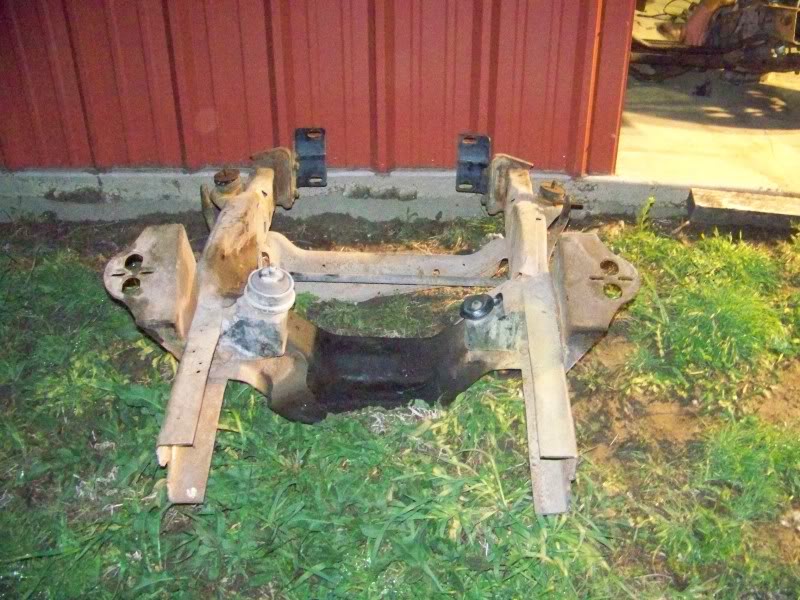
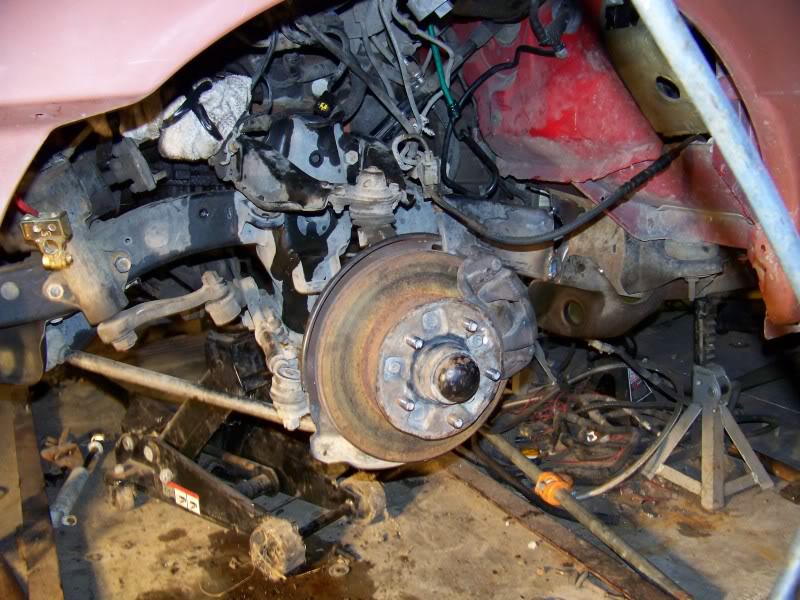
In with the new.
The yota clip was measured, cut, and welded into place of the factory Ranger clip.
Out with the old.
In with the new.
The yota clip was measured, cut, and welded into place of the factory Ranger clip.
06-20-2013, 10:10 AM
#5
Thread Starter
Join Date: Jun 2013
Location: Kansas
Posts: 20
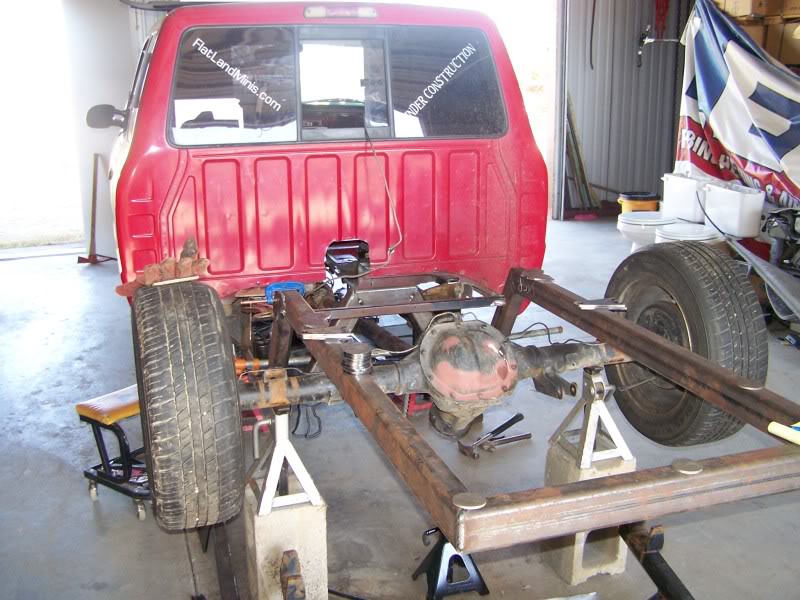
With everything welded solid, it was time to take her off of the blocks and jackstands.
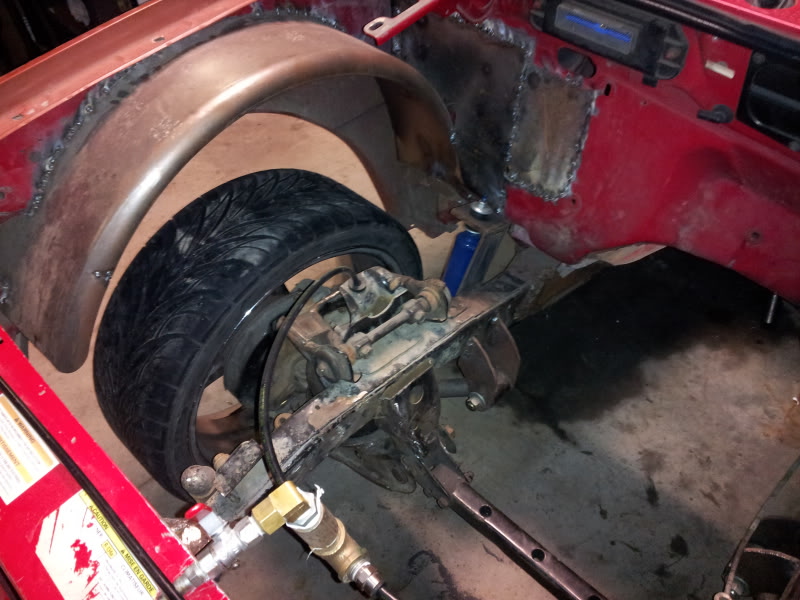
We had to modify both the arms to make it right for bags. We flipped the uppers, and plated them for strength, and triangulated and plated the lowers for strength as well.
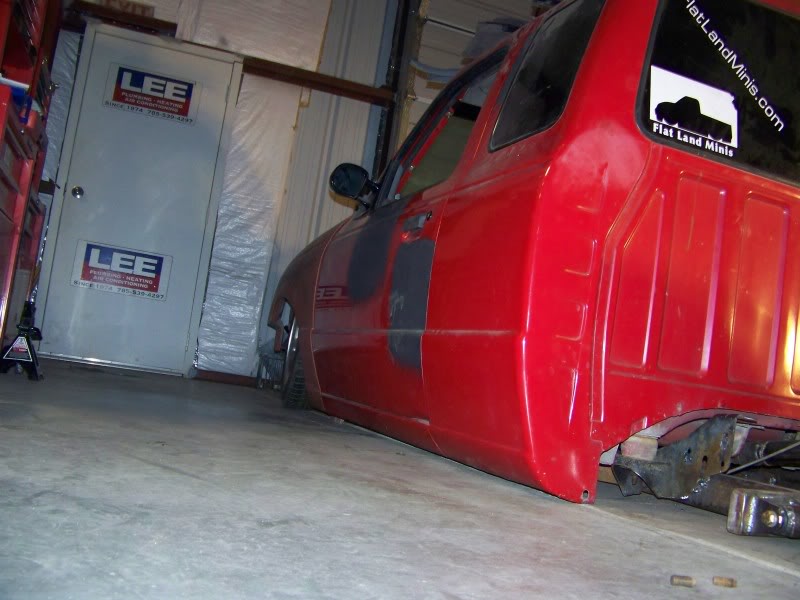
Next it was time to plant the rockers firmly on the ground. So we lowered the body mounts another 1/2" which gave us a total of 3 1/2" of bodydrop. The original frame is 6" tall, and the new frame is all 2x3. Just to show where we got the 3 1/2" from.
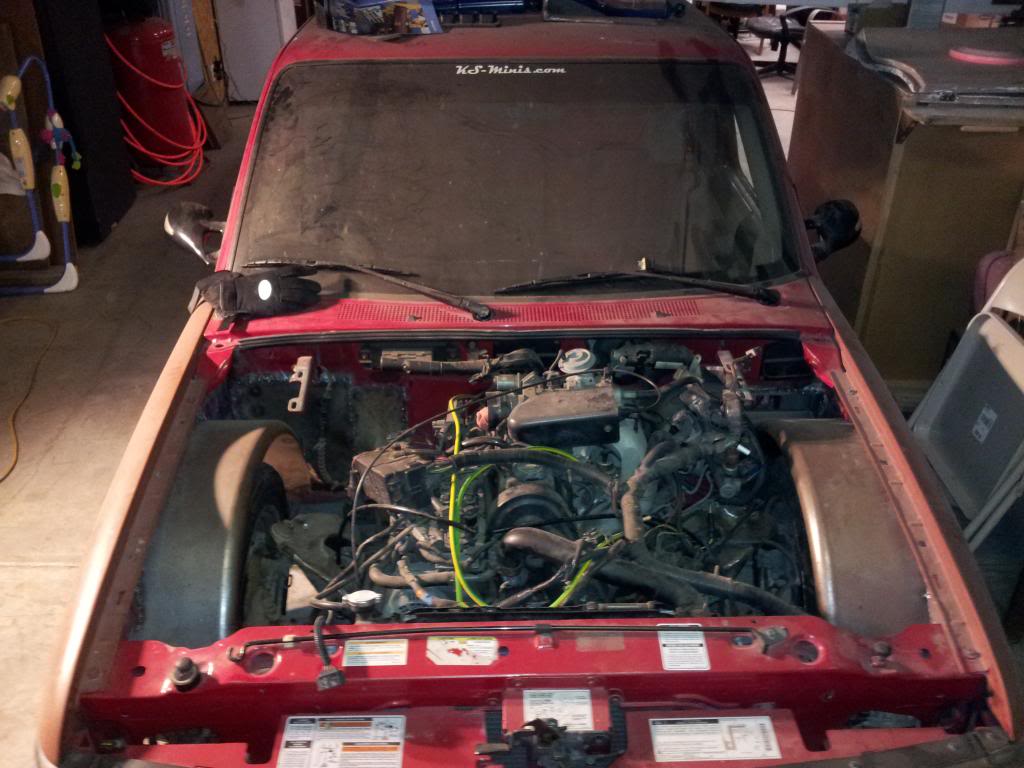
After several rounds of clean up work, and the body drop, it was time to decide what to do with the engine. Had the 2.3 with a 5 speed, and although these motors are solid and seem to run for every, it is time for an upgrade.
We had to modify both the arms to make it right for bags. We flipped the uppers, and plated them for strength, and triangulated and plated the lowers for strength as well.
Next it was time to plant the rockers firmly on the ground. So we lowered the body mounts another 1/2" which gave us a total of 3 1/2" of bodydrop. The original frame is 6" tall, and the new frame is all 2x3. Just to show where we got the 3 1/2" from.
After several rounds of clean up work, and the body drop, it was time to decide what to do with the engine. Had the 2.3 with a 5 speed, and although these motors are solid and seem to run for every, it is time for an upgrade.
06-20-2013, 10:19 AM
#6
Thread Starter
Join Date: Jun 2013
Location: Kansas
Posts: 20
We got the motor and trans out of the way, cleaned up the frame and got some shock mounts made and mounted.
Not having a motor yet, we decided while we waited for me to get the funds and get one, we would work on the bed. We raised the bed floor 8 1/2" to accommodate the new frame, and welded it back up.
While spending some time saving up money to get parts, I came across a deal for the exact rims I was wanting for the truck. A set of 20" Incubus Lores. All for $75. I was stoked to have that happen. So we spent some time just cleaning welds, doing some little nit picky things and getting ready for a motor.

My son loves working on the truck with me, and I love it when he comes with. He adds a lot of excitement to it. His favorite tool is the Plasma cutter. He has lent a hand in cutting several brackets. He just loves it.
Not having a motor yet, we decided while we waited for me to get the funds and get one, we would work on the bed. We raised the bed floor 8 1/2" to accommodate the new frame, and welded it back up.
While spending some time saving up money to get parts, I came across a deal for the exact rims I was wanting for the truck. A set of 20" Incubus Lores. All for $75. I was stoked to have that happen. So we spent some time just cleaning welds, doing some little nit picky things and getting ready for a motor.
My son loves working on the truck with me, and I love it when he comes with. He adds a lot of excitement to it. His favorite tool is the Plasma cutter. He has lent a hand in cutting several brackets. He just loves it.
06-20-2013, 10:26 AM
#7
Thread Starter
Join Date: Jun 2013
Location: Kansas
Posts: 20
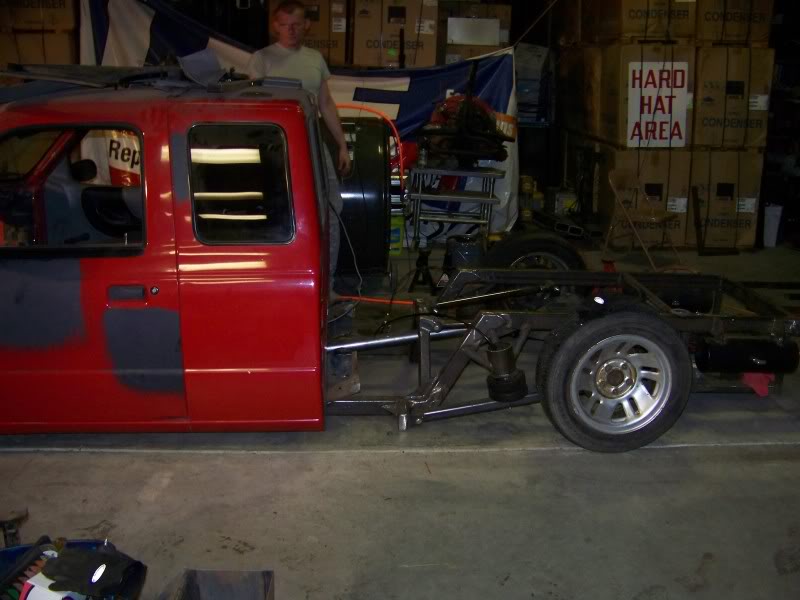
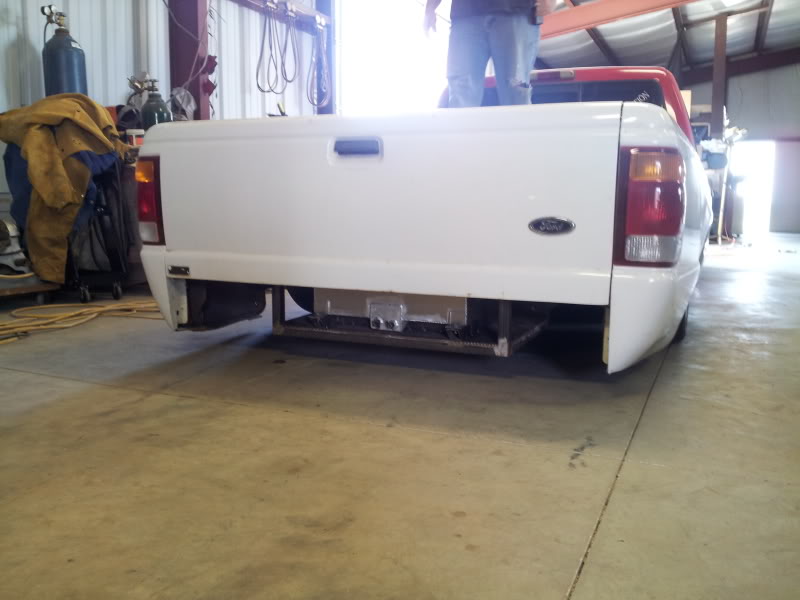
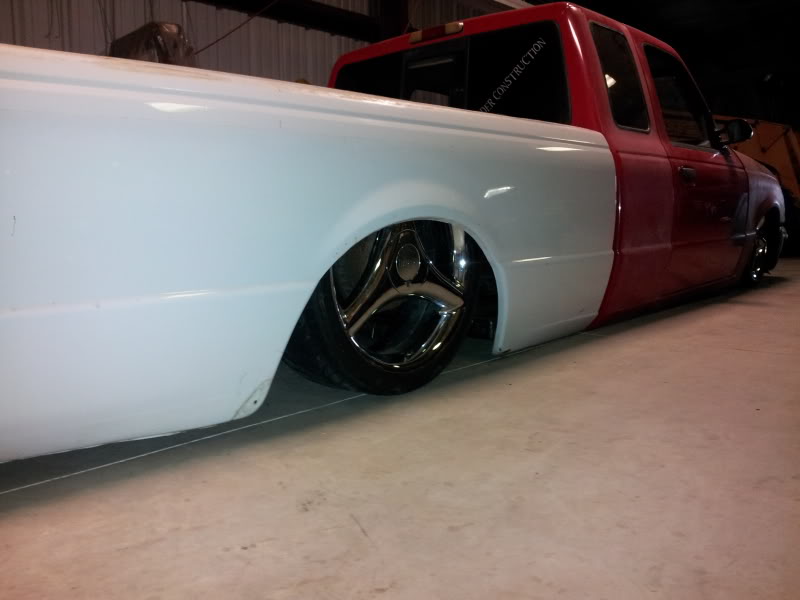
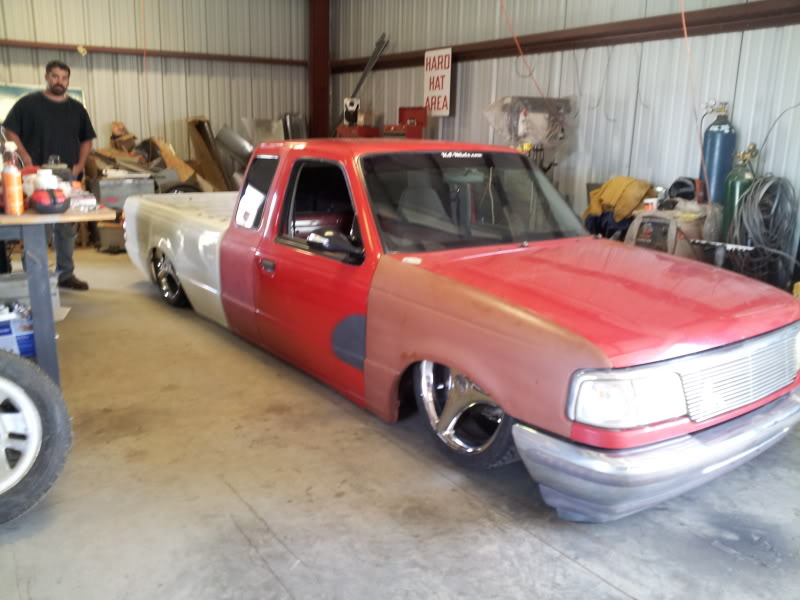
These pics just show how she sits today waiting for the motor and trans. Been a long road, with help from many friends and many late nights. Still got a ways to go, but it will all be worth it when she takes her first cruise.

06-20-2013, 10:34 AM
#8
Thread Starter
Join Date: Jun 2013
Location: Kansas
Posts: 20
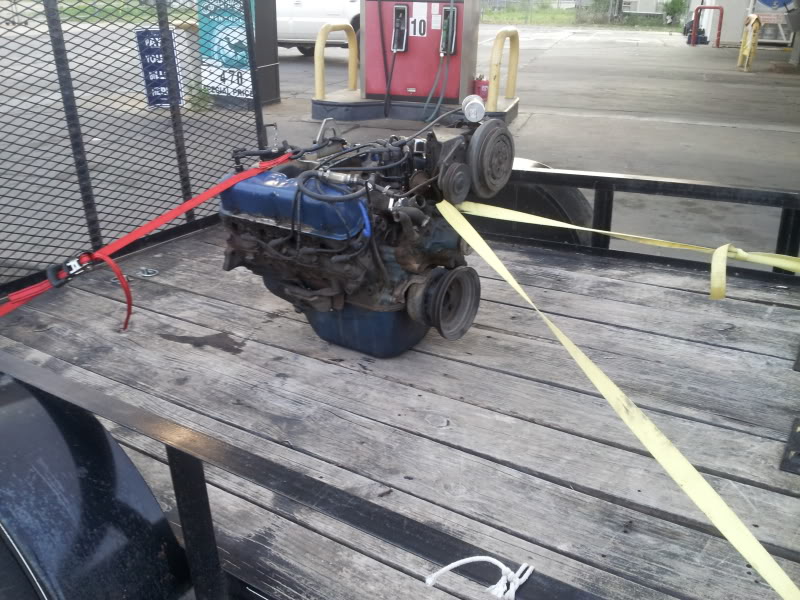
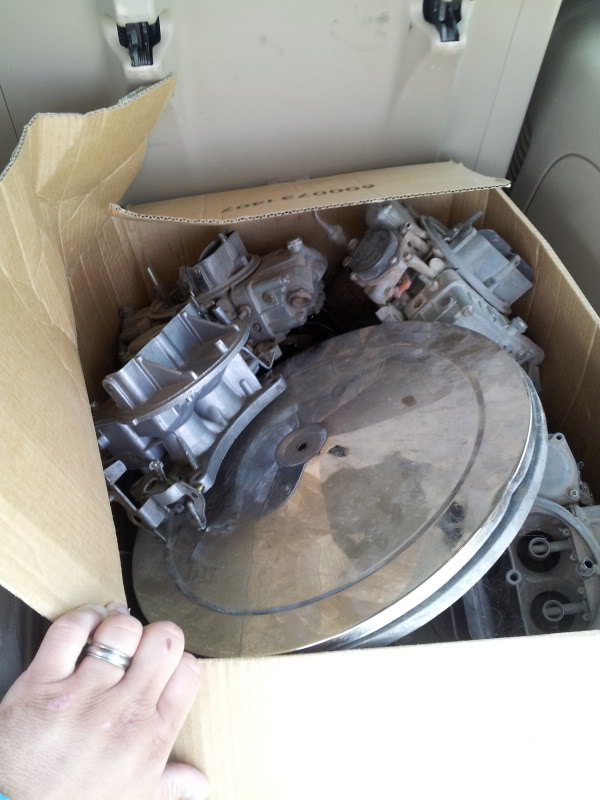
This last weekend we took a nice drive. Went to Wichita to pick up a 302 out of a 79 F100, then down by Eden, OK to get a trans. Then over to Tulsa to my buddies sisters house for the weekend. While getting the trans, I ended up picking up 3 trans, a box of random parts, and 3 Holley carbs. Turned out to be a long, but great trip.
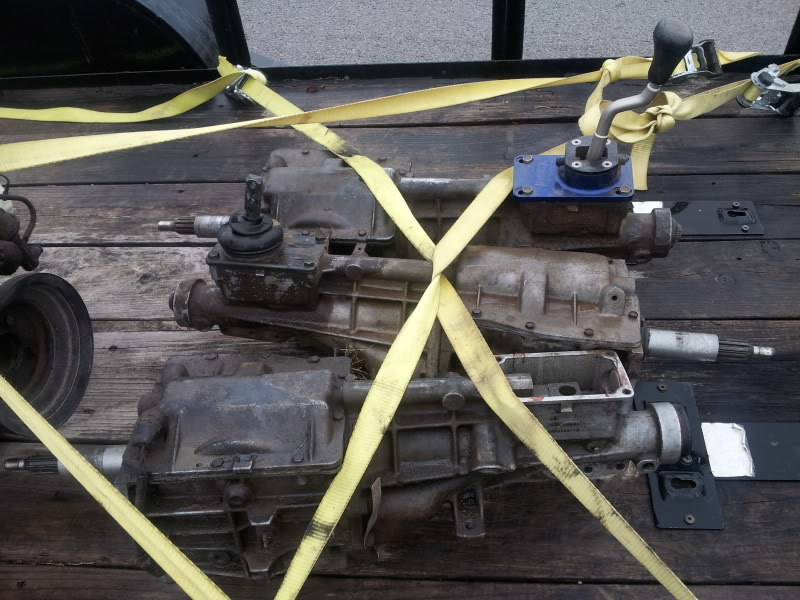
I will be using the trans with the brand new B&M short shifter on it. The trans in the middle is another one out of a mid 80's mustang, and the 3rd is out of a V6 model mustang. Plan on selling the other 2 to make some money for more parts, along with some other parts I have accumulated. But this is where I am at right now. Going up to the shop today to clean up the motor and start working on it. I am still gonna have to pick up an alternator, steering pump, bellhousing, clutch, and flywheel before I can get her running. We will use the motor as is to get the motor mounts made, and hopefully it won't take too long to get more parts to move forward with it. I got a busy couple weeks coming up, so we will see how things go. I will keep this thread going for all to see.
I will be using the trans with the brand new B&M short shifter on it. The trans in the middle is another one out of a mid 80's mustang, and the 3rd is out of a V6 model mustang. Plan on selling the other 2 to make some money for more parts, along with some other parts I have accumulated. But this is where I am at right now. Going up to the shop today to clean up the motor and start working on it. I am still gonna have to pick up an alternator, steering pump, bellhousing, clutch, and flywheel before I can get her running. We will use the motor as is to get the motor mounts made, and hopefully it won't take too long to get more parts to move forward with it. I got a busy couple weeks coming up, so we will see how things go. I will keep this thread going for all to see.
06-20-2013, 10:45 AM
#9
Thread Starter
Join Date: Jun 2013
Location: Kansas
Posts: 20
Oh ya, here are couple videos for some fun and enjoyment.

My kids helped with this one, and I am pretty happy with how it came out. Will probably make another one eventually. This was made before I parked the truck to start all the major work.

My kids helped with this one, and I am pretty happy with how it came out. Will probably make another one eventually. This was made before I parked the truck to start all the major work.

 , that looks like an amazing project and I can't wait to see more progress