spherical diff bushing
 11-04-2014, 07:21 PM
#1
1st Gear Member
Thread Starter

Join Date: Jun 2013
Location: new jersey
Posts: 77
Looking for suggestions on how install a diff spherical bushing. I've heard you can freeze the bearing and install this way. Is it acceptable to bang it in with a sledge?
I'm open to other suggestions.
I'm open to other suggestions.
 11-05-2014, 12:12 PM
#2
3rd Gear Member

Join Date: Jan 2010
Location: Louisiana
Posts: 738
Which one did you go with? I went with the Steeda unit. Give me 15 minutes and I will show you how I did it, I just need to snap a pic.
EDIT:
OK, this may take a little fabrication on your part but it's way better than hitting it with a hammer and probably damaging the unit. You can also use this same technique to strip out the old bushing.
First thing you need to make is this:
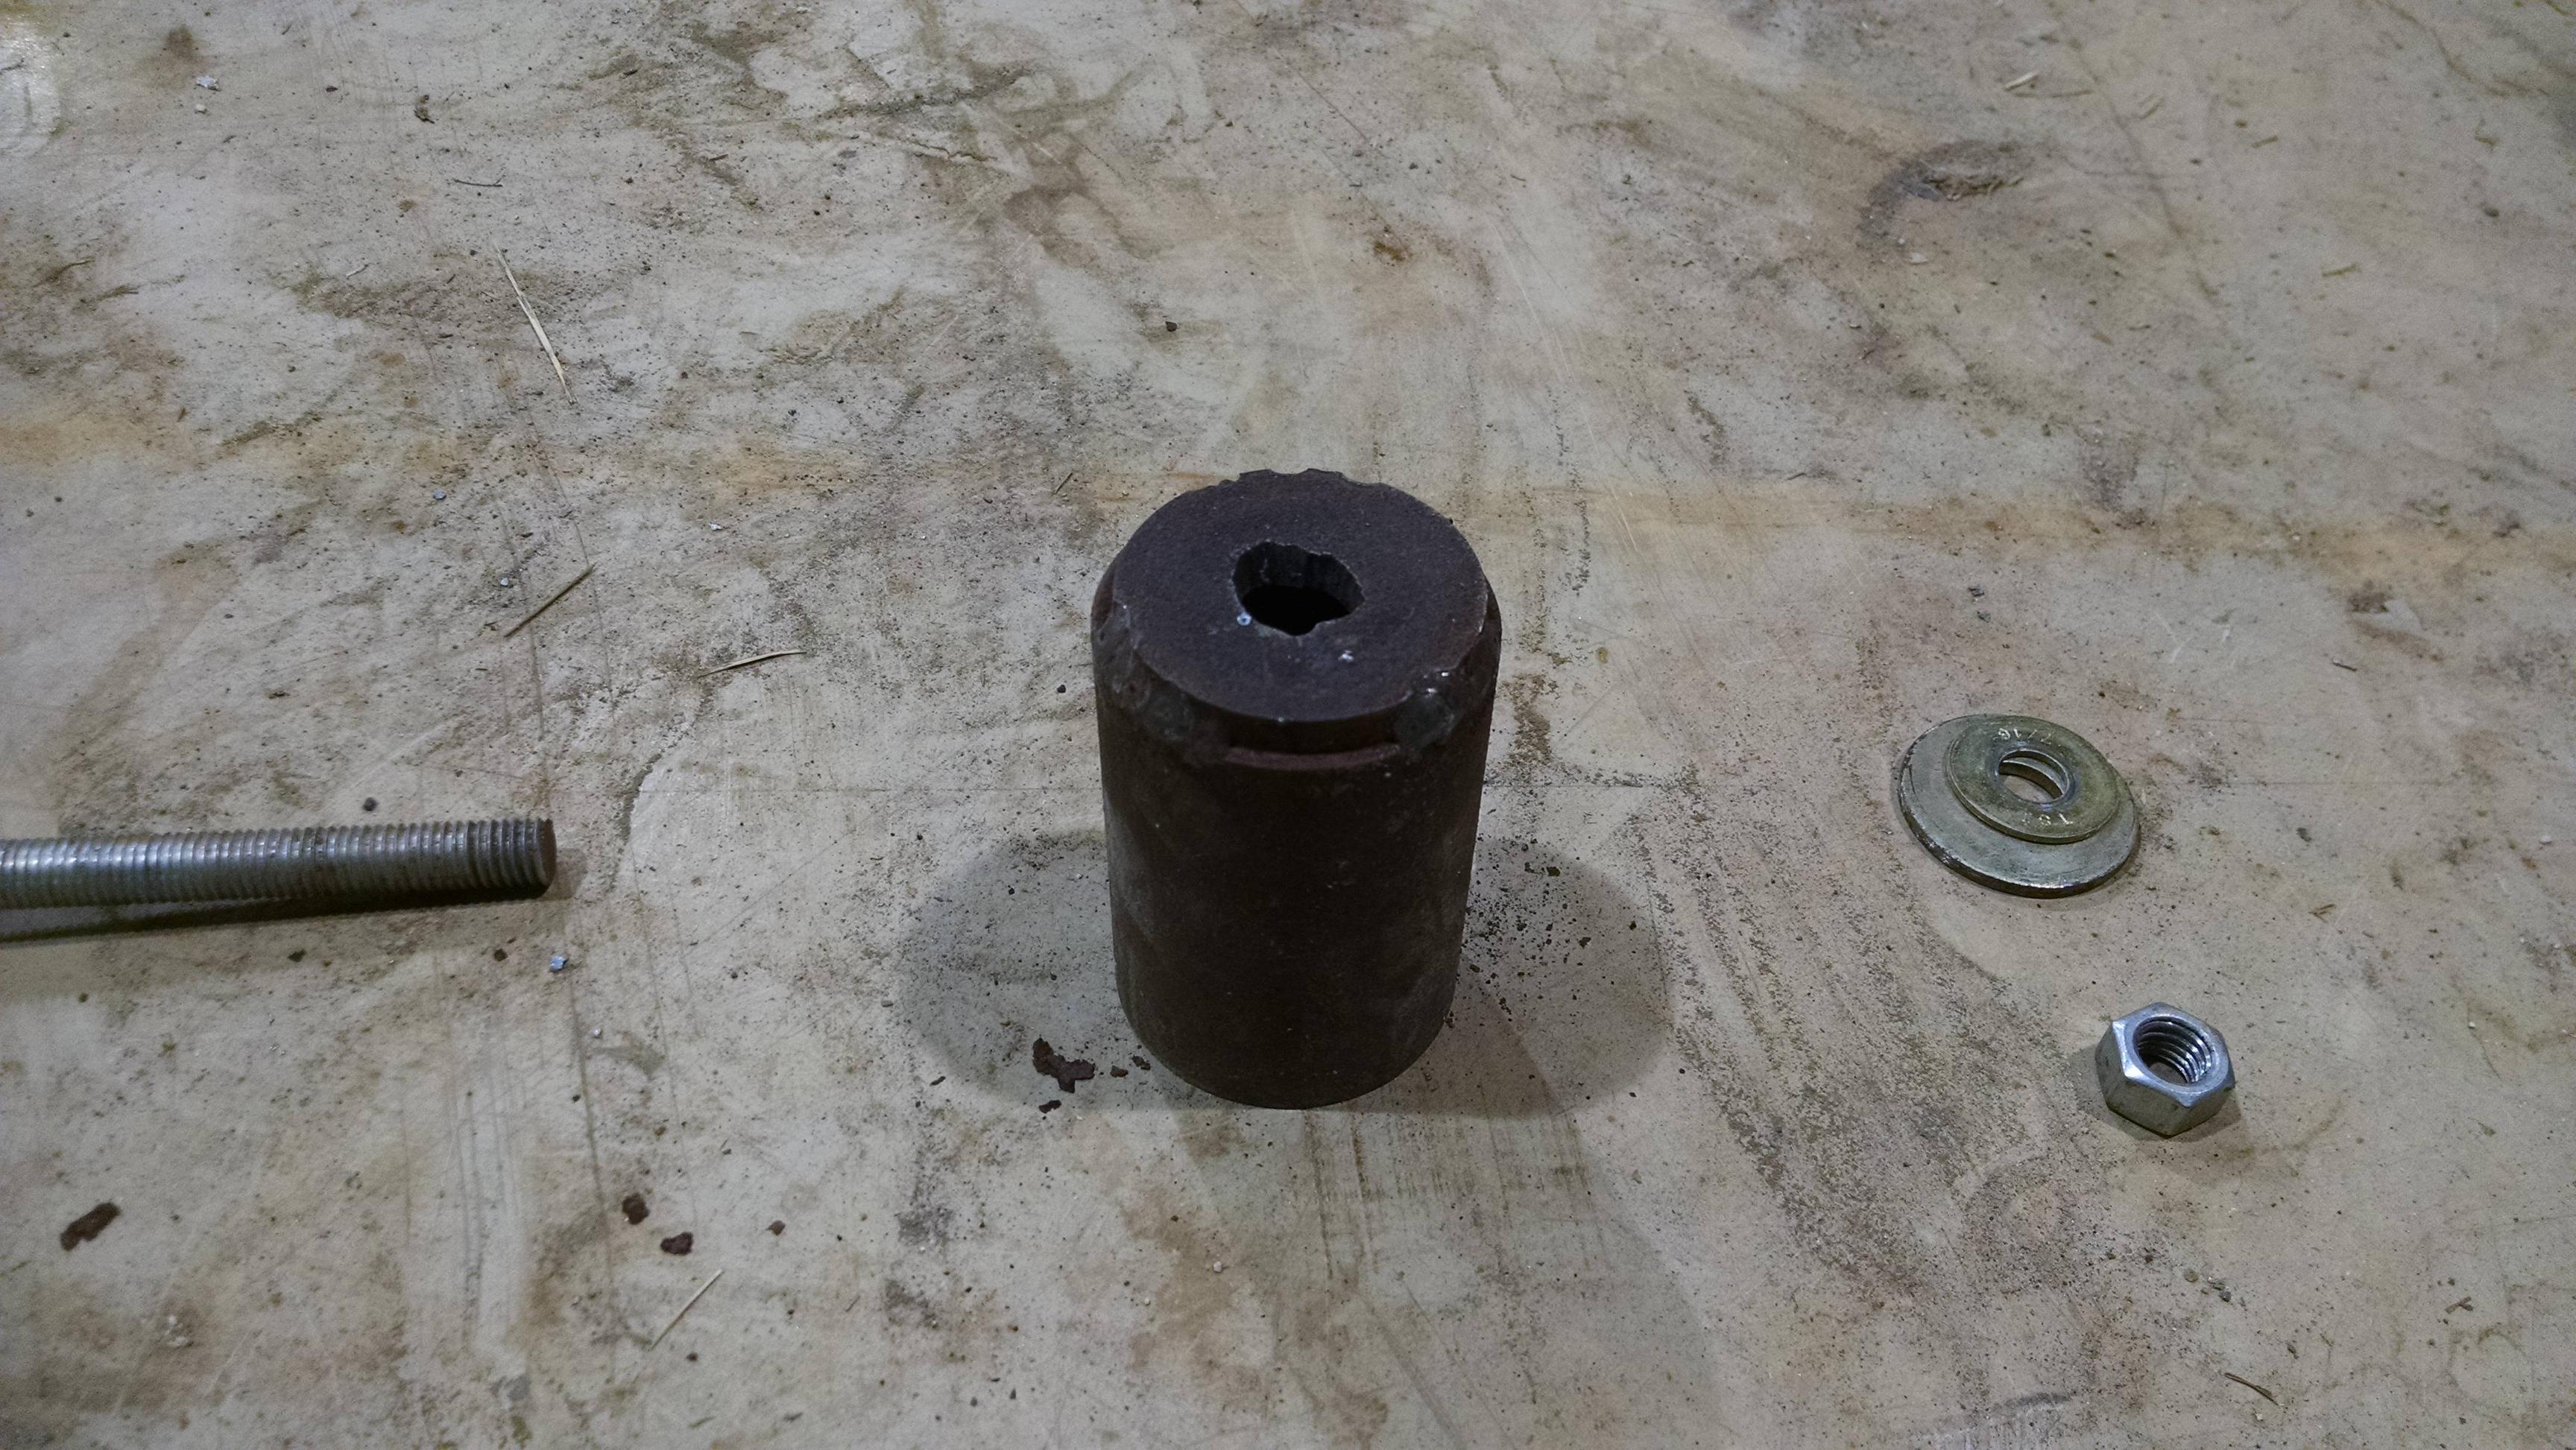
That's a piece of 2" sch40 carbon steel pipe with 1/4" piece of carbon steel to cap it that I ****illy blew a hole in with a handheld plasma because I didn't feel like using a drill press or any of the cnc machines. Plus my way was much quicker.
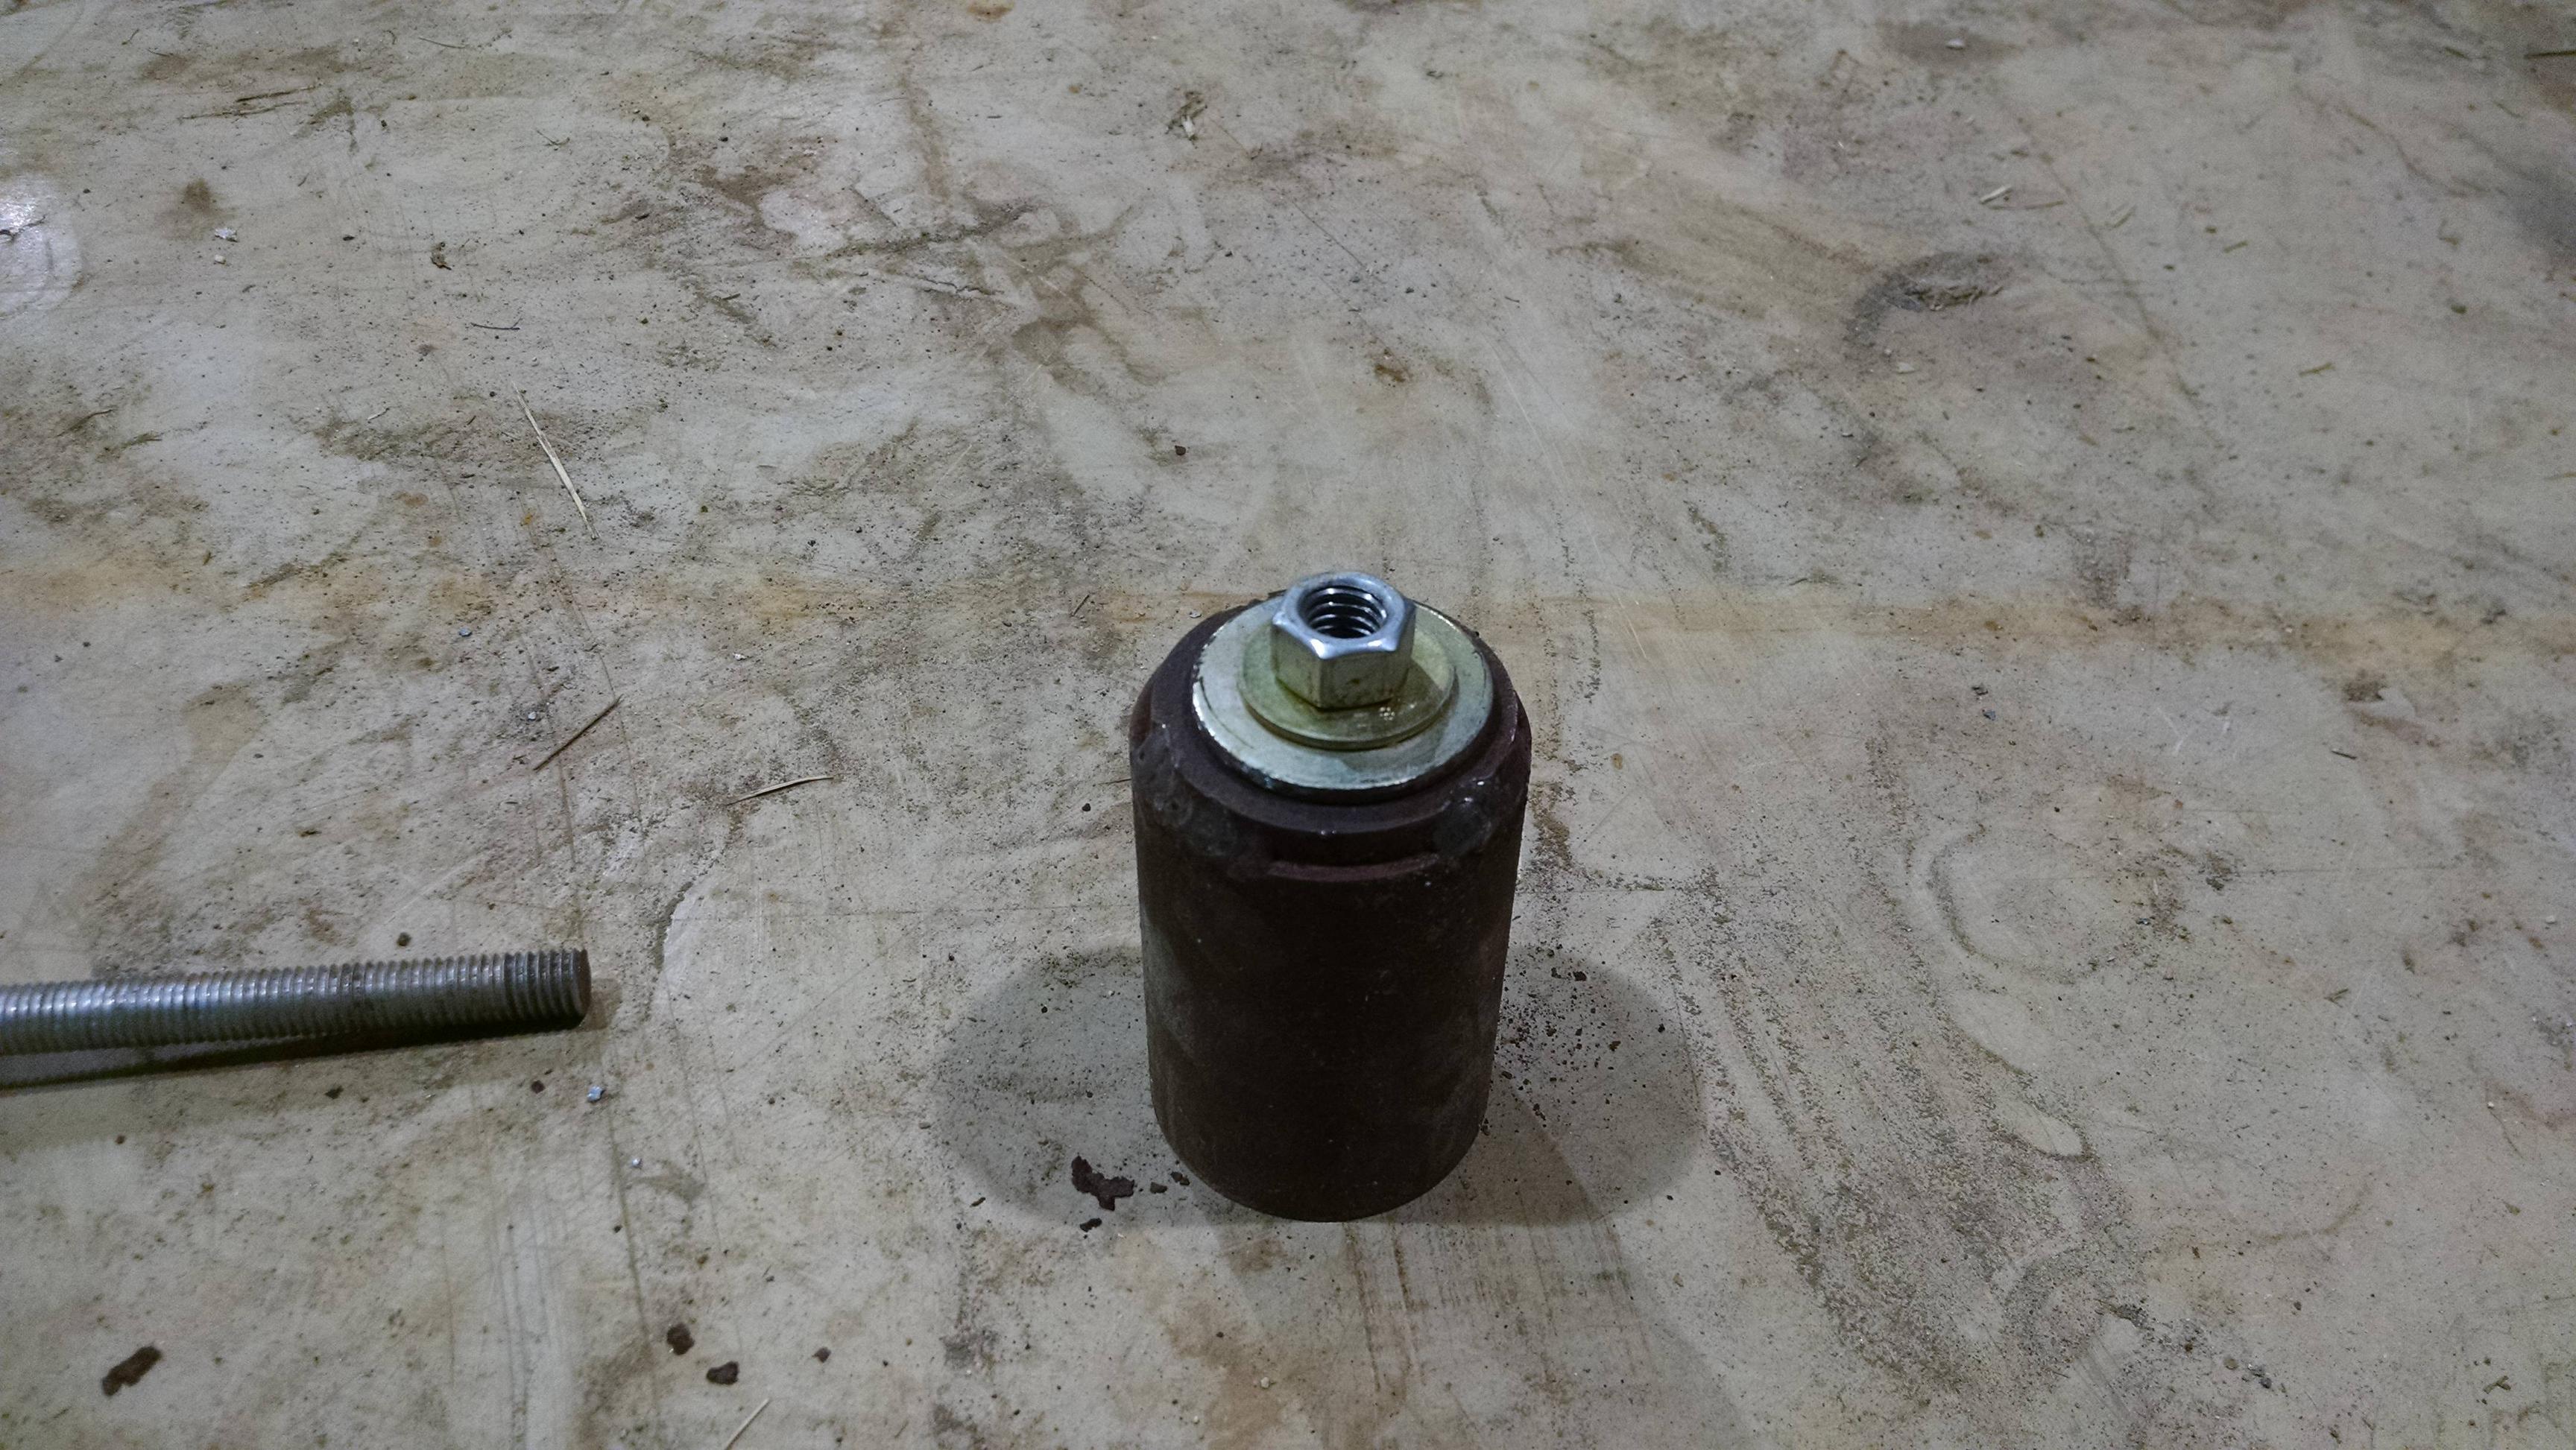
Step 2:
Nut and 2 washers to provide solid backing for the nut. I used a larger thicker washer with a smaller one on top that was metric so the all thread fit right through it barely. This gave the nut the perfect surface to mate against and didn't bend the washer when used.
Step 3:
All thread and a larger piece of pipe with a backer.
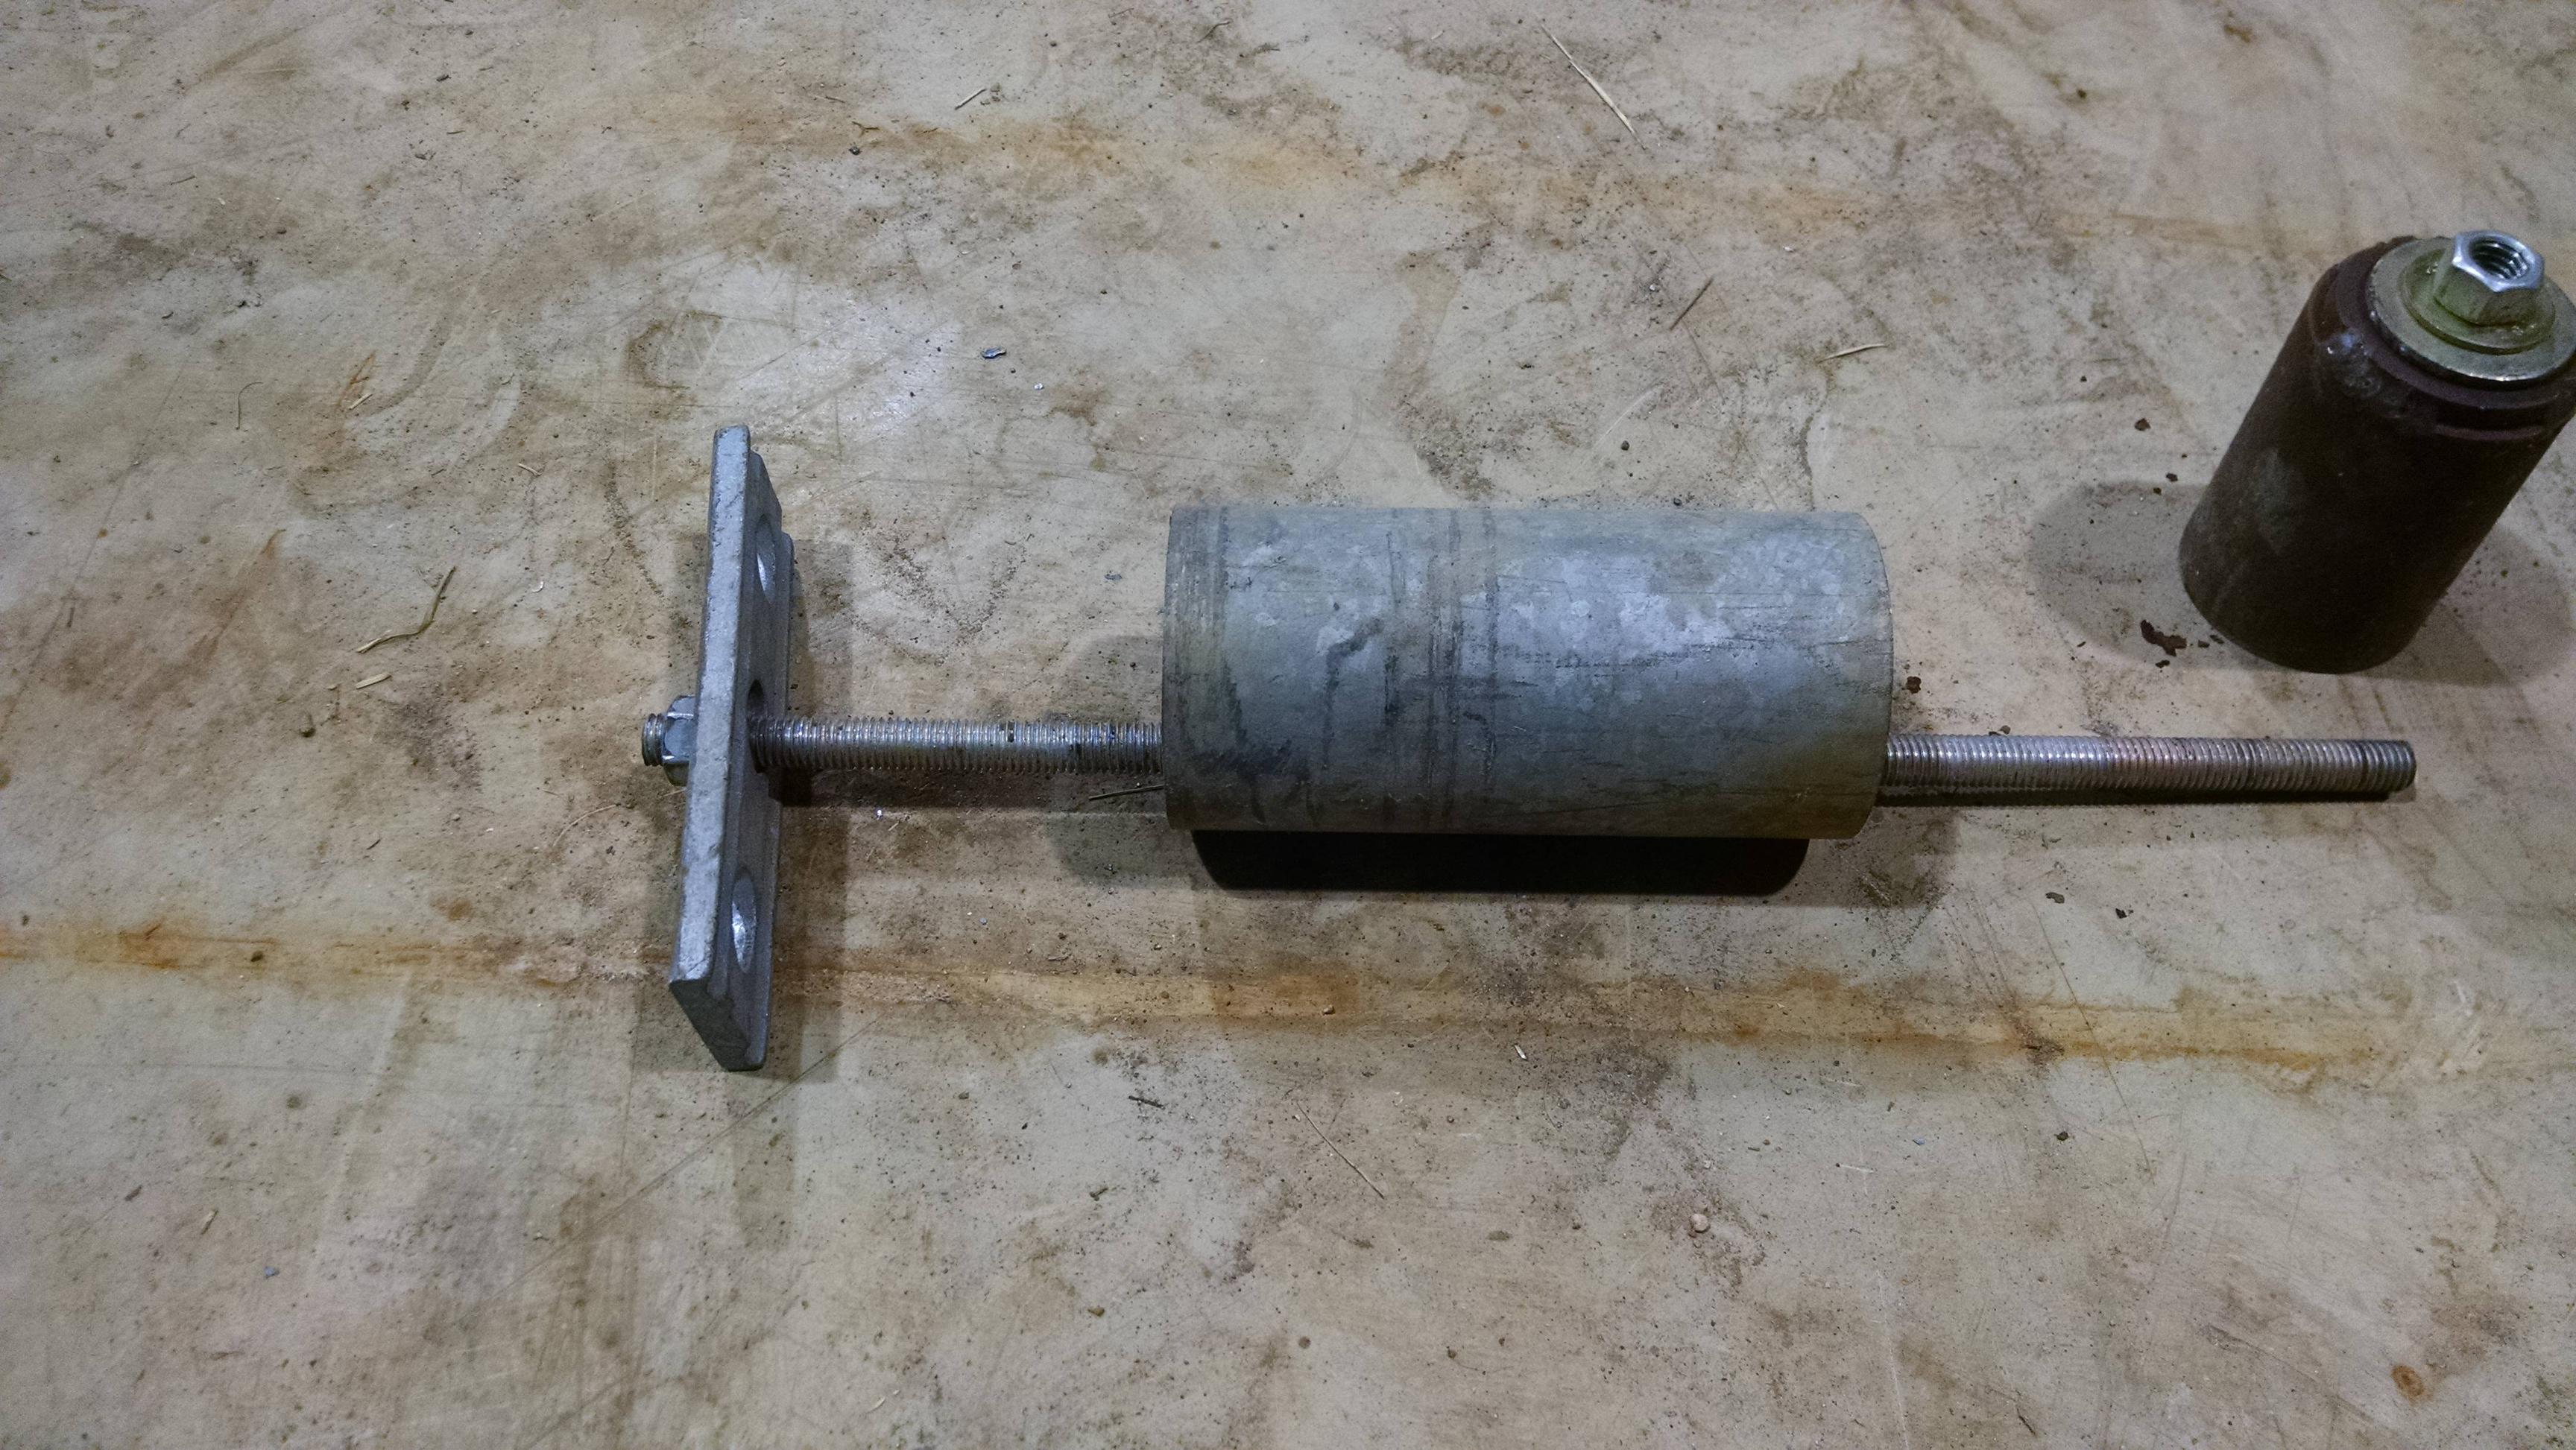
All this stuff goes together like this:
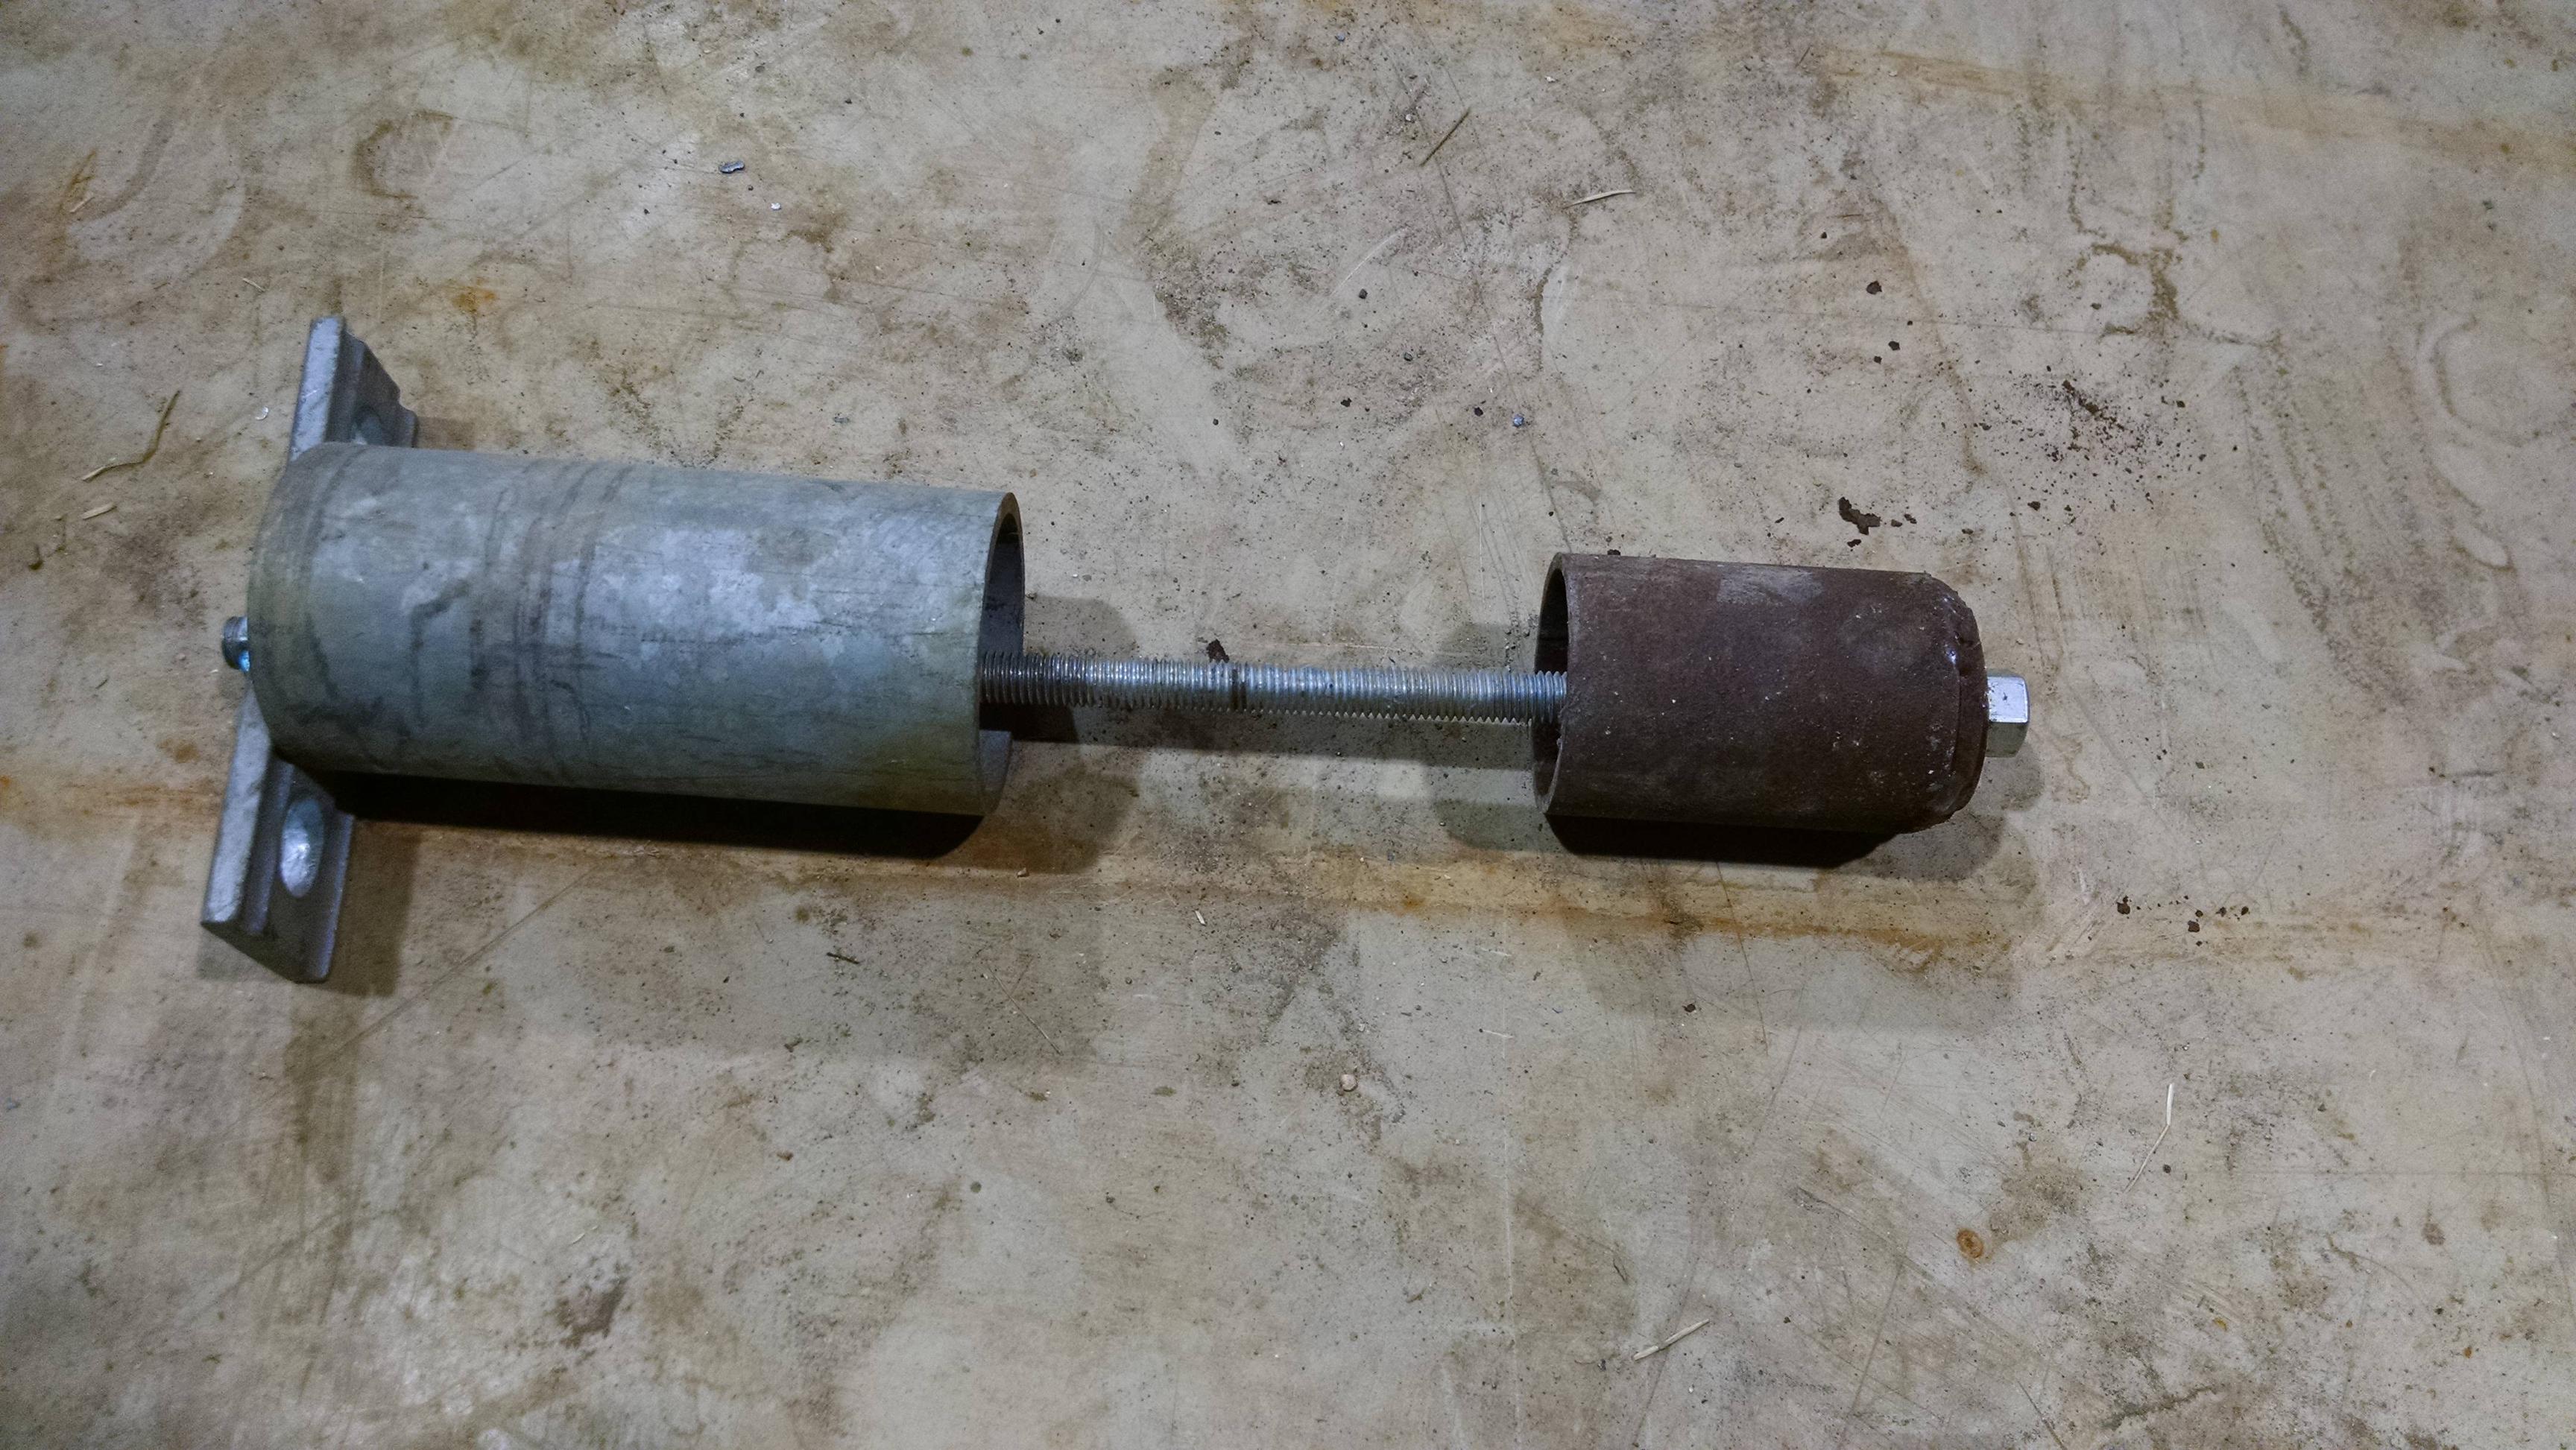
Once you have this thing built you can start the install process. Get the old bushing out is the first step. Depending on the unit you may have to take a file to the rear end to flatten the side of the bushing hole (Steeda has this step in their install procedure).
Once the hole is prepped and clean on the inside, place the bushing in the hole. Use the large piece of pipe on the opposite side of the bell housing and the small piece you fabbed up to touch the lip of the bushing. Place the allthread though both pieces of pipe and the bushing and tighten by hand. Then take an impact to it and impact the bushing until it sits flush with the side of the bushing hole.
Last edited by gmoran1469; 11-05-2014 at 12:39 PM.
11-06-2014, 12:13 PM
#4
3rd Gear Member
Join Date: Jan 2010
Location: Louisiana
Posts: 738
I run spherical on the rear-end side of my UCA and LCA and poly on the car side of those. I coupled that with a Fays2 watt's link and boy does the rear end just roll around the corners. It's a totally different car.
11-08-2014, 05:50 PM
#5
1st Gear Member
Thread Starter
Join Date: Jun 2013
Location: new jersey
Posts: 77
OK did the install banged a few knuckles but got it in, one problem the upper control arm does not line up. The arm seems to be shifted too far to the drivers side. I followed the instructions and installed bearing from the passenger side. I also checked alignment that's OK. The control arm is a new adjustable. The axle is hanging. I assume the control is symmetrical so couldn't of messed that up. Where did I go wrong?
11-08-2014, 06:46 PM
#6
6th Gear Member
Join Date: Feb 2007
Location: state of confusion
Posts: 7,635
If the axle is hanging free and you still have a PHB, it will have shifted slightly, most probably toward the passenger side. It'll move back toward the driver side when the car's weight is back on the rear wheels.
A picture or two might help here . . .
Norm
A picture or two might help here . . .
Norm
11-08-2014, 08:09 PM
#7
3rd Gear Member
Join Date: Jan 2010
Location: Louisiana
Posts: 738
OK did the install banged a few knuckles but got it in, one problem the upper control arm does not line up. The arm seems to be shifted too far to the drivers side. I followed the instructions and installed bearing from the passenger side. I also checked alignment that's OK. The control arm is a new adjustable. The axle is hanging. I assume the control is symmetrical so couldn't of messed that up. Where did I go wrong?
11-10-2014, 06:00 AM
#8
1st Gear Member
Thread Starter
Join Date: Jun 2013
Location: new jersey
Posts: 77
spent about 3 hours under the car trying to get the UCA onto the spherical bushing with no luck. I adjusted the panhard bar didn't work. Used jacks to maneuver still can't get it on. Thought maybe wrong or defective UCA but the old bearing fits. I never tried to fit the bearing prior to install maybe the bearing is machined incorrectly.
Taking a break, lying under a car that long can a toll on this old body. See attached photo.
Taking a break, lying under a car that long can a toll on this old body. See attached photo.