How To Paint Your Callipers
 06-13-2006, 01:35 PM
#1
Administrator
Thread Starter
Join Date: Dec 2003
Location: Southern California
Posts: 25,949
This step by step tech article was provided by Jefferson.
Thank you Jeff. [sm=smiley20.gif]
So, Here I am, back again to dispense my vast library of knowledge known by most as "Common."
Here is how the story goes. Boy/Girl is born, Boy/Girl plays with toys, Boy/Girl grows up, Smart Boy/Girl buys Mustang and becomes MFer. Now, from then on the same formula can be used, you get your car and you buy this for it, then you but that, etc.
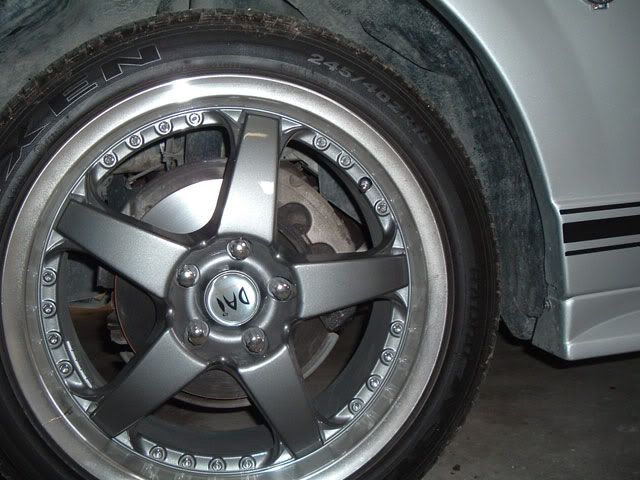
Many people get CAI, Exhaust and Rims as the first mods for their car. The CAI gives good throttle response, the exhaust gives the respected "Mustang Rumble" and a nice set of rims will make any car really stand out but lets make them POP by complimenting the rims by making our callipers really standout. To illustrate my point here is a before and after shot of my callipers.
Before
After
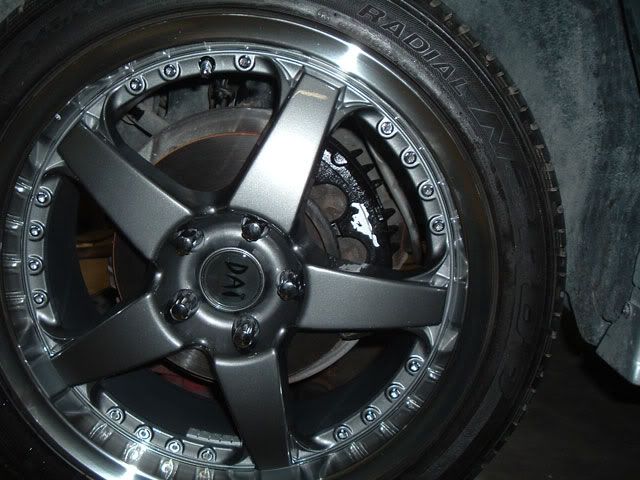
See, are they not a thing of beauty and a MASSIVE improvement!
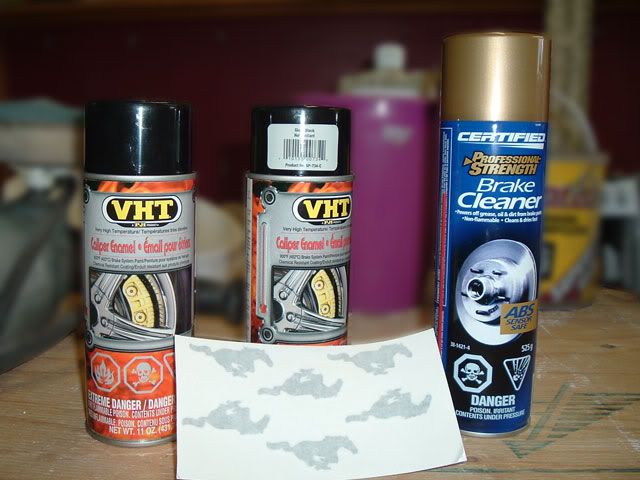
What You Need
2 cans of "High Heat Calliper Paint" (approx. $12) or a 2 part epoxy kit (Dupli-Color makes a good one) Note: The epoxy method is brush on, takes 24 to cure and costs about $70 US. This method will have the best outcome.
1 can of brake cleaner
Wire brush
Ratchet with 12mm socket
(optional) Pony or other calliper decals
What To Do
First, lets the the obvious out of the way...
1) Jack up your car and MAKE SURE to use jack stands as we don't need any crushed MFers. I started with the front end but if you want to do the back first or you have extra stands and are feeling a little crazy and want to put up the whole car, go right ahead.
2) Next, take off your rims and putt them where they wont be hit by overspray...otherwise your rims may end up a different colour.
<-----check out the U, what am I Canadian...oh wait...I am.
Lets recap, car up, rims off. Good! Now to the fun stuff.
3) First thing your going to do is cover up the car. You know you wash your car religiously every week to keep crap like dirt and break dust off your precious glossy paint, well this is going to make a mess so get to it. I was lucky enough to have a large plastic sheet and some old curtains lying around so I used those but failing that the daily newspaper and a role of masking tape (green painters tape is even better) will work just as well. Make sure to cover the entire wheel well, the exposed rotor and the body around the wheel well so that it stays its original colour, as seen below (Note: I did go a bit overboard)
4) Next is cleaning. While still attached clean the calliper as best you can, I found it much easier to wire brush it when still attached. make sure to get into all the small spaces as well, if you have trouble getting in the smaller spaces try using a flat head screw driver to gently scrape away some of the junk in the tight spots. The cleaner it is the better the paint will stick.
Here is mine after a good initial cleaning.
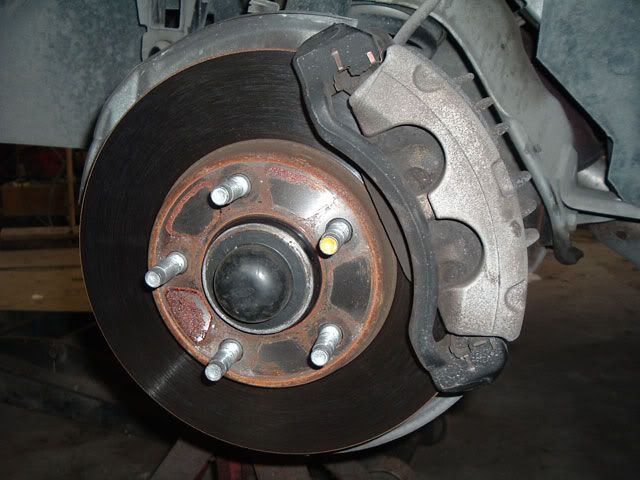
5) At this point you will need to take off the calliper, if you have never done this before don't worry is a pretty easy process. Take your ratchet with 12mm socket and take out the two bolts on the back of the calliper, circled in the picture below. Be careful as there is a small piece of metal that sits in the underside of the calliper that may fall out. Note how it is sitting before removing the calliper so you know how it goes back in, then take it out.
6) After detaching the calliper you can rest carefully on top of the rotor or hang it in the wheel well by a bent coat hanger. Which ever you do be VERY CAREFUL not to put stress on the brake line as it could pull out or tear and you will want to be able to stop when this is all said and done.

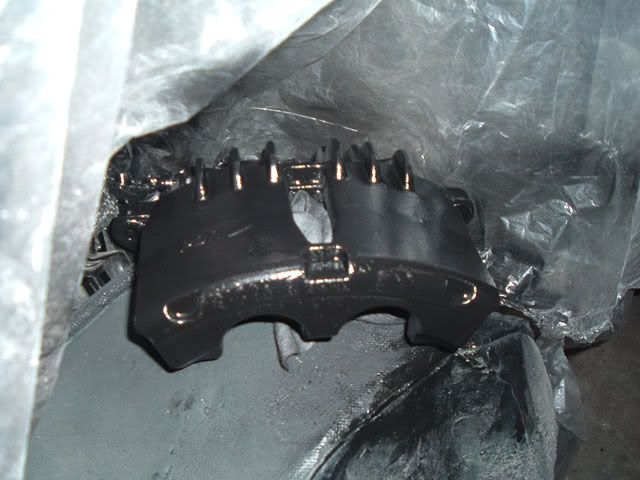
7) Now that it's off give it another quick clean with the wire brush in the spots that were difficult to get when it was attached. Take out your break cleaner and give the calliper a good soaking making sire not to get it in your eyes...if your worried about it, goggles are always good. If you want to really get in those pesky small spaces an old tooth brush with some break cleaner works out well. Wipe the calliper down thoroughly and allow about 10 min to dry. Now it should be ready to paint...here was mine.
8) Painting Time!!! WOOT!!!
Take your tape and mask over the two exposed cylinders on the inside of the calliper so you don't get any paint on them and mess them up. Ok, so sit your calliper at an appropriate so that you can get to all sides, as it says on the label, keep the can 12 to 16 inches away and spray in even, steady passes. Start and end your passes just before and just after the calliper to avoid runs. Spray a first coat (its ok if the calliper is not covered in you colour yet) wait at least 10 min, apply 2nd coat, wait 10 min, and apply last coat, then wait 30 min so it is dry to the touch. The painting should be done in a 70 degree+ temperature, the hotter it is the better the paint will set.
Note: If on the last coat you notice small pin holes where the paint is not sticking, it means those spots were not cleaned well enough. Wait the 10 min. for the paint to dry and grab an old tooth brush, take the brush and spray it with the break cleaner, gently brush over the spots in one direction a few times, you will notice the paint smudge a bit, wait another 10 min or so and recoat with paint, this should fix the spots.
9) OPTIONAL: If you decide to go with the "Calliper Decals" such as the pony ones I used, this is an easy step. Cut out a decal off the sheet, very carefully pull off the backing and apply the decal to the desired spot. I think this is a great accent to the painted calliper.

10) When you go to pt the calliper back on remember to put in that small metal piece that sits in the center of underside of calliper and take the tape off. Try no to handle the calliper too much as it is still no fully cured. I put a dish towel over it when I had to touch it so I wouldn't leave marks with my grimy hands. Also, if you notice, the bolts have a red stripe on them, it's Loc-tight. Use the wire brush to clean the bolt and you don't have to but should put a drop or two of blur Loc-tight on. When re-inserting the bolts turn them in by hand as far as you can to ensure you don't cross thread them and make sure they grab. Tighten them up good and tight and throw your rim back on.
In conclusion, just make sure to always double check your work and that everything is as it should be. Because its better to be sure than having something vital fly off while driving. If you have any question at all please post them and I will be happy to answer you as best I c
Thank you Jeff. [sm=smiley20.gif]
So, Here I am, back again to dispense my vast library of knowledge known by most as "Common."
Here is how the story goes. Boy/Girl is born, Boy/Girl plays with toys, Boy/Girl grows up, Smart Boy/Girl buys Mustang and becomes MFer. Now, from then on the same formula can be used, you get your car and you buy this for it, then you but that, etc.
Many people get CAI, Exhaust and Rims as the first mods for their car. The CAI gives good throttle response, the exhaust gives the respected "Mustang Rumble" and a nice set of rims will make any car really stand out but lets make them POP by complimenting the rims by making our callipers really standout. To illustrate my point here is a before and after shot of my callipers.
Before
After
See, are they not a thing of beauty and a MASSIVE improvement!
What You Need
2 cans of "High Heat Calliper Paint" (approx. $12) or a 2 part epoxy kit (Dupli-Color makes a good one) Note: The epoxy method is brush on, takes 24 to cure and costs about $70 US. This method will have the best outcome.
1 can of brake cleaner
Wire brush
Ratchet with 12mm socket
(optional) Pony or other calliper decals
What To Do
First, lets the the obvious out of the way...
1) Jack up your car and MAKE SURE to use jack stands as we don't need any crushed MFers. I started with the front end but if you want to do the back first or you have extra stands and are feeling a little crazy and want to put up the whole car, go right ahead.
2) Next, take off your rims and putt them where they wont be hit by overspray...otherwise your rims may end up a different colour.
<-----check out the U, what am I Canadian...oh wait...I am.
Lets recap, car up, rims off. Good! Now to the fun stuff.
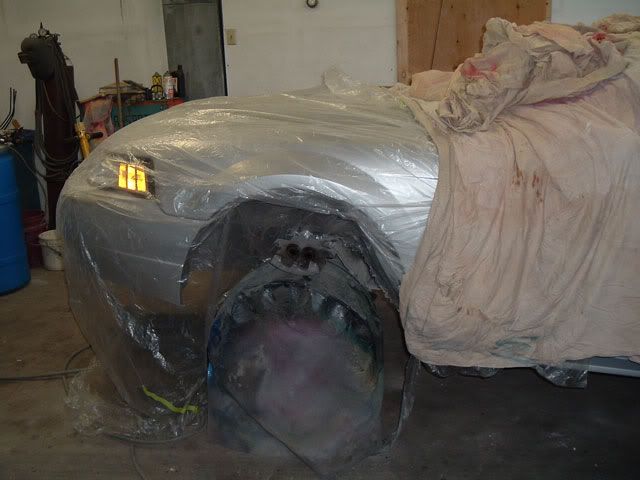
3) First thing your going to do is cover up the car. You know you wash your car religiously every week to keep crap like dirt and break dust off your precious glossy paint, well this is going to make a mess so get to it. I was lucky enough to have a large plastic sheet and some old curtains lying around so I used those but failing that the daily newspaper and a role of masking tape (green painters tape is even better) will work just as well. Make sure to cover the entire wheel well, the exposed rotor and the body around the wheel well so that it stays its original colour, as seen below (Note: I did go a bit overboard)
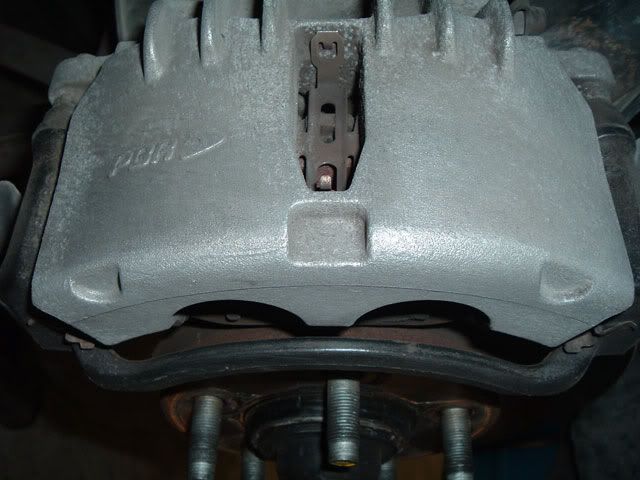
4) Next is cleaning. While still attached clean the calliper as best you can, I found it much easier to wire brush it when still attached. make sure to get into all the small spaces as well, if you have trouble getting in the smaller spaces try using a flat head screw driver to gently scrape away some of the junk in the tight spots. The cleaner it is the better the paint will stick.
Here is mine after a good initial cleaning.
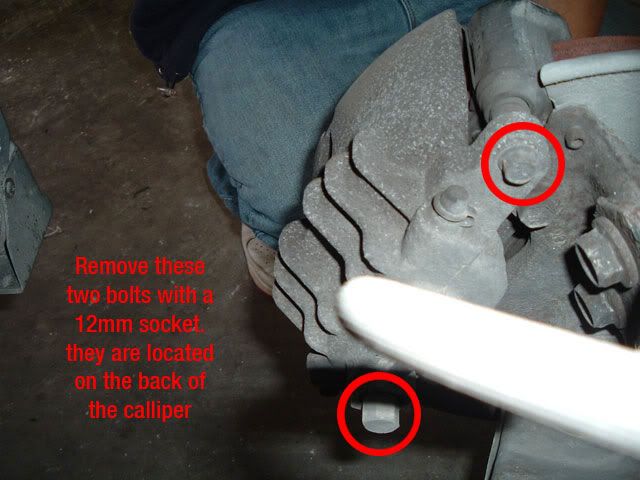
5) At this point you will need to take off the calliper, if you have never done this before don't worry is a pretty easy process. Take your ratchet with 12mm socket and take out the two bolts on the back of the calliper, circled in the picture below. Be careful as there is a small piece of metal that sits in the underside of the calliper that may fall out. Note how it is sitting before removing the calliper so you know how it goes back in, then take it out.
6) After detaching the calliper you can rest carefully on top of the rotor or hang it in the wheel well by a bent coat hanger. Which ever you do be VERY CAREFUL not to put stress on the brake line as it could pull out or tear and you will want to be able to stop when this is all said and done.
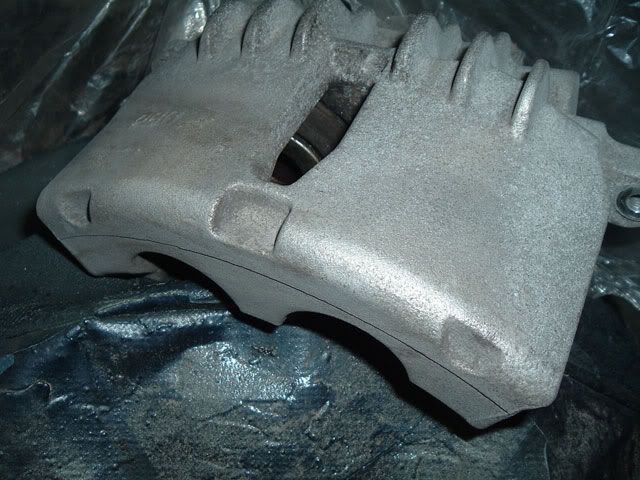
7) Now that it's off give it another quick clean with the wire brush in the spots that were difficult to get when it was attached. Take out your break cleaner and give the calliper a good soaking making sire not to get it in your eyes...if your worried about it, goggles are always good. If you want to really get in those pesky small spaces an old tooth brush with some break cleaner works out well. Wipe the calliper down thoroughly and allow about 10 min to dry. Now it should be ready to paint...here was mine.
8) Painting Time!!! WOOT!!!
Take your tape and mask over the two exposed cylinders on the inside of the calliper so you don't get any paint on them and mess them up. Ok, so sit your calliper at an appropriate so that you can get to all sides, as it says on the label, keep the can 12 to 16 inches away and spray in even, steady passes. Start and end your passes just before and just after the calliper to avoid runs. Spray a first coat (its ok if the calliper is not covered in you colour yet) wait at least 10 min, apply 2nd coat, wait 10 min, and apply last coat, then wait 30 min so it is dry to the touch. The painting should be done in a 70 degree+ temperature, the hotter it is the better the paint will set.
Note: If on the last coat you notice small pin holes where the paint is not sticking, it means those spots were not cleaned well enough. Wait the 10 min. for the paint to dry and grab an old tooth brush, take the brush and spray it with the break cleaner, gently brush over the spots in one direction a few times, you will notice the paint smudge a bit, wait another 10 min or so and recoat with paint, this should fix the spots.
9) OPTIONAL: If you decide to go with the "Calliper Decals" such as the pony ones I used, this is an easy step. Cut out a decal off the sheet, very carefully pull off the backing and apply the decal to the desired spot. I think this is a great accent to the painted calliper.
10) When you go to pt the calliper back on remember to put in that small metal piece that sits in the center of underside of calliper and take the tape off. Try no to handle the calliper too much as it is still no fully cured. I put a dish towel over it when I had to touch it so I wouldn't leave marks with my grimy hands. Also, if you notice, the bolts have a red stripe on them, it's Loc-tight. Use the wire brush to clean the bolt and you don't have to but should put a drop or two of blur Loc-tight on. When re-inserting the bolts turn them in by hand as far as you can to ensure you don't cross thread them and make sure they grab. Tighten them up good and tight and throw your rim back on.
In conclusion, just make sure to always double check your work and that everything is as it should be. Because its better to be sure than having something vital fly off while driving. If you have any question at all please post them and I will be happy to answer you as best I c


Thread
Thread Starter
Forum
Replies
Last Post
mungodrums
S550 2015-2023 Mustang
10
09-28-2015 10:54 PM