05-08 3rd brake light installation
 09-21-2007, 07:34 AM
#1
2nd Gear Member
Thread Starter

Join Date: Mar 2007
Location: Sarasota FL
Posts: 324
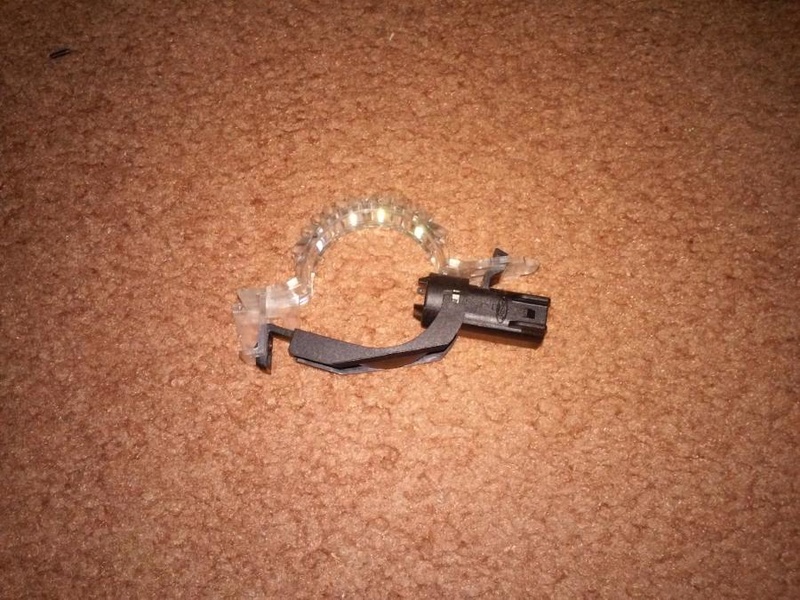
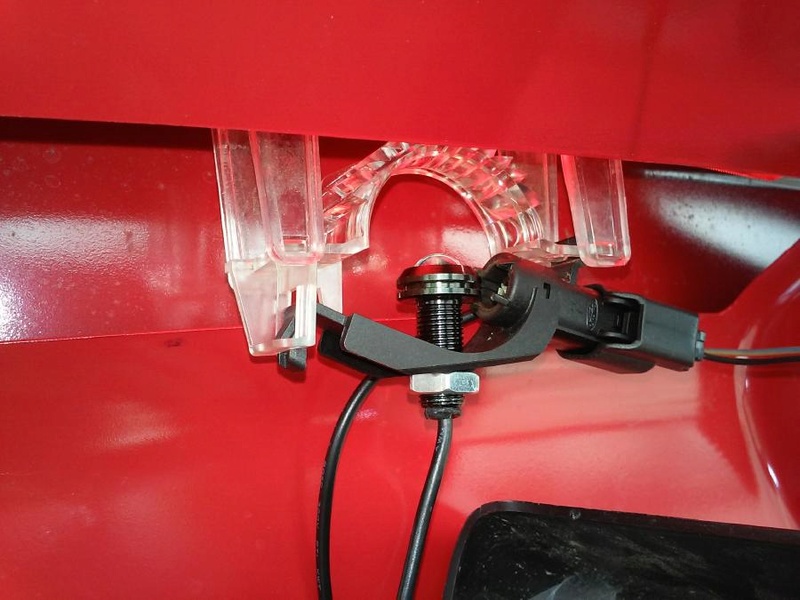
The 3rd brake light installation isa fairly simple procedure.You'll be dealing with plastic snaps, delicate wires, and several things that can GO BREAK, so take your time and don't force anything. First photo below shows the stock 3rd brake light in place in the trunk lid slot and the replacement clear lens red LED light unit below it. Firststep, open the trunk lid and remove the black plastic coverexposingthe trunk latch mechanism and back area of 3rd brake light unit. See photo below. The plastic cover is held in place by two snap pins pressed up into holes in the trunk lid. You can see them in the photo below. Gently pull down on the cover by grabbing each side. Don't pull too hard or down too far because all the wiring contained inside the cover is connected to items on the cover. Again, the photo shows what's housed inside the cover. Next, disconnect two things: the connection to the trunk light located on the cover and the connection to the 3rd brake light mechanism. Now you can lay the cover down. Second major step is too loosen and take the stock 3rd brake light unit out of the trunk lid. There are plastic snaps located on each side of the unit and a large flat head screw driver is the weapon of choice to gently press on the snaps thus releasing the unit to be pulled out of the slot where it resides. See photo below for info. Take the new clear lens LED unit and install it in the hole in the trunk and gently snap it into place, making sure to first thread the wiring harnes connected to it through the hole first. It's best to take one end of the new unit and drop it into one side of the hole fitting it into place and then lower the other side of the unit fitting it into place completing the installation. When I first tried putting the new unit in, it wouldn't go into place when I tried to push it in in a "flush" manner. Dipping one end in first is the way to go. You'll see what I mean when you start trying to put the new unit into place, be gentle so you don't break something. Next main step. To hook the unit's wiring harness up to the wiring harness of the car, take the light bulb out of the socket that fitted into the stock brake light unit. Then gently press the male connection on the new brake light unit into the socket you took the light bulb out of. This is how the juice gets to the new LED unit, pretty cool and clean installation. IMPORTANT NOTE, there is a definite way the new male fitting has to go into the old socket or the new unit WILL NOT LIGHT UP! Test one way first and if the new light doesn't work, reverse the male fitting 180 degrees and you're set. You've got the polarity correct now. The fourth photo below shows how the new male fitting goes into the female socket on the existing wiring harness. Now that the "forward" installation steps are complete, it's time to "reverse" our procedures, button everything back up like you disassembled it, and you're finished. Be sure though to test the unit several times with a friend either watching the unit to make sure it lights up, or you do that and have your sidekick step on the brake peddle. See final photo below for completed installation look. Pretty cool, and it gives a very clean look to your car, especially if it's silver like my Mustand. Take care, Jack.
[IMG]local://upfiles/63501/F7781B5E78FF4AB0A51A008A83658ACA.jpg[/IMG]
[IMG]local://upfiles/63501/D4EA519CA1C145B4A0F69CC0DB436B43.jpg[/IMG]
[IMG]local://upfiles/63501/2D728C42C3CD4C02990ABA75CE7ACD47.jpg[/IMG]
[IMG]local://upfiles/63501/5F3C6C1906494F3AB28CC915554D32B5.jpg[/IMG]
[IMG]local://upfiles/63501/3614C51FB5B94C13BFF3D32698FC0A41.jpg[/IMG]


 Too hard to read, but the pictures look nice.
 06-18-2018, 02:18 PM
#6
Banned

Join Date: Jan 2018
Location: Pennsylvania
Posts: 2,327
You're basically unplugging the harness, and using release tabs, out...
https://lib.americanmuscle.com/files...ht-install.pdf
The bulb and refactor lens is also attached to the center light, you can
pop that out first.
I put an LED projector in mine:
https://lib.americanmuscle.com/files...ht-install.pdf
The bulb and refactor lens is also attached to the center light, you can
pop that out first.
I put an LED projector in mine:

Thread
Thread Starter
Forum
Replies
Last Post

