Ford Mustang V6 and Mustang GT 1994-2014: How to Replace Power Door Lock Actuator
There's a lot more going on inside your car door than you realize. When your power door locks stop working, you may have a broken or snapped actuator. This article will show you how to replace yours step by step.
This article applies to the Ford Mustang V6 and Ford Mustang GT (1994-2014).
The mechanism that allows door locks to work is the door lock actuator. This assembly contains a set of tiny gears that cause the door latch to lock and unlock your door. We all take this assembly for granted, so when the gears get damaged and the actuator as well as power doors stop working all together, we wonder how we ever lived without them. The good news is that replacing the actuator is a lot easier than you might think. Learn how to replace the one in your Mustang using our removal and installation guide.

Materials Needed
- 8mm wrench
- Flat head screwdriver
- Phillips screwdriver
- T27 Torx bit with ratchet
This tutorial demonstrates how to replace the actuator in the passenger door.
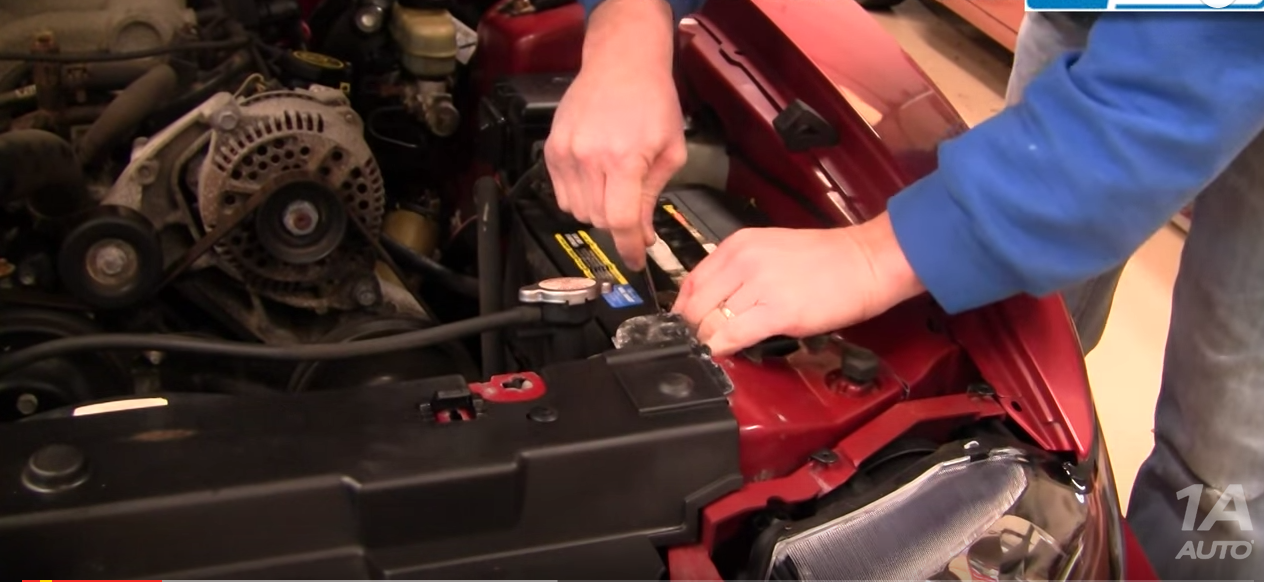
Step 1 – Disconnect the battery
- Safety first! — Use an 8mm wrench to disconnect the negative lead (black cable) from the battery. This will allow you to work safely without having to worry about live wires.
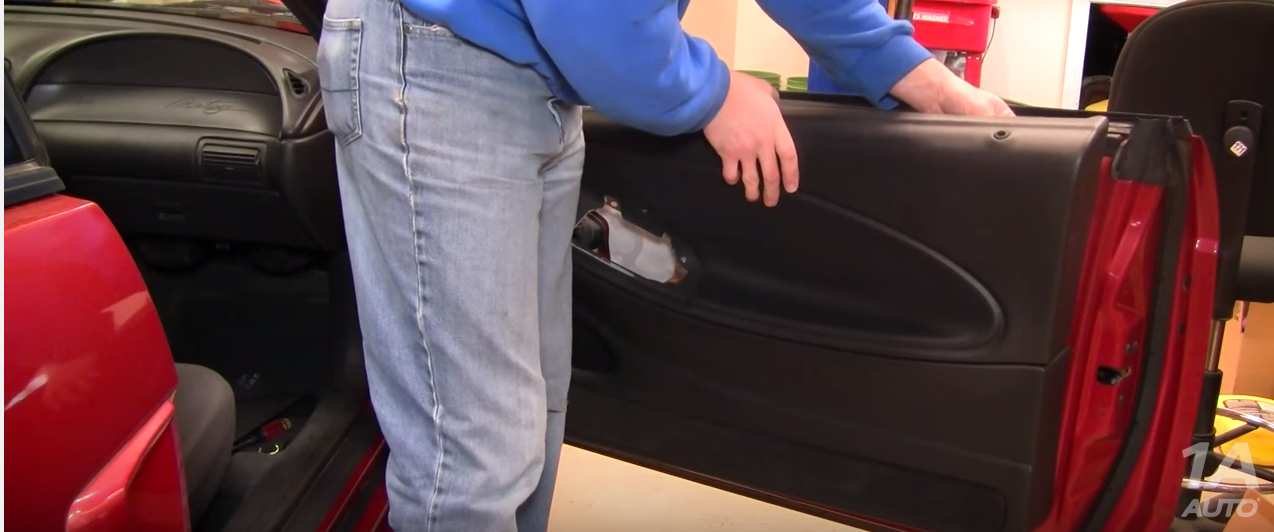
Step 2 – Remove the interior door panel
- Use a flat head screwdriver to pry out the retaining pin on the lower part of the interior door panel closest to the hinge.

- Next, pry off the door switch assembly.
- Use a Phillips screwdriver to remove the wire connectors from the door switch assembly and set it aside.
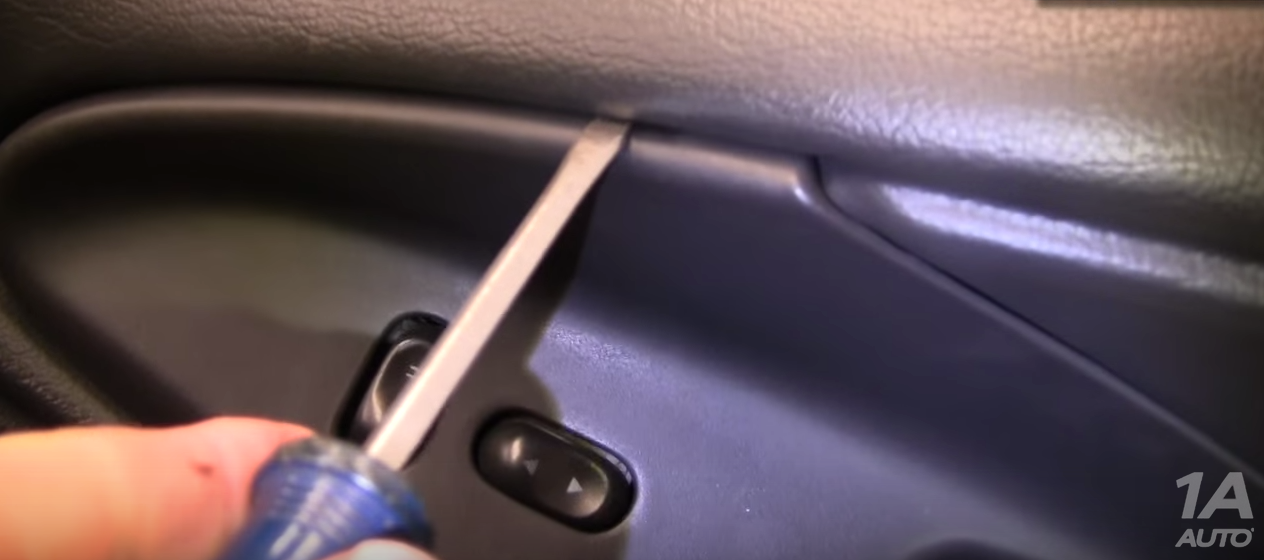
- There are two additional screws holding the door panel in place, which are now visible with the switch assembly removed. Remove both screws using your Phillips screwdriver.
- Now pry off the door handle trim starting from the bottom and working your way to the top.

- Pry off the small triangular moulding behind the side view mirror.
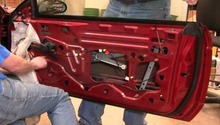
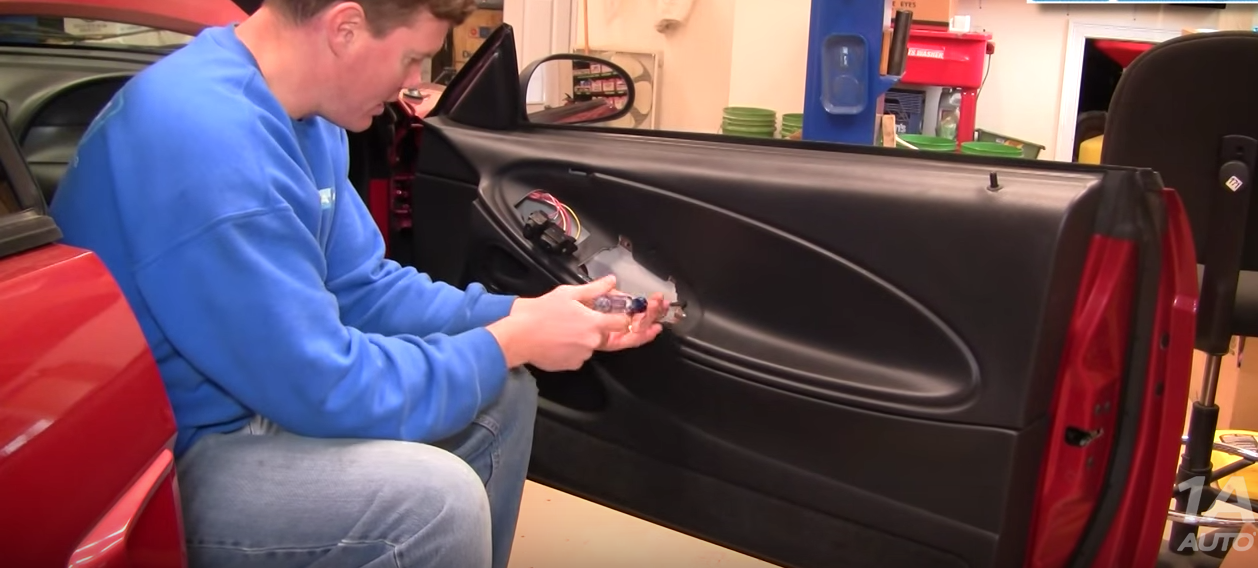
- Then remove the entire panel by lifting it up from the bottom and pulling it toward you.
- Peel off the white water shield to gain access to the actuator assembly.

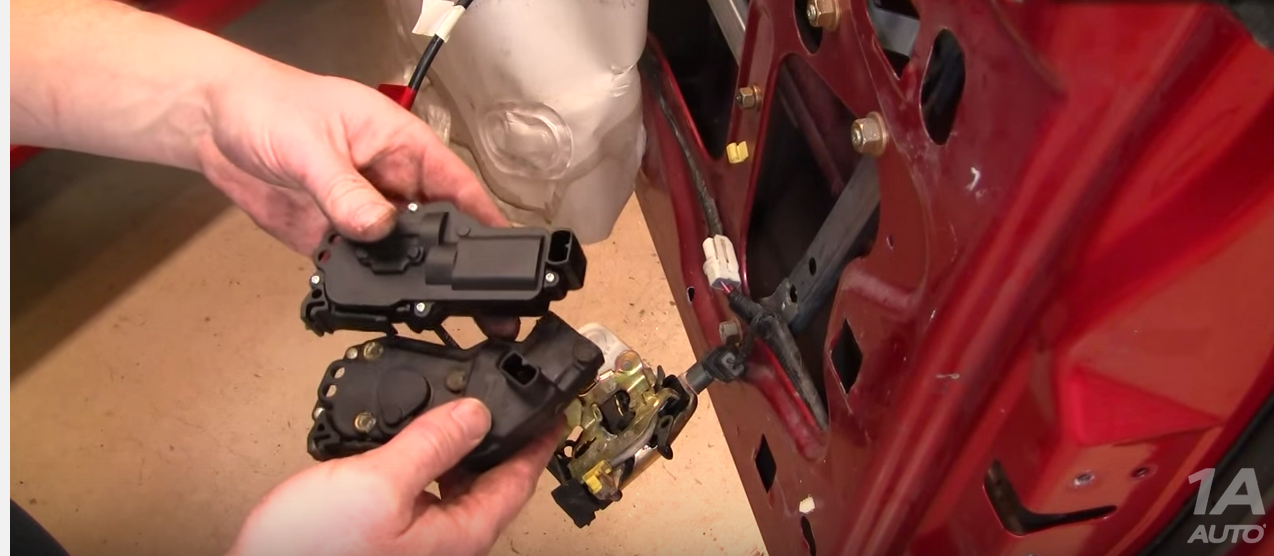
Step 3 – Remove the actuator assembly
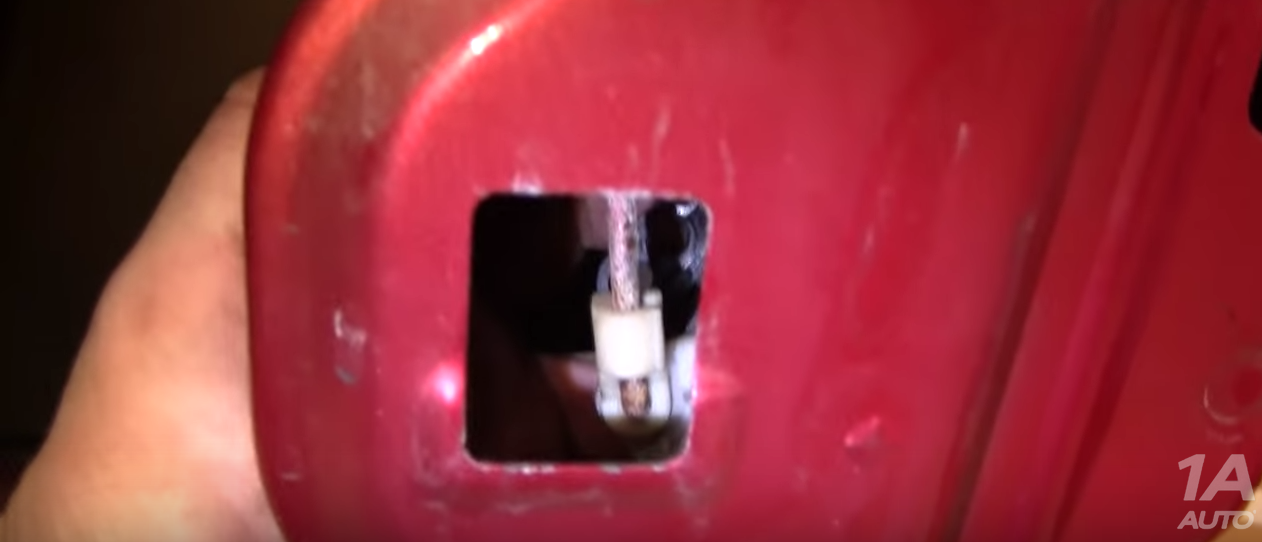
- With the door panel and all the trim removed, you can now proceed to remove the actuator assembly. First unlatch the door rod that runs from the door handle to the assembly. You will see a yellow clip holding it in place.

- Next, use a ratchet with T27 Torx driver to remove the three screws holding the assembly to the outside of the door shell.
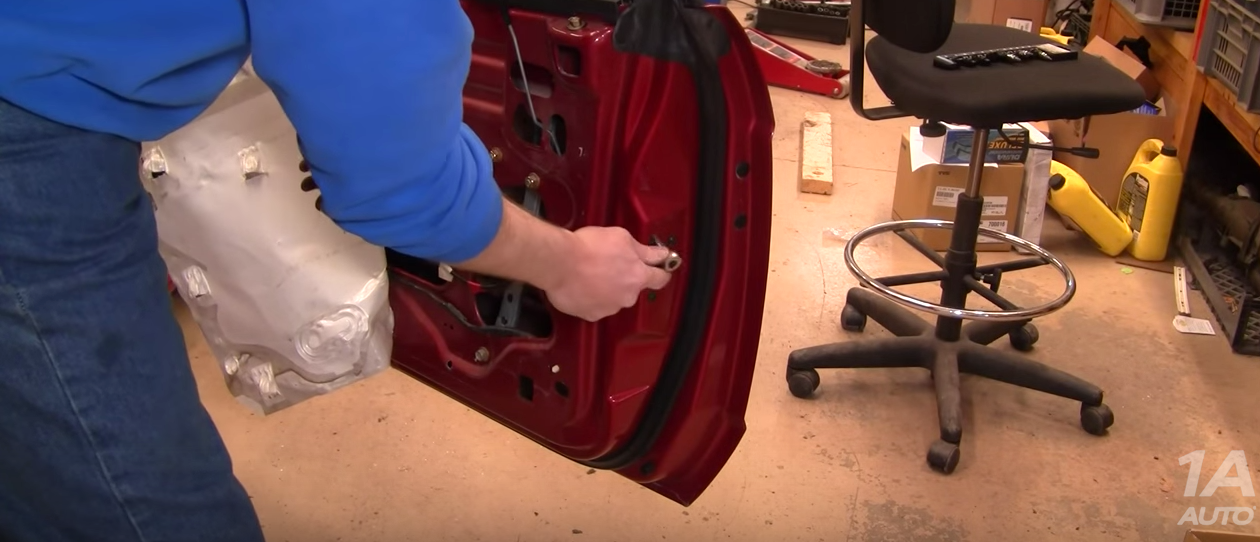
- Drop the assembly to the lower part of the door, and then pull it out from the lower opening. You will need to push down on the white clip to release the lock rod.
- Once the rod is released, pull the assembly out.

- With the assembly removed from the door shell, separate the lock actuator by using your flat head screwdriver to press down on the lower tab. It may take a little extra prying with the screwdriver to wrestle it free.
- Disconnect the wire from the actuator by prying the connector tab upward and sliding it off.
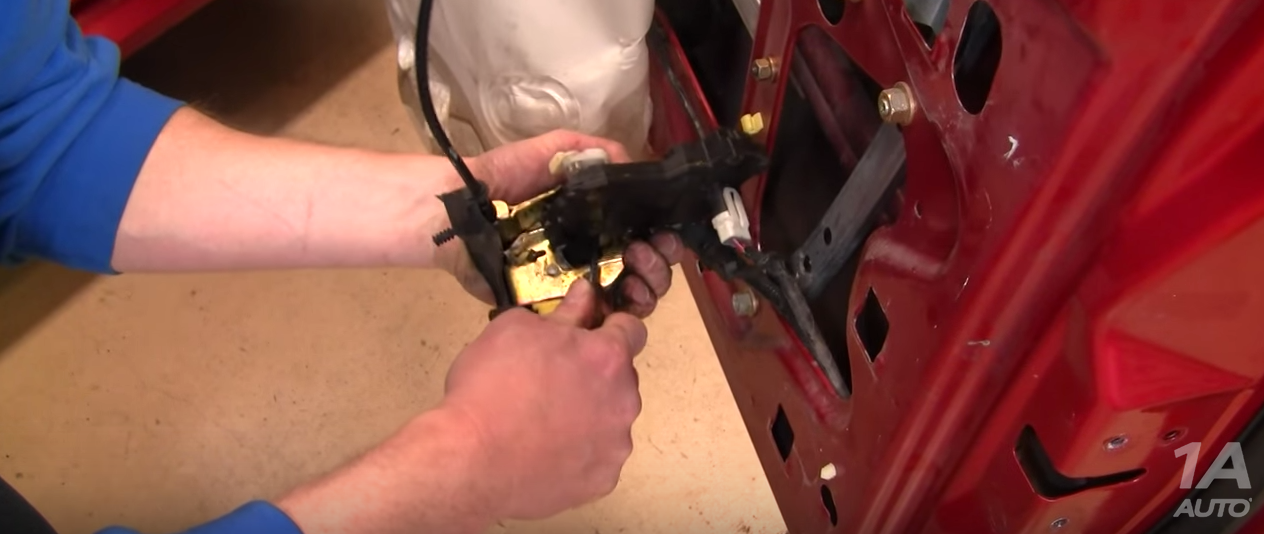
Step 4 – Install the new actuator assembly
- Not all actuator assemblies are identical, but the mounting points and connections should always be the same. Compare your old and new assembly to verify that the mounting points are correct.
- Line up the slots, slide the new module onto the housing, and snap it in place.
- Reconnect the wire and re-install the actuator assembly into the door shell.
- Turn the assembly around and line it up to the mounting screw locations on the back of the door.
- Before attaching the screws, position the lock rod correctly and snap it back into place on the assembly by fastening the white clip.
- Fasten the three mounting screws and reconnect the top rod from the door handle to the assembly using the yellow clip.
- Press and secure the water shield back onto the door.
- Feed the lock through the top of the door.
- Then line of the bottom tabs of the door panel and snap it into place.
- Finish up the installation by securing the remaining screws and retaining pin.
- Then snap on the trim pieces you removed earlier.
Featured Video: How to Replace Power Door Lock Actuator
Related Discussions
- Power Door Lock Actuator Replacement - MustangForums.com
- Door Actuator Replacement Mustang GT 2000 - MustangForums.com