Ford Mustang V6 and Mustang GT 2005-2014: How to Swap Out Map Lights for LEDs
The cheapest modification you'll make on your Ford Mustang V6 or GT is an LED installation.
This article applies to the Ford Mustang V6 or Ford Mustang GT (2005-2014).
While your dome lights provide all-around illumination for your entire Ford Mustang V6 or Ford Mustang GT, your map lights provide more concentrated light so you can read maps or take care of other small business, such as locating a telephone number in your cell phone. You'll find your map lights near your front windshield for easy operation. If you feel your current lights don't offer sufficient illumination, it's highly recommended that you swap out your existing halogen bulbs for LED alternatives. You'll notice the difference right away, not to mention increased visibility and a longer lifespan. Here's how to make the switch today!

Material Needed
- Flat head screwdrivers (long and short)
Step 1 – Remove the assembly
- With a flat head screwdriver, remove your dome light assembly.
- Place the flat head screwdriver over each of the two clips located on either side of the assembly.
- You'll need to disengage the clips to remove the assembly from the roof of your Mustang.
- It's highly recommended that you pull down on the assembly to get a better hold of the two clips in question.
- Disengage the clips one by one using your screwdriver.

Figure 1. Go grab your flat head screwdriver. 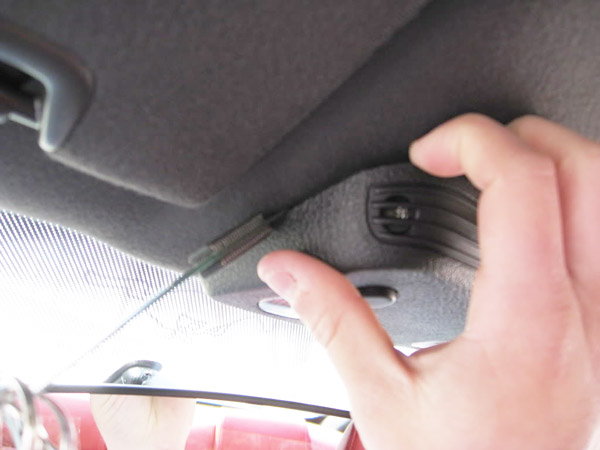
Figure 2. Release the clips. 
Figure 3. Pull down on the assembly. 
Figure 4. Disengage the clips.
Step 2 – Remove the old bulbs
- Remove the clip that connects the entire assembly electrically to your Mustang.
- Doing so will allow you to disconnect the entire assembly and hold it in your hands.
- Remove the bulb sockets (see Figure 6).
- Remove the lenses, which are held in place by a series of tabs (3); one for each lens.
- Start with the smallest tab first.
- Remove the first lens, so you can replace the bulb.

Figure 5. Remove the assembly completely. 
Figure 6. Remove the bulb sockets. 
Figure 7. Pop out the smallest tab. 
Figure 8. Remove the lens by hand.
Step 3 – Slide your new LED bulbs into the socket
- Slide your new LED bulb into the first socket.
- Do the same for the remaining sockets.
- Complete the installation process by putting your lenses, sockets, and assembly firmly back into place.
- Check your work by clicking on your new LED map lights once your assembly has been carefully reinstalled.

Figure 9. Install your new LED bulbs. 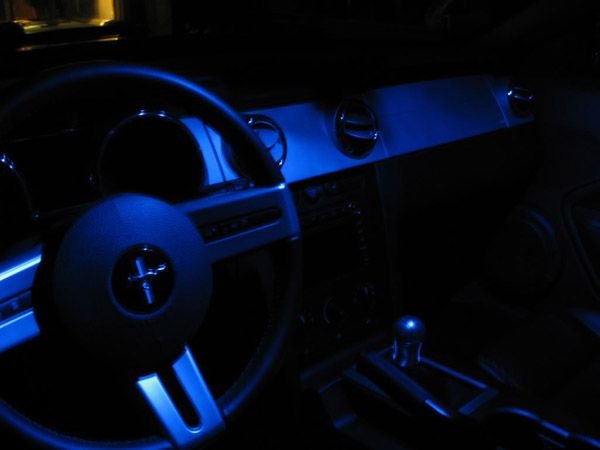
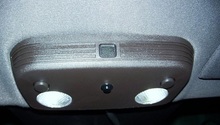
Figure 10. Here is the finished look.
Related Discussions
- How to Swap Out Map Lights for LEDs - MustangForums.com
- LED Interior Lighting - MustangForums.com
- Interior Lighting Question - MustangForums.com
- LED Interior Lights - MustangForums.com
- LED Blue Dome Lights - MustangForums.com