
Steeda Adjustable Panhard Bar and Lateral Stiffener Bar installation (w/pics)
 01-25-2008, 12:25 PM
#1
2nd Gear Member
Thread Starter
Join Date: Jun 2006
Location:
Posts: 415
Adjustable Panhard Bar and Lateral Stiffener Bar installation
Installation was performed on Leo_06GT’s 2006 GT (hardtop, Automatic). Both the panhard bar and lateral stiffener are from Steeda. Leo selected Steeda because of the ‘maintenance free’ bushings that do not require greasing.
Installation time: 1-2 hours (depending on level of experience and tool availability)
Tools/Materials needed:
Jack stands (or ramps)
Metric sockets (standard depth and deep) – 15mm, 18mm
Various length socket extensions
Metric wrenches (optional) – 15mm, 18mm
Breaker bar (optional, but handy)
Torque wrench capable up to 129 lb-ft
Loctite
Grease
Marker pen (or white-out)
String
Tape
Ruler
1. Safely load the rear axle up in the air. Jack stands placed on the outward ends of the axle tubes or the use of car ramps will suffice. Be sure to chock the front tires.
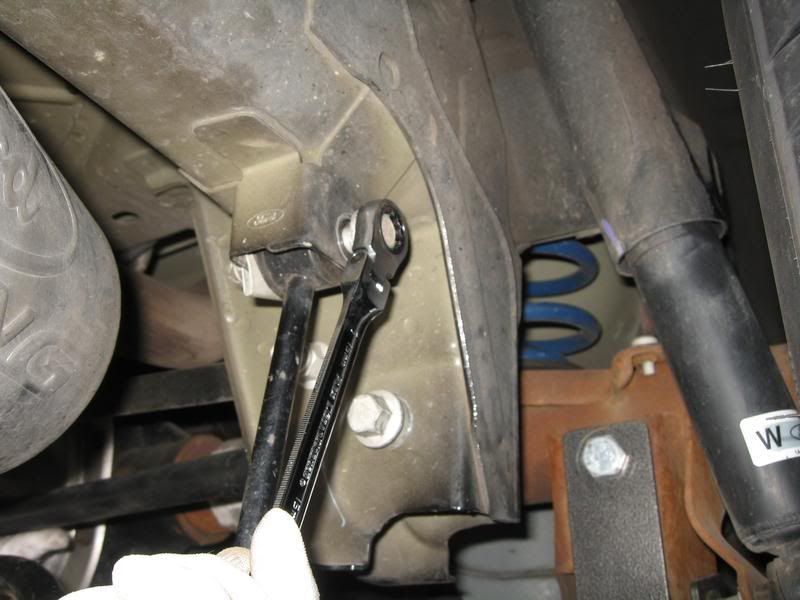
2. Remove the factory panhard bar.
Plastic cover over Drivers side panhard bar attaching bolt.
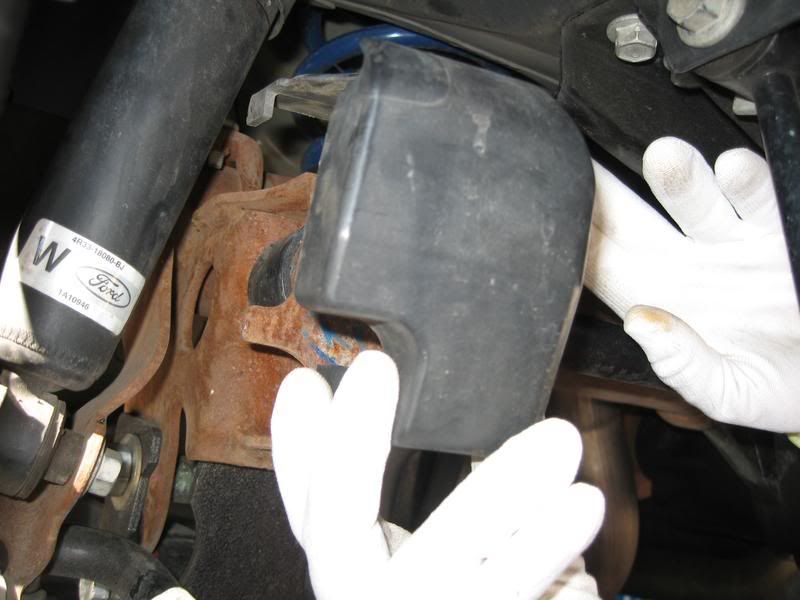
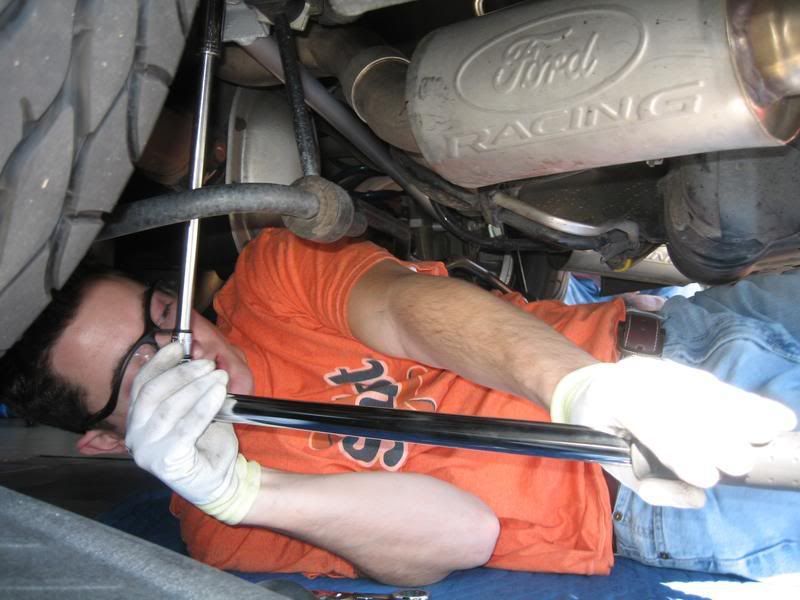
This bolt is on tight, breaker bar may be required.
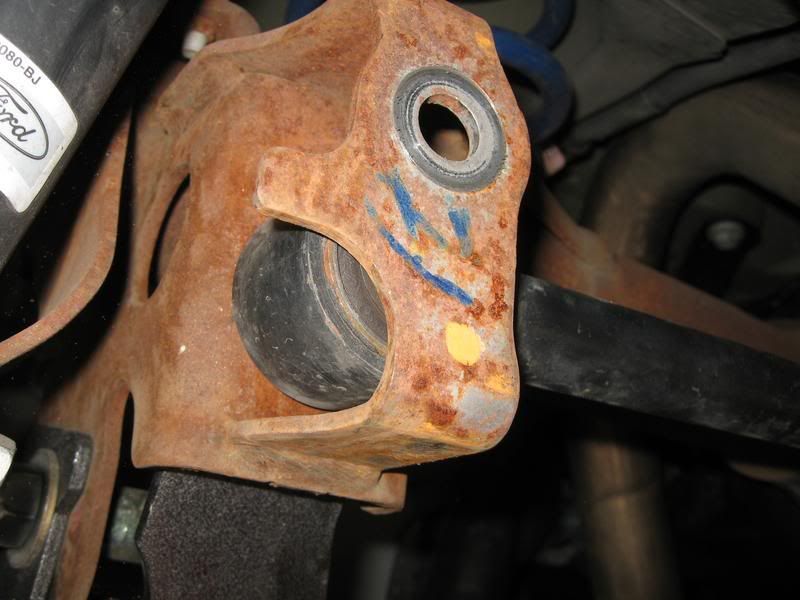
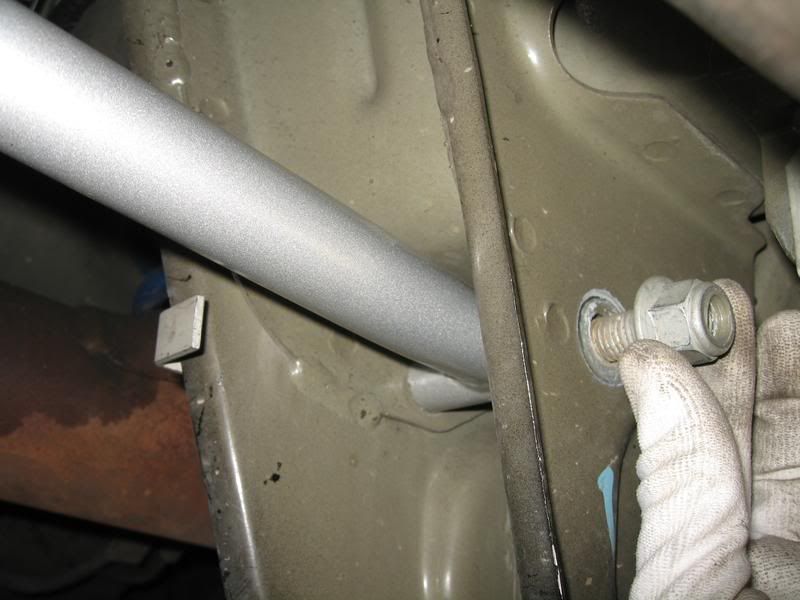
Moving to the Passenger side, remove the 18mm bolt and flag nut.
Note: The factory installed Leo’s panhard bolt on the wrong side (per the service manual).
Panhard bar removed.
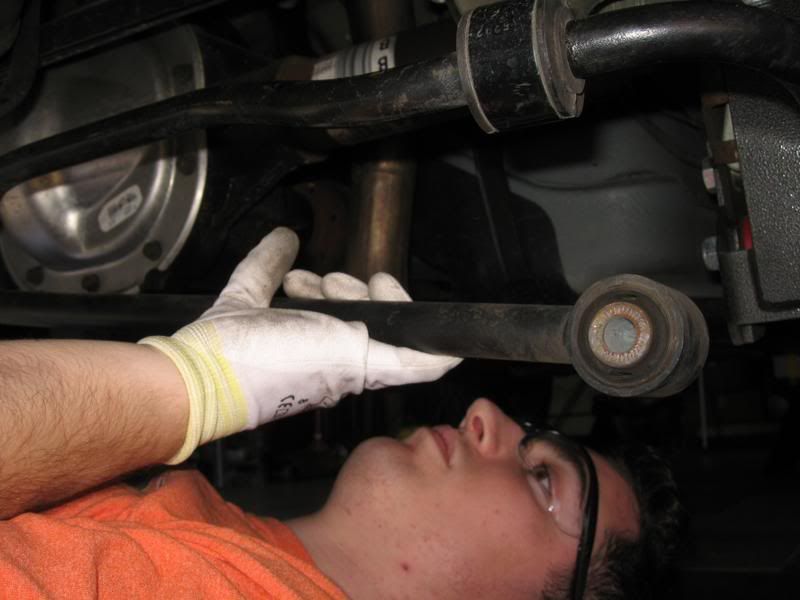
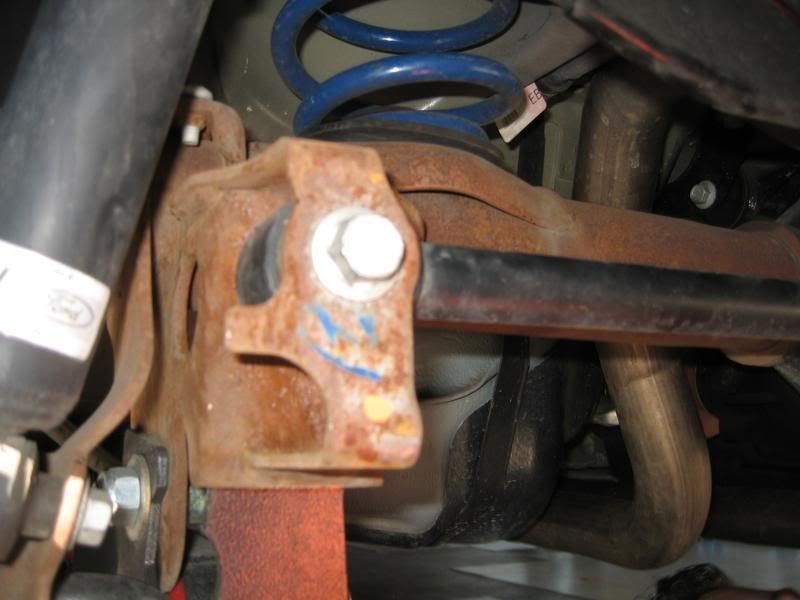
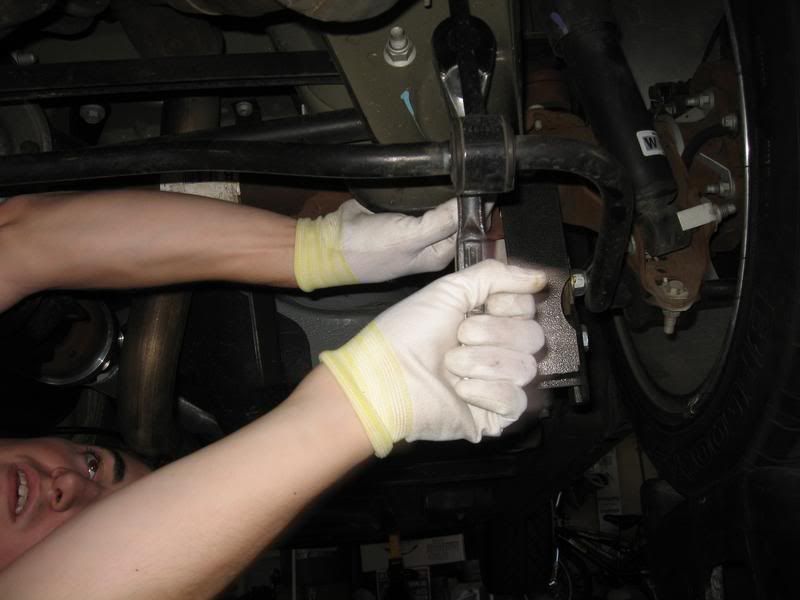
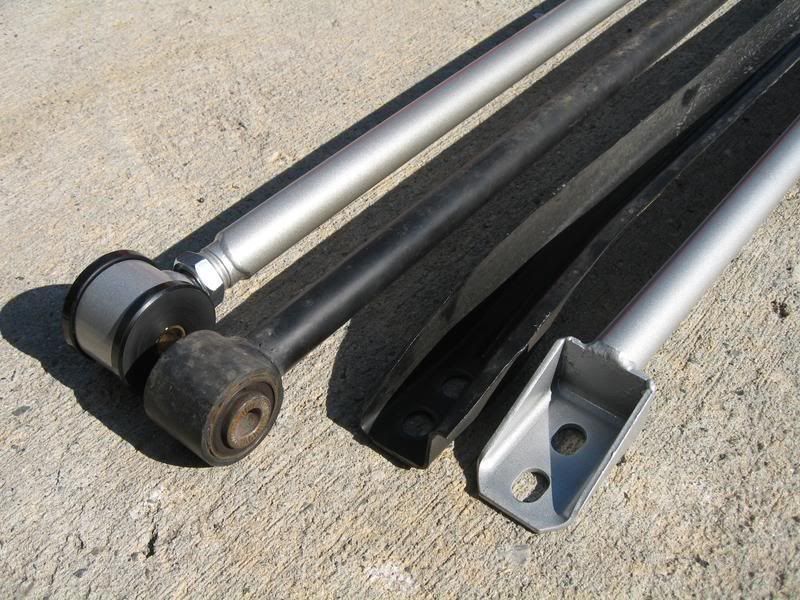
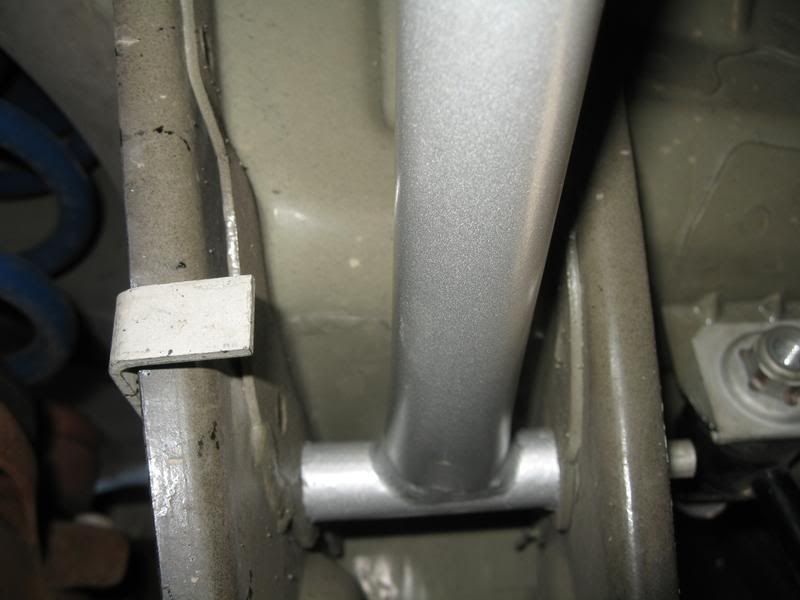
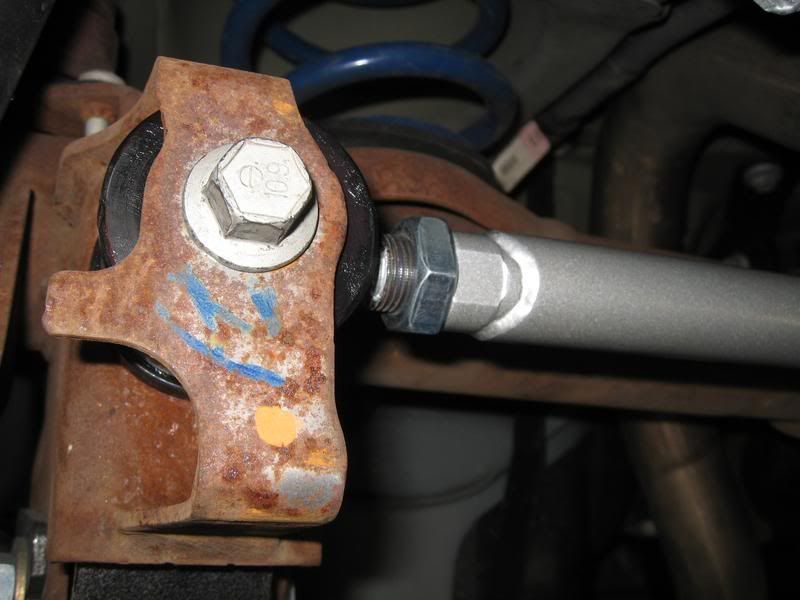
3. Remove the lateral stiffener bar.
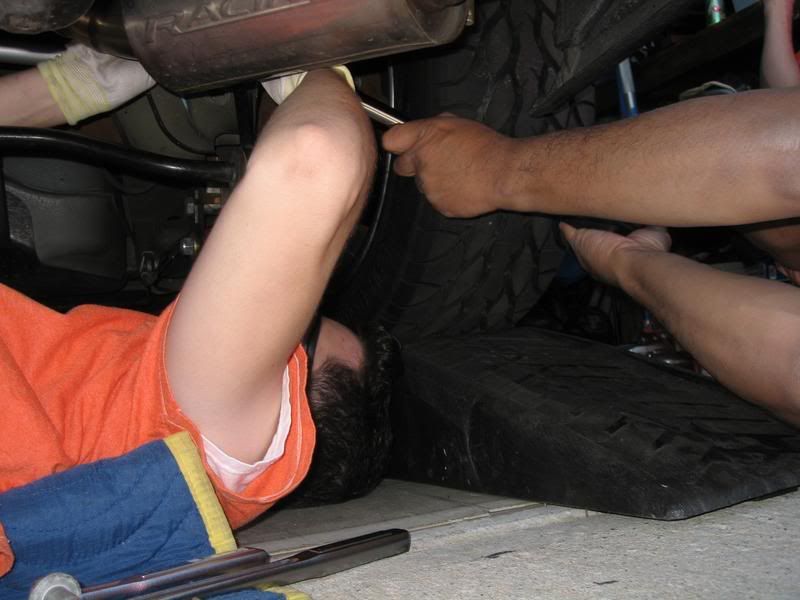
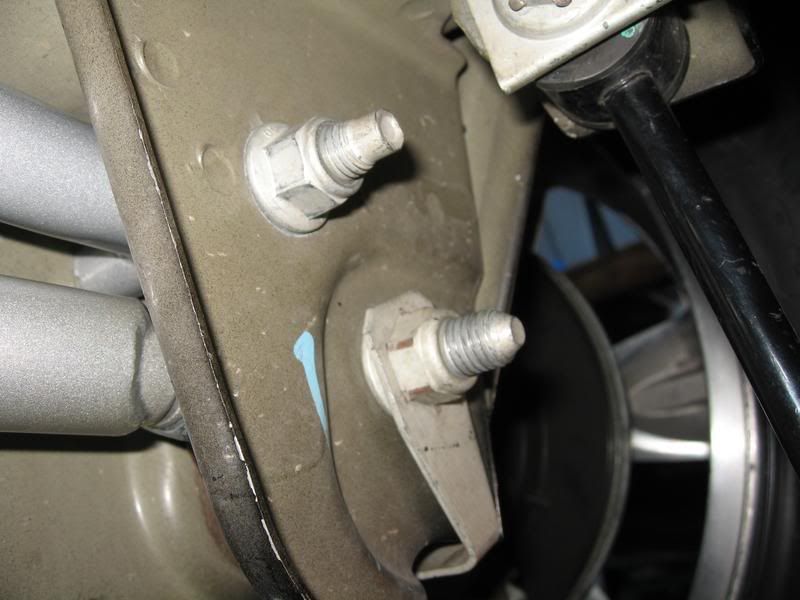
Drivers side, (2) bolts, 15mm socket.
Passenger side, flag bolt, 18mm deep socket or wrench.

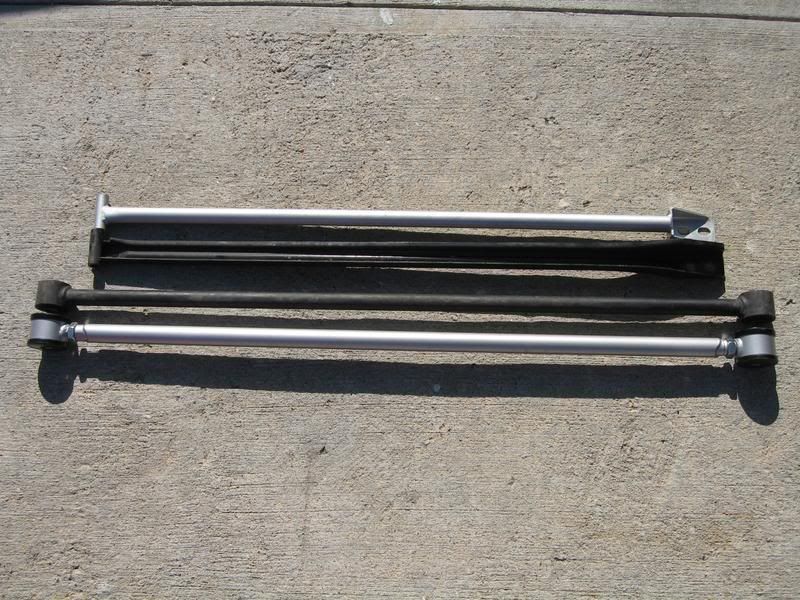
Side-by-Side comparison
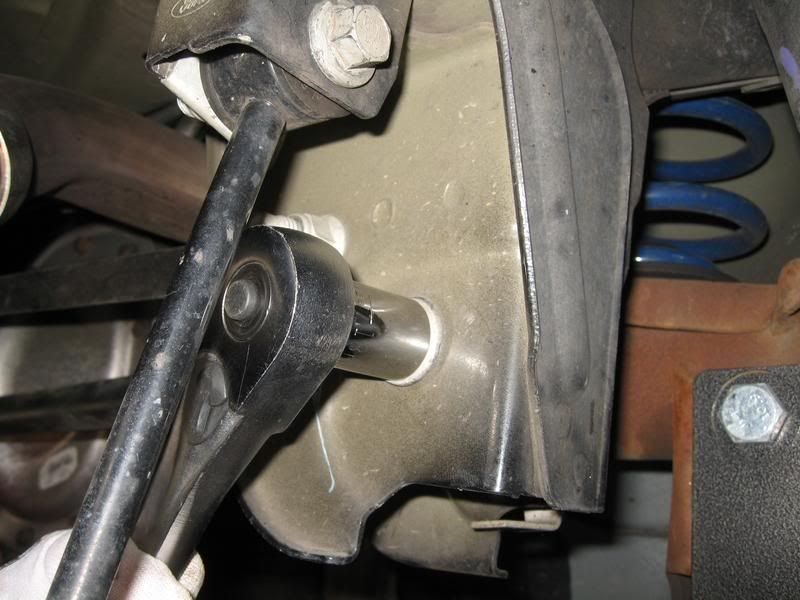
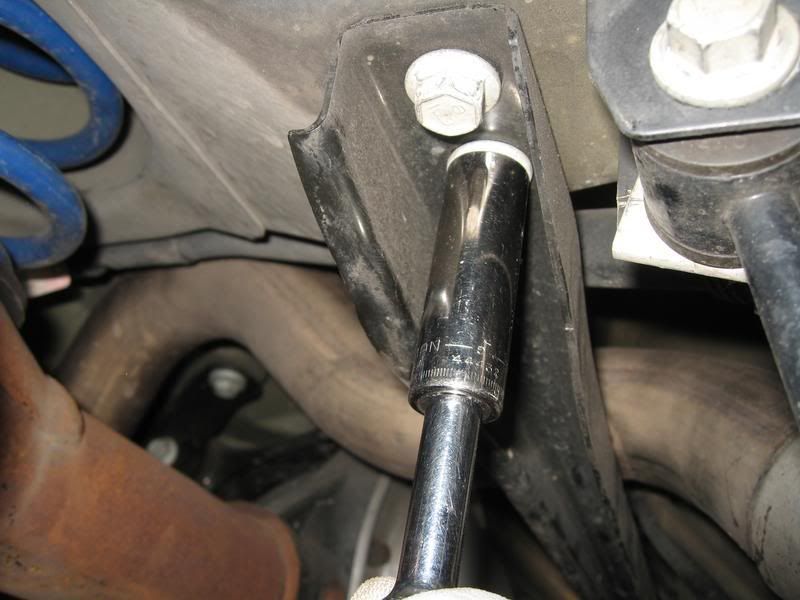
4. Install the Steeda lateral stiffener bar.
Re-use the factory hardware, install tight. Torque once both ends are in.
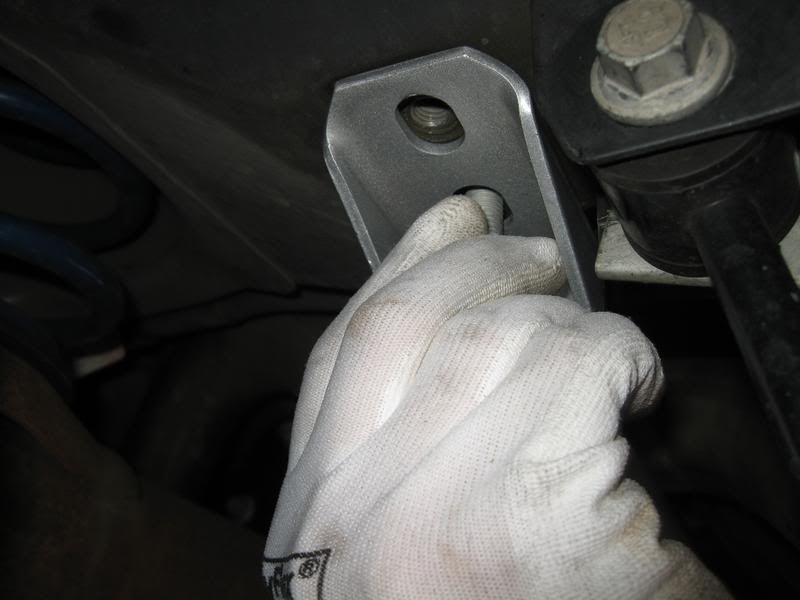
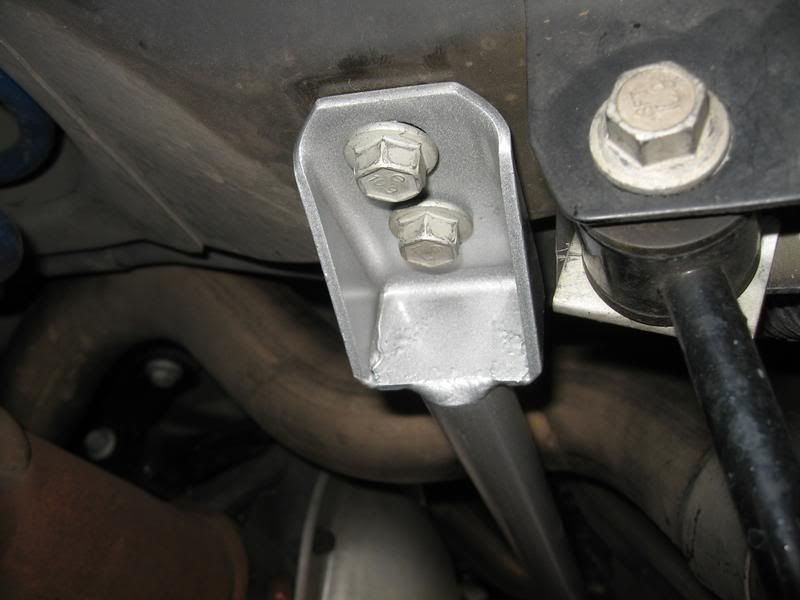
Torque
(2) Drivers side bolts: 46 lb-ft
(1) Passenger side flag bolt: 85 lb-ft
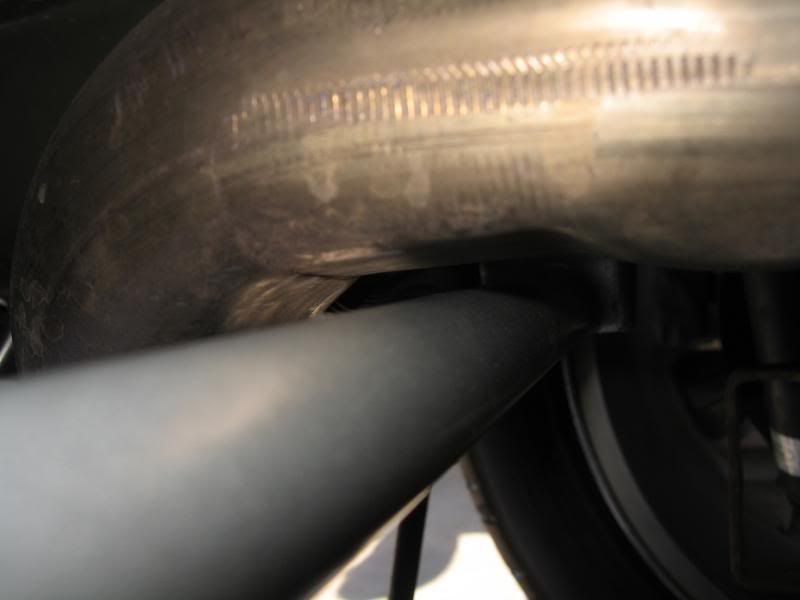
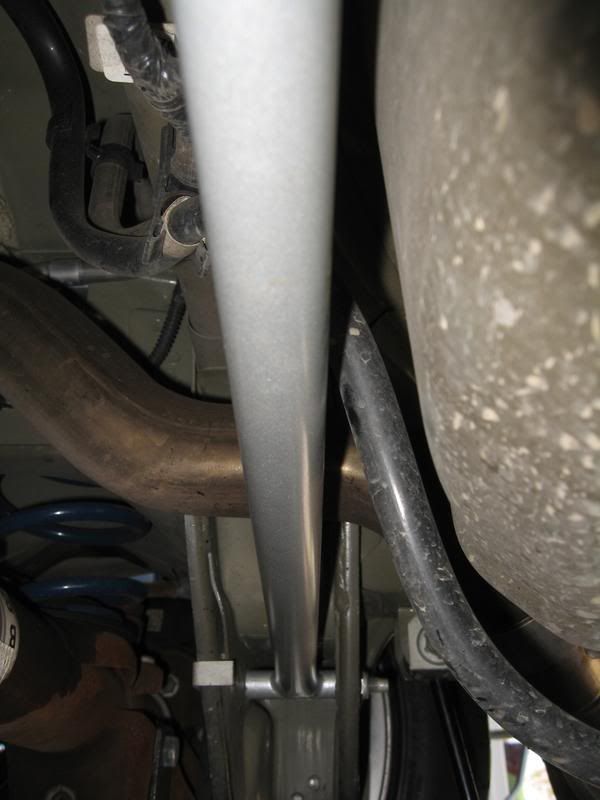
Lateral stiffener bar installed complete.
Note: If the swaybar endlink was removed, re-install it.
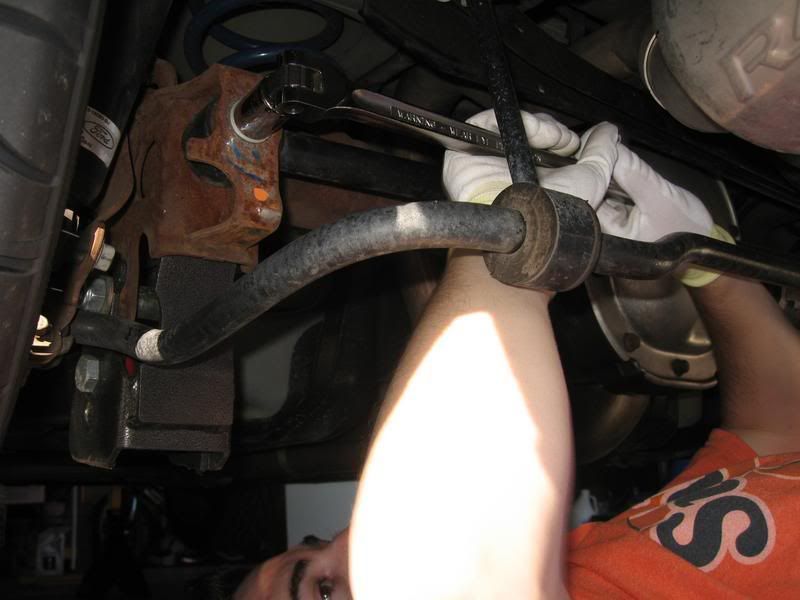
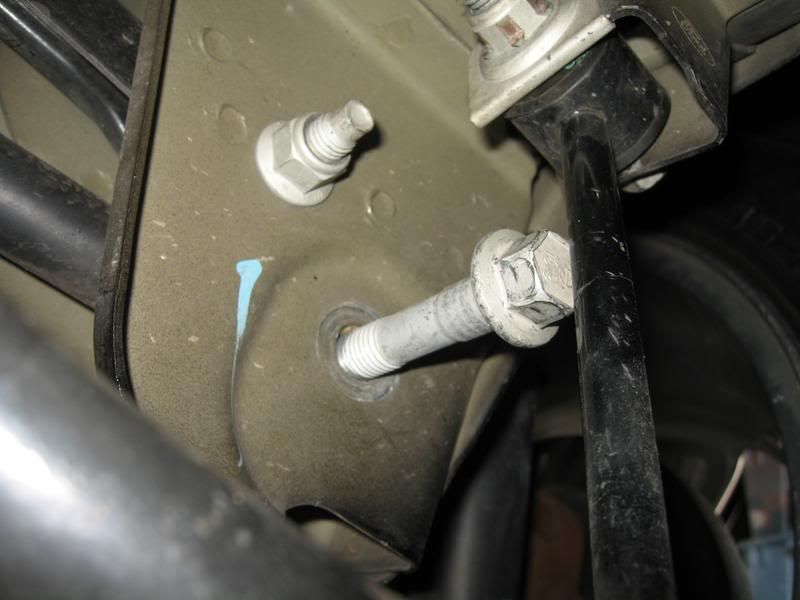
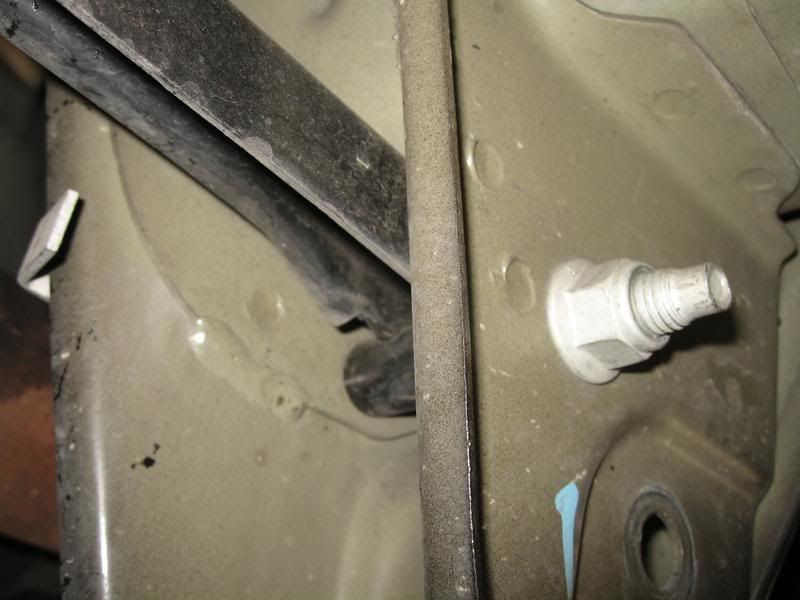
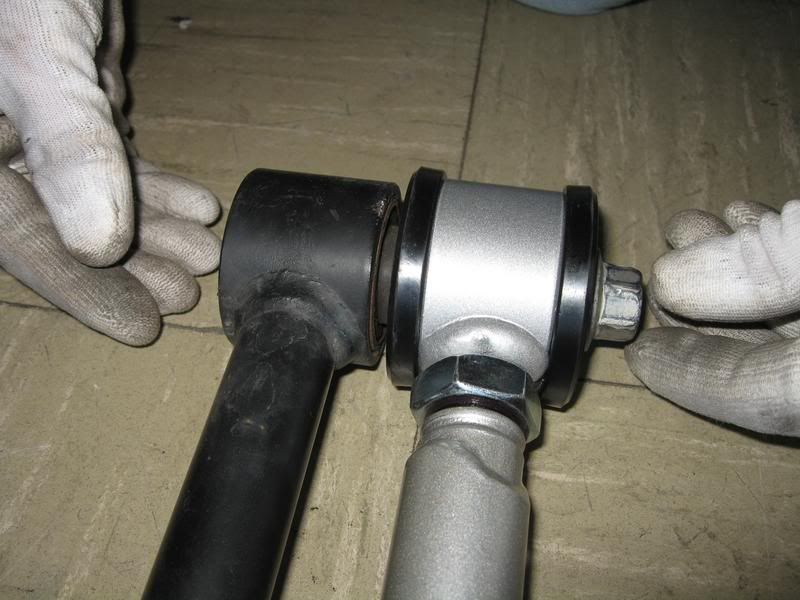
5. Install the Steeda adjustable panhard bar.
Adjust the length of the Steeda bar to match the factory bar; use factory bolts as a guide.
Note: Steeda bar adjusts at both ends, we opted to center the bar, approximately 4 threads on each end.
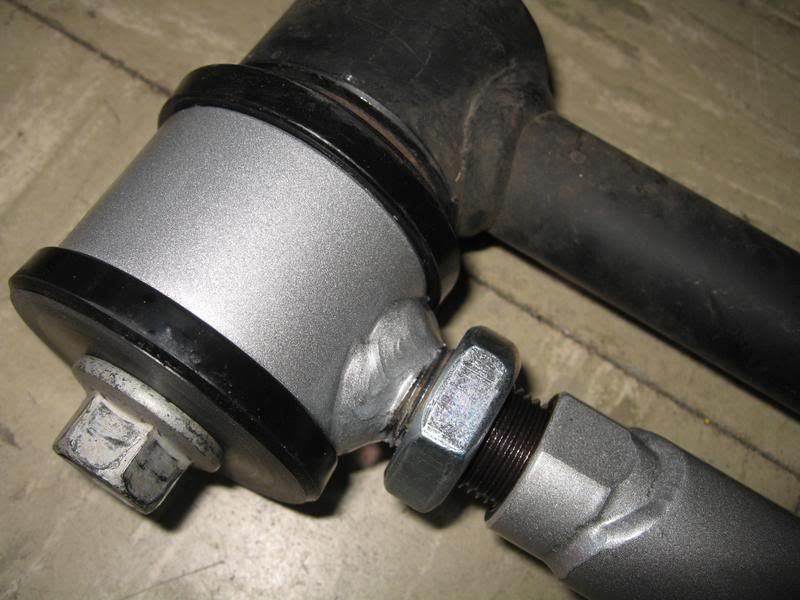
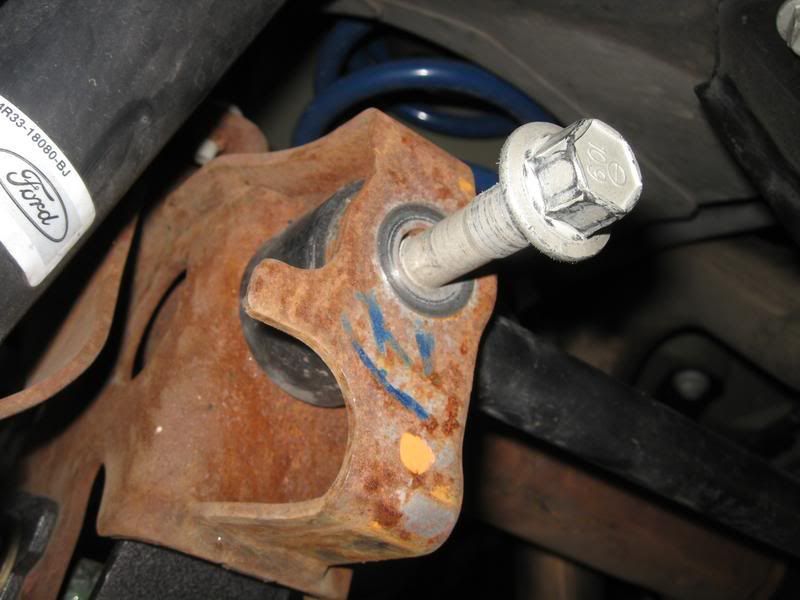
Although not in the directions, we used Mobil 1 grease on both sides of the bushing face.

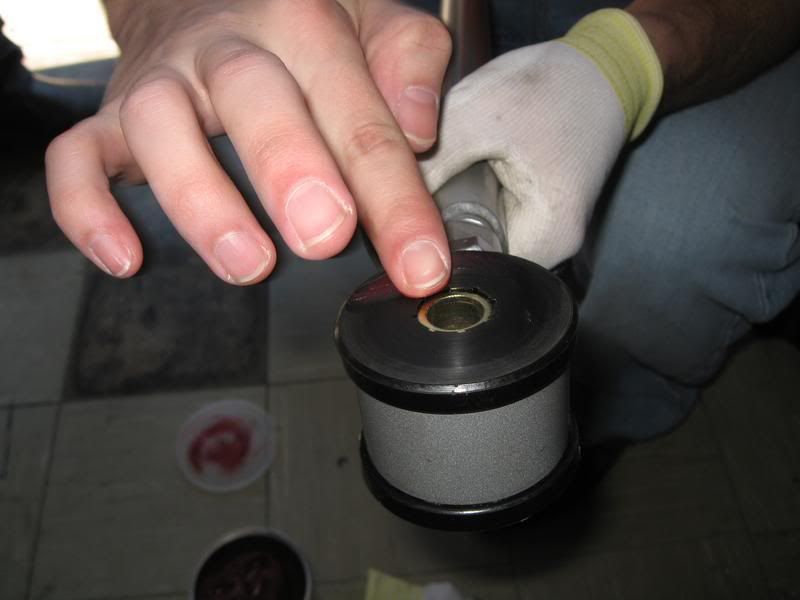
Re-use the factory hardware, install tight. Torque once both ends are in.
Torque: 129 lb-ft (both bolts)

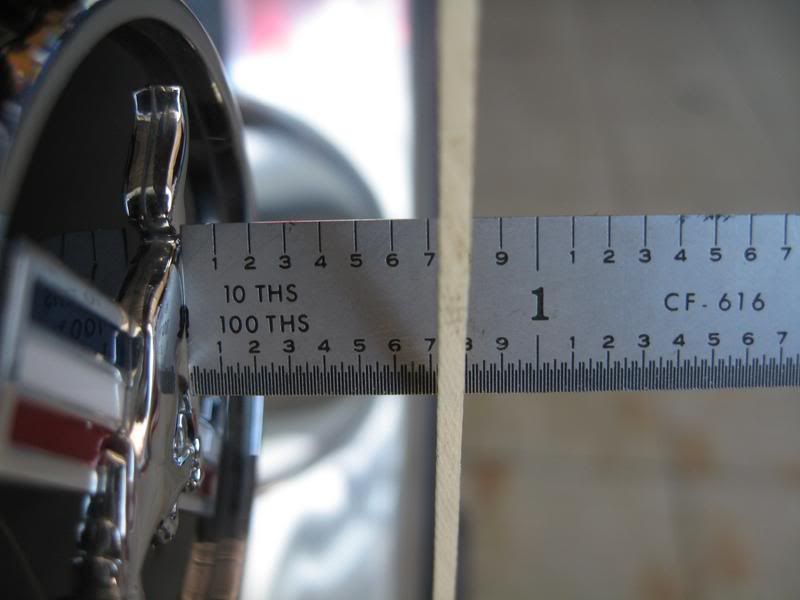
6. Using some string and a weighted object (ie. Socket), rig up a plumb-bob to measure axle shift.
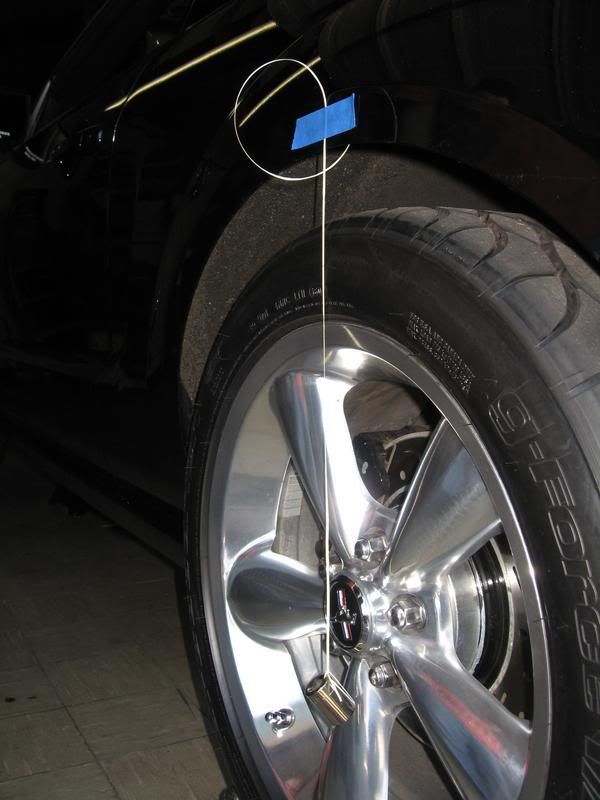
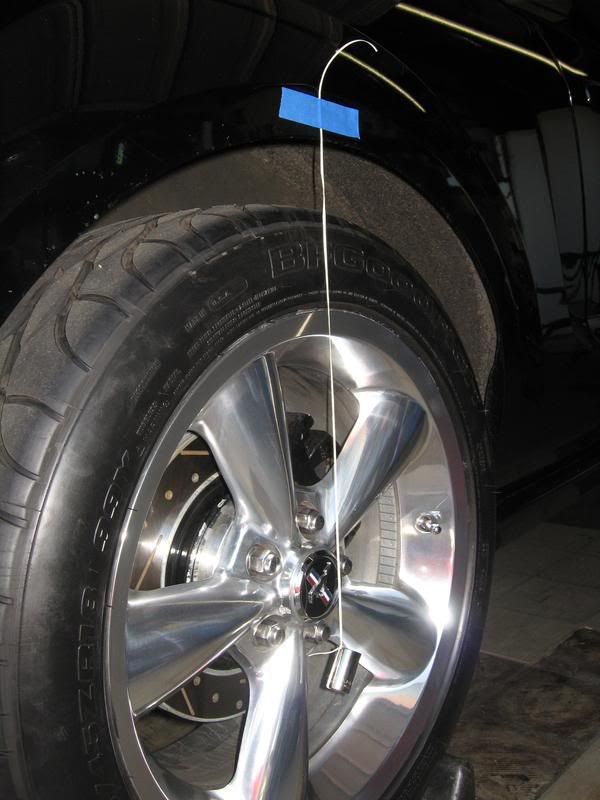
Loosen both jam nuts on the adj. panhard bar and rotate the bar by hand. You will see the body of the car move as you turn the panhard bar.
Center the axle until the distance measured is equal on both sides.
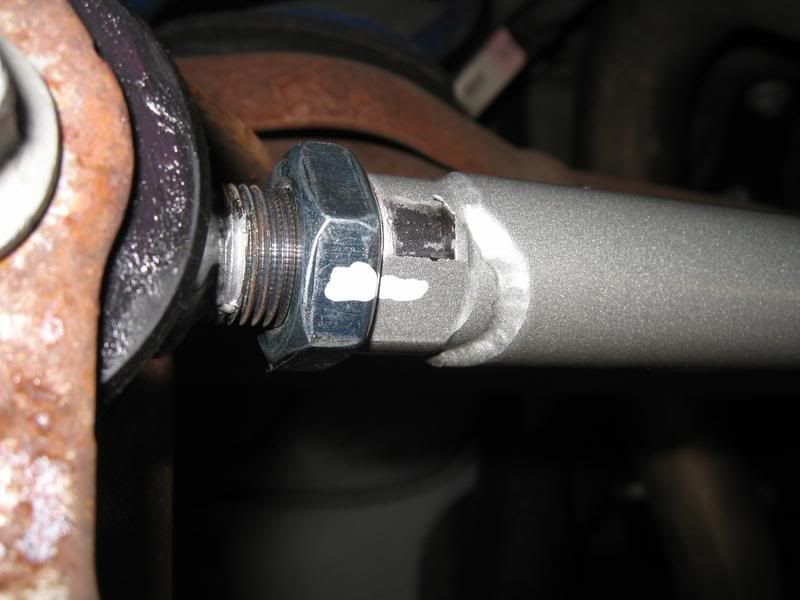
7. Once in the position, Loctite the jam nuts in place to prevent further movement of the bar. (2) wrenches can be used to tighten the jam nut.
Note: The Passenger side jam nut may be difficult to access with a wrench.
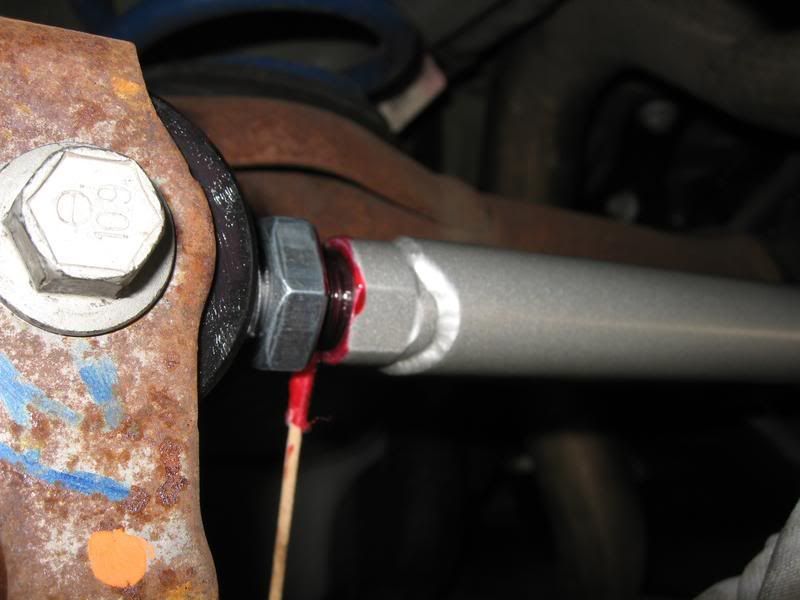
8. Using a marker or white-out, apply a torque stripe along the jam nut and panhard bar to monitor any slippage or movement. Re-check this mark periodically.
Installation complete!
Installation was performed on Leo_06GT’s 2006 GT (hardtop, Automatic). Both the panhard bar and lateral stiffener are from Steeda. Leo selected Steeda because of the ‘maintenance free’ bushings that do not require greasing.
Installation time: 1-2 hours (depending on level of experience and tool availability)
Tools/Materials needed:
Jack stands (or ramps)
Metric sockets (standard depth and deep) – 15mm, 18mm
Various length socket extensions
Metric wrenches (optional) – 15mm, 18mm
Breaker bar (optional, but handy)
Torque wrench capable up to 129 lb-ft
Loctite
Grease
Marker pen (or white-out)
String
Tape
Ruler
1. Safely load the rear axle up in the air. Jack stands placed on the outward ends of the axle tubes or the use of car ramps will suffice. Be sure to chock the front tires.
2. Remove the factory panhard bar.
Plastic cover over Drivers side panhard bar attaching bolt.
This bolt is on tight, breaker bar may be required.
Moving to the Passenger side, remove the 18mm bolt and flag nut.
Note: The factory installed Leo’s panhard bolt on the wrong side (per the service manual).
Panhard bar removed.
3. Remove the lateral stiffener bar.
Drivers side, (2) bolts, 15mm socket.
Passenger side, flag bolt, 18mm deep socket or wrench.
Side-by-Side comparison
4. Install the Steeda lateral stiffener bar.
Re-use the factory hardware, install tight. Torque once both ends are in.
Torque
(2) Drivers side bolts: 46 lb-ft
(1) Passenger side flag bolt: 85 lb-ft
Lateral stiffener bar installed complete.
Note: If the swaybar endlink was removed, re-install it.
5. Install the Steeda adjustable panhard bar.
Adjust the length of the Steeda bar to match the factory bar; use factory bolts as a guide.
Note: Steeda bar adjusts at both ends, we opted to center the bar, approximately 4 threads on each end.
Although not in the directions, we used Mobil 1 grease on both sides of the bushing face.
Re-use the factory hardware, install tight. Torque once both ends are in.
Torque: 129 lb-ft (both bolts)
6. Using some string and a weighted object (ie. Socket), rig up a plumb-bob to measure axle shift.
Loosen both jam nuts on the adj. panhard bar and rotate the bar by hand. You will see the body of the car move as you turn the panhard bar.
Center the axle until the distance measured is equal on both sides.
7. Once in the position, Loctite the jam nuts in place to prevent further movement of the bar. (2) wrenches can be used to tighten the jam nut.
Note: The Passenger side jam nut may be difficult to access with a wrench.
8. Using a marker or white-out, apply a torque stripe along the jam nut and panhard bar to monitor any slippage or movement. Re-check this mark periodically.
Installation complete!

 01-25-2008, 03:07 PM
#3
3rd Gear Member
Join Date: Sep 2006
Location: Indianapolis
Posts: 770
Awesome...this'how to' and all your othersare making me think that I could do this install myself when I lower my car in a month or so... I was planning on having a shop do it for $350. (Dspecs andSteeda Ultralites, Adj Panhard, Brace)
A couple questions, anyone who knows can answer:
1. By "lateral stiffener bar" are you talking about the Steeda Panhard Brace? From the pictures it looks the same but I've never heard it called that.
2.Step #6, I think someone on here said using body panels toadjust the panhard was not a goodidea.Comments?

 01-25-2008, 07:00 PM
#8
2nd Gear Member
Thread Starter
Join Date: Jun 2006
Location:
Posts: 415
ORIGINAL: timothyrw
A couple questions, anyone who knows can answer:
1. By "lateral stiffener bar" are you talking about the Steeda Panhard Brace? From the pictures it looks the same but I've never heard it called that.
2.Step #6, I think someone on here said using body panels toadjust the panhard was not a goodidea.Comments?
2. The included Steeda instructions has you set the pandhard bar the same way, by using the rear fender to wheel/tire via string method.
Most people (if not all) add an adjustable panard bar to correct the visual shifting of the rear axle (in relation to the fender lip)when running wider tires and/or lowering it.
01-26-2008, 10:30 AM
#9
3rd Gear Member
Join Date: Sep 2006
Location: Indianapolis
Posts: 770
thank you much, sir!
since you have installed everything i wanted to install (minus Dspecs), looks like i'll be doing the install myself (w/the help of a friend).
awesome...
since you have installed everything i wanted to install (minus Dspecs), looks like i'll be doing the install myself (w/the help of a friend).
awesome...
