
Sound Dampening, by myself [56k beware]
 11-03-2008, 02:55 PM
#1
1st Gear Member
Thread Starter

Join Date: Apr 2007
Posts: 120
Hello, I wanted to share with you all My latest mod on the mustang. Sound Dampening.
We all know that the road sound and drone from the exhaust can be really annoying sometimes, some might not care but others do. I did.
So I searched around and found alot of different brands to use but at the end I chose secondskin, from www.secondskinaudio.com.
I bought 80 sq feet of Damplifier Pro (DP) and 4 sheets of luxury liner pro (aka LLP) I also ordered their wooden roller, but that didn't make it across the sea so I took my kids Christmas cookie baking stuff and used that instead ^^.
I dampened all the areas from the rear passengers feet's and all the way to the rear of the car, and the doors.
Its very straight forward but Im still gonna tell you all the little things that I can remember.
Before I start with the pics and such I want to apologize for not knowing what the tools are names are, and all other things you might think is anoying.
Step 1. [Removing the backseat]
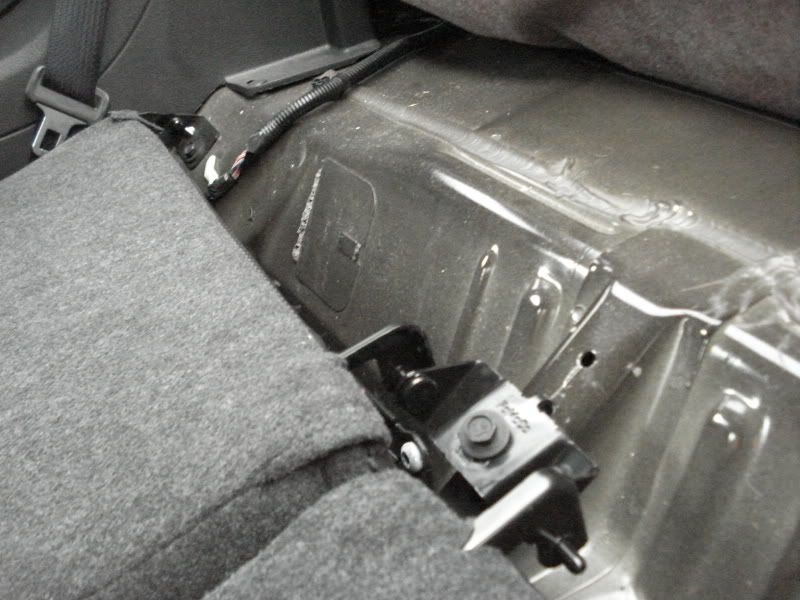
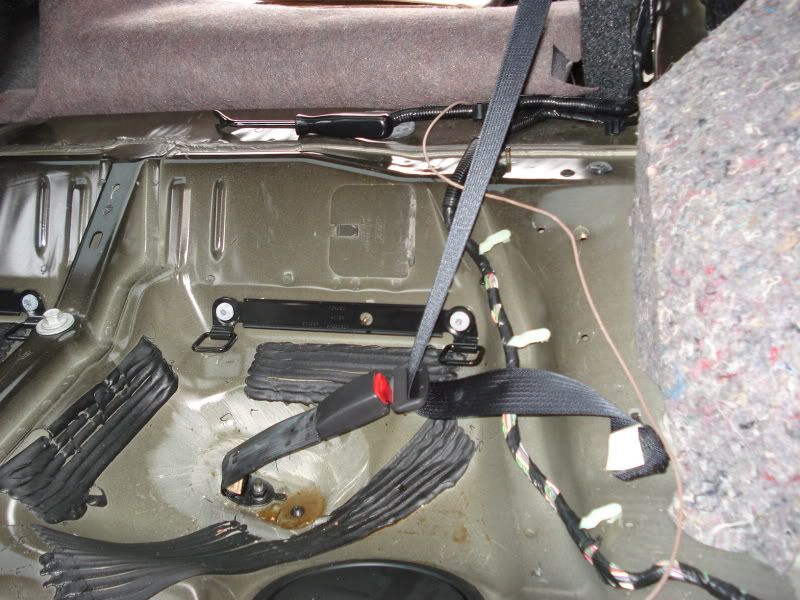
First lift up your seat cushion (I bet you can figure out how to do this) and pull it out. Then you pull your seat backrest down and loosen the three bolts, one on the right, one on the left and one in the middle as seen on the pic.
Here you can see two of the screws.
Step 2. [Removing the entry Guards]
Get a good grip on one side of the entry guard, and pull straight up, put some power into it and it will soon let go, don't worry about the small glue strip, it might peel off but the guards will sit tight even if its not all there.
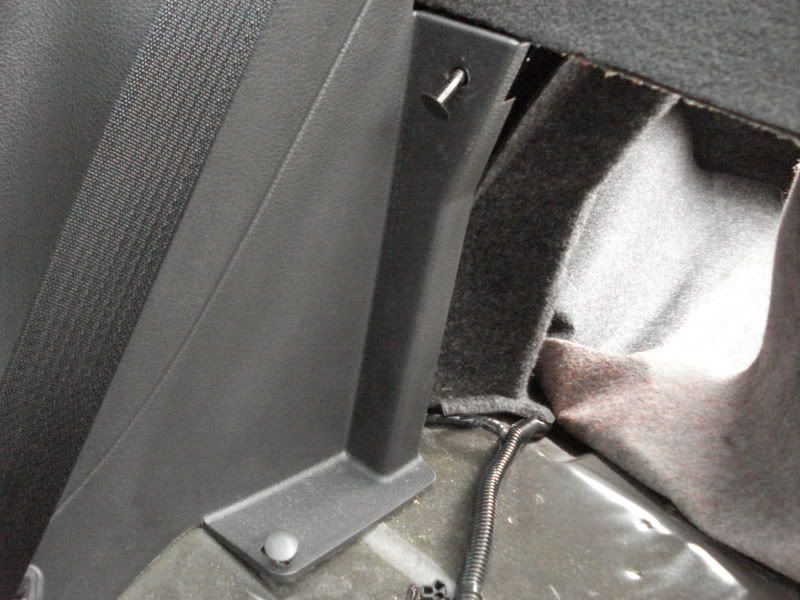
step 3. [Removing the Side Panels]
Lossen the two clips with a panel popper thing, and then starting from the door, pull the panel with your fingers so that it can slid off at the front, it will be very tight so again, put some power into it! then you can just carefully get it out.
there is a clip below where the front seat belt enters the panel, but it shouldnt be any problem getting it lose, if it is, try pushing it down with a flat screwdriver with some tape on it so you don't scratch the panel.
The two first clips, Sorry, didnt get a picture of the one by the door.
Step 4 [Installing dampening material]
I chose to only use DP on these areas, because of the LLP is to thick to get under the seats. Cut out pieces of the DP and put it on with the roller. Make sure to press it down firmly. Its lots of hills and holes so it will take some time.
Do not cover any holes or the small rubber boots or screws or anything that you might wanna get to later, like the openings to the fuel pumps, make sure that they can be opened.
You don't have to loosen the baby seat fastener metal piece. you can slide the DP behind it.
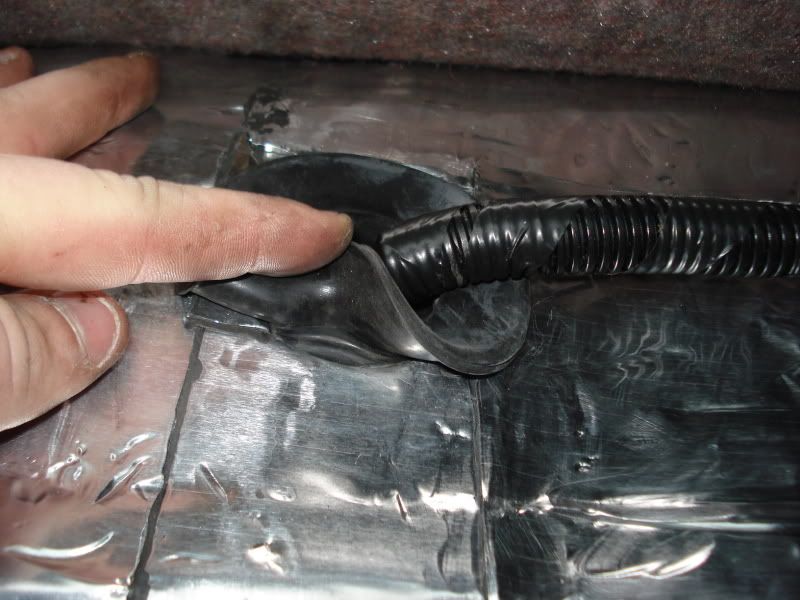
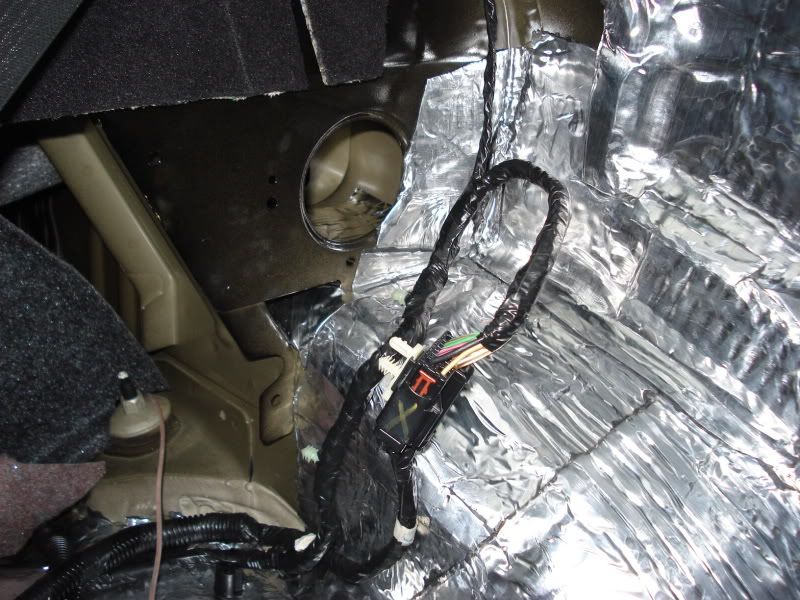
On this pic you can see a hole that I have no idea why not to fill it up with something, so I did I used the old isolating material that covered the wheel houses and stuffed it in there. But make sure to do a copy of the old one on your LLP. So you can put LLP where the old one was. Oh, and I also put DP inside the hole, everywhere I could get to.
Make sure to cut it really good. its really hard to get the panels back in place with the LLP on that spot.
The hole is filled up

I then used DP and covered the hole entirely.
Not much more to say now, put DP everywhere you can, and pray to God that you can get all your **** back together.
Random pics.

the LLP is on place.
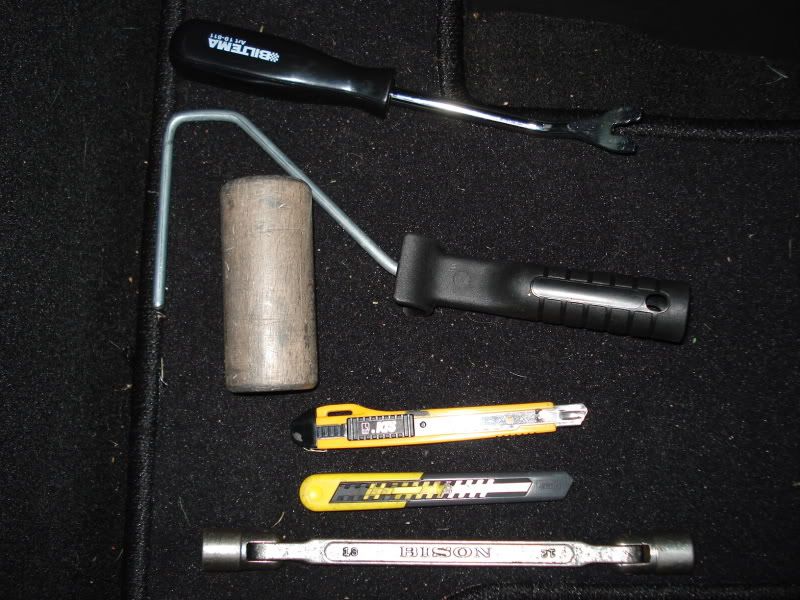
The tools needed for this part.
Now reverse the first steps to get your seats and panels in place.
!Warning! Before you put everything back, Make sure the Cat is safely positioned on the Ironing table!

Tada!
Notice the circle around the fuel pump entry, Make sure that you can open those, its really hard to get the DP off when you have pushed it down.
Now. To the doors.
This part might be lacking some info, but please ask if there is anything you dont understand.
Step 1.
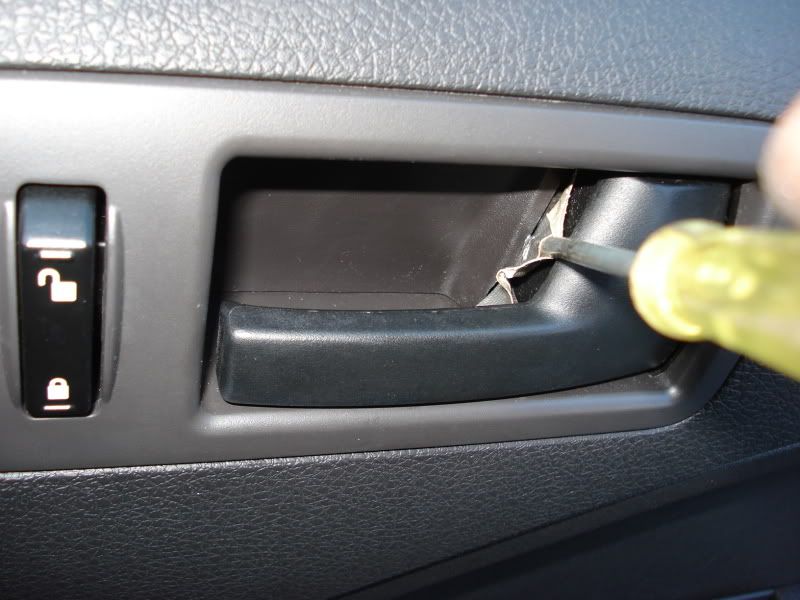
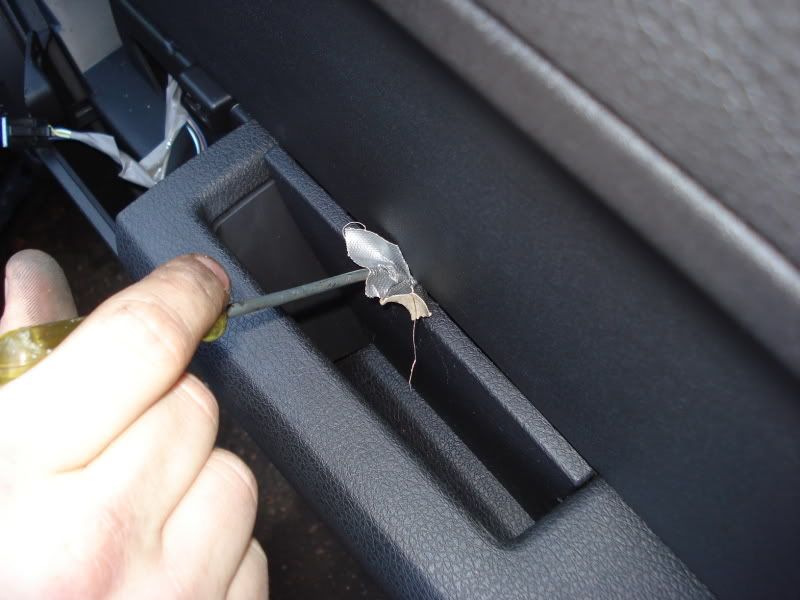
Peel of the little plastic piece behind the door handle, as seen on the pic, it will loosen if you bend it a little bit.
Step 2.
Do the same thing to the little plastic piece around the door lock noobs. from one side, just bend it. Very easy.
Step 3.
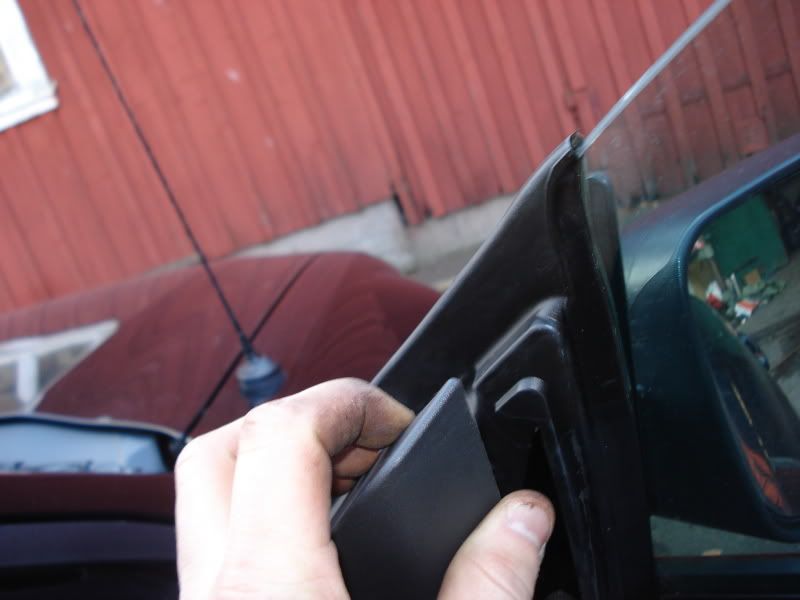
Peel of the small plastic piece at the inside of the mirror as seen on the pic. Good grip at the top then pull out. Then pull out at the bottom and it will be loose. Dont forget to loosen the cable to the mirror.
Step 4.
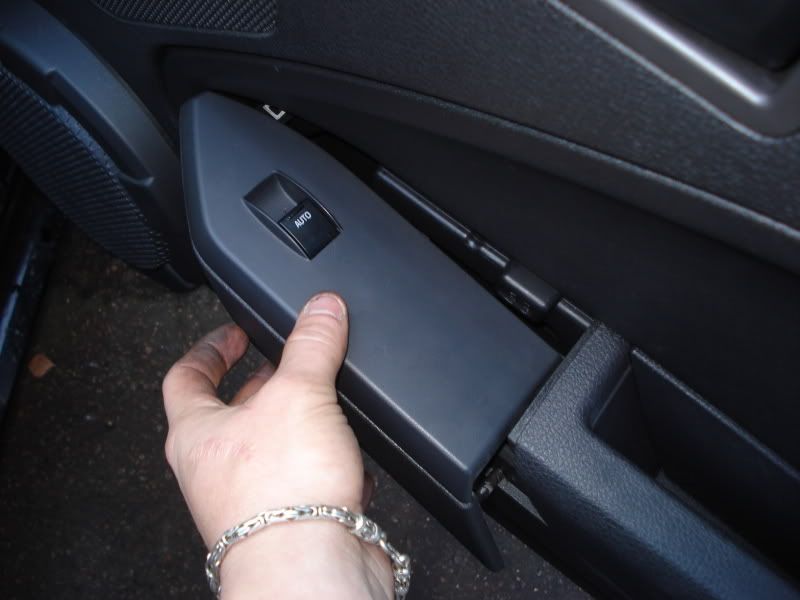
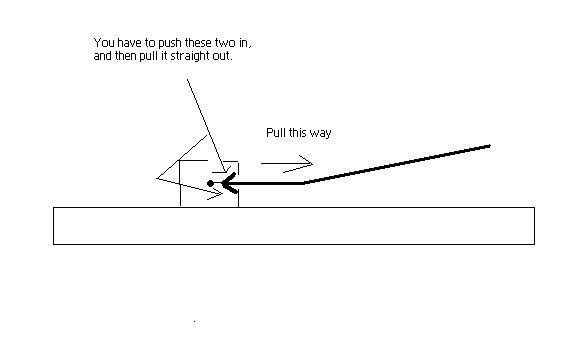
Remove the window controller plastic thing. its actully two pieces but I got it out like the pic shows. I used the flat screwdriver with tape once again and bent it out. Im not sure how I did this so you will have to figure it out yourself. Dont forget to loosen the cable.
Step 5.
Another small plastic piece, use the screwdriver from above, there will be two small metal clips on each side on the top if I remember correctly, push them down, pull the piece out and then up.
Step 6.
Now you have to loosen all the screws. I think there were some missing on my doors but never mind that.
You have two on the left, two on the right and about 4 in the bottom of the door. You also have one behind the door handle and one behind the arm rest.
Step 7.
Remove the door panel by pulling upwards, it should pop loose quite easily.
You will have to remove the cable at the door handle, and also the wire that is fastened in the door handle.
I will add a paint picture of how it looks further down, I cant add any more pics atm.
Now pull the panel away.
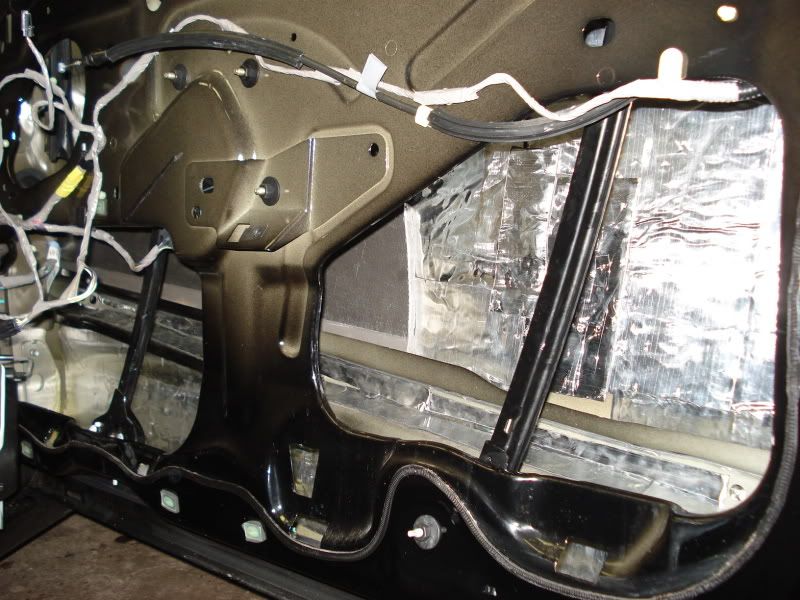
Step 8.
Remove the speaker. Really straight forward. Cant do this wrong.
Step 9.
Remove the plastic sheet, but do not toss it. You will reuse it later, at least I did.
Step 10.
Get to work.
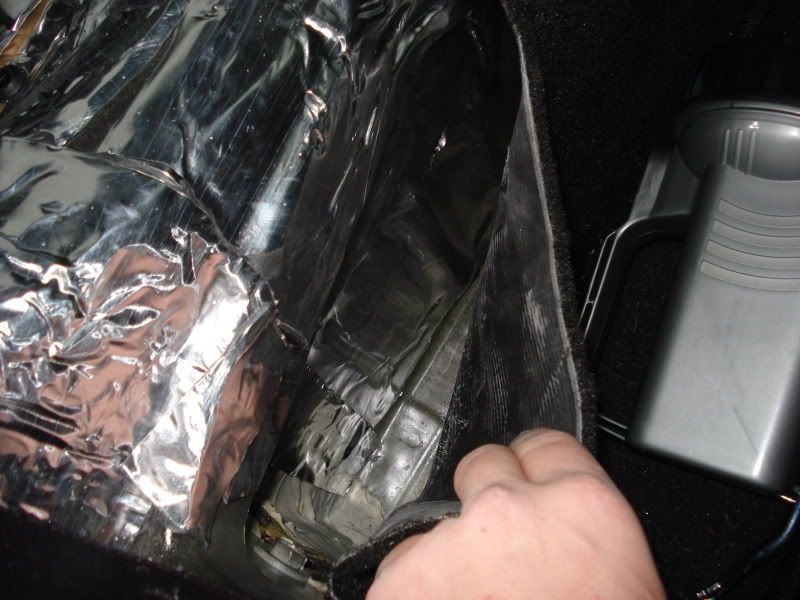
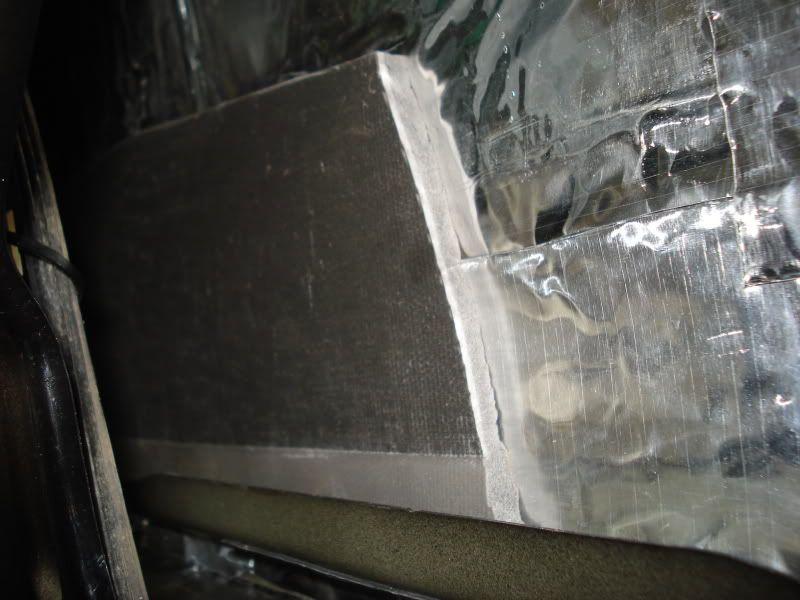
I covered everything inside the door with DP, except for the two holes in the bottom that are water drains. After that I used LLP and spay glue and put it on top of the DP.
Like this
I also used DP on the side with all the cables and such, but I dont have any pics on that.
Do not try to put LLP on the inside where the cables is, you wont get the door panel back. Trust me, I tried.A lot.
Now reverse everything and enjoy the new sound when closing the doors. Its great
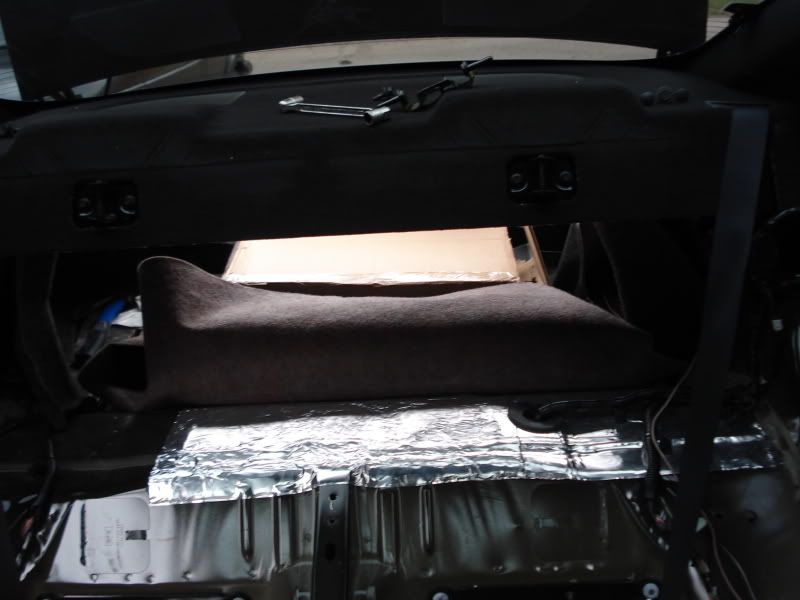
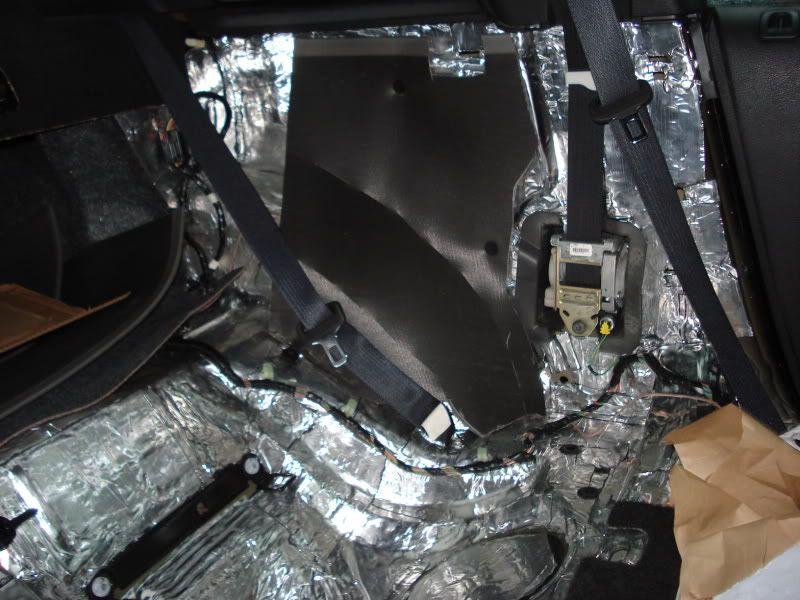
The last step is the trunk, I covered the entire area with DP and I also put two layers of LLP in the wheel hole because I had a lot to spare. Then I also put two sheets behind the rear seat backrest. Do not put the LLP to high, or you wont be able to lock the seats in place.
Next year I will probably do this on the whole floor and the roof also.
I will also put some kind of mass in the wheel houses so I cant get rid of the sound from gravel and such.
Final thoughts.
Did it dampen anything?
Yes, the car is alot more silenced, especially the road noise has been lowered a great deal.
The drone from the exhaust is still annoying around 2k rpm, so that sucks. Didn't help much there.
The doors are great. I will never have to complain about people slamming the doors. It doesn't matter how hard I close it, its still a very solid thump sound.
Was it worth it?
No, it wasn't worth the 500usd and the 25 hours of work to do this.
You can spend the money on better things. But if you enjoy a more silent ride and like to crawl around your car then do it.
The Doors sound was worth it tough.
Many thanks to
Cookiemonster and his thread
https://mustangforums.com/forum/show...t=noise+damper
Where I found almost everything I had to know.
And to Secondskinaudio.com for the great product and reasonable price.
And of course my dad that help me with experience and all the tools and a place to do this in.
Im sure I have forgotten alot of info, so ask if there is anything you would like to know.
//Roy
We all know that the road sound and drone from the exhaust can be really annoying sometimes, some might not care but others do. I did.
So I searched around and found alot of different brands to use but at the end I chose secondskin, from www.secondskinaudio.com.
I bought 80 sq feet of Damplifier Pro (DP) and 4 sheets of luxury liner pro (aka LLP) I also ordered their wooden roller, but that didn't make it across the sea so I took my kids Christmas cookie baking stuff and used that instead ^^.
I dampened all the areas from the rear passengers feet's and all the way to the rear of the car, and the doors.
Its very straight forward but Im still gonna tell you all the little things that I can remember.
Before I start with the pics and such I want to apologize for not knowing what the tools are names are, and all other things you might think is anoying.
Step 1. [Removing the backseat]
First lift up your seat cushion (I bet you can figure out how to do this) and pull it out. Then you pull your seat backrest down and loosen the three bolts, one on the right, one on the left and one in the middle as seen on the pic.
Here you can see two of the screws.
Step 2. [Removing the entry Guards]
Get a good grip on one side of the entry guard, and pull straight up, put some power into it and it will soon let go, don't worry about the small glue strip, it might peel off but the guards will sit tight even if its not all there.
step 3. [Removing the Side Panels]
Lossen the two clips with a panel popper thing, and then starting from the door, pull the panel with your fingers so that it can slid off at the front, it will be very tight so again, put some power into it! then you can just carefully get it out.
there is a clip below where the front seat belt enters the panel, but it shouldnt be any problem getting it lose, if it is, try pushing it down with a flat screwdriver with some tape on it so you don't scratch the panel.
The two first clips, Sorry, didnt get a picture of the one by the door.
Step 4 [Installing dampening material]
I chose to only use DP on these areas, because of the LLP is to thick to get under the seats. Cut out pieces of the DP and put it on with the roller. Make sure to press it down firmly. Its lots of hills and holes so it will take some time.
Do not cover any holes or the small rubber boots or screws or anything that you might wanna get to later, like the openings to the fuel pumps, make sure that they can be opened.
You don't have to loosen the baby seat fastener metal piece. you can slide the DP behind it.
On this pic you can see a hole that I have no idea why not to fill it up with something, so I did
I used the old isolating material that covered the wheel houses and stuffed it in there. But make sure to do a copy of the old one on your LLP. So you can put LLP where the old one was. Oh, and I also put DP inside the hole, everywhere I could get to.Make sure to cut it really good. its really hard to get the panels back in place with the LLP on that spot.
The hole is filled up
I then used DP and covered the hole entirely.
Not much more to say now, put DP everywhere you can, and pray to God that you can get all your **** back together.
Random pics.
the LLP is on place.
The tools needed for this part.
Now reverse the first steps to get your seats and panels in place.
!Warning! Before you put everything back, Make sure the Cat is safely positioned on the Ironing table!
Tada!
Notice the circle around the fuel pump entry, Make sure that you can open those, its really hard to get the DP off when you have pushed it down.
Now. To the doors.
This part might be lacking some info, but please ask if there is anything you dont understand.
Step 1.
Peel of the little plastic piece behind the door handle, as seen on the pic, it will loosen if you bend it a little bit.
Step 2.
Do the same thing to the little plastic piece around the door lock noobs. from one side, just bend it. Very easy.
Step 3.
Peel of the small plastic piece at the inside of the mirror as seen on the pic. Good grip at the top then pull out. Then pull out at the bottom and it will be loose. Dont forget to loosen the cable to the mirror.
Step 4.
Remove the window controller plastic thing. its actully two pieces but I got it out like the pic shows. I used the flat screwdriver with tape once again and bent it out. Im not sure how I did this so you will have to figure it out yourself. Dont forget to loosen the cable.
Step 5.
Another small plastic piece, use the screwdriver from above, there will be two small metal clips on each side on the top if I remember correctly, push them down, pull the piece out and then up.
Step 6.
Now you have to loosen all the screws. I think there were some missing on my doors but never mind that.
You have two on the left, two on the right and about 4 in the bottom of the door. You also have one behind the door handle and one behind the arm rest.
Step 7.
Remove the door panel by pulling upwards, it should pop loose quite easily.
You will have to remove the cable at the door handle, and also the wire that is fastened in the door handle.
I will add a paint picture of how it looks further down, I cant add any more pics atm.
Now pull the panel away.
Step 8.
Remove the speaker. Really straight forward. Cant do this wrong.
Step 9.
Remove the plastic sheet, but do not toss it. You will reuse it later, at least I did.
Step 10.
Get to work.
I covered everything inside the door with DP, except for the two holes in the bottom that are water drains. After that I used LLP and spay glue and put it on top of the DP.
Like this
I also used DP on the side with all the cables and such, but I dont have any pics on that.
Do not try to put LLP on the inside where the cables is, you wont get the door panel back. Trust me, I tried.A lot.
Now reverse everything and enjoy the new sound when closing the doors. Its great
The last step is the trunk, I covered the entire area with DP and I also put two layers of LLP in the wheel hole because I had a lot to spare. Then I also put two sheets behind the rear seat backrest. Do not put the LLP to high, or you wont be able to lock the seats in place.
Next year I will probably do this on the whole floor and the roof also.
I will also put some kind of mass in the wheel houses so I cant get rid of the sound from gravel and such.
Final thoughts.
Did it dampen anything?
Yes, the car is alot more silenced, especially the road noise has been lowered a great deal.
The drone from the exhaust is still annoying around 2k rpm, so that sucks. Didn't help much there.
The doors are great. I will never have to complain about people slamming the doors. It doesn't matter how hard I close it, its still a very solid thump sound.
Was it worth it?
No, it wasn't worth the 500usd and the 25 hours of work to do this.
You can spend the money on better things. But if you enjoy a more silent ride and like to crawl around your car then do it.
The Doors sound was worth it tough.
Many thanks to
Cookiemonster and his thread
https://mustangforums.com/forum/show...t=noise+damper
Where I found almost everything I had to know.
And to Secondskinaudio.com for the great product and reasonable price.
And of course my dad that help me with experience and all the tools and a place to do this in.
Im sure I have forgotten alot of info, so ask if there is anything you would like to know.
//Roy
Last edited by ODDYSEY; 01-12-2011 at 09:18 PM.
 11-03-2008, 03:08 PM
#3
2nd Gear Member

Join Date: Feb 2007
Location: Atlanta, Georgia
Posts: 321
It looks good. The reason that it didn't kill your exhaust note is because the damplifier just weighs down the flat panels and physically dampens the vibrations that are caused by road noise, stereo, etc. It DOES NOT kill airborne sound waves, such as those caused by the fact that your exhaust tips are vibrating at the same frequency, i.e. the notorious exhaust drone. You need an airborne sound wave filtering material, like that luxury liner, applied on the areas that the drone comes through mainly, which would be the floor pan. But even then it won't absolutely kill the drone. it'll just quieten it down a bit. That's assuming that it'll fit under the carpet and seats.
 11-03-2008, 03:12 PM
#5
1st Gear Member
Thread Starter
Join Date: Apr 2007
Posts: 120
It looks good. The reason that it didn't kill your exhaust note is because the damplifier just weighs down the flat panels and physically dampens the vibrations that are caused by road noise, stereo, etc. It DOES NOT kill airborne sound waves, such as those caused by the fact that your exhaust tips are vibrating at the same frequency, i.e. the notorious exhaust drone. You need an airborne sound wave filtering material, like that luxury liner, applied on the areas that the drone comes through mainly, which would be the floor pan. But even then it won't absolutely kill the drone. it'll just quieten it down a bit. That's assuming that it'll fit under the carpet and seats.
Im gonna get to the drone next year also, probably put some resonators on. But we will see, now its going into winter storage so no more work atm.
Thanks for the creds 5speed07gt and good luck on your own car.
Secondskin is the way to go, great service.
11-03-2008, 03:27 PM
#6
2nd Gear Member
Join Date: Feb 2007
Location: Atlanta, Georgia
Posts: 321
I don't think I got enough praise across in my first post, you did a really good job especially with the tight space that a mustang offers. also, props on choosing second skin, I recommend them to everyone I talk to about sound dampening.
11-03-2008, 04:59 PM
#8
4th Gear Member
Join Date: Aug 2008
Location: Mississippi
Posts: 1,679
It looks good. The reason that it didn't kill your exhaust note is because the damplifier just weighs down the flat panels and physically dampens the vibrations that are caused by road noise, stereo, etc. It DOES NOT kill airborne sound waves, such as those caused by the fact that your exhaust tips are vibrating at the same frequency, i.e. the notorious exhaust drone.
I suspect I'll do this over time and not kill 25 hours in a short period. Maybe do the trunk one day, and the rest - sometime later depending on how promising the trunk results are.
11-04-2008, 05:09 AM
#9
1st Gear Member
Thread Starter
Join Date: Apr 2007
Posts: 120
I didn't do everything at onces, it took me 3 weekends to do it.
If you are gonna use the overkill product, make sure to use the thin one, not the pro. I don't think you can make it fit below the seats if you use pro. You can always put another layer with the thin one if there is room.
And dont use pro where the panels are either, if its as hard to compress as the LLP you will have alot of work to make it fit.
The trunk of course are no problem to fill up with everything you got.