
AutoMeter and SOS Radio Panel Install..PICS.
 12-13-2008, 09:43 PM
#1
5th Gear Member
Thread Starter
Join Date: Feb 2005
Location: Anaheim, California
Posts: 4,205
So, in preparation of installing the Vortech on my 05, I decided to get the gauges in place prior to the install. I'm personally not very fond of pillar pods, nor did I want to use a center dash pod, due to visibility issues, as well as trying to stay as covert as possible.
My gauges of choice are the AutoMeter Z Series, which in my opinion are the low key look I was going for, and quite honestly, they are one of the more reasonably priced gauges from AutoMeter.
As mentioned above, I personally am not a big fan of pillar pods or center dash pods. So, I decided on the Speed of Sound Radio Dash Panel. More on that later.
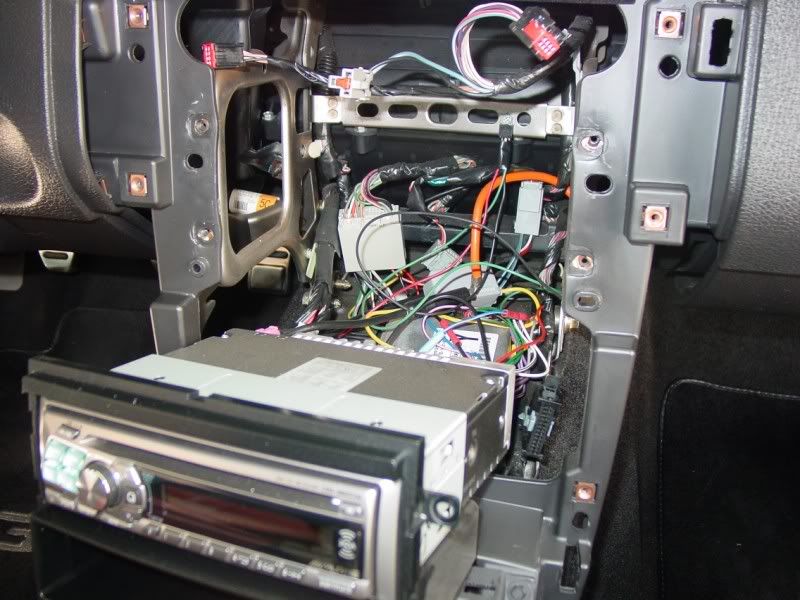
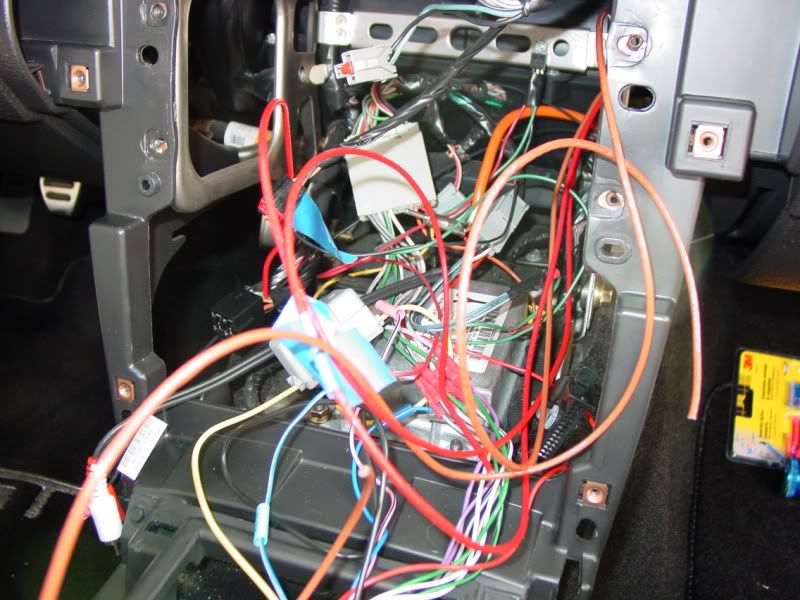
I won't bore everyone with the removal of the center console and such, because most people have already done that, or at least read the procedure somewhere. Anyway, here is what it looks like with the center stack torn down to the radio.

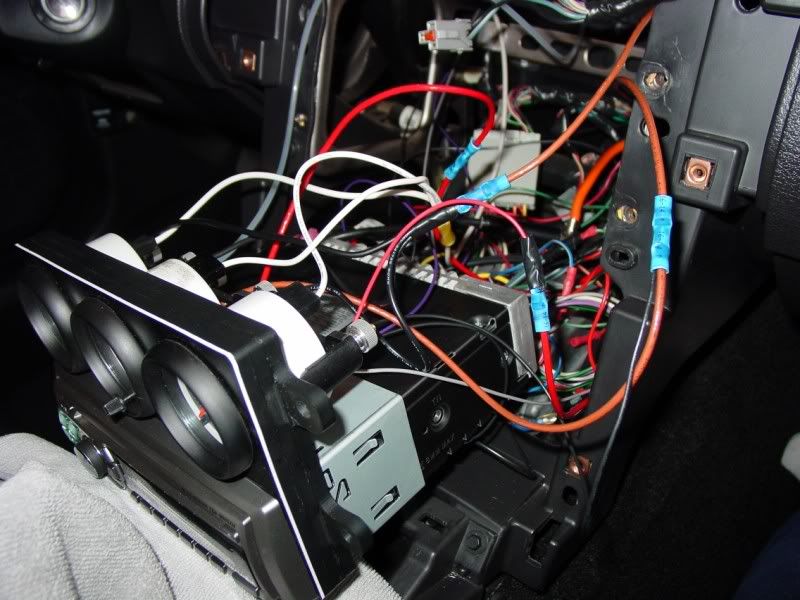
Removal of radio and in my case, the single DIN storage cubby....
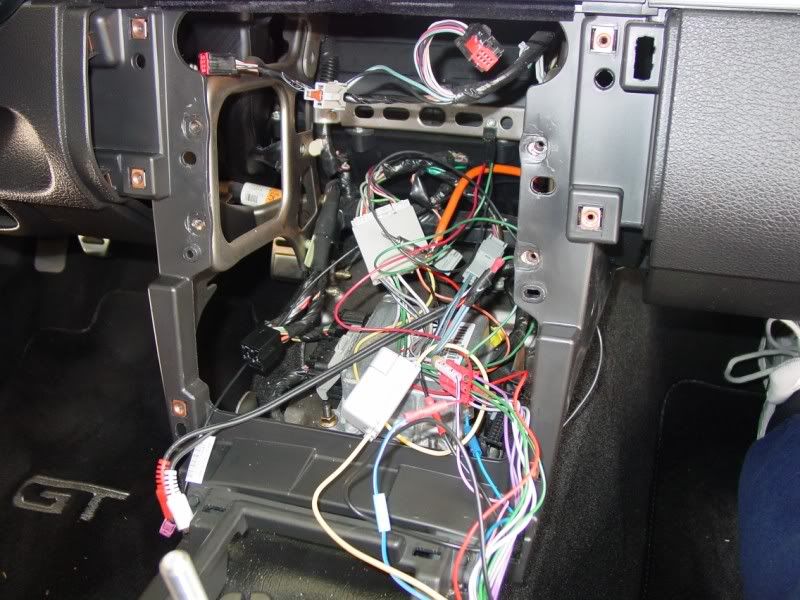
And, the remaining mess...
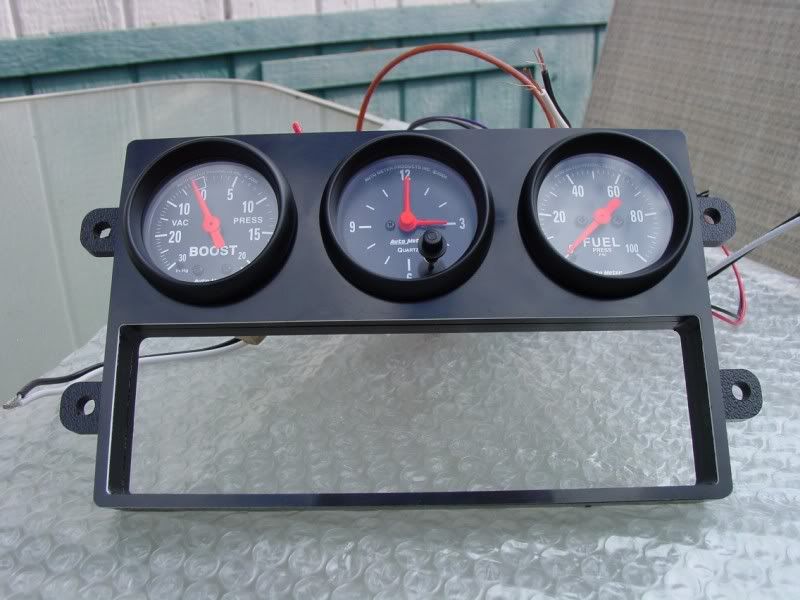
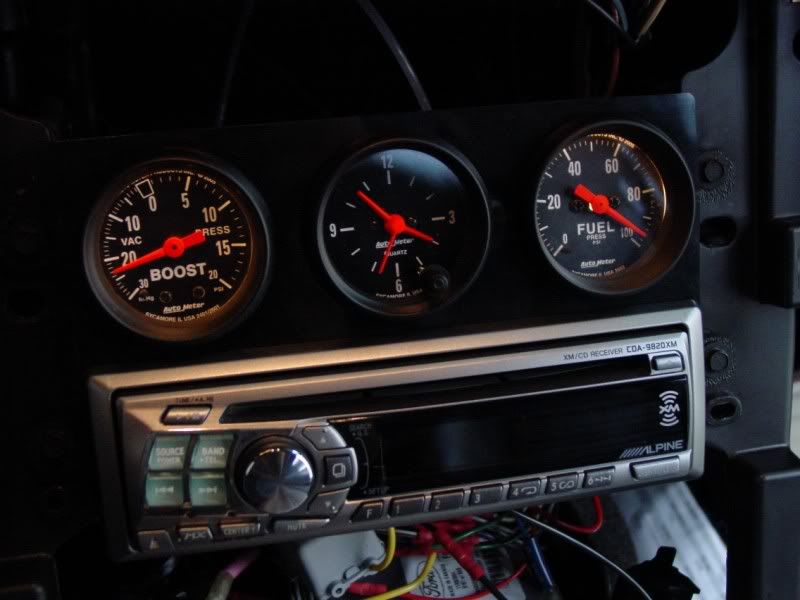
Here is the SOS dash panel with the gauges already installed. I was going to remove the gauges and show just the panel, but more on that later...
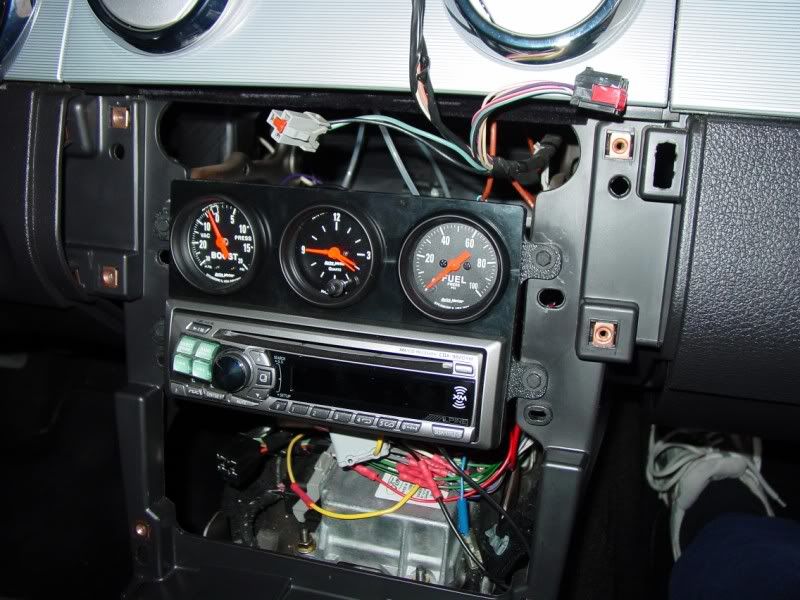
This is with the installation box for the stereo in place...

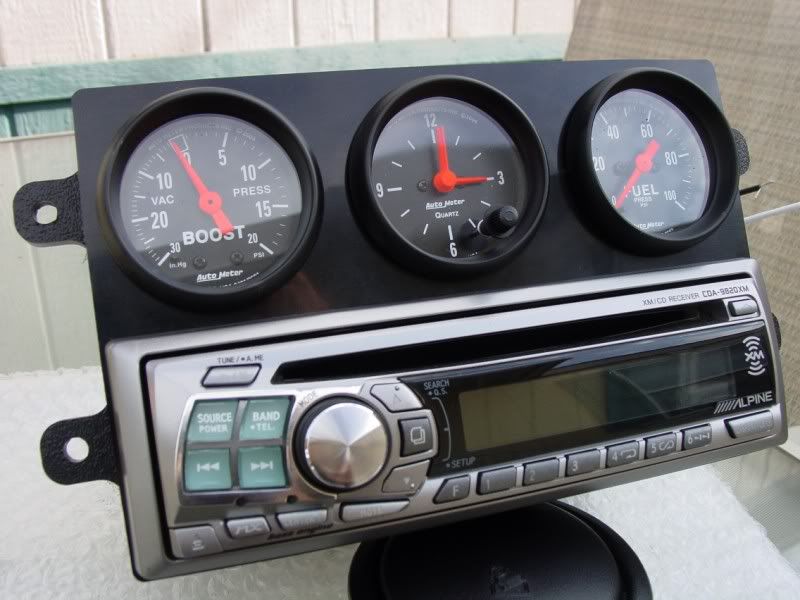
And finally, with the radio re-installed in the dash panel...
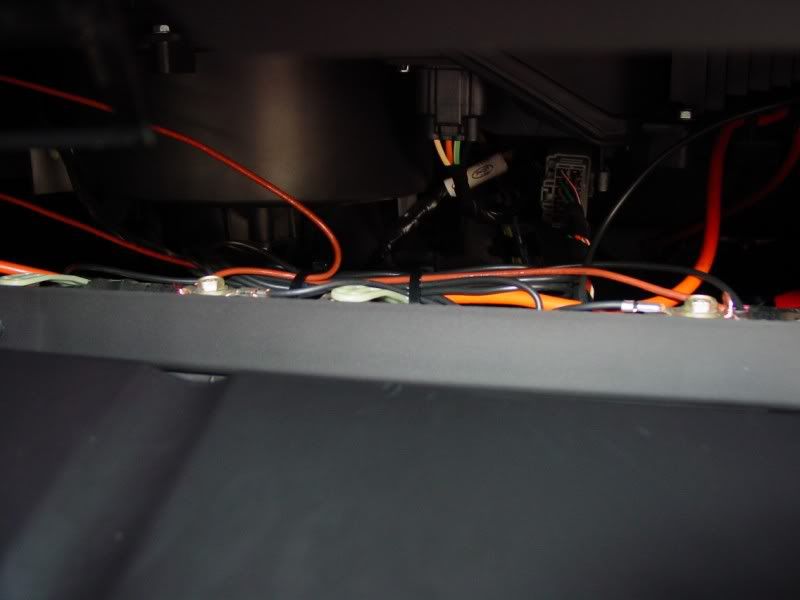
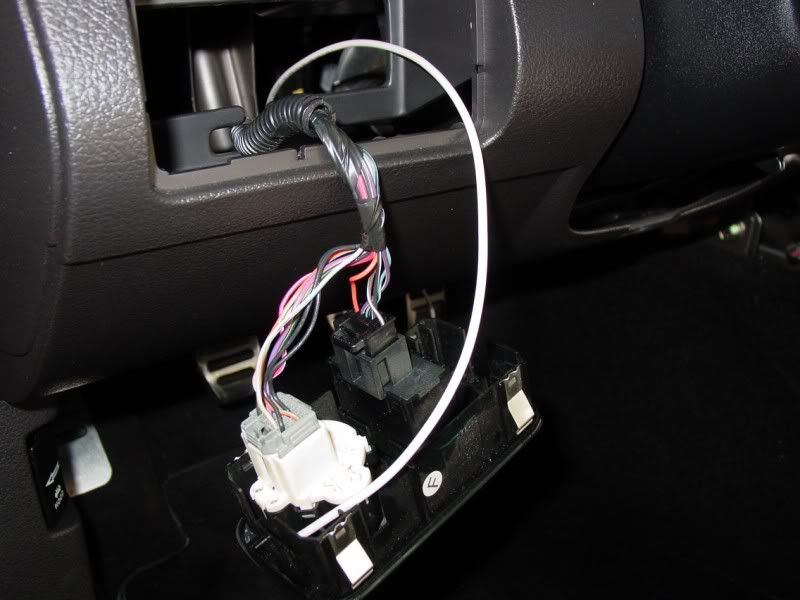
The two main lines that need to be pulled into the radio area for the gauge install are power and ground. If you drop down the glove box, by squeezing in the side panels, you will see two very nice ground bolts just waiting to be used...
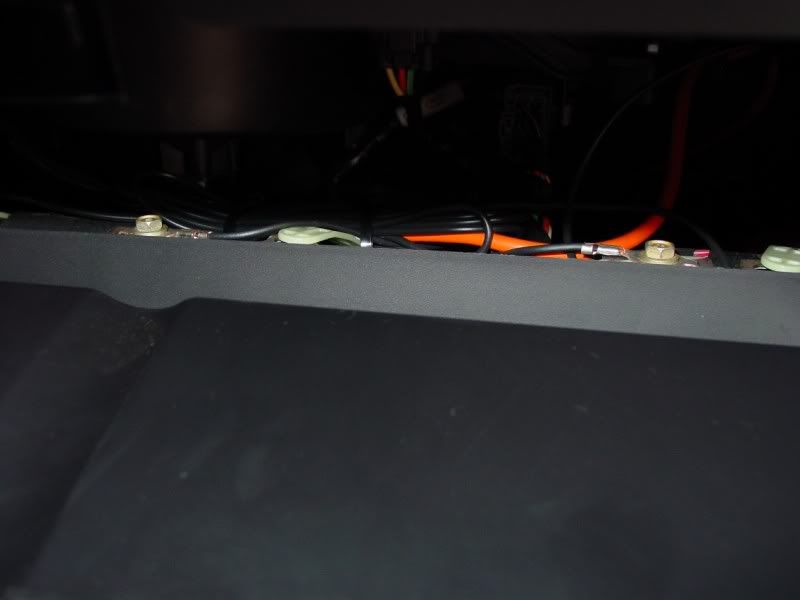
I ran two ground wires, one from each bolt. One ground to use on the gauge lighting, and one ground to use on the gauge function itself...
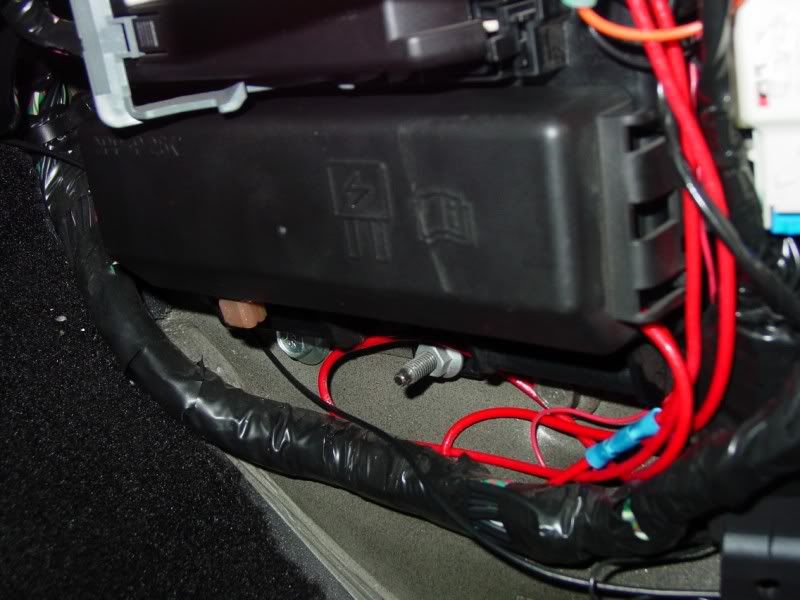
As far as the power connections, I ran two lines over to the fuse panel in the passenger kick panel. One to be switched, and one to be unswitched. (for the clock I installed) The add a circuit you see connected was already there from my shift light install. I used the same add a circuit for the switched power to the gauges. Not shown, I added a second add a circuit to a constant hot fuse, in my case, the fuse for the power mirrors.
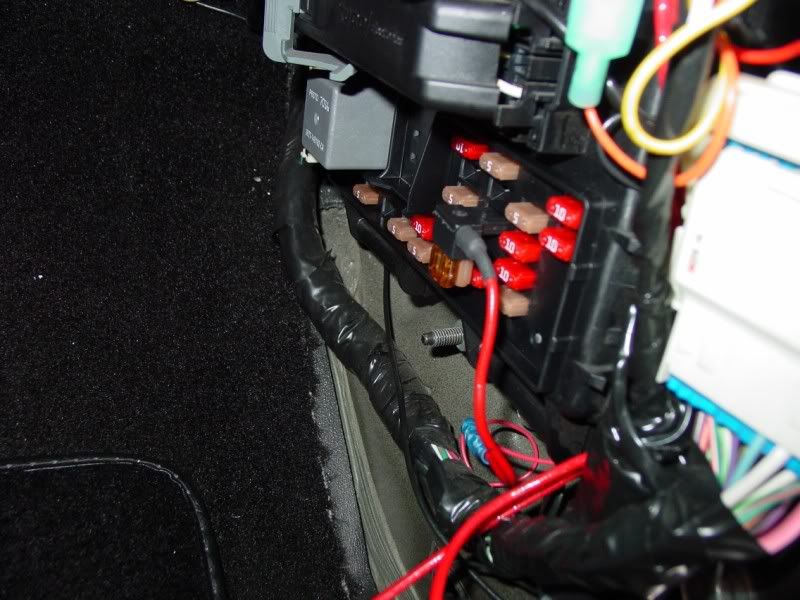
After connecting both add a circuit power lines, the fuse box gets buttoned back up...
So at this point, this is what your dash opening looks like...
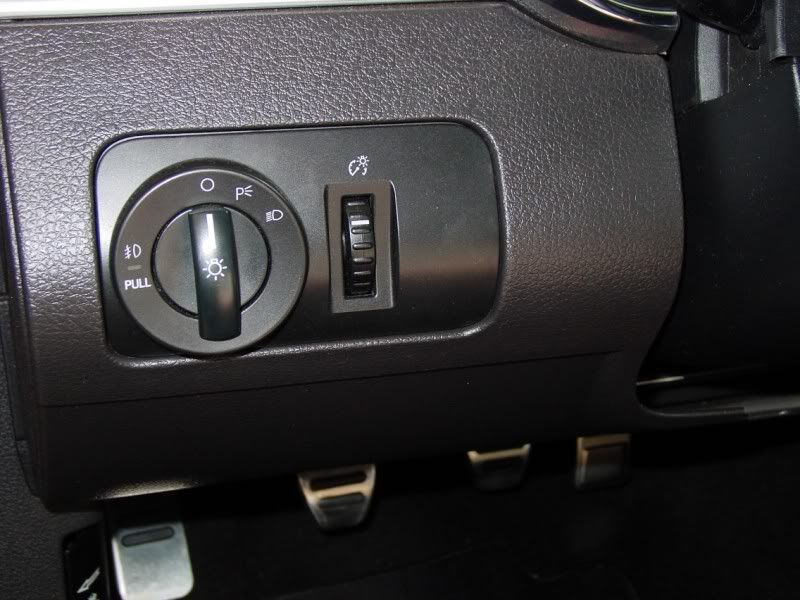
Next, we need to run power to the lights of the gauges. You also want this to be dimmer controlled. So, pop out the headlight switch. This can be done with no tools. Just press up from under the round area on the switch, and it will pop out....Run one wire from the headlight switch area over to your dash opening...
The second pin, which is a white wire with a blue stripe, is the dimmer controlled light power. I used a quick connect to tap this wire for the gauges...

Re-install the light switch...
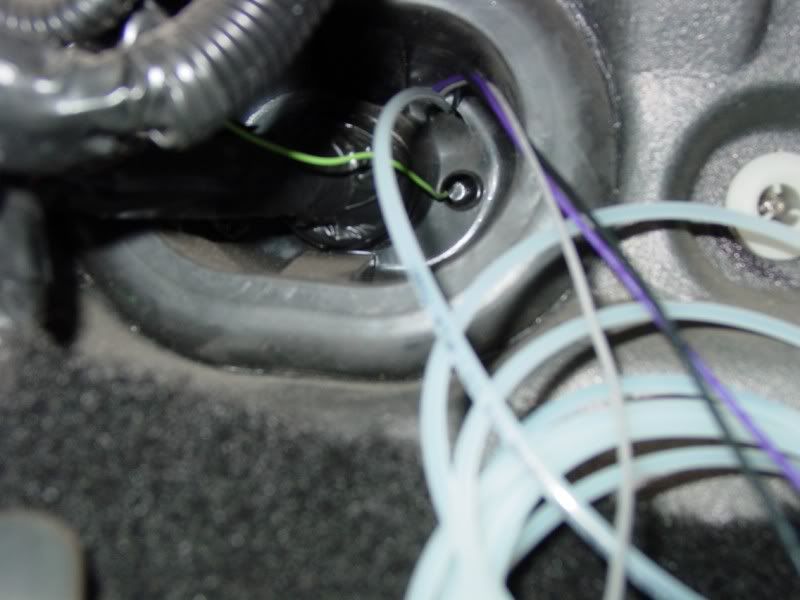
Directly behind the clutch pedal, there is a rubber grommet that is the perfect access to get your lines (fuel pressure wire loom, and boost / vacuum tubing) into the engine bay. The green wire you see is the wire that I had run previously for the shift light.
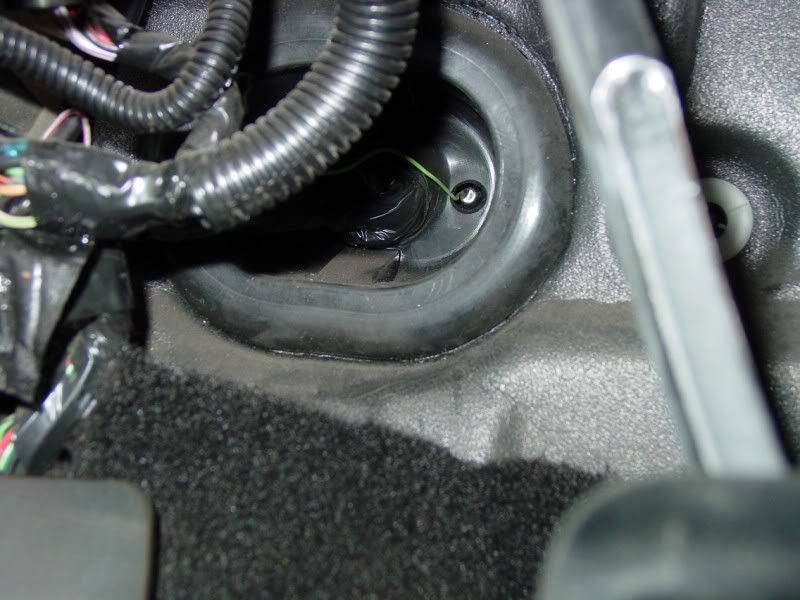
Because of the size of the connector for the fuel pressure gauge, I slit the top of the grommet to allow the lines to be fed through from the inside.
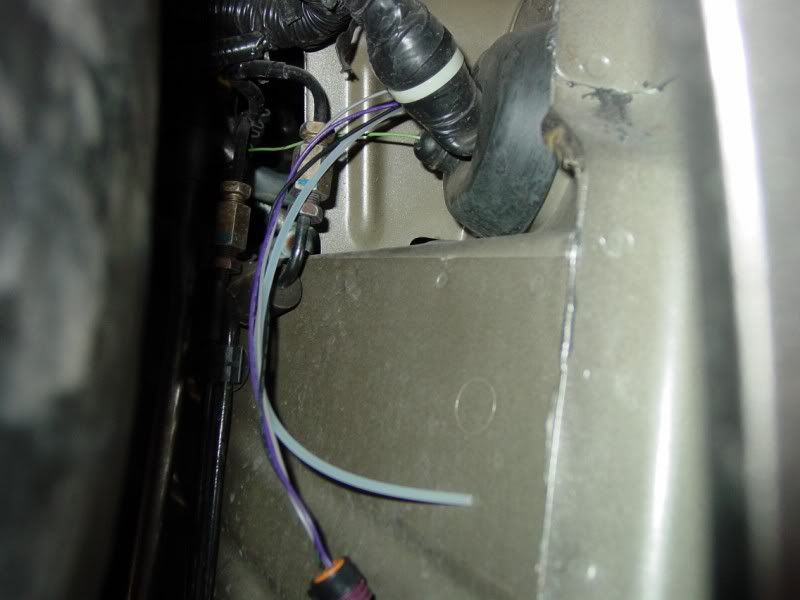
Now, to access those lines you just fed through, you need to remove three push pin connectors from the inside of the drivers side wheel well, and peel it back. When you do, you will see the lines that you fed through from the drivers compartment...
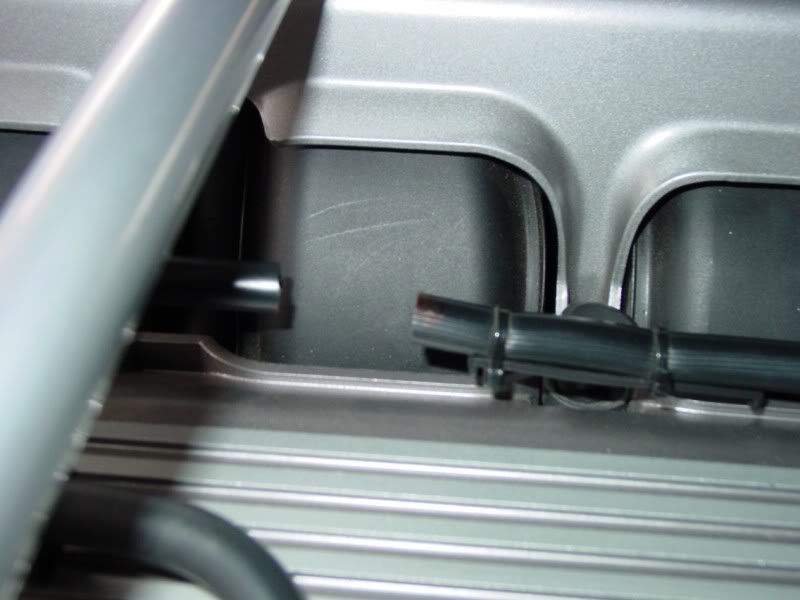
Now, under the hood, you can reach down below the master brake cylinder, and grab these lines that you fed through...
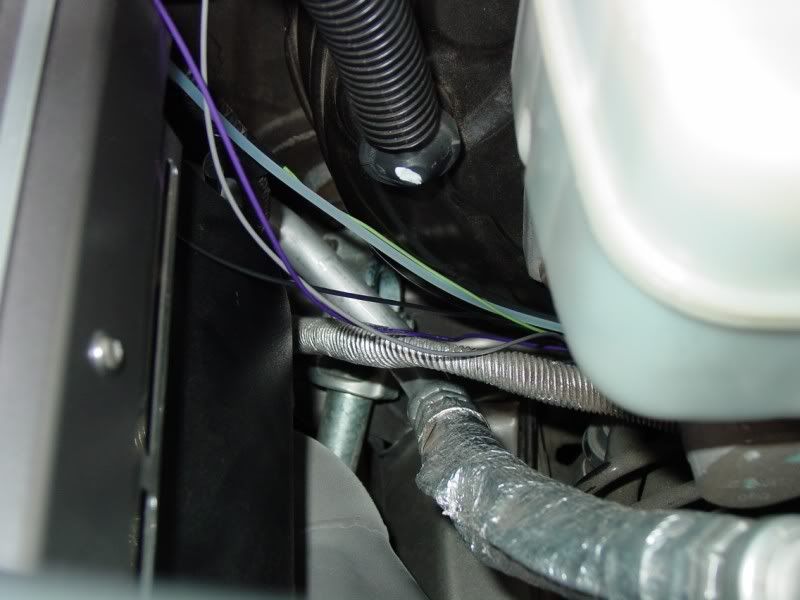
Be very gentle when pulling the lines up to the engine bay. The tubing for the boost gauge will kink very easily, and you do not want to re-do this part...
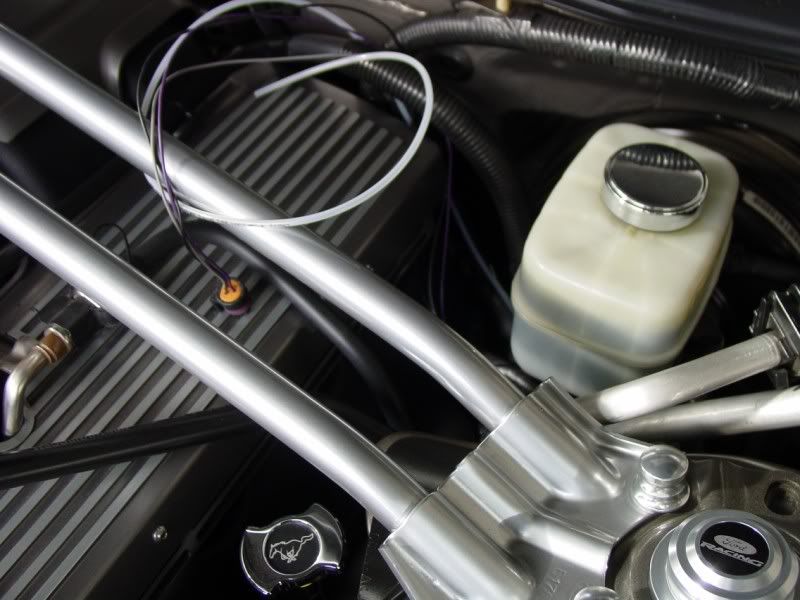
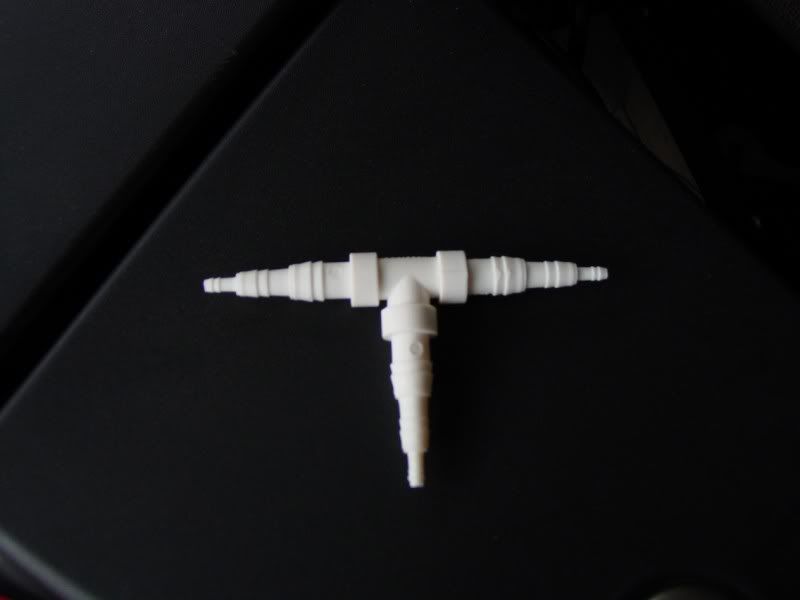
The vacuum Tee that comes with the gauge will not work for this particular application, but, this multi size Tee is easily available at your local auto parts store, and fits the bill perfectly...
CONTINUED NEXT POST.....
My gauges of choice are the AutoMeter Z Series, which in my opinion are the low key look I was going for, and quite honestly, they are one of the more reasonably priced gauges from AutoMeter.
As mentioned above, I personally am not a big fan of pillar pods or center dash pods. So, I decided on the Speed of Sound Radio Dash Panel. More on that later.
I won't bore everyone with the removal of the center console and such, because most people have already done that, or at least read the procedure somewhere. Anyway, here is what it looks like with the center stack torn down to the radio.
Removal of radio and in my case, the single DIN storage cubby....
And, the remaining mess...
Here is the SOS dash panel with the gauges already installed. I was going to remove the gauges and show just the panel, but more on that later...
This is with the installation box for the stereo in place...
And finally, with the radio re-installed in the dash panel...
The two main lines that need to be pulled into the radio area for the gauge install are power and ground. If you drop down the glove box, by squeezing in the side panels, you will see two very nice ground bolts just waiting to be used...
I ran two ground wires, one from each bolt. One ground to use on the gauge lighting, and one ground to use on the gauge function itself...
As far as the power connections, I ran two lines over to the fuse panel in the passenger kick panel. One to be switched, and one to be unswitched. (for the clock I installed) The add a circuit you see connected was already there from my shift light install. I used the same add a circuit for the switched power to the gauges. Not shown, I added a second add a circuit to a constant hot fuse, in my case, the fuse for the power mirrors.
After connecting both add a circuit power lines, the fuse box gets buttoned back up...
So at this point, this is what your dash opening looks like...
Next, we need to run power to the lights of the gauges. You also want this to be dimmer controlled. So, pop out the headlight switch. This can be done with no tools. Just press up from under the round area on the switch, and it will pop out....Run one wire from the headlight switch area over to your dash opening...
The second pin, which is a white wire with a blue stripe, is the dimmer controlled light power. I used a quick connect to tap this wire for the gauges...
Re-install the light switch...
Directly behind the clutch pedal, there is a rubber grommet that is the perfect access to get your lines (fuel pressure wire loom, and boost / vacuum tubing) into the engine bay. The green wire you see is the wire that I had run previously for the shift light.
Because of the size of the connector for the fuel pressure gauge, I slit the top of the grommet to allow the lines to be fed through from the inside.
Now, to access those lines you just fed through, you need to remove three push pin connectors from the inside of the drivers side wheel well, and peel it back. When you do, you will see the lines that you fed through from the drivers compartment...
Now, under the hood, you can reach down below the master brake cylinder, and grab these lines that you fed through...
Be very gentle when pulling the lines up to the engine bay. The tubing for the boost gauge will kink very easily, and you do not want to re-do this part...
The vacuum Tee that comes with the gauge will not work for this particular application, but, this multi size Tee is easily available at your local auto parts store, and fits the bill perfectly...
CONTINUED NEXT POST.....
 12-13-2008, 09:47 PM
#2
5th Gear Member
Thread Starter
Join Date: Feb 2005
Location: Anaheim, California
Posts: 4,205
CONTINUED.....
The vacuum line that runs to the fuel pressure sensor is easily accessable for this application...
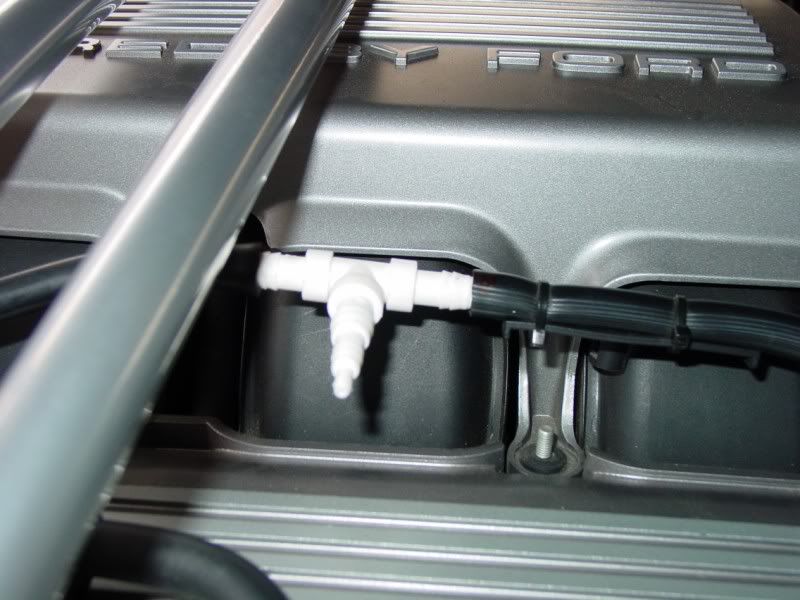
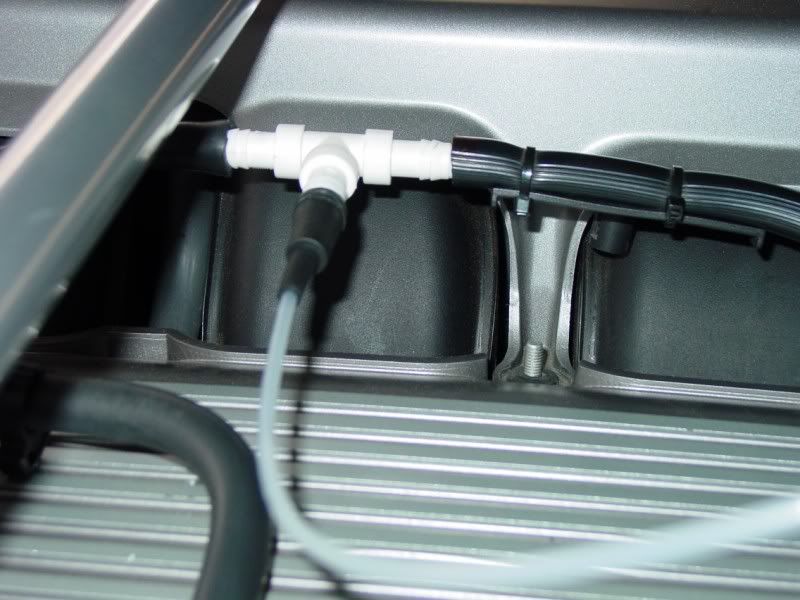
I left some slack in the vacuum line, because the fuel rail adapter that I was expecting did not arrive. When it is installed, it will elevate the vacuum line from where it now sits.

Now that all the wiring and mechanical lines are run, it's time to connect everything to the gauges. Won't bore you with all those connections...

Once those connections are done, time to slide the entire assembly back into the dash...
Once the assembly is slid back into place, re-secure it with the four bolts...
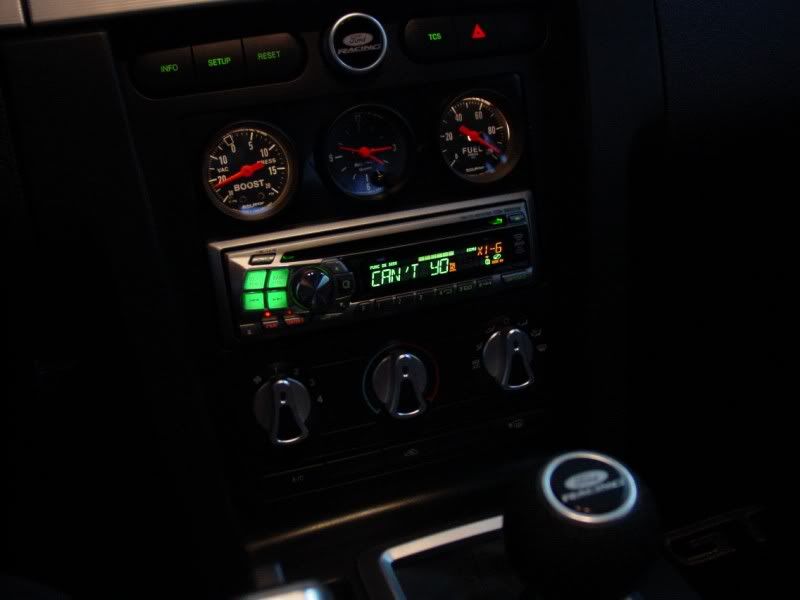
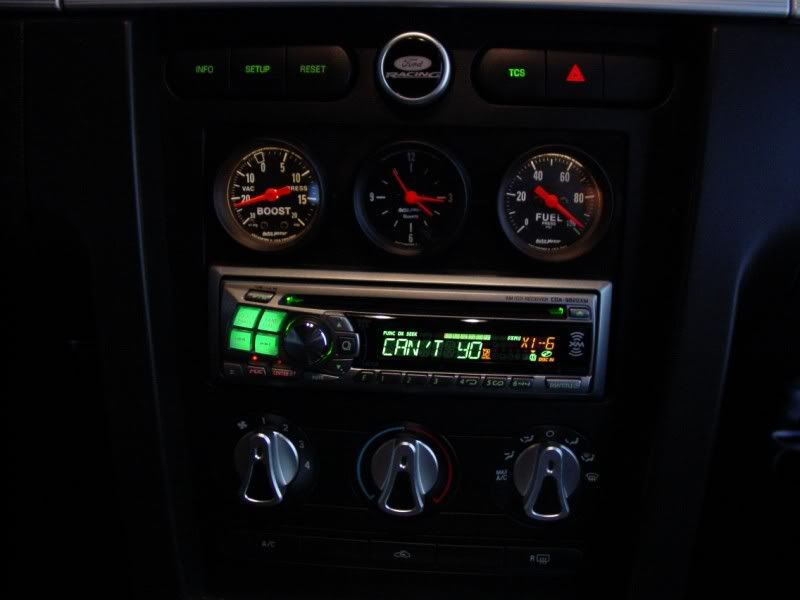
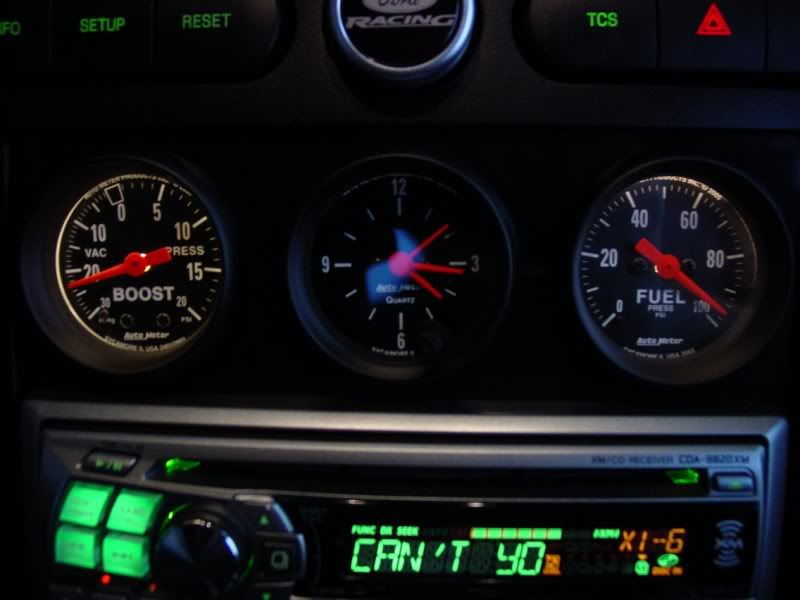
Before buttoning up the rest of the dash stack, I tested the gauges and lighting at this point.
As noted earlier, my fuel rail adapter did not arrive as planned. I thought the fuel gauge would just stay dead without being hooked up under the hood...WRONG!! I caught the key before the gauge wrapped completely. At this point, I pulled the panel back off, and disconnected the wire loom from the back of the gauge until I receive the fuel rail adapter and install it. At that point, I will also be installing blue LCD bulbs in the gauges to match the my color I normally use...
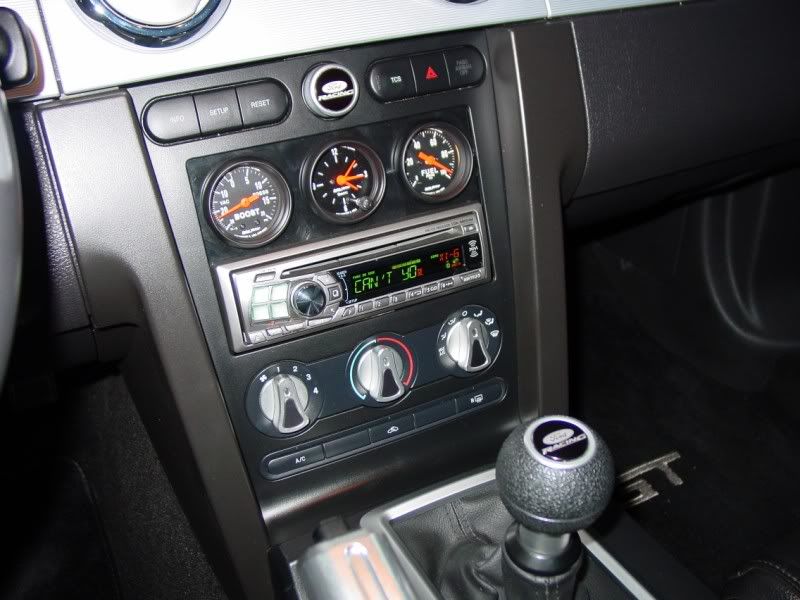
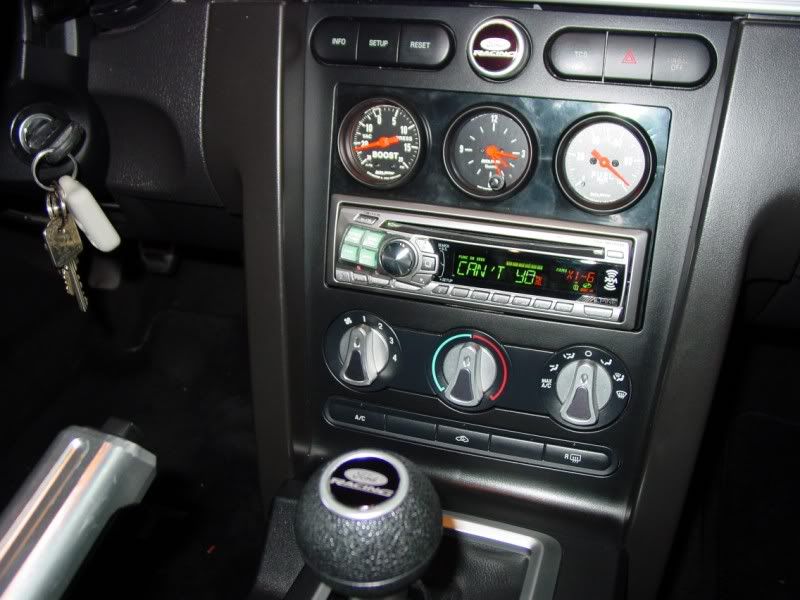
And here is the finished project...
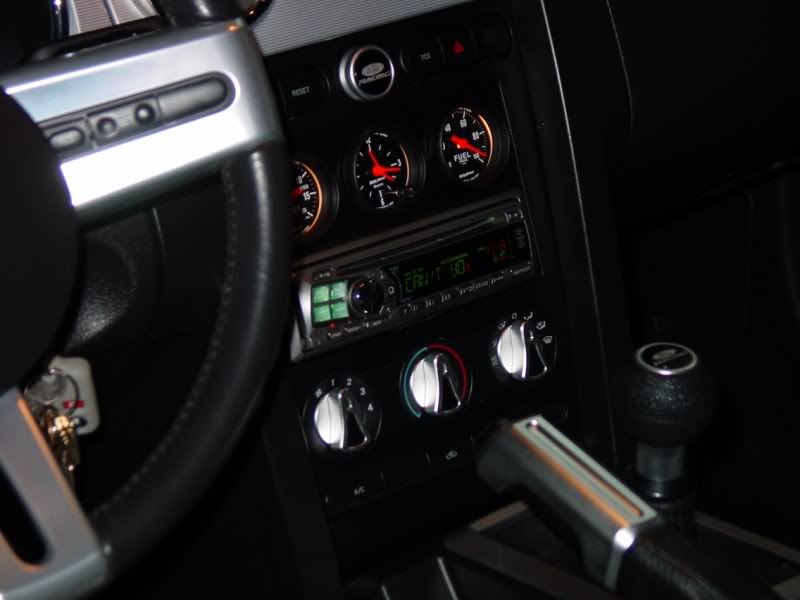
So, about the SOS dash panel.....
I am pleased with the results of the mod. Exactly what I was looking for, from a standpoint of keeping the gauges low key, and I already had a single DIN radio. So for me, works pefectly....But....
When I looked at the SOS website, this is the description they give of the dash panel...
Quote:
These CNC machined panels are made with the quality and attention to detail you�d expect from Speed of Sound. Your choice of Brushed Aluminum or Satin Black finish is available. The panels bolt firmly in place using the OEM radio bolt locations for a tight, trouble-free installation.
I made very poor assumption that this was describing a metal piece. It is not. The dash panel is plastic. The face of it, that is exposed, is made of a formica, or masonite type material....Will it work? Yes. Worth the purchase price? We shall see...
Secondly, because of the close tolerance of available room, once the gauges are placed in location, there is not enough room behind them to completely use the securing brackets furnished by AutoMeter. The middle location is fine, but the two sides are so snug left to right, that I had to modify both of those brackets to work..That said....
The holes for the gauges are SO TIGHT, it was a struggle to get the gauges in all the way flush. Secondly, the DIN area for the radio was also way too snug. I had to use a file, and clean up all four corners to get the radio installation bracket to fit, and even then, it was very snug.....
Tight tolerance is one thing, and appreciated, but I think this one could have been machined with a bit more tolerance, to facilitate a much easier install....
Special thanks to Hammeron, for taking the time to give me some great guidance, and links to some very helpful threads.....Appreciated very much......!!!!
Mike
The vacuum line that runs to the fuel pressure sensor is easily accessable for this application...
I left some slack in the vacuum line, because the fuel rail adapter that I was expecting did not arrive. When it is installed, it will elevate the vacuum line from where it now sits.
Now that all the wiring and mechanical lines are run, it's time to connect everything to the gauges. Won't bore you with all those connections...
Once those connections are done, time to slide the entire assembly back into the dash...
Once the assembly is slid back into place, re-secure it with the four bolts...
Before buttoning up the rest of the dash stack, I tested the gauges and lighting at this point.
As noted earlier, my fuel rail adapter did not arrive as planned. I thought the fuel gauge would just stay dead without being hooked up under the hood...WRONG!! I caught the key before the gauge wrapped completely. At this point, I pulled the panel back off, and disconnected the wire loom from the back of the gauge until I receive the fuel rail adapter and install it. At that point, I will also be installing blue LCD bulbs in the gauges to match the my color I normally use...
And here is the finished project...
So, about the SOS dash panel.....
I am pleased with the results of the mod. Exactly what I was looking for, from a standpoint of keeping the gauges low key, and I already had a single DIN radio. So for me, works pefectly....But....
When I looked at the SOS website, this is the description they give of the dash panel...
Quote:
These CNC machined panels are made with the quality and attention to detail you�d expect from Speed of Sound. Your choice of Brushed Aluminum or Satin Black finish is available. The panels bolt firmly in place using the OEM radio bolt locations for a tight, trouble-free installation.
I made very poor assumption that this was describing a metal piece. It is not. The dash panel is plastic. The face of it, that is exposed, is made of a formica, or masonite type material....Will it work? Yes. Worth the purchase price? We shall see...
Secondly, because of the close tolerance of available room, once the gauges are placed in location, there is not enough room behind them to completely use the securing brackets furnished by AutoMeter. The middle location is fine, but the two sides are so snug left to right, that I had to modify both of those brackets to work..That said....
The holes for the gauges are SO TIGHT, it was a struggle to get the gauges in all the way flush. Secondly, the DIN area for the radio was also way too snug. I had to use a file, and clean up all four corners to get the radio installation bracket to fit, and even then, it was very snug.....
Tight tolerance is one thing, and appreciated, but I think this one could have been machined with a bit more tolerance, to facilitate a much easier install....
Special thanks to Hammeron, for taking the time to give me some great guidance, and links to some very helpful threads.....Appreciated very much......!!!!
Mike


 12-13-2008, 10:44 PM
#7
5th Gear Member
Thread Starter
Join Date: Feb 2005
Location: Anaheim, California
Posts: 4,205
Thanks guys, appreciate it.....
Yeah, the stereo clock works, but if you leave it on the clock display, then none of the other XM info displays...And you are correct, wanted to stay with the same style. That said, I am sure it will end up being a placeholder for a wideband eventually....
Thanks...
Well done Mike, just curious for the clock gauge instead of something else... doesnt you stereo clock work ok? Just wondering your intentions.. style and class maybe..
Thanks...
12-14-2008, 12:57 AM
#9
3rd Gear Member
Join Date: Jun 2008
Location:
Posts: 638
Nice write up and glad you noted it is not a metal piece. I bought one of these for my car and wanted it for my N2O guages and switches, radio but in the end went with a DVD screen and put my guages in Roush AC vent pods. SOS does really nice work but I to thought it would be made of metal when I ordered one. Does look nice in your car and again great write up.
