
DIY: Halo Fog Lights

Thread Starter
5th Gear Member
Joined: Sep 2007
Posts: 2,059
From: Nor Cali
This mod will really turn heads at dusk/night.
1. Remove radiator cover. There's 6 plastic tabs you'll need to pry off. Sorry, no pic.
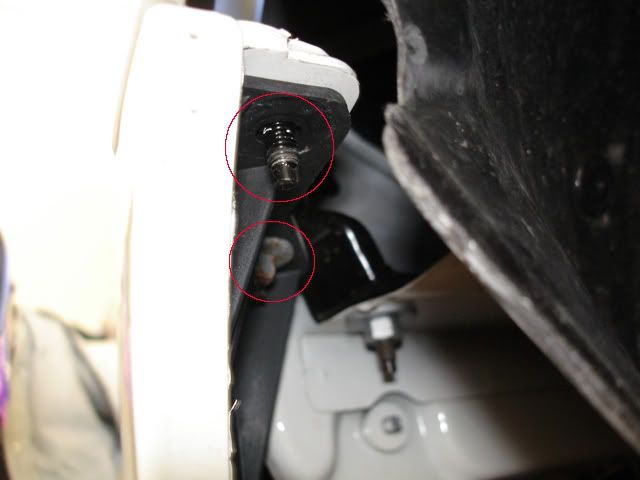
2. Removeupper bumper bolts-one on each side
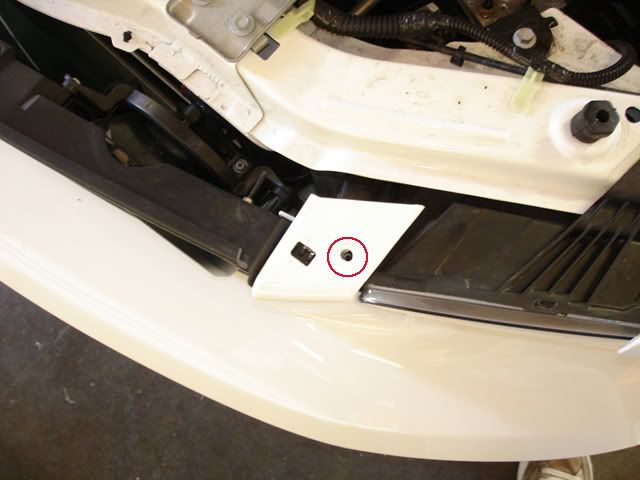
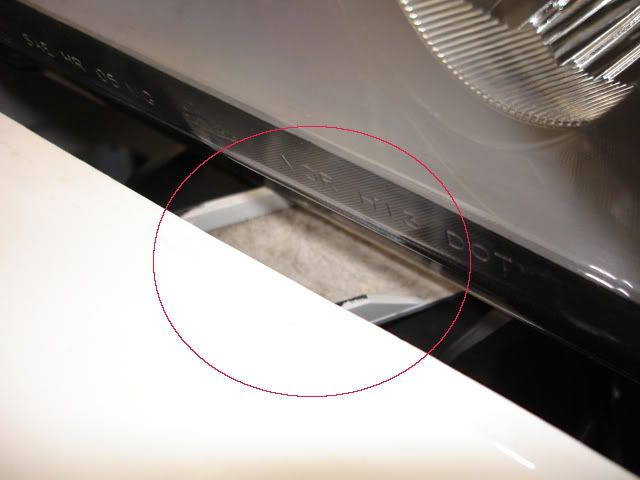
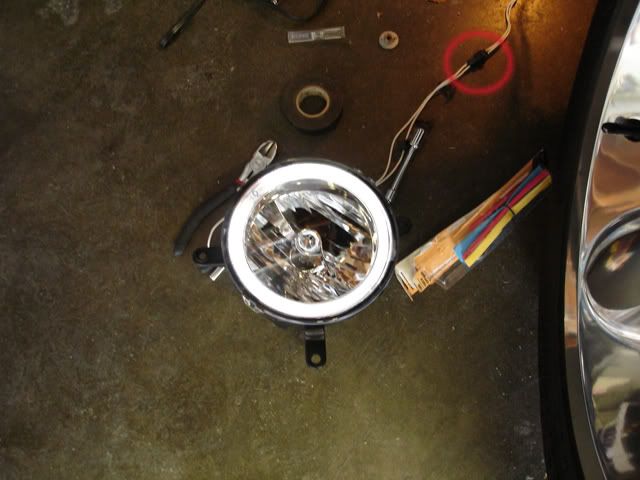
3. Remove screws where the red circles are. I've already done this in the picture.
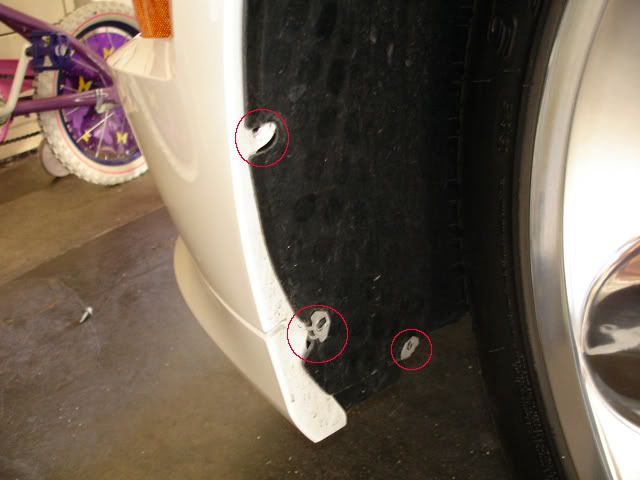
4. Pull back wheelwell cover from bumper. You'll see two bumper bolts. There's two on each side of the car. Remove them.
5. Remove any bolts under air dam/front spoiler that attaches to bumper that may impede separation of bumper from body. My GT/CS has5 small bolts. Sorry forgot to take pics.
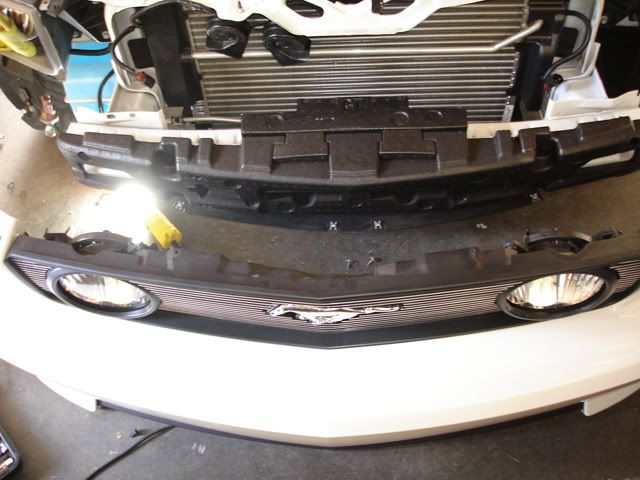
6. Pull side of bumper down, to separate it from the mounting bolts, and then out to the side to separate bumper (red)from body (green). The red area hooks around the green area so that's why you'll need to pull the bumper out towards you from the side.If you don't do this, it'll be tough to pull the bumper off from the front of the car.
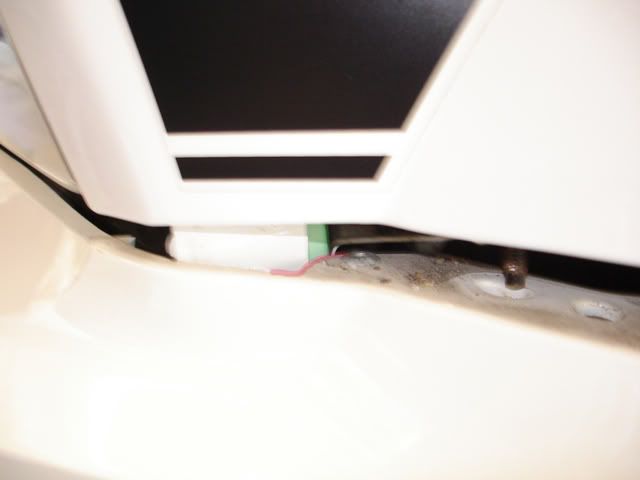
7.This is the bumper guide tab which slides under the headlight housing. This will be your guide when putting the bumper back on. Make sure it slides back under the headlight housing.
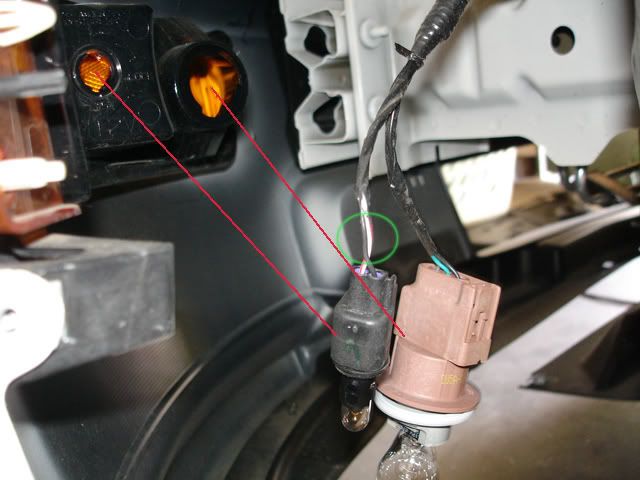
8. Before completely separating bumper from body you'll need to remove the corner light bulb socketsorelse you'll pull the wires and risk breaking/damaging them. Just turn them counterclockwise a 1/4 turn to remove.
9. Pull bumper off one side at a time.
10. Remove four torx screws from fog lamp and remove lamp.

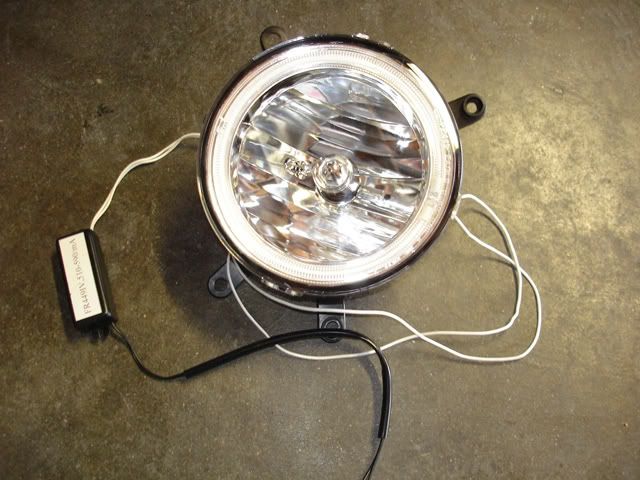
11. Halo fog lamps.
12. I used an x-acto knife to slice away the insulation of the two wireson the smaller bulb. I then soldered the halo wires to these and wrapped them with electrical tape.The halo wires are both black and it doesn't matter which wires go to which. The thing circled in green was later attached tothe car body after everything was put back together. It came with 3M tape.
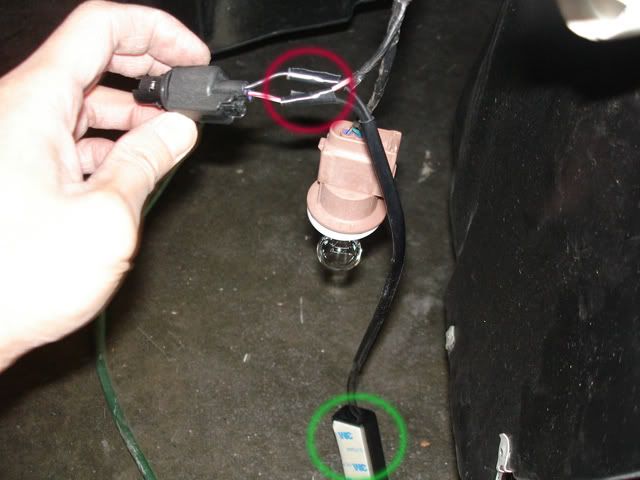
13. Turn on halo to test it. Connector circled in red allows separation of halo from spliced section.
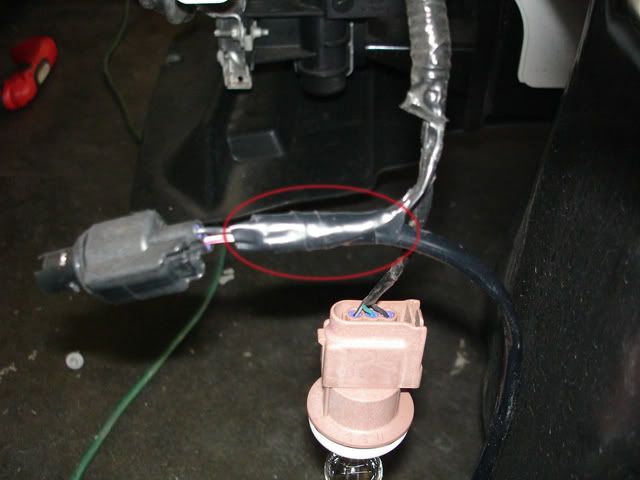
14. I then wrapped the two spliced wires together twice with electrical tape to keep out the elements.
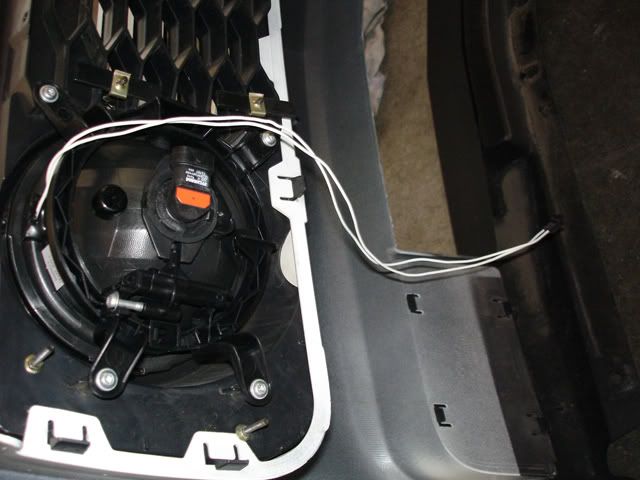
15. Disconnect halo from spliced section and mount halointo grill.
16.Reinstall bumperonto car and tighten all screws except for the wheelwell-to-bumper screws. Don't put those on yet. You'll still need access to the corner light area. Reinstall corner light bulb sockets.
17. Route halo wires to the side and connect to splicedsection from the bottom of car. Shown is the driver's side halo.
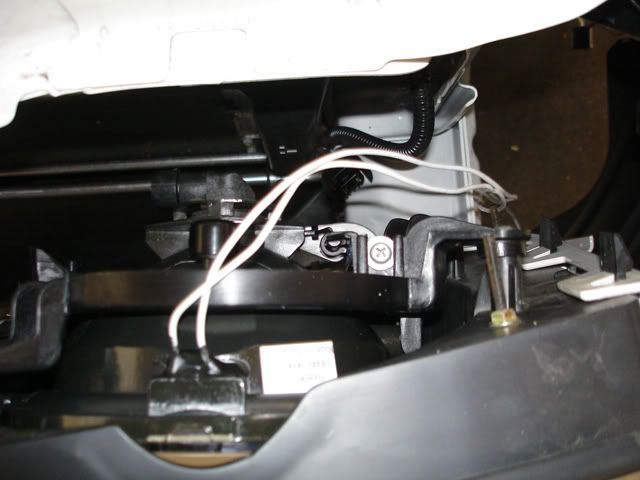
18. Put wheelwell-to-bumper screws back on to close everything up.
19. Attach black unit with 3M tape to car body. Replace radiator cover.
20. Make sure all bolts are tightened then go turn on your halos and enjoy!
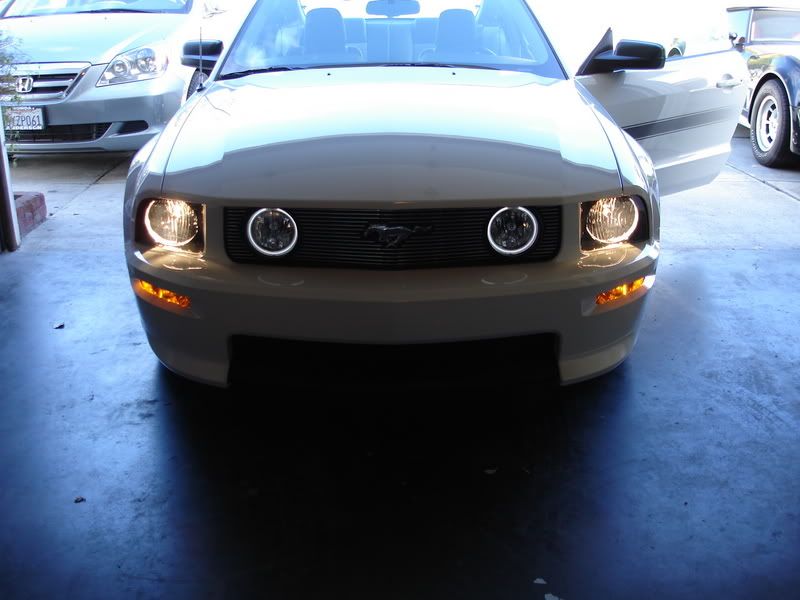
Stay tuned for my halo headlights DIY. That's when I get them of course.
1. Remove radiator cover. There's 6 plastic tabs you'll need to pry off. Sorry, no pic.
2. Removeupper bumper bolts-one on each side
3. Remove screws where the red circles are. I've already done this in the picture.
4. Pull back wheelwell cover from bumper. You'll see two bumper bolts. There's two on each side of the car. Remove them.
5. Remove any bolts under air dam/front spoiler that attaches to bumper that may impede separation of bumper from body. My GT/CS has5 small bolts. Sorry forgot to take pics.
6. Pull side of bumper down, to separate it from the mounting bolts, and then out to the side to separate bumper (red)from body (green). The red area hooks around the green area so that's why you'll need to pull the bumper out towards you from the side.If you don't do this, it'll be tough to pull the bumper off from the front of the car.
7.This is the bumper guide tab which slides under the headlight housing. This will be your guide when putting the bumper back on. Make sure it slides back under the headlight housing.
8. Before completely separating bumper from body you'll need to remove the corner light bulb socketsorelse you'll pull the wires and risk breaking/damaging them. Just turn them counterclockwise a 1/4 turn to remove.
9. Pull bumper off one side at a time.
10. Remove four torx screws from fog lamp and remove lamp.
11. Halo fog lamps.
12. I used an x-acto knife to slice away the insulation of the two wireson the smaller bulb. I then soldered the halo wires to these and wrapped them with electrical tape.The halo wires are both black and it doesn't matter which wires go to which. The thing circled in green was later attached tothe car body after everything was put back together. It came with 3M tape.
13. Turn on halo to test it. Connector circled in red allows separation of halo from spliced section.
14. I then wrapped the two spliced wires together twice with electrical tape to keep out the elements.
15. Disconnect halo from spliced section and mount halointo grill.
16.Reinstall bumperonto car and tighten all screws except for the wheelwell-to-bumper screws. Don't put those on yet. You'll still need access to the corner light area. Reinstall corner light bulb sockets.
17. Route halo wires to the side and connect to splicedsection from the bottom of car. Shown is the driver's side halo.
18. Put wheelwell-to-bumper screws back on to close everything up.
19. Attach black unit with 3M tape to car body. Replace radiator cover.
20. Make sure all bolts are tightened then go turn on your halos and enjoy!
Stay tuned for my halo headlights DIY. That's when I get them of course.

Thread Starter
5th Gear Member
Joined: Sep 2007
Posts: 2,059
From: Nor Cali
ORIGINAL: ReaperGT
Nice write up and that looks really sweet. How much did those halos cost you?
Nice write up and that looks really sweet. How much did those halos cost you?
I did this mod last December and since then one of the halo inverters died. The inverter is the little black box circled in green in the pictures above. I figured it was because water got into the unit because it wasn't sealed properly. I purchased two new inverters for $4.50ea. and haven't had time to replace them. I'm going to seal the hole where the wiring goes into the inverter this time around so water doesn't get into it.

5th Gear Member
Joined: May 2005
Posts: 2,195
From: Loooong Island!
sweet ***.. i never really thought they would look that good.. i might be buyign my own set now haha
good job.. i wnana see the headlights also.. any one have pics of the halo headlights?
also kind of confused. what are the halo lights spliced into?? is that the running lights?
good job.. i wnana see the headlights also.. any one have pics of the halo headlights?
also kind of confused. what are the halo lights spliced into?? is that the running lights?