What are you working on?
 10-15-2014, 06:28 AM
#8571
6th Gear Member
Join Date: Aug 2011
Location: Thomasville, NC Where we beat headers into submission!!
Posts: 7,233
 10-15-2014, 07:54 AM
#8572
 10-15-2014, 10:09 AM
#8574
6th Gear Member
Here's my write up
Just installed carbon look aeorcatch hood pins...
Of course it called for taking off the whole front end.

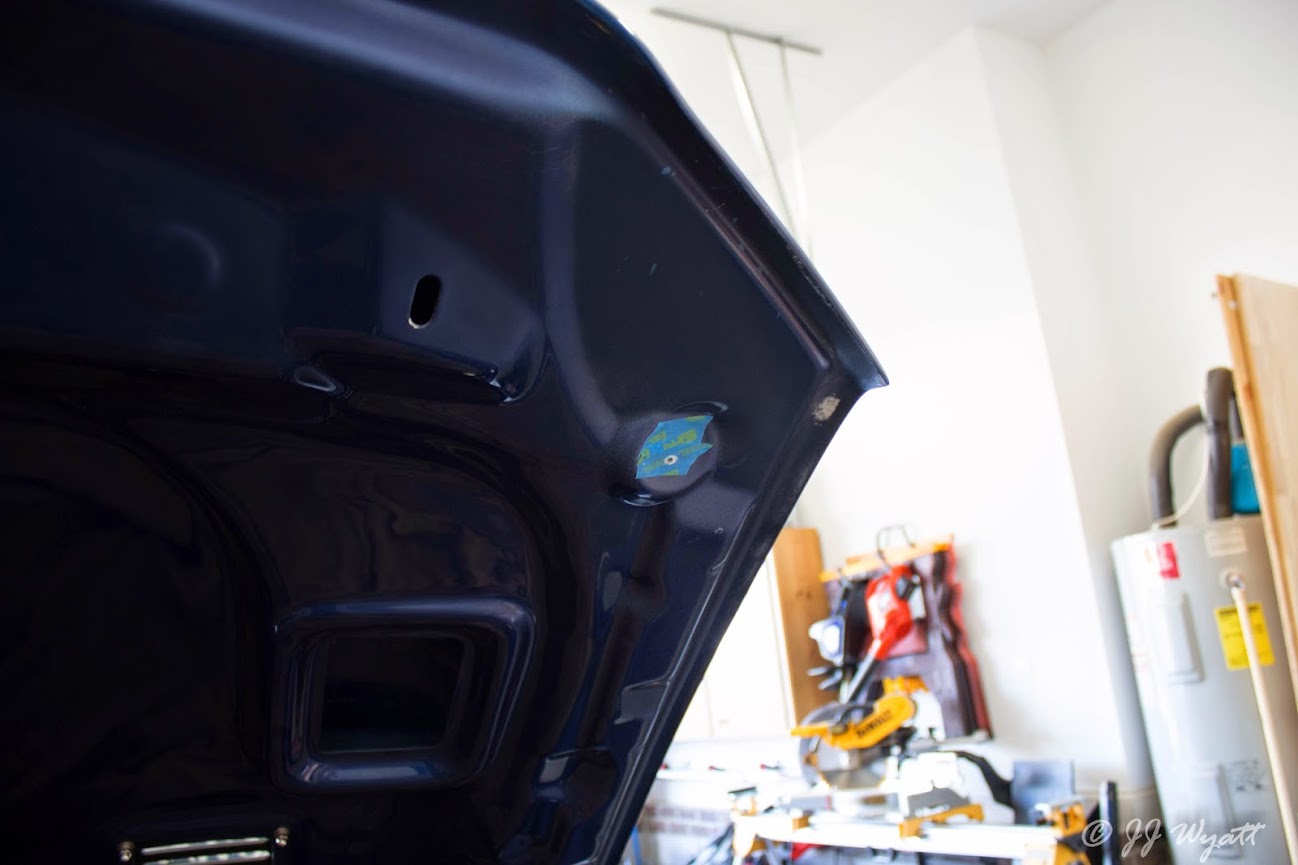
I removed the outer rubber hood bumps stops.

Then drilled out the bottom

Tape the top and bottom work area.


Then installed the pin. (Note: you will not need the rubber bump on the pin. I later took it off as it makes the pins sit too high. The pin is threaded and there is a nut and washer for the top and bottom. With this you can adjust the pin height.) I also added some white lithium grease to the top of the pin to mark where I would drill the center hole.

Cover the motor

Drill a pilot hole
Then on large enough for the pin to pass through

Then put more lithium grease on the pin and close the hood. Lift the hood and drill a small pilot hole though the hood where the grease mark is. Then close the hood and drill from the top to the bottom and larger enough hole for the pin to pas through. (Does it really matter is you go from the top, probably not since you are going to cut the whole center out.)
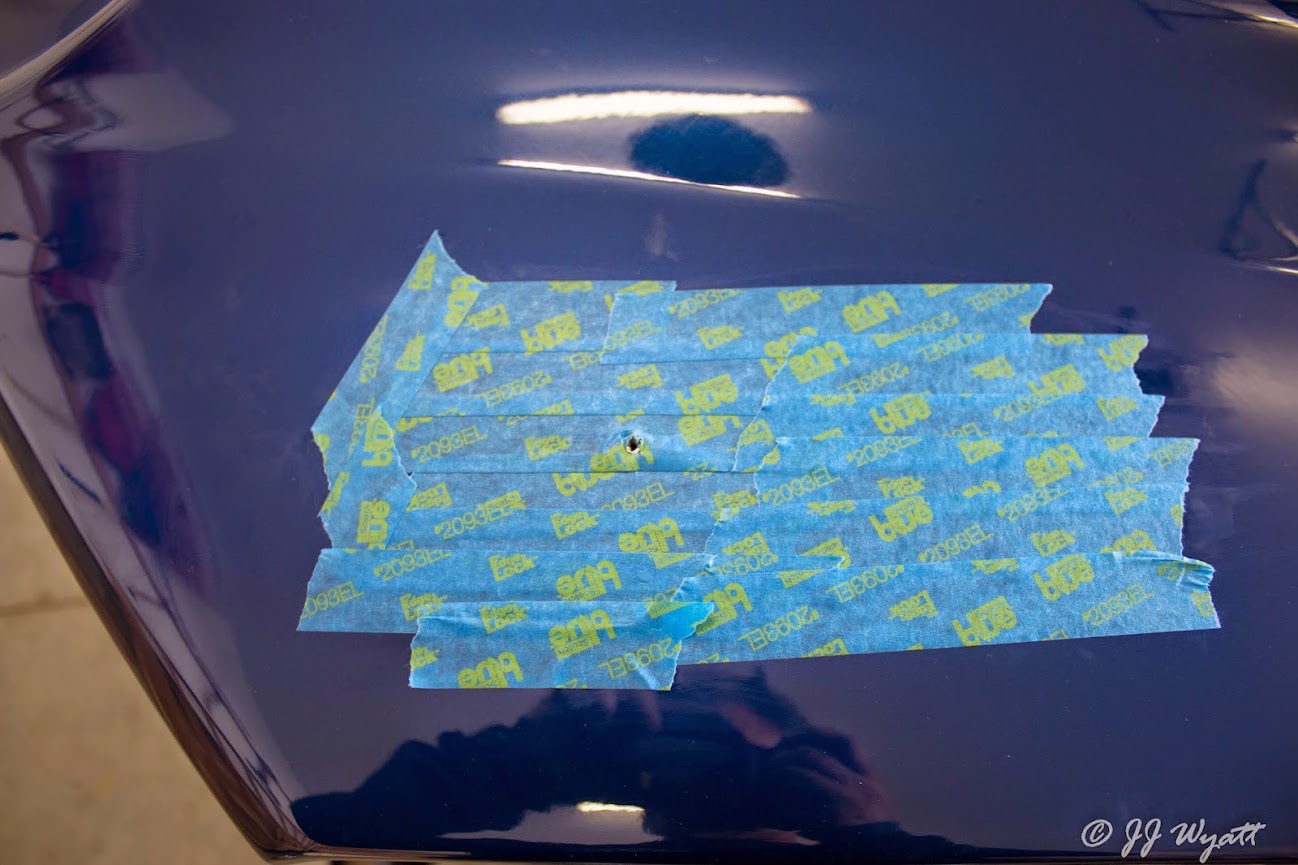

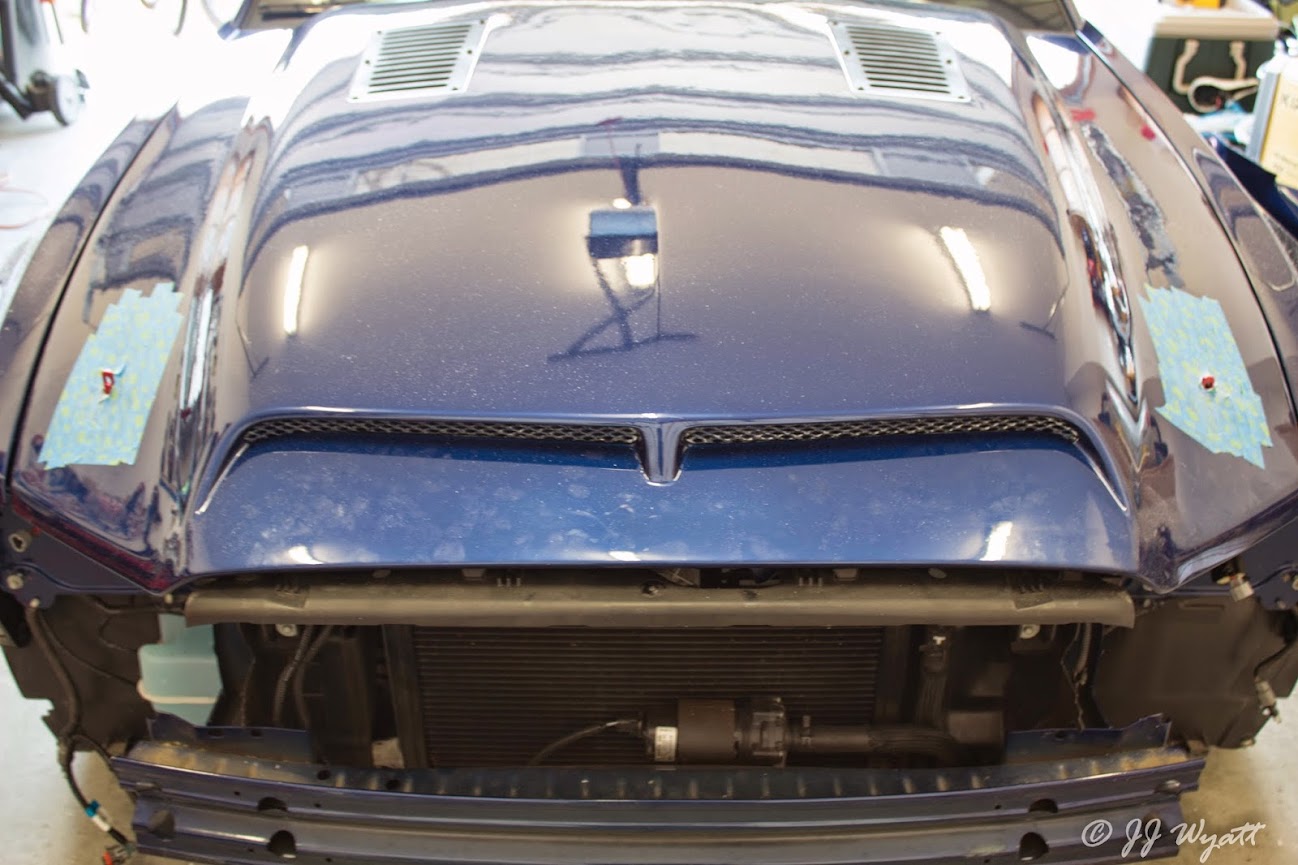
Now align the templates and tape them in place. (Once aligned I used a sharpie and traced the inside.)


Get a suitable hood support and cut it out. (I used a cutting wheel to take out most of it, but stayed away from the line. Then I used a sanding wheel to clean it up.)

For the bottom I used a carbite bit. Looking from the top I cut from the bottom. Then I cleaned it up with a sanding wheel.
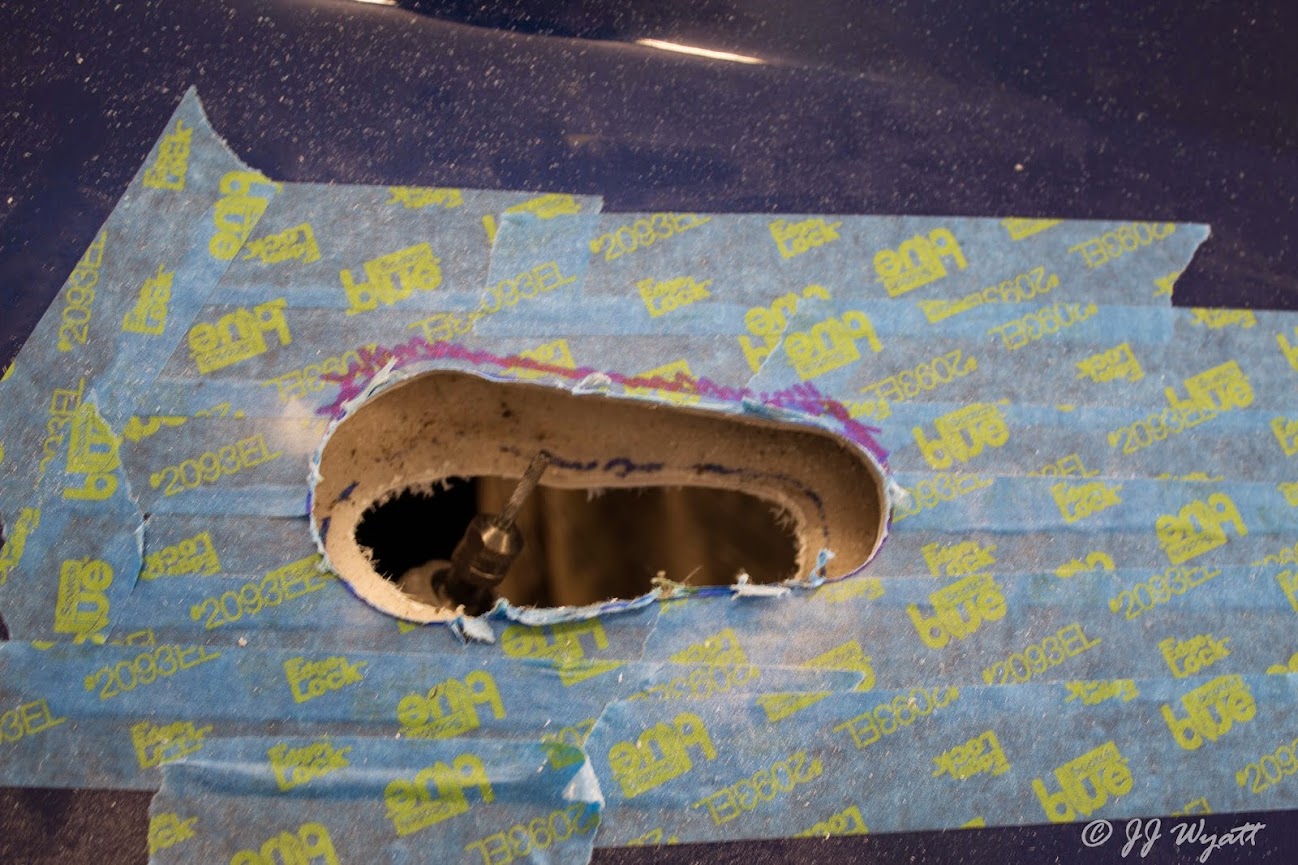


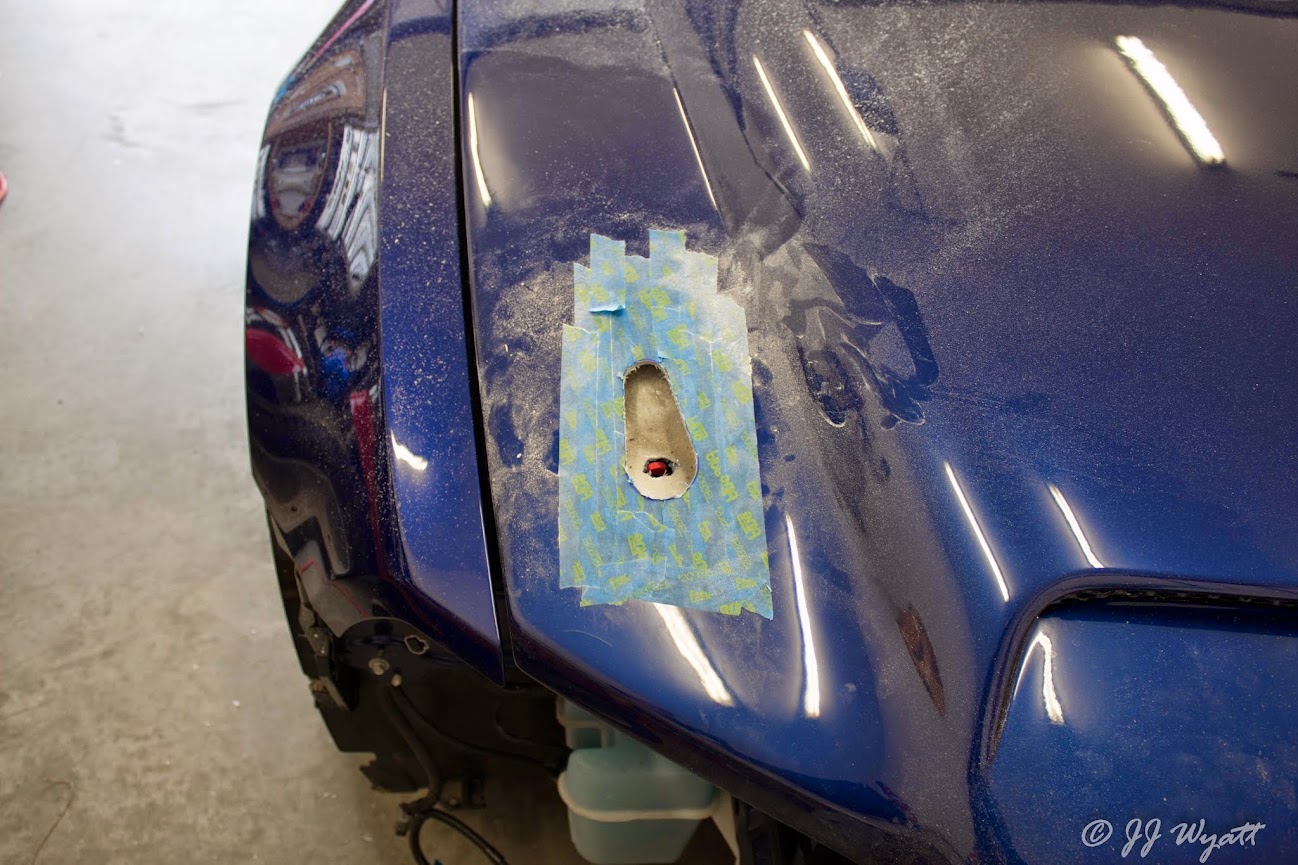
The bottom hole needs to be about a 1/4 inch larger than the top. This is so you can hole the lower up and get the nuts in place.

I used new tape but you don't have too. Place the latch system in place and mark the hole to be drilled.
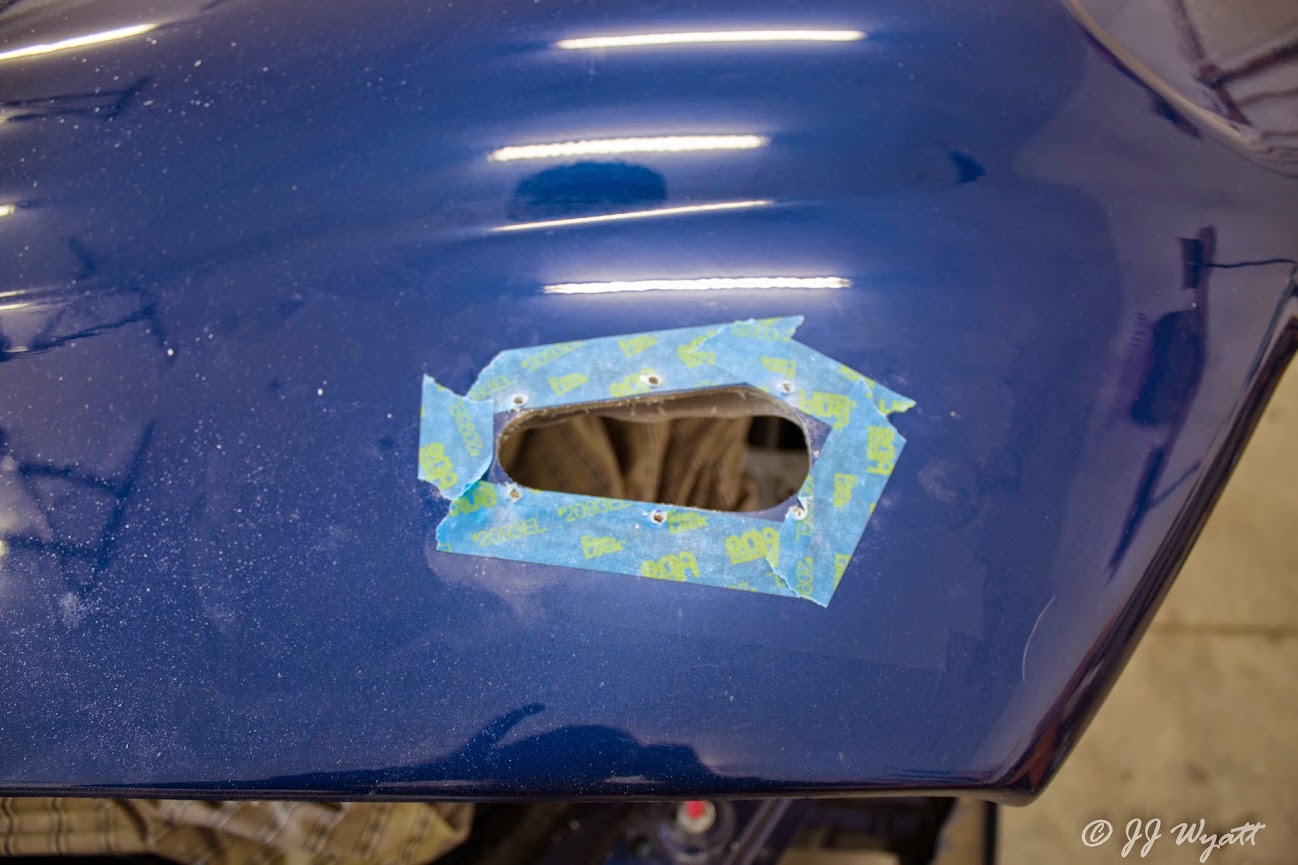

The install the latch system


Next you will have to take your time to get the pins at the right height for smooth operation. I had a lot of trouble with this and I believe it's because I had the rubber sleeve on the pin when I did the marking. I had to widen the mounting hole I had for the pins. They latch, but it's not supper smooth and I'm sure it's because of how I mounted them to make the marks. It's not that hard, but you just have to take your time. It's all worth it in the end.


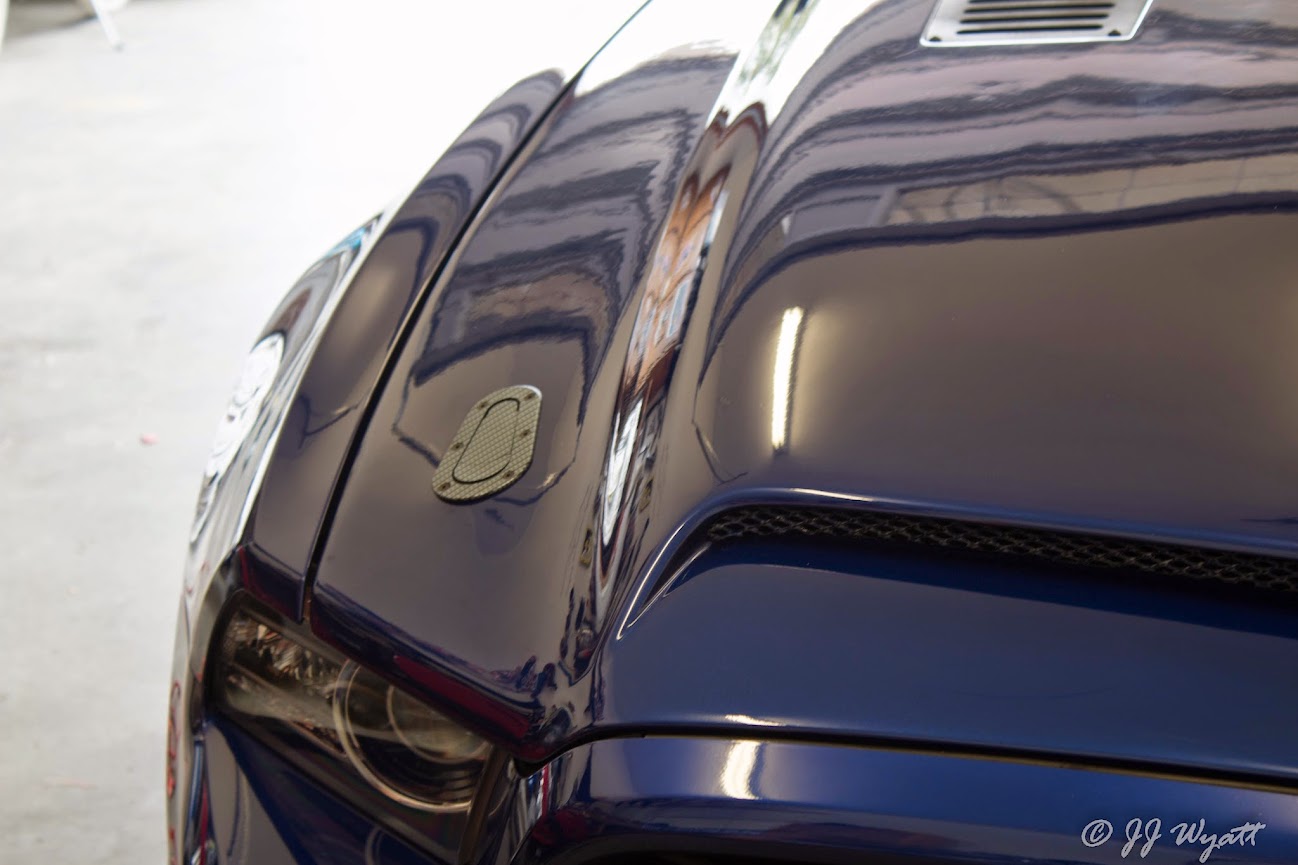
Now, the manufacturer says to mount them the opposite way than I did and up to a 15 degree tilt. BUT even on their website racers have mounted them the way I did. Along with many other people during my research prior to install. I choose this way be aesthetically I think it looks better and I'm sure it will hold. Gallery picture from aerocatch:
http://www.aerocatch.com/aerocatch/photo-gallery
Just installed carbon look aeorcatch hood pins...
Of course it called for taking off the whole front end.
I removed the outer rubber hood bumps stops.
Then drilled out the bottom
Tape the top and bottom work area.
Then installed the pin. (Note: you will not need the rubber bump on the pin. I later took it off as it makes the pins sit too high. The pin is threaded and there is a nut and washer for the top and bottom. With this you can adjust the pin height.) I also added some white lithium grease to the top of the pin to mark where I would drill the center hole.
Cover the motor
Drill a pilot hole
Then on large enough for the pin to pass through
Then put more lithium grease on the pin and close the hood. Lift the hood and drill a small pilot hole though the hood where the grease mark is. Then close the hood and drill from the top to the bottom and larger enough hole for the pin to pas through. (Does it really matter is you go from the top, probably not since you are going to cut the whole center out.)
Now align the templates and tape them in place. (Once aligned I used a sharpie and traced the inside.)
Get a suitable hood support and cut it out. (I used a cutting wheel to take out most of it, but stayed away from the line. Then I used a sanding wheel to clean it up.)
For the bottom I used a carbite bit. Looking from the top I cut from the bottom. Then I cleaned it up with a sanding wheel.
The bottom hole needs to be about a 1/4 inch larger than the top. This is so you can hole the lower up and get the nuts in place.
I used new tape but you don't have too. Place the latch system in place and mark the hole to be drilled.
The install the latch system
Next you will have to take your time to get the pins at the right height for smooth operation. I had a lot of trouble with this and I believe it's because I had the rubber sleeve on the pin when I did the marking. I had to widen the mounting hole I had for the pins. They latch, but it's not supper smooth and I'm sure it's because of how I mounted them to make the marks. It's not that hard, but you just have to take your time. It's all worth it in the end.
Now, the manufacturer says to mount them the opposite way than I did and up to a 15 degree tilt. BUT even on their website racers have mounted them the way I did. Along with many other people during my research prior to install. I choose this way be aesthetically I think it looks better and I'm sure it will hold. Gallery picture from aerocatch:
http://www.aerocatch.com/aerocatch/photo-gallery
Last edited by Sleeper_GT; 10-15-2014 at 11:31 AM.
10-15-2014, 10:36 AM
#8575
You want to put that in the how to thread JJ?
As to drilling from top to bottom, fiberglass might make a difference if you grab some fibers and "rip the stitching". Going top to bottom with the larger bit would limit it to occurring on the underside where no one will see it. I did that on the drain hole for the boat, great. Really depends on the mat type and how it was laid up. Probably not an issue with your hood since it was most likely vacuum bagged. My hand laid weave wasn't so lucky.
Metal hoods, not so much. You might get a few burrs that would be in the way of keeping a jigsaw flat but it's easily corrected.
Last edited by clowe1965; 10-15-2014 at 10:38 AM.
10-15-2014, 10:56 AM
#8576
6th Gear Member
You want to put that in the how to thread JJ?
As to drilling from top to bottom, fiberglass might make a difference if you grab some fibers and "rip the stitching". Going top to bottom with the larger bit would limit it to occurring on the underside where no one will see it. I did that on the drain hole for the boat, great. Really depends on the mat type and how it was laid up. Probably not an issue with your hood since it was most likely vacuum bagged. My hand laid weave wasn't so lucky.
Metal hoods, not so much. You might get a few burrs that would be in the way of keeping a jigsaw flat but it's easily corrected.
As to drilling from top to bottom, fiberglass might make a difference if you grab some fibers and "rip the stitching". Going top to bottom with the larger bit would limit it to occurring on the underside where no one will see it. I did that on the drain hole for the boat, great. Really depends on the mat type and how it was laid up. Probably not an issue with your hood since it was most likely vacuum bagged. My hand laid weave wasn't so lucky.
Metal hoods, not so much. You might get a few burrs that would be in the way of keeping a jigsaw flat but it's easily corrected.
10-15-2014, 11:27 AM
#8577
6th Gear Member
You want to put that in the how to thread JJ?
As to drilling from top to bottom, fiberglass might make a difference if you grab some fibers and "rip the stitching". Going top to bottom with the larger bit would limit it to occurring on the underside where no one will see it. I did that on the drain hole for the boat, great. Really depends on the mat type and how it was laid up. Probably not an issue with your hood since it was most likely vacuum bagged. My hand laid weave wasn't so lucky.
Metal hoods, not so much. You might get a few burrs that would be in the way of keeping a jigsaw flat but it's easily corrected.
As to drilling from top to bottom, fiberglass might make a difference if you grab some fibers and "rip the stitching". Going top to bottom with the larger bit would limit it to occurring on the underside where no one will see it. I did that on the drain hole for the boat, great. Really depends on the mat type and how it was laid up. Probably not an issue with your hood since it was most likely vacuum bagged. My hand laid weave wasn't so lucky.
Metal hoods, not so much. You might get a few burrs that would be in the way of keeping a jigsaw flat but it's easily corrected.
 10-15-2014, 02:07 PM
#8579