What are you working on?

 02-28-2017, 07:43 AM
1st Gear Member
Join Date: Jul 2007
Location: Kansas
Posts: 106
Cleaning up a 10 year old restore. It's a 1964.5 that originally is a U code (6 cyl) but has had a 302 installed. Automatic, and everything seems good for a 10 year old restore job, but it's starting to leak fluid from I think both the engine and trany. Needs a little cleanup to call it finished. Runs and drives great though.


 02-28-2017, 09:54 PM
4th Gear Member

Join Date: Aug 2012
Location: Close Enough
Posts: 1,413
I am finishing up the restoration of the Triumph Gauges.
Most of them were pretty straightforward..Disassemble, clean, reassemble.
1968-1972 used an ammeter. The original alternator is a 30 amp unit and barely had enough power to run the lights. I am planning to upgrade my alternator to a 60 amp unit. I didn't want to use a volts gauge so I decided to see what I could do with the original ammeter.
Because all power runs into the ammeter the 60 amp alternator would easily burn out the ammeter. All of the aftermarket ammeters would look really out of place in the dash so....
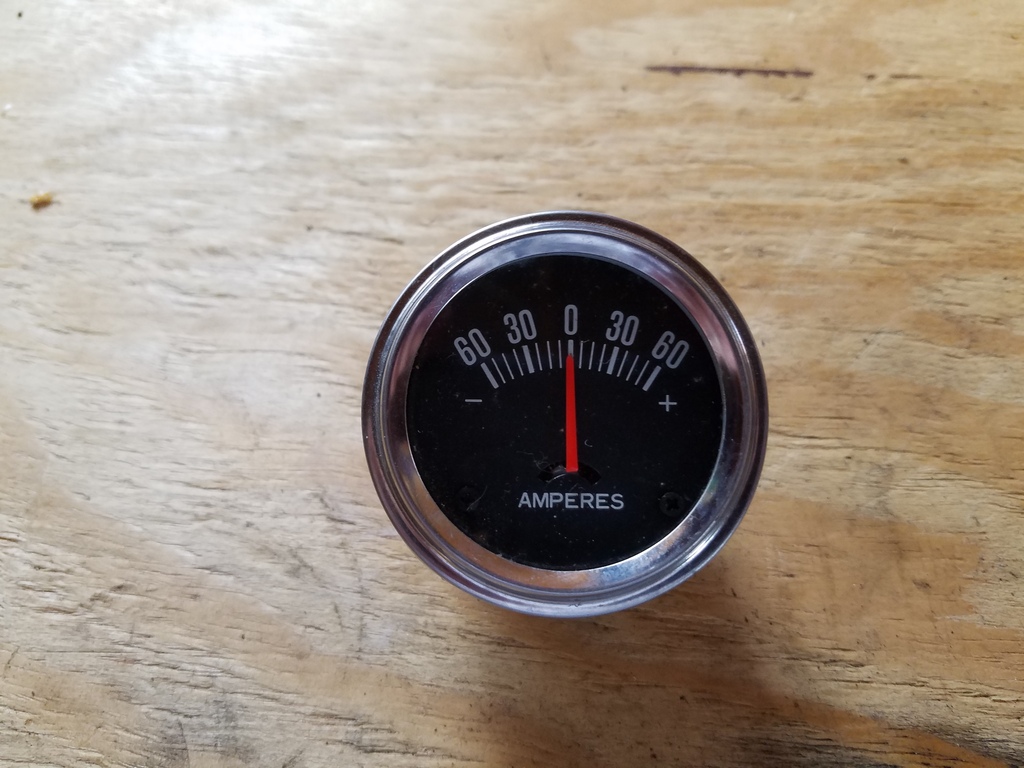
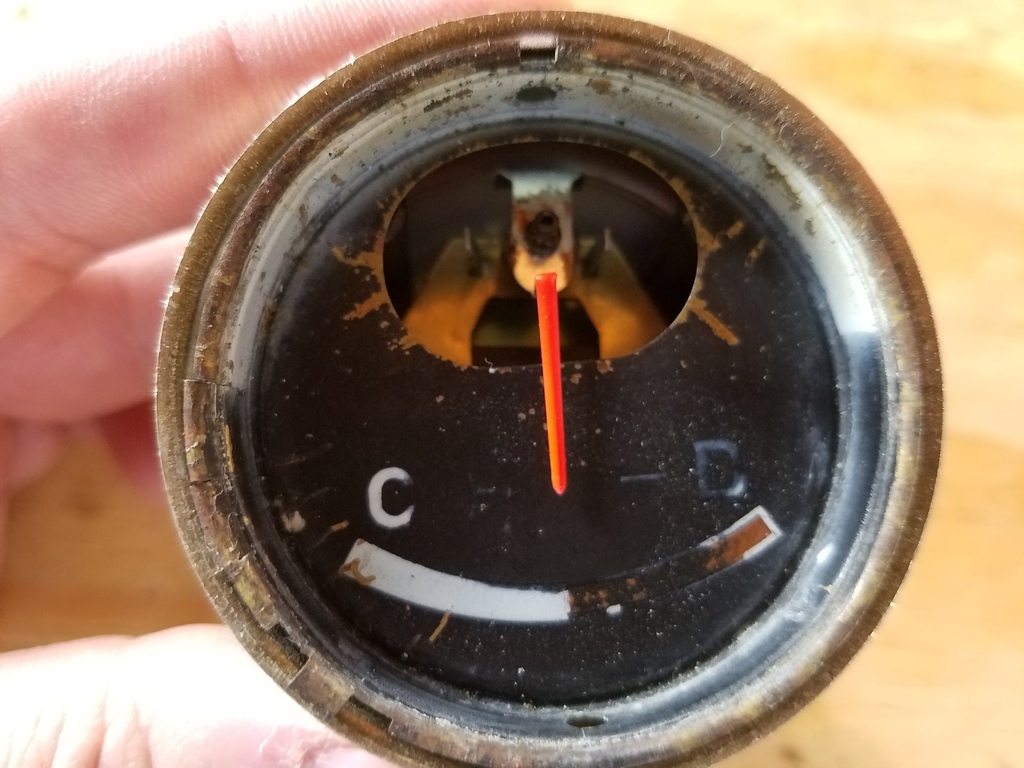
This is the 60 amp ammeter I started with.
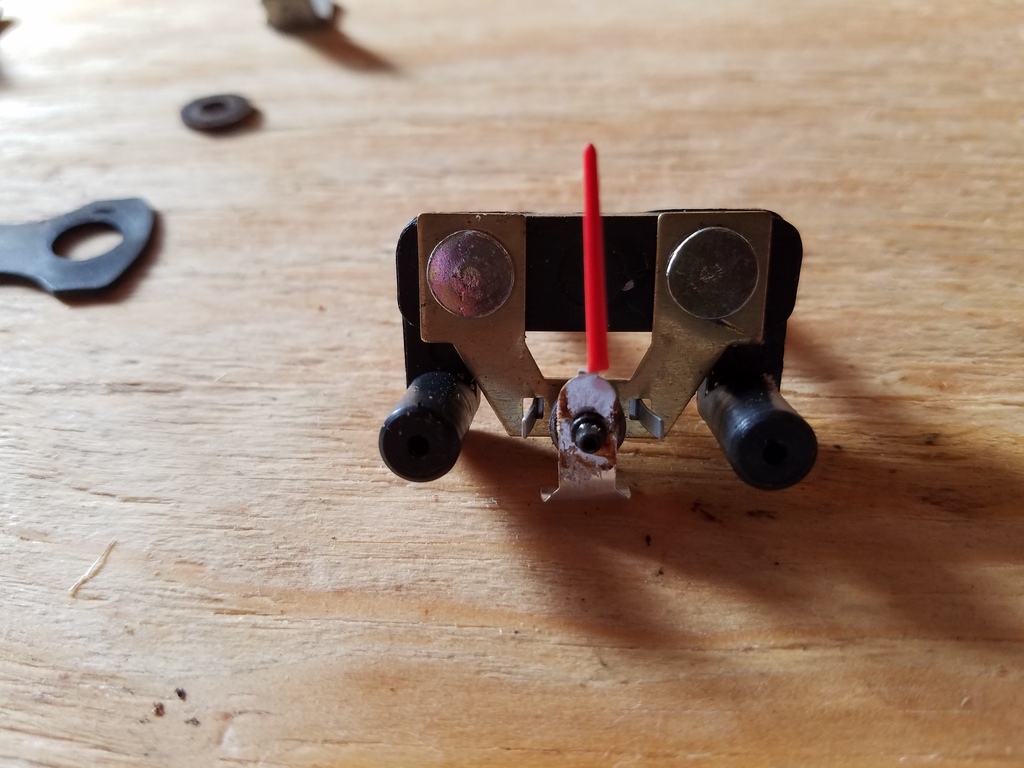
This is what the insides of the 60 amp ammeter looks like after I got it out of its case.
You can see the black cylinders to the left and right of the needle. These are made of plastic and were originally used to fasten the face to the gauge. These had to be trimmed to allow the 30 amp face to sit far enough into the case.
I happened to have a spare 30 amp ammeter that was toast. Here is the insides of it.
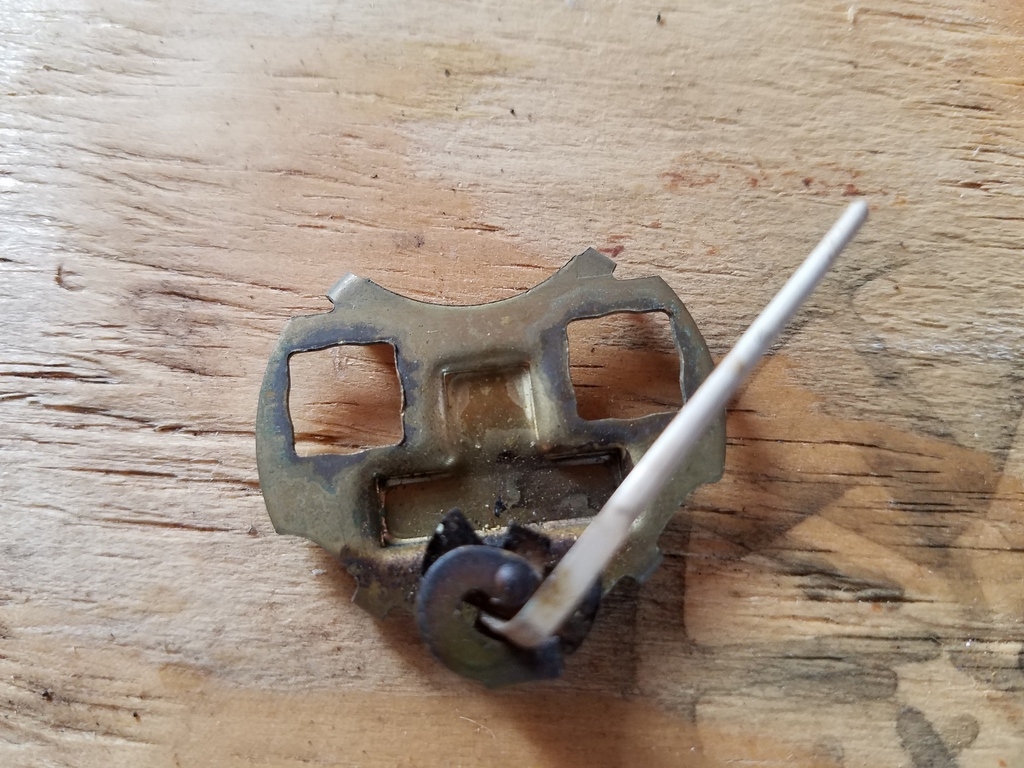
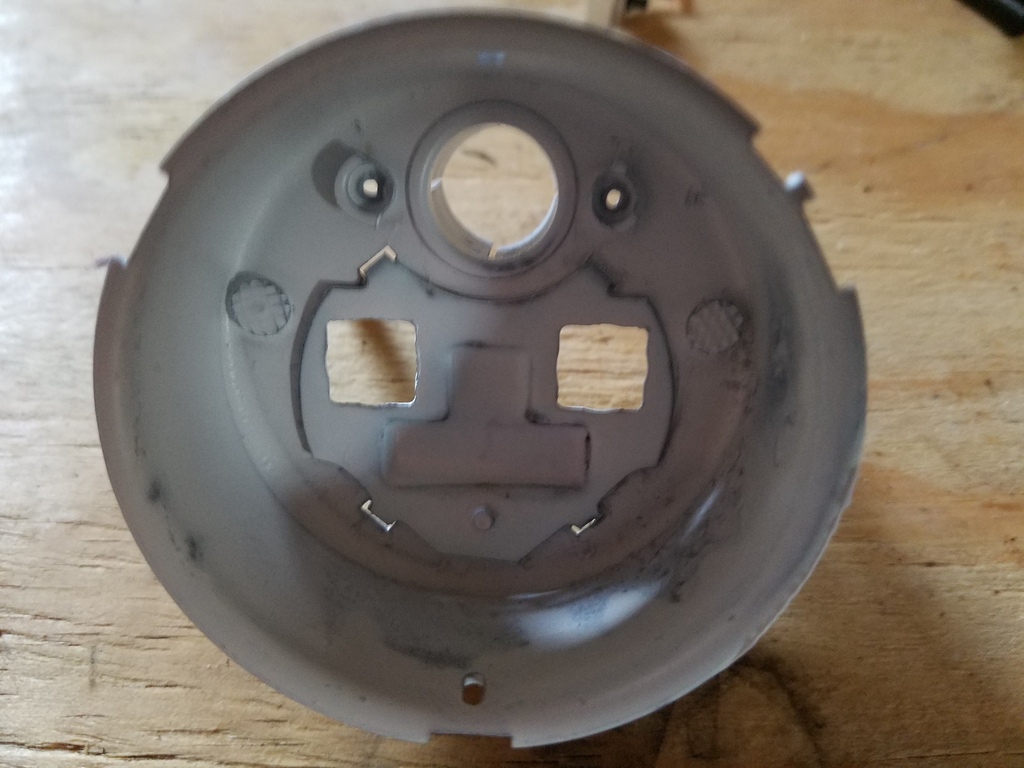
I cut the needle and the parts of the 30 amp away to create a plate for the back of the 30 amp case. I wasn't planning to use this case until I decided to go with a 60 amp alternator. So the paint that is in it isn't the best. I will blast and clean and paint the case much better once I find out if this will even work.
Here is the 60 amp mounted in the 30 amp case. I am using a spare case and the face from an old gauge that is toast just to mock all of this up and see if it will even work.
Here is the 60 amp mounted in the 30 and with the original face. It is starting to look like this will actually work.
I straightened the needle to give it more length and painted it white.
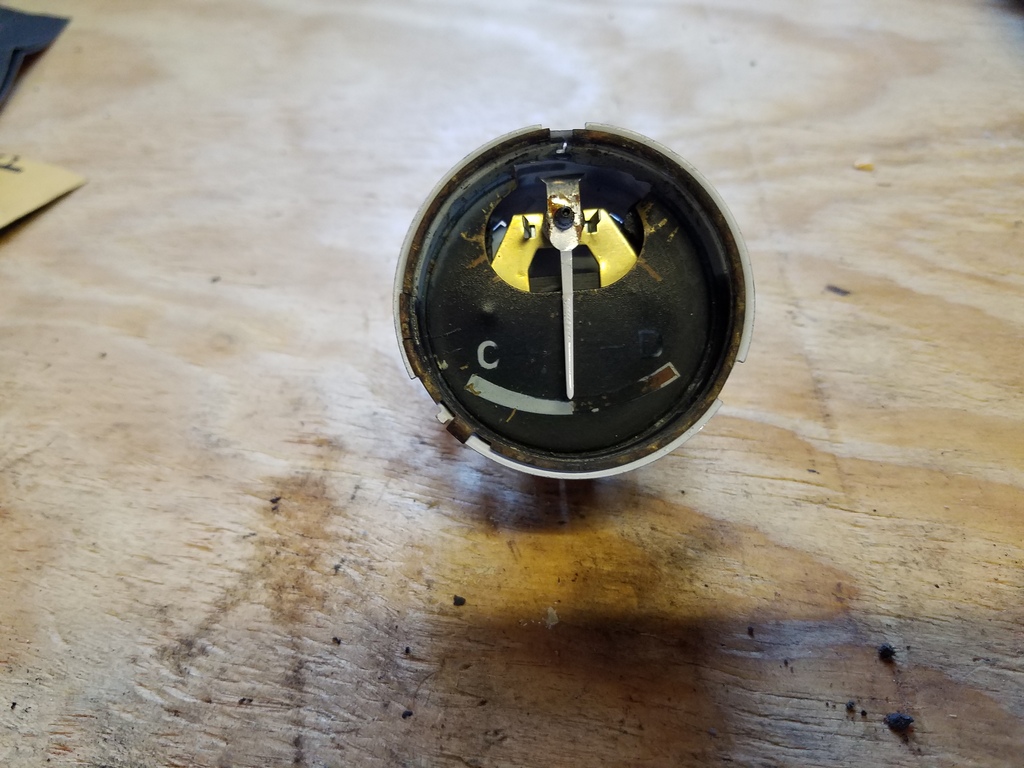
And it actually worked. This is the 60 amp ammeter mounted inside the 30 amp case.
Now I will use the good face that I have and clean and paint the bezel as well as blast and clean the case and glass.
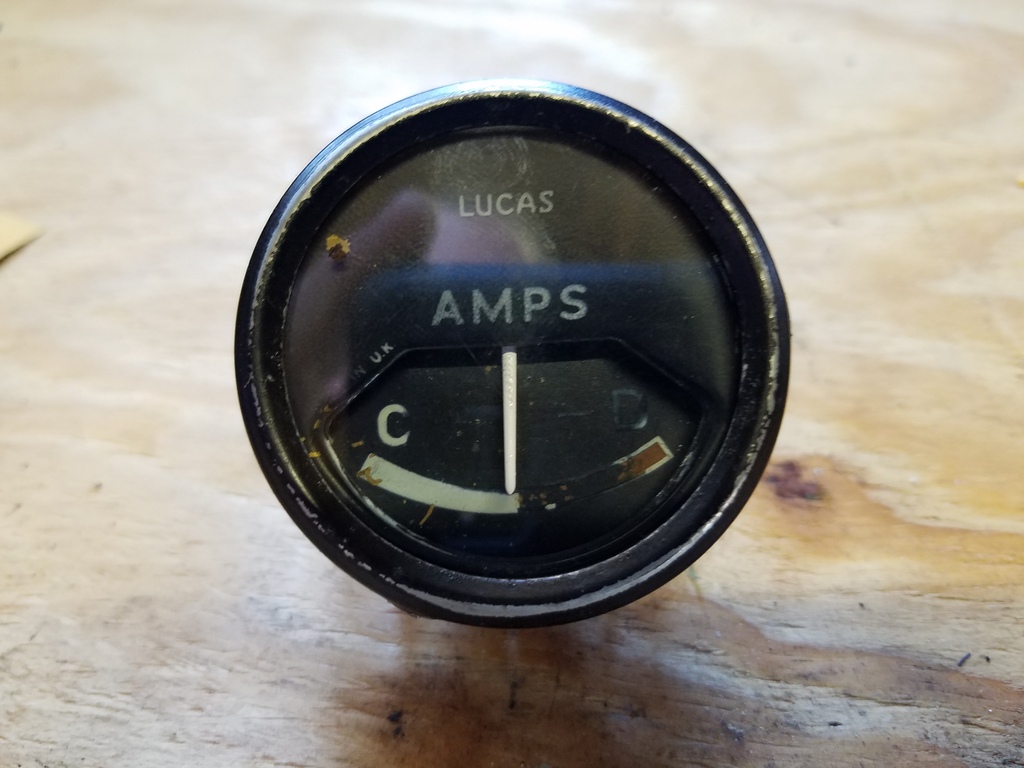
And here it is ready to be put on the shelf for final assembly and installation.

Most of them were pretty straightforward..Disassemble, clean, reassemble.
1968-1972 used an ammeter. The original alternator is a 30 amp unit and barely had enough power to run the lights. I am planning to upgrade my alternator to a 60 amp unit. I didn't want to use a volts gauge so I decided to see what I could do with the original ammeter.
Because all power runs into the ammeter the 60 amp alternator would easily burn out the ammeter. All of the aftermarket ammeters would look really out of place in the dash so....
This is the 60 amp ammeter I started with.

This is what the insides of the 60 amp ammeter looks like after I got it out of its case.
You can see the black cylinders to the left and right of the needle. These are made of plastic and were originally used to fasten the face to the gauge. These had to be trimmed to allow the 30 amp face to sit far enough into the case.

I happened to have a spare 30 amp ammeter that was toast. Here is the insides of it.

I cut the needle and the parts of the 30 amp away to create a plate for the back of the 30 amp case. I wasn't planning to use this case until I decided to go with a 60 amp alternator. So the paint that is in it isn't the best. I will blast and clean and paint the case much better once I find out if this will even work.

Here is the 60 amp mounted in the 30 amp case. I am using a spare case and the face from an old gauge that is toast just to mock all of this up and see if it will even work.
Here is the 60 amp mounted in the 30 and with the original face. It is starting to look like this will actually work.

I straightened the needle to give it more length and painted it white.

And it actually worked. This is the 60 amp ammeter mounted inside the 30 amp case.
Now I will use the good face that I have and clean and paint the bezel as well as blast and clean the case and glass.

And here it is ready to be put on the shelf for final assembly and installation.
