Finally PROGRESS!!
 05-18-2009, 09:30 PM
#11
2nd Gear Member
Thread Starter
Join Date: Oct 2008
Location: CO
Posts: 224
LOL! I hear ya guys loud and clear. I ordered a template and drill bit today. I know you can download them off the internet, but I'm paranoid since I really only get one shot at this. I also ordered a new set of front brake lines! I'm not sure where this thing is going to end, I keep seeing stuff that "well that would be good to do while everything is apart."
Thanks for the heads up on the differnet specs, I remember reading that on a how-to website somewhere. I think I found a "good" alignment shop, there's three guys at work that have 65 and 66 mustangs, so I asked a couple of them.
Thanks for the heads up on the differnet specs, I remember reading that on a how-to website somewhere. I think I found a "good" alignment shop, there's three guys at work that have 65 and 66 mustangs, so I asked a couple of them.
 05-18-2009, 11:35 PM
#12
5th Gear Member
Join Date: Aug 2007
Location: Delaware(US) & Nova Scotia(Canada)
Posts: 2,035
 05-24-2009, 05:35 PM
#15
2nd Gear Member
Thread Starter
Join Date: Oct 2008
Location: CO
Posts: 224
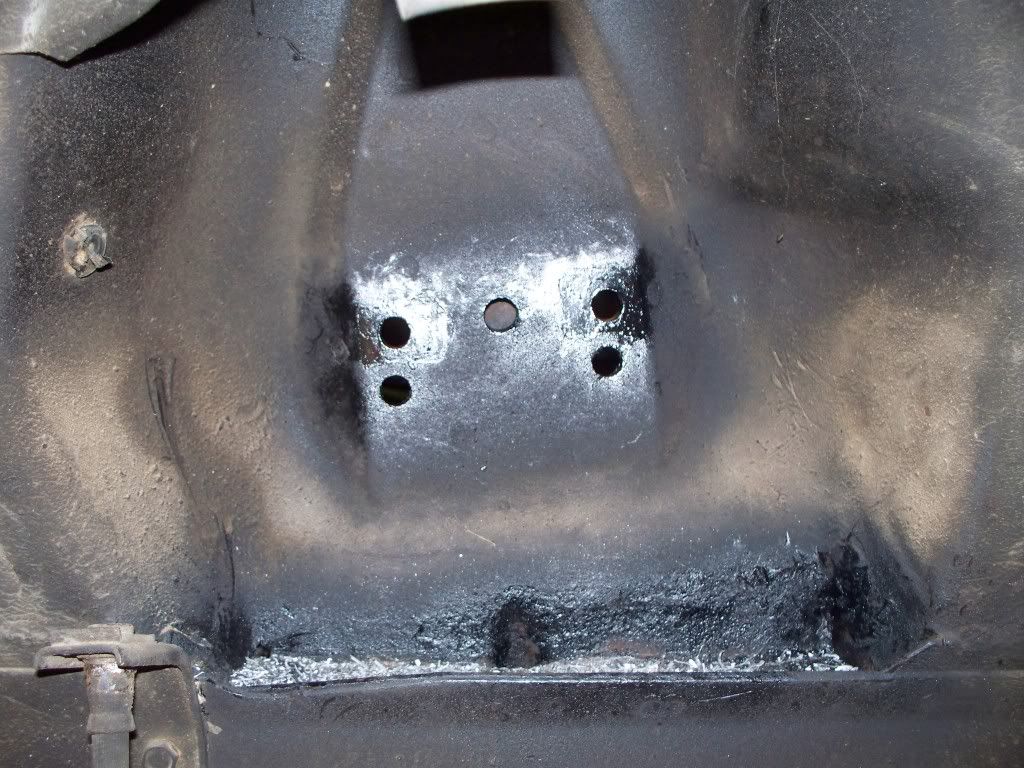
Well I drilled the holes for the drop today:
And then I finally got to start putting some parts back on the car, man did that feel good (SO SEXY!):
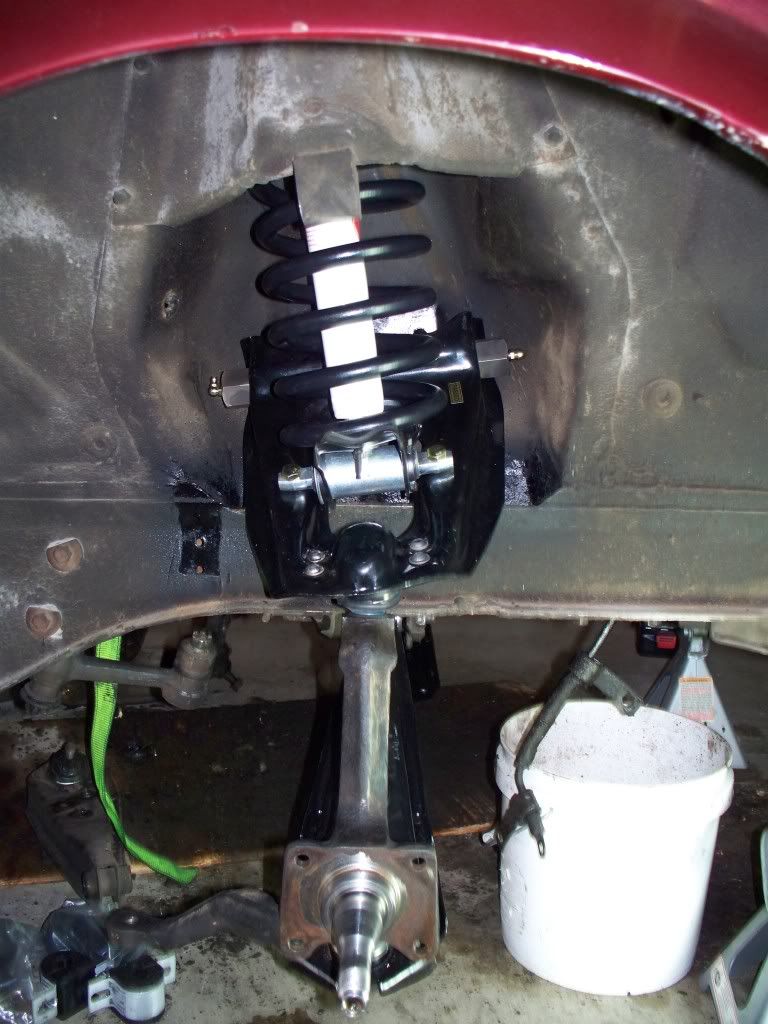
And then I finally got to start putting some parts back on the car, man did that feel good (SO SEXY!):
Last edited by 90RunnerRed; 11-07-2011 at 05:05 PM.
05-26-2009, 07:44 PM
#16
2nd Gear Member
Thread Starter
Join Date: Oct 2008
Location: CO
Posts: 224
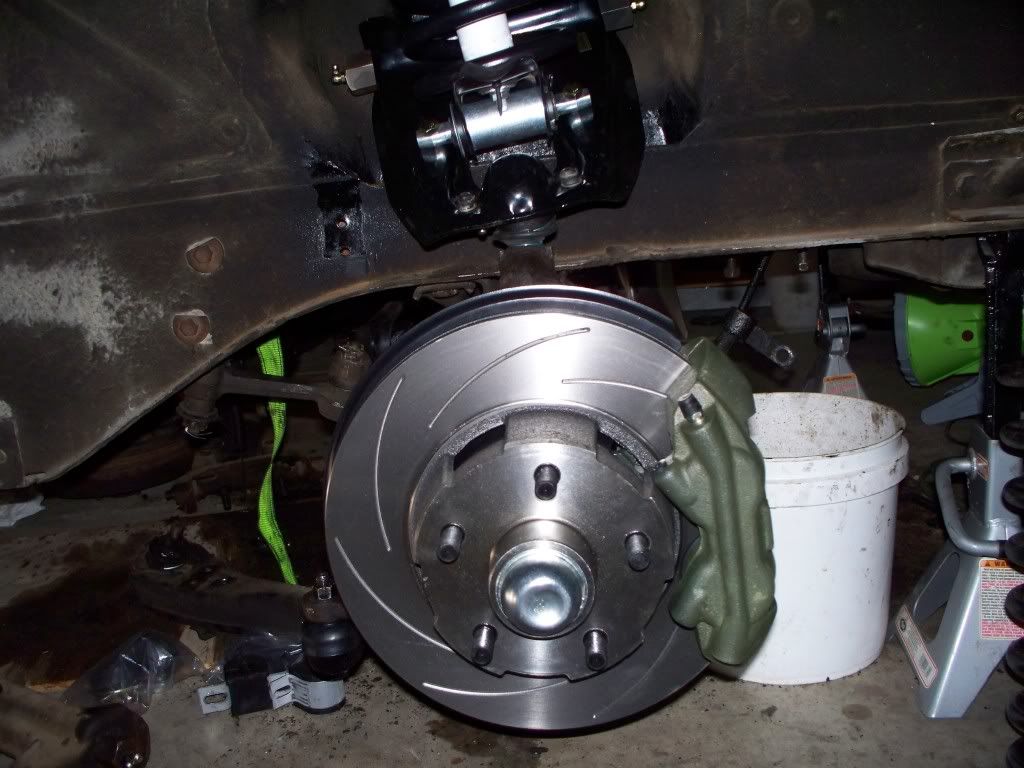
Brakes are ON! I'm rather excited because at this point I could actually throw the wheels on and move the car if needs be. I still have to attach the lines, proportioning valve and master cylinder, but it could technically be moved...
Last edited by 90RunnerRed; 11-07-2011 at 05:06 PM.
05-26-2009, 11:54 PM
#17
2nd Gear Member

Join Date: Mar 2006
Location:
Posts: 445
looking good man. im doing the exact same thing right now, hopefully getting the template in the mail tomorrow to perform the drop. A few questions, what was your process in the reassemble. did you do both arms and the spindle before the spring? im just concerned about getting the new spring back in. Also, what kind of springs are those, drop or stock height? and what pound springs are they as well. GR2 shocks? Which took longer, tearing it down or putting it back together.
05-27-2009, 09:24 PM
#18
2nd Gear Member
Thread Starter
Join Date: Oct 2008
Location: CO
Posts: 224
looking good man. im doing the exact same thing right now, hopefully getting the template in the mail tomorrow to perform the drop. A few questions, what was your process in the reassemble. did you do both arms and the spindle before the spring? im just concerned about getting the new spring back in. Also, what kind of springs are those, drop or stock height? and what pound springs are they as well. GR2 shocks? Which took longer, tearing it down or putting it back together.
http://dazed.home.bresnan.net/spring
So basically the spring and the saddle go in first and you compress them enough to get the upper A-arm bolted into the shock towers, and then you bolt the saddle onto the a-arm. With everything bolted in and tightened down, I left the spring compressed and installed the spindle and the lower control arm, then I slowly released the spring. It just seemed like stuff would line up a little better with the spring compressed a little, not sure if that's necessary though. Plus with the bolt in type compressor I really wasn't worried about it going anywhere. I would imagine, whatever type spring compressor you use, you would need to have the spring up in the shock tower before you bolt the a-arm in, but having never done it, I don't know for sure. Someone can correct me.
THey are stock springs (height and lbf). I like the stock ride height. I had wanted the GT springs but every where I looked they were on like 3 or 4 month back order, maybe I just didn't look hard enough.
I am using GR2 shocks, I had those on prior to all of the suspension work and loved them.
Tearing everything down definitely took longer for me, I had trouble with a couple of ball joints and I went through two different spring compressors before buying this one and finally feeling safe enough to compress the old springs and take them out. Reassembly of just the spring, two control arms, and spindle took me about 2 hours per side, I took my time though making sure I had everything right.
Alright, well I'll stop typing now.
06-02-2009, 01:52 PM
#19
2nd Gear Member
Join Date: Mar 2006
Location:
Posts: 445
so, not sure how you are supposed to install the saddle with the spring before you attach the saddle to the UCA. also, should the end of the spring sit close to the raised tab on the saddle. its on the inner front side of the saddle.