How to: Clean IMRCs (part-1)
 05-20-2010, 05:41 PM
#1
5th Gear Member
Thread Starter

Join Date: Nov 2007
Location: Maryland
Posts: 4,955
Well my car was throwing a IMRC code, So i tore down the car, got to the IMRC and the IMRC's control, Took a lot of pics so here we go. This is on a 96 cobra, 96-98 should be the same with the exception that the 98s have a different material IMRC and do not tend to gum up as much.
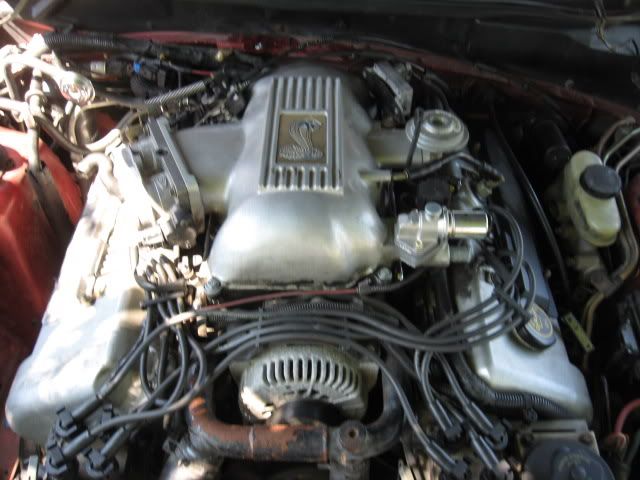
Motor!:

remove strutt tower brace and air intake
Damn they didn't show up at all, i'll try to take another pic indoors.
Pretty easy 8 bolts total on the STB 3 on each side 2 up top.
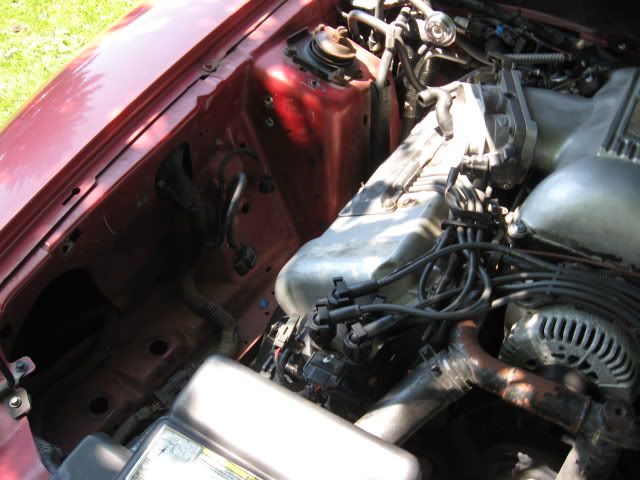
I just took a screwdriver to the clamp at the TB loosened the air tube up there, unplugged the MAF and sensor above it, took the bolt out of the sidewall near the airbox (8mm) and wiggled it out. The airbox is snapped to a holder under the air filter, just wiggle it out.
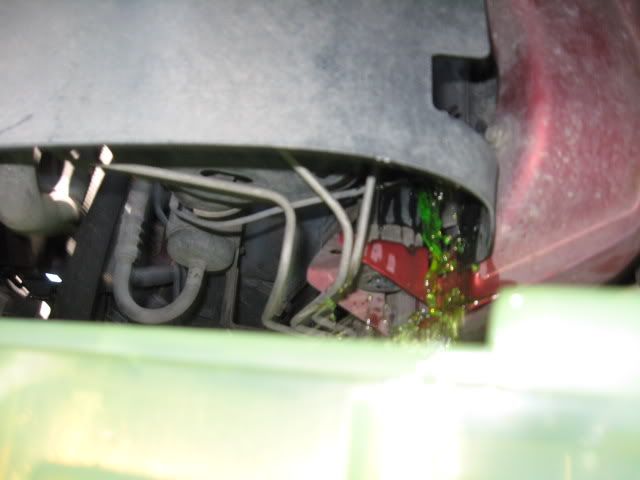
Next, drain coolant, drivers side under the radiator, pretty self explanitory.
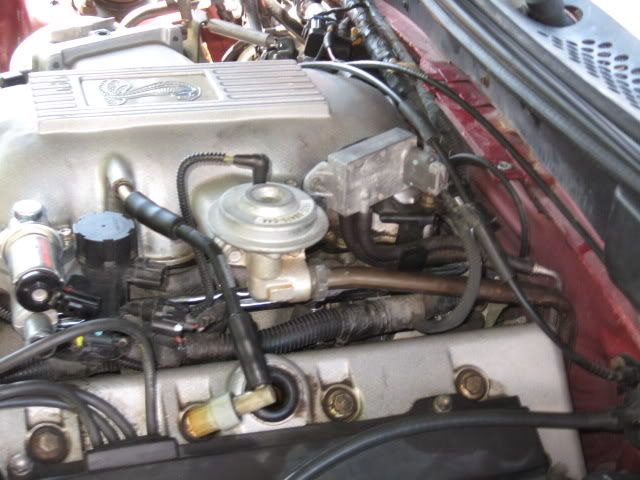
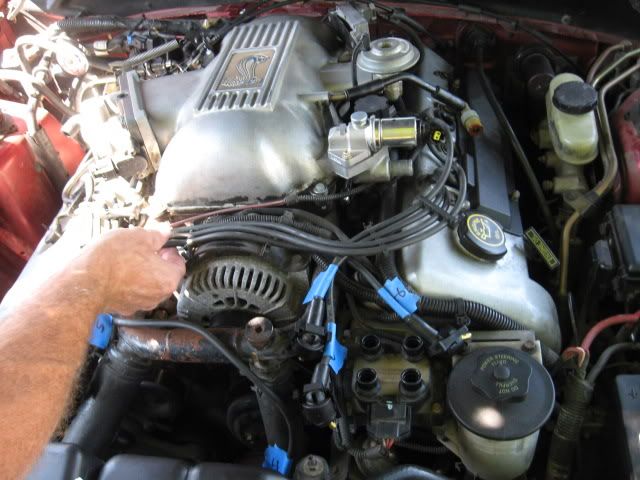
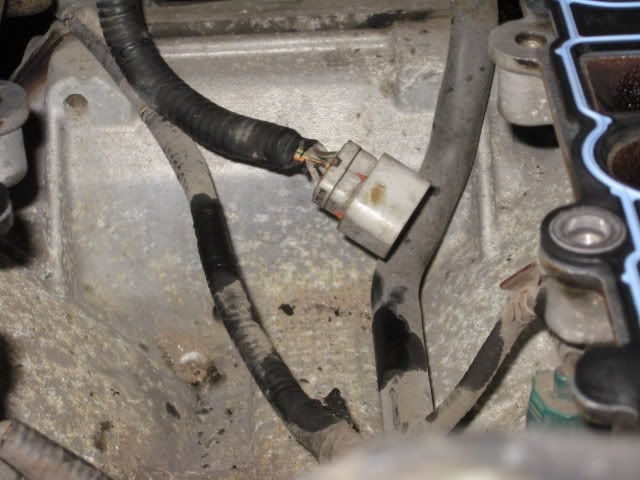
Next, unplug all clips and hoses to the Upper intake manifold, this is from drivers side, Also there is a metal hose that needs to be loosened using a wrench, its the brass/copper color seen.
little clearer there, make sure everything is unplugged.

and there ^ it is undone, the metal line just pulls out. I used an Adjustable Wrench.
I always number my sparkplug wires so i don't forget what is what,
used 3m tape and a sharpie.
again there are several clips and hoses to each side of the intake manifold, some just require some elbow grease to get out.
Other side! remove everything that looks like it comes off, including this bracket holding the throttle cable, 2 screws.. i also took off the spring to the throttle cable.

And gone!
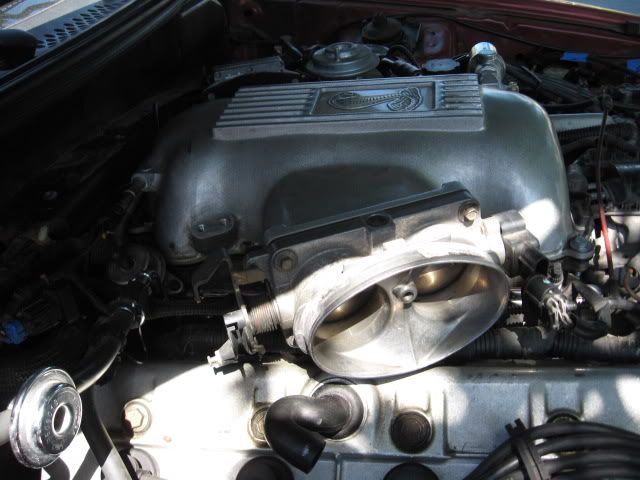
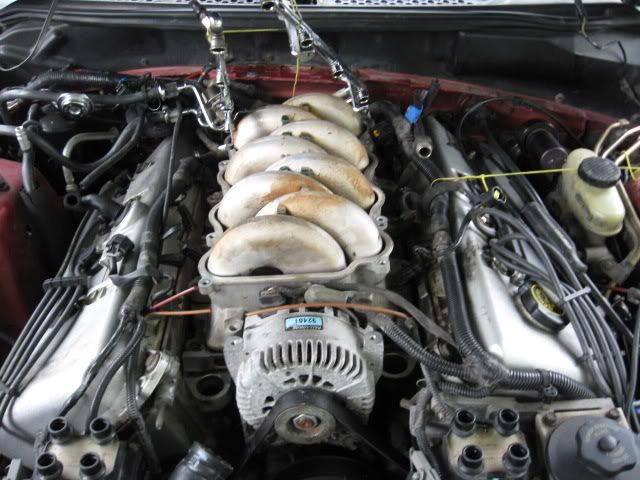
Remove all bolts around upper intake and take it off!
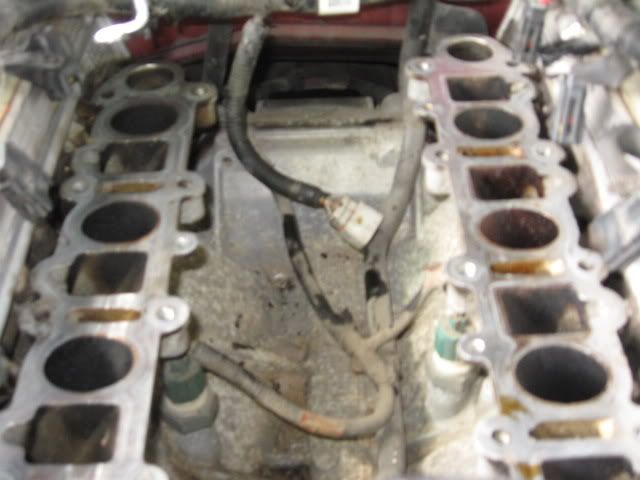
Inside of the upper intake.

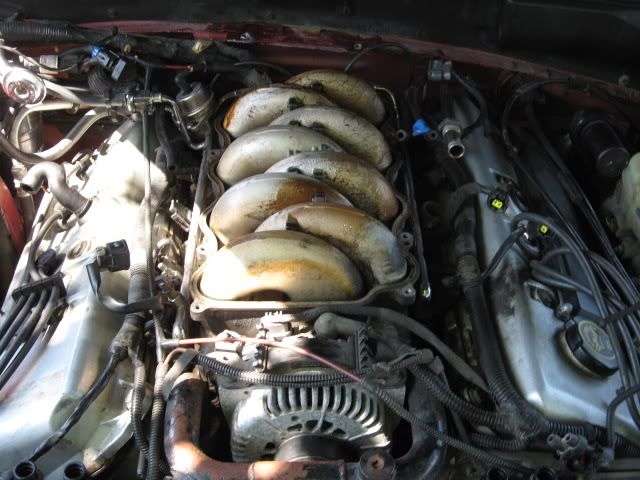
Snake like lower intake.
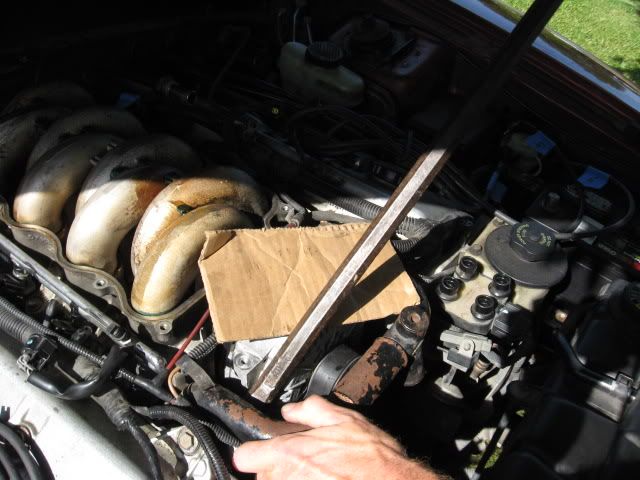
Remove the bracket on the alternator holding the coolant crossover tube(Black rusty tube around the alternator going under the intakemanifold.)
Getting the coolant crossover tube out! This takes some "delicate muscle" becareful not to break it but you will have to pry it wasn't easy getting out, the cardboard is not not scratch anything, there is a coolant temp sensor to remove, make sure all bolts and brackets are clear, there is nothing holding the tube itself in the head except pressure.(The bracket on/near the alternator holds it down so be sure to take all of those bolts off)
The lowerintake was a painto take off, there are two bolts inside the intake walls (10mm)
and several outerbolts, IIRC it was 13MM deep socket for 2 and 8mm socket for the other (on each side) However there is also 2 bolts at the very back of the intake, which is a PITA to get to, you really need someone else holding hoses back with a screwdriver.
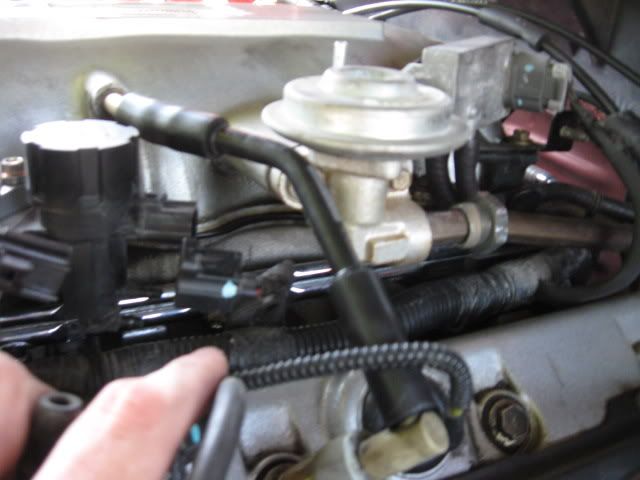
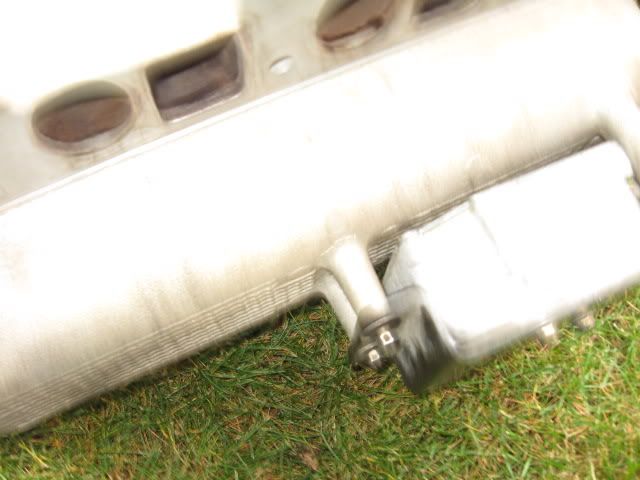
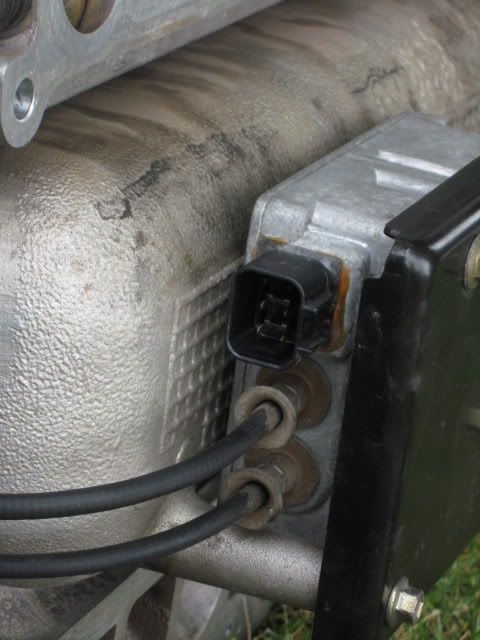
The IMRC control is this box seen at the bottom of the lower intake, it is attached to the IMRCs by throttle style cables and springs, just like the throttlebody.
I used pliers to take these off, i didn't get a pic because i was into it.

If i were to do it again i'd take off the fuel rails, o-rings for injectors are only $2 for 8 so thats like $8 total(2 per injector top and bottom)
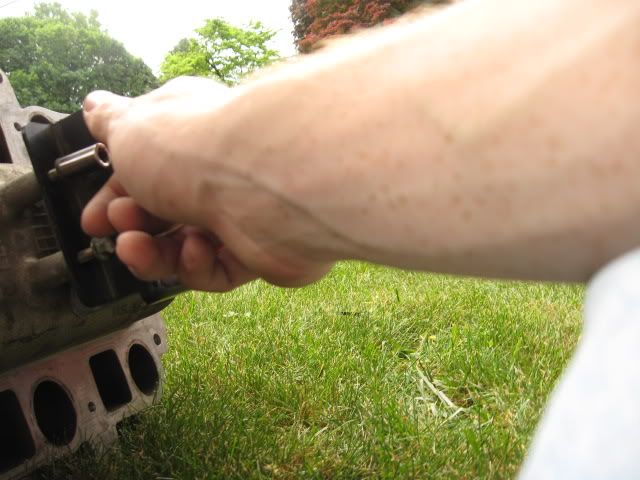
Here are my IMRC with the control. The control was held onto the intake with 3 bolts though there are more than 3, just look and see which 3 hold it, its fairly easy to see.
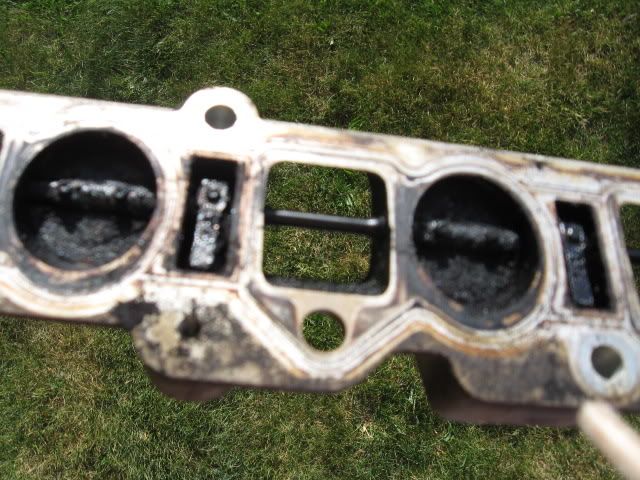
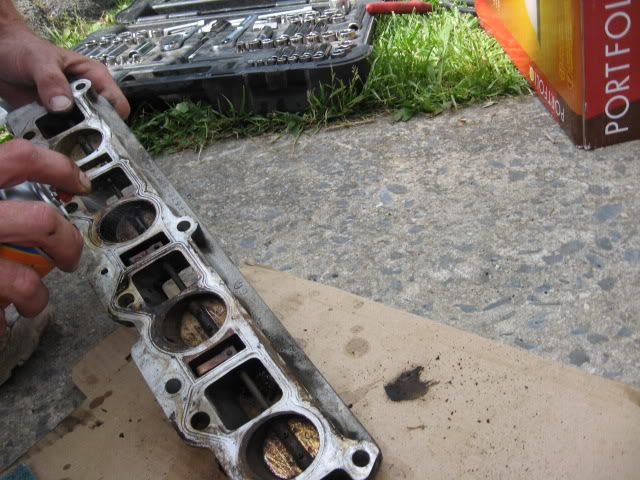
IMRCs pretty gummed up.

IMRCS with the controller.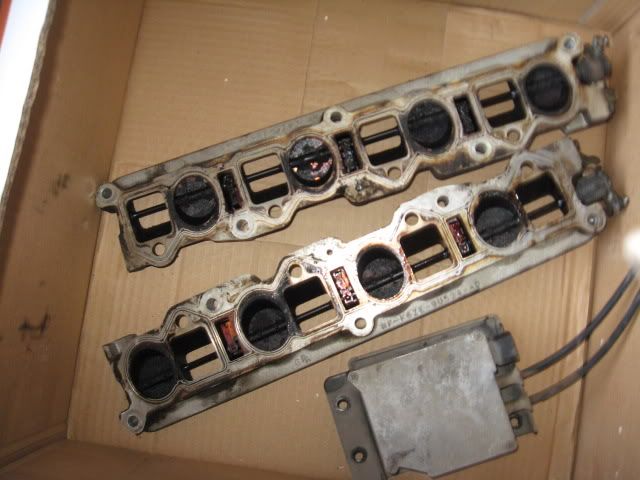
Cleaning time!
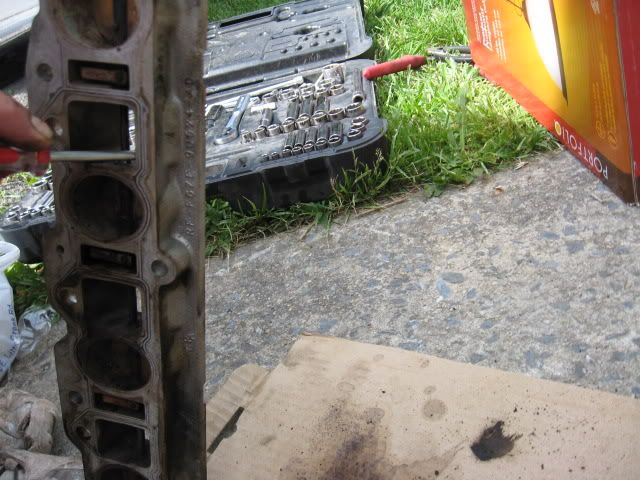
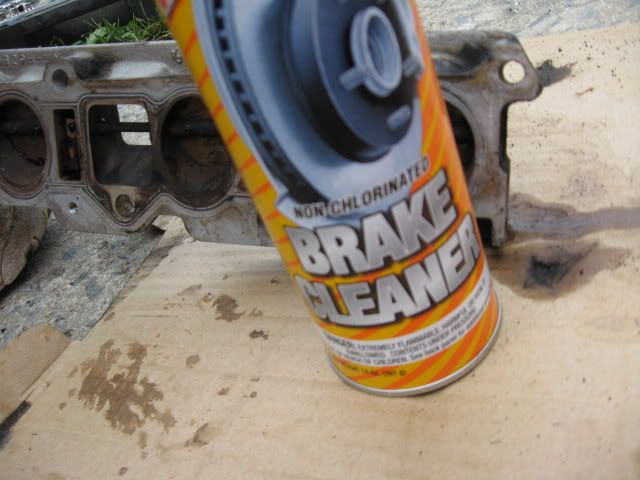

pretty self explanitory, get the gunk out, i used a small screwdriver (lightly) 2 toothbrushes and a lot of brake cleaner.
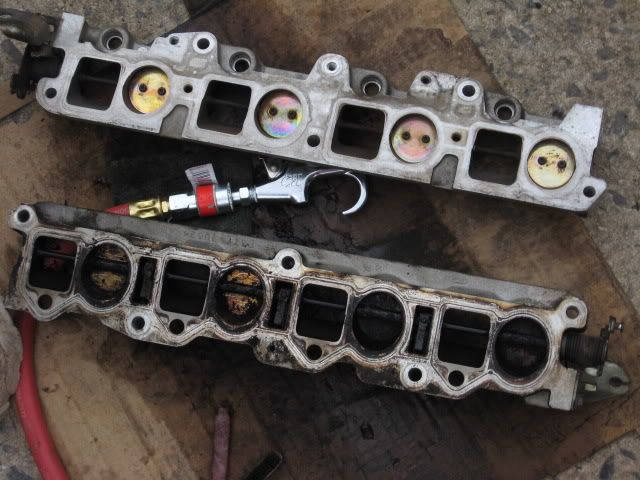
Def better

Cleaned up the head where the IMRC's/intake goes as well.
Next we put the control back on the intake, the 3 bolts you removed, put em back.
I got new gaskets, ran me $75 for the whole deal IMRCs to heads/lowerintake to IMRCs and Plenum (upper intake ) to lower intake.


I threw one small bolt in the middle so i could keep the gasket and IMRC lined up then just throw them in at once.

again same deal
Please dont rain!
lol

clear pic of gasket on lower before IMRC went on.
When putting the lower on, as a help to which side they go obviously see if they line up on the head with the fuel injector holes facing up (the flat surface should be down and a little taper/drop off should be up.)
I didn't really get a good picture of the reconnecting of the wires but its pretty self explanitory, now when you put the lower intake in this...
connects to..
that port on the IMRC control.
I slid the intake in first, then lifted the front up and stuck my hand back there and connected em.
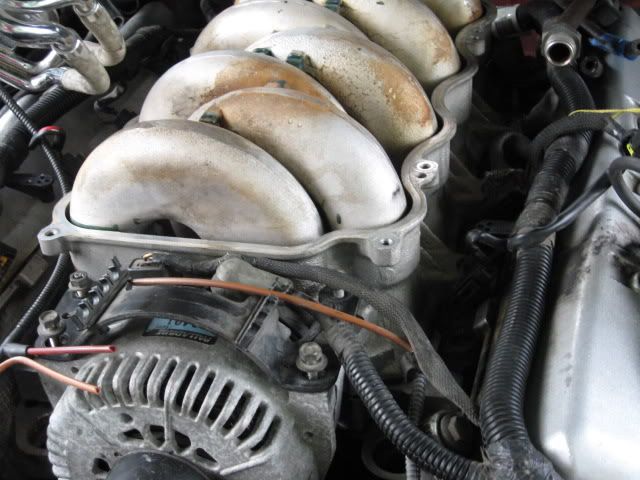
Intake back in!
next, these bolts

go to the 4 middle sections around the intake, just incase you don't remember where you took em off at.
Don't overtighten because there is a sequence and torque specs. At this point i just made sure everything lined up and put them in, didn't tighten at all.
As far as torque specs go, the larger bolts are 15-22ft/lbs + 90 degrees, the small bolts are 76-102 inch/lbs
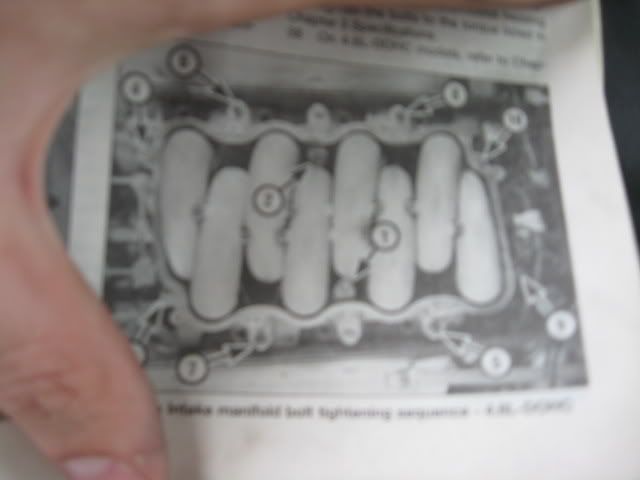
hopefully that shows up, if not consult the internet or a repair manual.


Injectors!

yeah my injectors looked rough some tips looked cracked and some uneven, today i ordered a new set.
the bracket over the Alt back on. Yes i broke EGR hoses, i already bought replacements.
I will continue this as soon as my injectors get here AM usually ships fast so hopefully in the next few days.
here is a pic of my dogs to keep you entertained in the meantime.
Motor!:
remove strutt tower brace and air intake
Damn they didn't show up at all, i'll try to take another pic indoors.
Pretty easy 8 bolts total on the STB 3 on each side 2 up top.
I just took a screwdriver to the clamp at the TB loosened the air tube up there, unplugged the MAF and sensor above it, took the bolt out of the sidewall near the airbox (8mm) and wiggled it out. The airbox is snapped to a holder under the air filter, just wiggle it out.
Next, drain coolant, drivers side under the radiator, pretty self explanitory.
Next, unplug all clips and hoses to the Upper intake manifold, this is from drivers side, Also there is a metal hose that needs to be loosened using a wrench, its the brass/copper color seen.
little clearer there, make sure everything is unplugged.
and there ^ it is undone, the metal line just pulls out. I used an Adjustable Wrench.
I always number my sparkplug wires so i don't forget what is what,
used 3m tape and a sharpie.
again there are several clips and hoses to each side of the intake manifold, some just require some elbow grease to get out.
Other side! remove everything that looks like it comes off, including this bracket holding the throttle cable, 2 screws.. i also took off the spring to the throttle cable.
And gone!
Remove all bolts around upper intake and take it off!
Inside of the upper intake.
Snake like lower intake.
Remove the bracket on the alternator holding the coolant crossover tube(Black rusty tube around the alternator going under the intakemanifold.)
Getting the coolant crossover tube out! This takes some "delicate muscle" becareful not to break it but you will have to pry it wasn't easy getting out, the cardboard is not not scratch anything, there is a coolant temp sensor to remove, make sure all bolts and brackets are clear, there is nothing holding the tube itself in the head except pressure.(The bracket on/near the alternator holds it down so be sure to take all of those bolts off)
The lowerintake was a painto take off, there are two bolts inside the intake walls (10mm)
and several outerbolts, IIRC it was 13MM deep socket for 2 and 8mm socket for the other (on each side) However there is also 2 bolts at the very back of the intake, which is a PITA to get to, you really need someone else holding hoses back with a screwdriver.
The IMRC control is this box seen at the bottom of the lower intake, it is attached to the IMRCs by throttle style cables and springs, just like the throttlebody.
I used pliers to take these off, i didn't get a pic because i was into it.
If i were to do it again i'd take off the fuel rails, o-rings for injectors are only $2 for 8 so thats like $8 total(2 per injector top and bottom)
Here are my IMRC with the control. The control was held onto the intake with 3 bolts though there are more than 3, just look and see which 3 hold it, its fairly easy to see.
IMRCs pretty gummed up.
IMRCS with the controller.
Cleaning time!
pretty self explanitory, get the gunk out, i used a small screwdriver (lightly) 2 toothbrushes and a lot of brake cleaner.
Def better
Cleaned up the head where the IMRC's/intake goes as well.
Next we put the control back on the intake, the 3 bolts you removed, put em back.
I got new gaskets, ran me $75 for the whole deal IMRCs to heads/lowerintake to IMRCs and Plenum (upper intake ) to lower intake.
I threw one small bolt in the middle so i could keep the gasket and IMRC lined up then just throw them in at once.
again same deal
Please dont rain!
lol
clear pic of gasket on lower before IMRC went on.
When putting the lower on, as a help to which side they go obviously see if they line up on the head with the fuel injector holes facing up (the flat surface should be down and a little taper/drop off should be up.)
I didn't really get a good picture of the reconnecting of the wires but its pretty self explanitory, now when you put the lower intake in this...
connects to..
that port on the IMRC control.
I slid the intake in first, then lifted the front up and stuck my hand back there and connected em.
Intake back in!
next, these bolts
go to the 4 middle sections around the intake, just incase you don't remember where you took em off at.
Don't overtighten because there is a sequence and torque specs. At this point i just made sure everything lined up and put them in, didn't tighten at all.
As far as torque specs go, the larger bolts are 15-22ft/lbs + 90 degrees, the small bolts are 76-102 inch/lbs
hopefully that shows up, if not consult the internet or a repair manual.
Injectors!
yeah my injectors looked rough some tips looked cracked and some uneven, today i ordered a new set.
the bracket over the Alt back on. Yes i broke EGR hoses, i already bought replacements.
I will continue this as soon as my injectors get here AM usually ships fast so hopefully in the next few days.
here is a pic of my dogs to keep you entertained in the meantime.
Last edited by SVTeeshirt; 05-24-2010 at 01:41 PM.
 05-20-2010, 10:01 PM
#3
5th Gear Member
Thread Starter
Join Date: Nov 2007
Location: Maryland
Posts: 4,955
Also, i may not even put my intake back on lol I have 01 heads/cam/intake i might throw in instead lol.
05-21-2010, 05:52 PM
#8
5th Gear Member
Thread Starter
Join Date: Nov 2007
Location: Maryland
Posts: 4,955
talked myself out of it, there is still a good bit of work to go that far and my bottom end has 158k and change, who knows how long it'll be before im back in there.
Hopefully i'll have enough time to do some appearence inside and out before she goes also a built rear/tranny.
4.30s are going in the week i get tags.
Cleaned the IMRCs today, took FOREVER lol they were baaaad. I took some pics will put them up when i continue this write-up.
Hopefully i'll have enough time to do some appearence inside and out before she goes also a built rear/tranny.
4.30s are going in the week i get tags.
Cleaned the IMRCs today, took FOREVER lol they were baaaad. I took some pics will put them up when i continue this write-up.
05-23-2010, 12:55 PM
#10
5th Gear Member
Thread Starter
Join Date: Nov 2007
Location: Maryland
Posts: 4,955
158k  By the look of the IMRCs i don't think the owner used premium gas, the exhaust valves ARE FILTHY. I got some seafoam im putting in the crankcase, i'll probably keep seafoaming it for the next few oil changes. She's def a diamond in the rough but im willing to put in the work to bring it back to its former glory.
By the look of the IMRCs i don't think the owner used premium gas, the exhaust valves ARE FILTHY. I got some seafoam im putting in the crankcase, i'll probably keep seafoaming it for the next few oil changes. She's def a diamond in the rough but im willing to put in the work to bring it back to its former glory.