
Installing LCA's. DIY thread.

Thread Starter
3rd Gear Member
Joined: Jan 2008
Posts: 638
From: CA
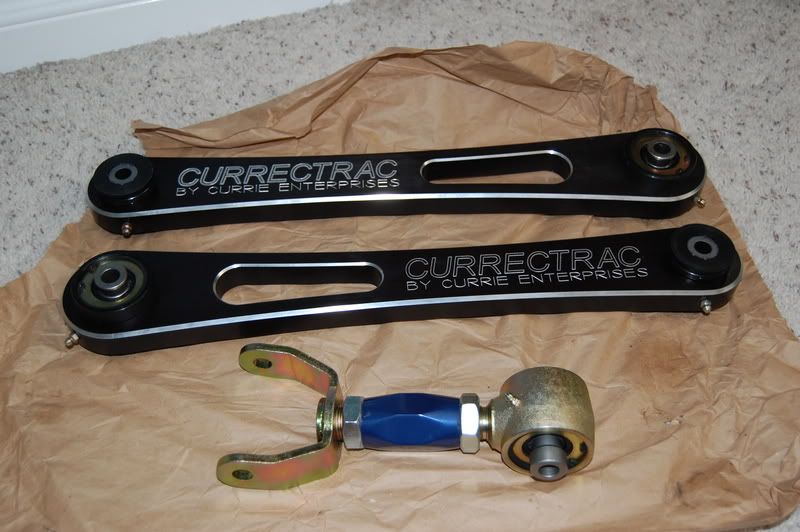
So as some of you may have seen, I picked up my control arms the other day. I had a chance to put them on this morning, but I only did the lowers. Ill be doing the upper once I get my suspension all taken care of. Anyways, this is a pretty simple job, and only requires basic hand tools.
Tools Needed:
18mm socket w/ ratchet or 18mm wrench.
Flathead screwdriver
Parts:
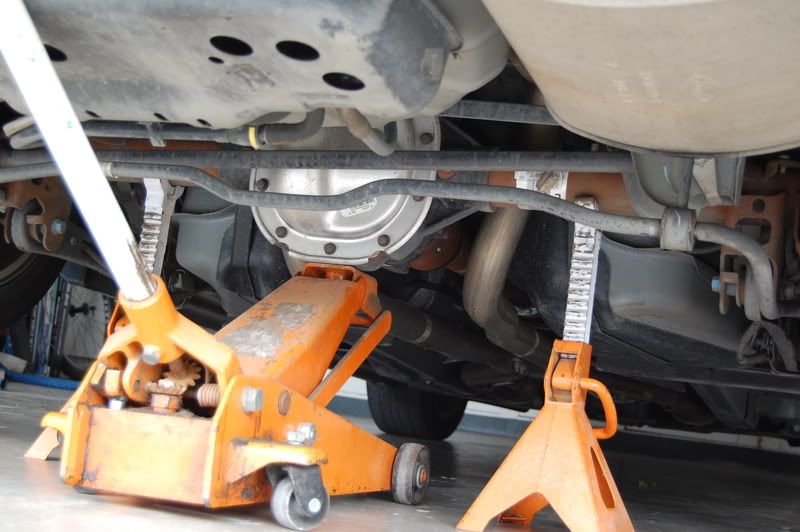
First off, start by jacking up the car. I did this by placing the jack underneath the rear end center section. Make sure you dont bend the bottom of the cover! Once you have it high enough, I just placed the jack stands under each one of the axle tubes.
Once you have it off the ground and you have the wheels removed, grab your ratchet with an 18mm socket and climb underneath the car. There are only 2 bolts holding on the control arms. One is on the rear end, the other is on the body itself.
Frameside bracket:
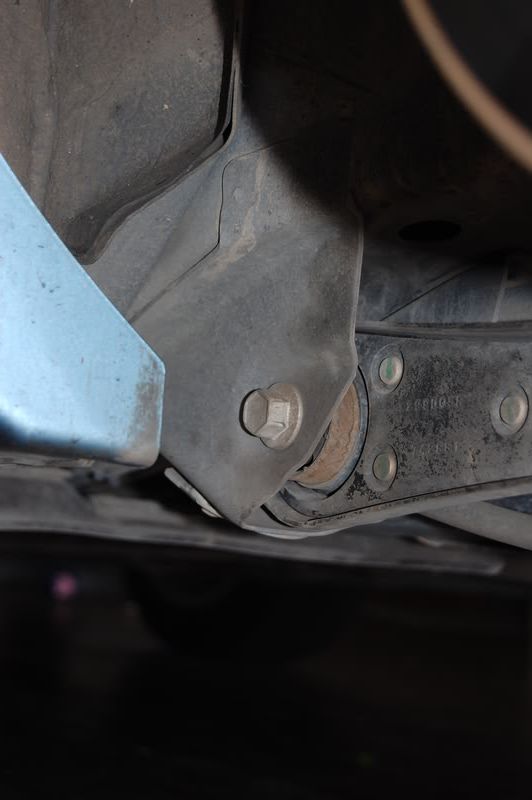
Rearend bracket:
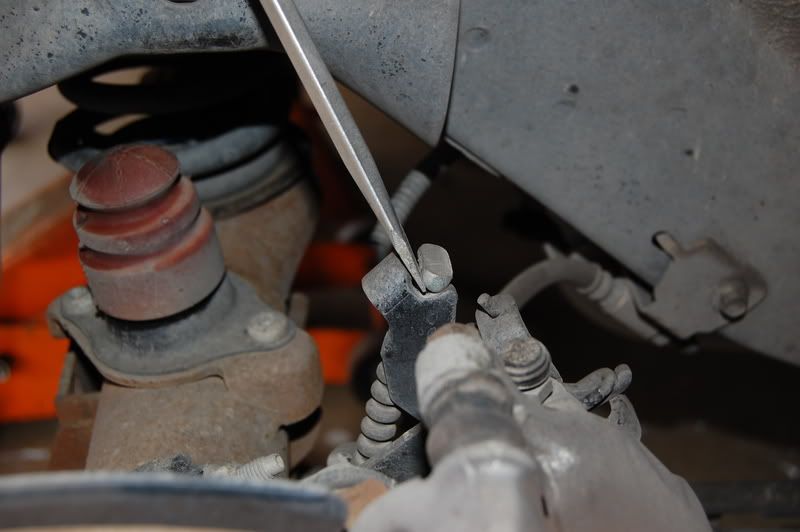
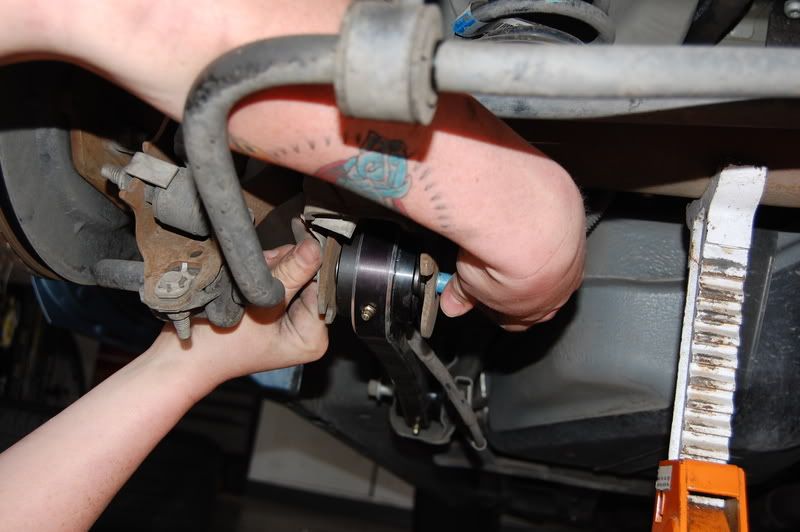
Now youll notice that the parking brake cables run right through the control arm itself. No need to worry. They are easy to remove. Start off by popping the cable off of the parking brake fork. I just used a flathead screwdriver to push it off. This is real easy to do.
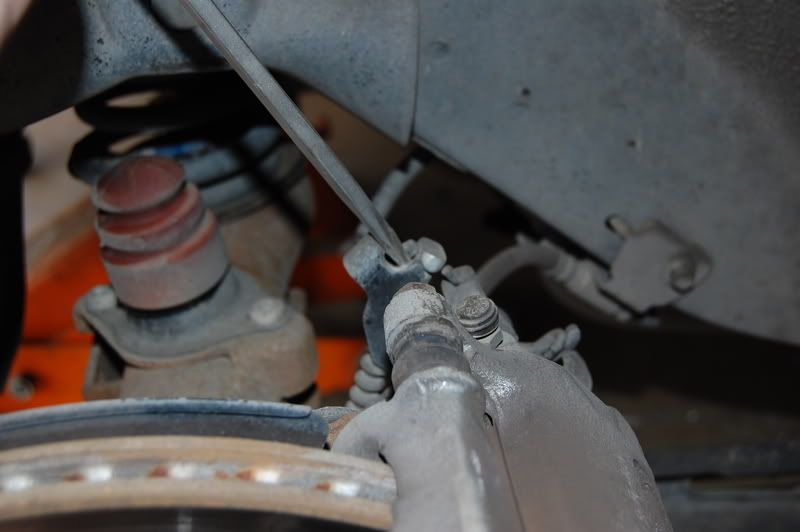
Once you have that done. Simply pop off the clip that holds the cable to bracket.
Once that is done, and you have removed both bolts holding the control arm in place, simply remove the control arm.

Once that is done, grab your new control arms. Make sure you fish the cable back through the control arm as it previously was. I started by placing the frameside end of the control arm in its bracket and putting the bolt through just making it hand tight for now.
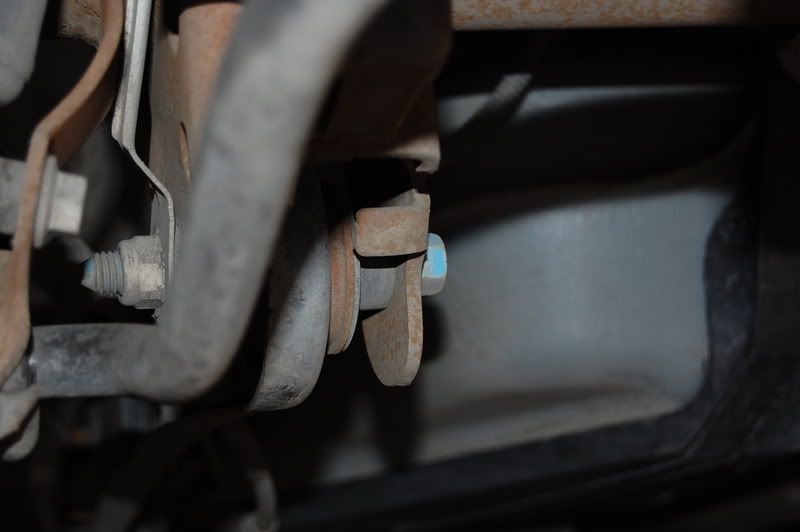
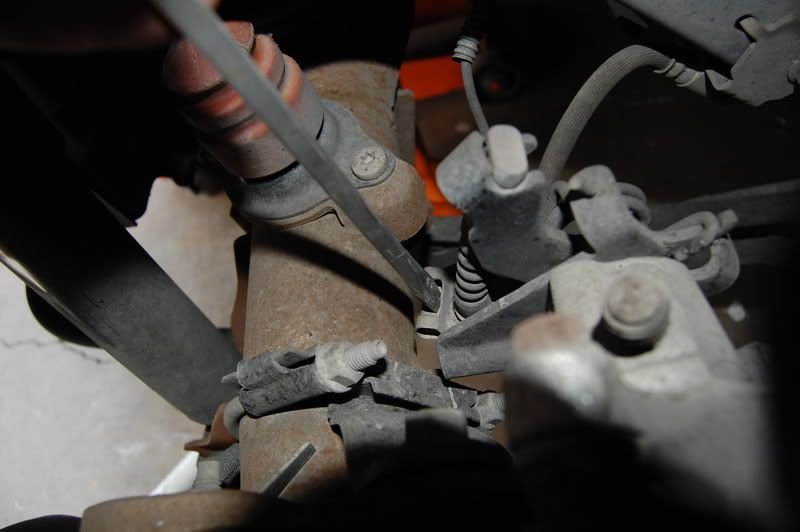
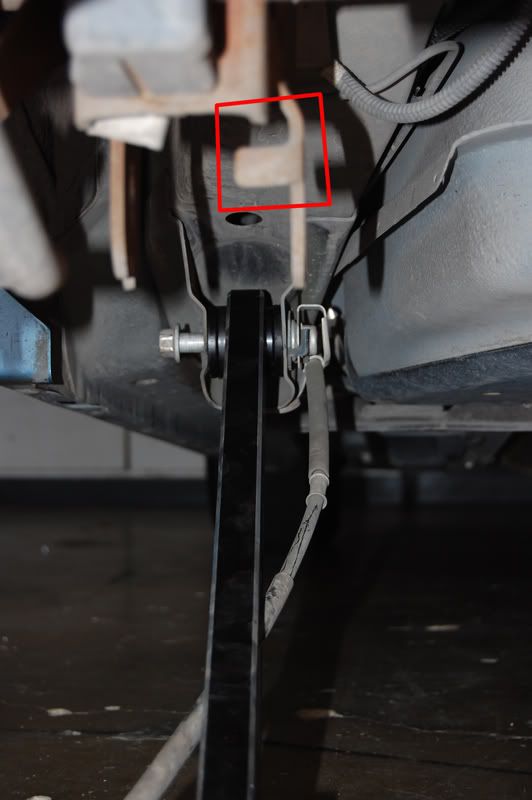
Now, before you place the control arm in the rearend bracket, take a look at the bracket itself. You will notice there is a tab that is bent going across the rear of the bracket. On these particular control arms, you willl have to bend that tab back to keep it from gouging the control arm. You may not have to do this on your particular setup, but just keep an eye out for it.
Here it is before its bent:
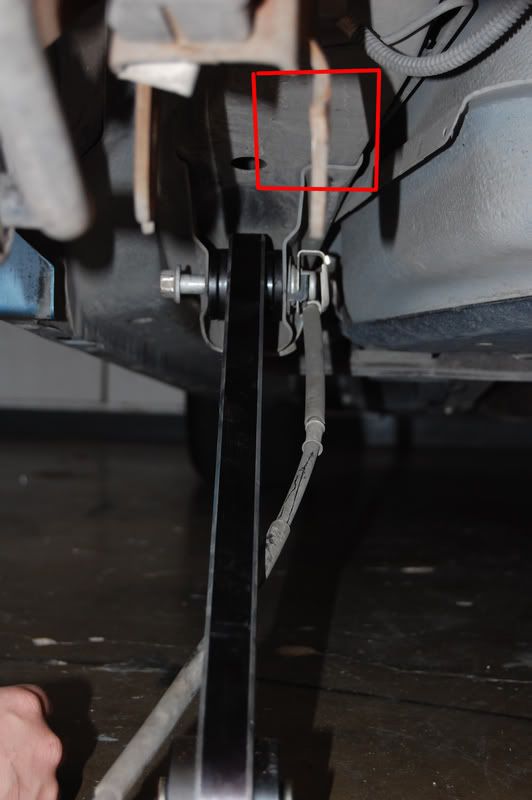
Here it is after I bent it straight back (might be kind of hard to see):
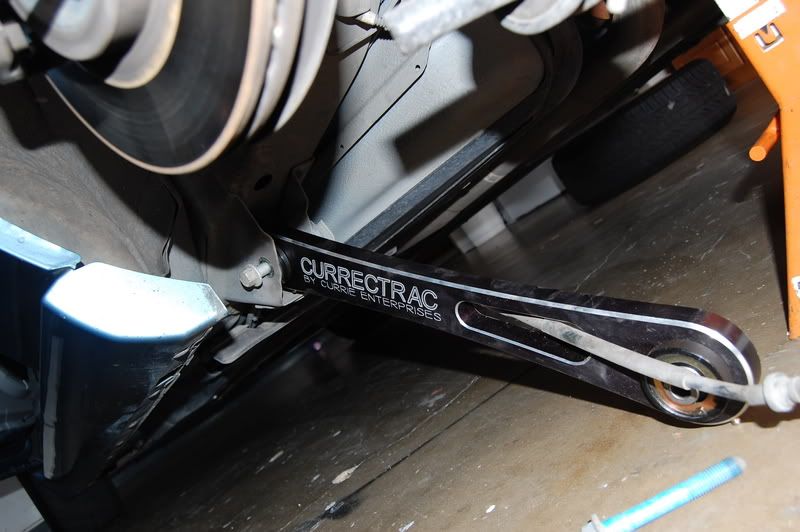
Once that is done, slide the other end of the control arm up into place and slide the bolt in.
Once that is done, just make sure you have everything nice and tight. Repeat these steps for the other side and youre all set.

You can still kind of see it even with the wheel on too.

Anyways, like I said, it is pretty straightforward. I havent had a chance to fully test them out yet, but once I do, I will definitely let you all know.
Tools Needed:
18mm socket w/ ratchet or 18mm wrench.
Flathead screwdriver
Parts:
First off, start by jacking up the car. I did this by placing the jack underneath the rear end center section. Make sure you dont bend the bottom of the cover! Once you have it high enough, I just placed the jack stands under each one of the axle tubes.
Once you have it off the ground and you have the wheels removed, grab your ratchet with an 18mm socket and climb underneath the car. There are only 2 bolts holding on the control arms. One is on the rear end, the other is on the body itself.
Frameside bracket:
Rearend bracket:
Now youll notice that the parking brake cables run right through the control arm itself. No need to worry. They are easy to remove. Start off by popping the cable off of the parking brake fork. I just used a flathead screwdriver to push it off. This is real easy to do.
Once you have that done. Simply pop off the clip that holds the cable to bracket.
Once that is done, and you have removed both bolts holding the control arm in place, simply remove the control arm.
Once that is done, grab your new control arms. Make sure you fish the cable back through the control arm as it previously was. I started by placing the frameside end of the control arm in its bracket and putting the bolt through just making it hand tight for now.
Now, before you place the control arm in the rearend bracket, take a look at the bracket itself. You will notice there is a tab that is bent going across the rear of the bracket. On these particular control arms, you willl have to bend that tab back to keep it from gouging the control arm. You may not have to do this on your particular setup, but just keep an eye out for it.
Here it is before its bent:
Here it is after I bent it straight back (might be kind of hard to see):
Once that is done, slide the other end of the control arm up into place and slide the bolt in.
Once that is done, just make sure you have everything nice and tight. Repeat these steps for the other side and youre all set.
You can still kind of see it even with the wheel on too.
Anyways, like I said, it is pretty straightforward. I havent had a chance to fully test them out yet, but once I do, I will definitely let you all know.


5th Gear Member
Joined: Jul 2006
Posts: 3,834
From:
Thanks....awesome write up. I am getting ready to do the install myself...just waiting to see what type lca's I will get....prob BMR....now did you have to bend the tab just so you did not scratch the lca (aesthetic) or was there a mechanical reason behind that....I just copied your write up to a word doc and now i can order my LCA......looks great...
Thread Starter
3rd Gear Member
Joined: Jan 2008
Posts: 638
From: CA
The bend in the bracket will limit the Johnny Joint from working properly. Some arms dont need to have that piece bent. If youre interested in a set of these arms...let me know.[8D]
Multi-Tasking Moderator!
Joined: Nov 2006
Posts: 15,618
From: Detroit Rock City!
I see the grease zerts and are they poly/poly or poly/rod ends? I am interested but want your take on how they feel and act on the road. I would torque the bolt to spec and if it will not hold spec get new hardware. Ford does say they are one time use hardware and should be replaced if they will not torque to the proper 129 ft/lbs! JMO better safe than sorry. I am not saying that it cannot be reused but sometimes they wont hold the torque spec after they were removed! J
ORIGINAL: xROBxCOREx
The bend in the bracket will limit the Johnny Joint from working properly. Some arms dont need to have that piece bent. If youre interested in a set of these arms...let me know.[8D]
The bend in the bracket will limit the Johnny Joint from working properly. Some arms dont need to have that piece bent. If youre interested in a set of these arms...let me know.[8D]

3rd Gear Member
Joined: Dec 2006
Posts: 531
From: PA
Just did my CHE's yesterday, pretty easy once I figured out how to fit my fat head between the jack Stand and the wheel to get my fat hands up in there to release the Ebrake cable.
Took me two hours with hand tools in the garage.
Took me two hours with hand tools in the garage.


5th Gear Member
Joined: Oct 2006
Posts: 3,115
From: Baytown, TX
just checking as to if anyone remembered this
https://mustangforums.com/m_4370038/...tm.htm#4370038
https://mustangforums.com/m_4370038/...tm.htm#4370038

Thread
Thread Starter
Forum
Replies
Last Post
28HopUp
2005-2014 Mustangs
4
Apr 21, 2009 12:58 PM
2000GT4.6
4.6L General Discussion
17
Nov 29, 2007 08:37 AM