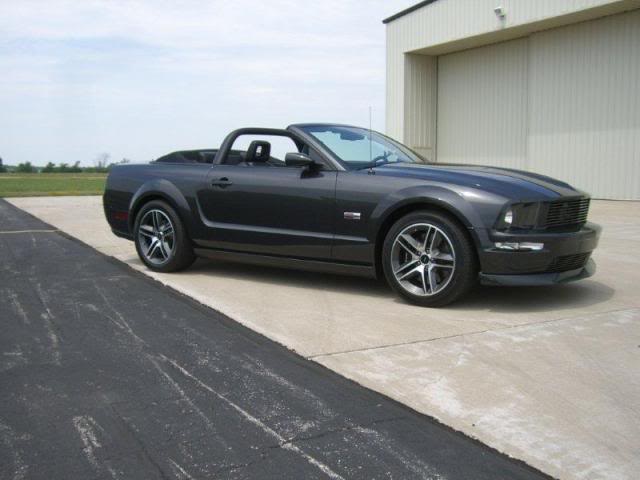
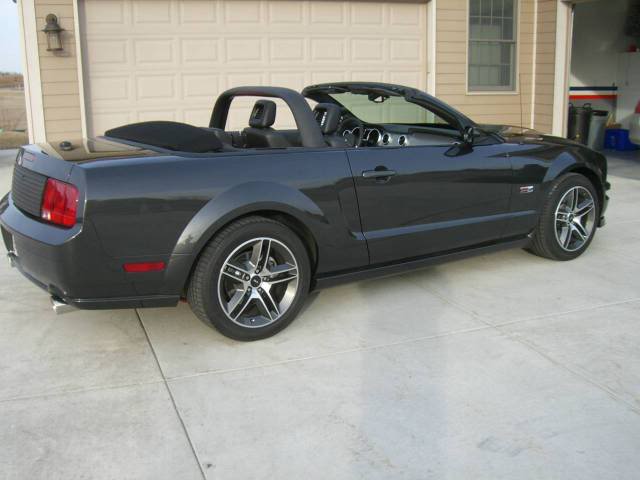
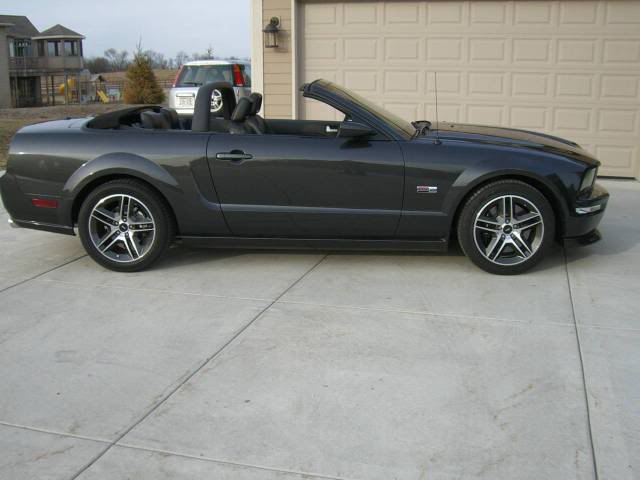
CDC light bar...

Thread Starter
2nd Gear Member
Joined: Jan 2013
Posts: 260
From: Indiana
I ordered one of these from American Muscle tonight. Does anyone have experience installing this and can you tell me how it went? I still have a bit before it get's warm enough to work on the car, but I would love to get a handle on it beforehand.
CDC Light Bar
CDC Light Bar
4th Gear Member
Joined: Oct 2008
Posts: 1,898
From: WI
Very simple install as this was very mod I did to my car. Taking my time, it probably took all of 2 hours. I would recommend downloading the install instructions from AM to ensure you have the correct drill bits before starting.
2nd Gear Member
Joined: Jul 2008
Posts: 327
From: Missouri
Agreed, an easy install.
The 2 hardest parts of the install are
1) working up the courage to take a drillbit to your interior (you must drill an inch wide hole on 2 panels)
2) wiring the brake light.
I ordered the one without the brake light, so I avoided that issue.
The 2 hardest parts of the install are
1) working up the courage to take a drillbit to your interior (you must drill an inch wide hole on 2 panels)
2) wiring the brake light.
I ordered the one without the brake light, so I avoided that issue.
4th Gear Member
Joined: Mar 2007
Posts: 1,227
From: tennessee
and be careful when you are carrying the light bar around your car getting ready to install it, or you will end up with a scratch on the side of your rear quarter panel... like mine (the edges are very sharp)
Thread Starter
2nd Gear Member
Joined: Jan 2013
Posts: 260
From: Indiana
One thing... AM had the poor taste not to include the interrupt switch for when the top is up; something every other company selling it, including CDC, offered with the light bar. I had to pay an extra $40 for it. I called them up and they had no idea why they did that, but it's kind of a low rent thing.
You guys wouldn't have some pictures of what it looks like when finished, would you? All I can find are pretty low-res...
Kevin
You guys wouldn't have some pictures of what it looks like when finished, would you? All I can find are pretty low-res...
Kevin
1st Gear Member
Joined: May 2008
Posts: 59
From: Massachusetts
There wasn't any extra switch needed or used with mine. It goes inline with the existing top switch, that's where it gets it's ground from. As others have said, the drilling is what you need to be careful with. Triple check the template placement on the plastic part. One other tip, use the biggest magnet you can find when drilling the mount bracket. The shavings like to fall right in to the seatbelt mechanism and the magnet will help prevent it.