Hood Accent Decals (Installed!)

Thread Starter
3rd Gear Member
Joined: Feb 2012
Posts: 578
From: GA
Just installed these! I LOVE them! Just thought I'd share a few things  http://www.americanmuscle.com/hood-a...lack-1012.html
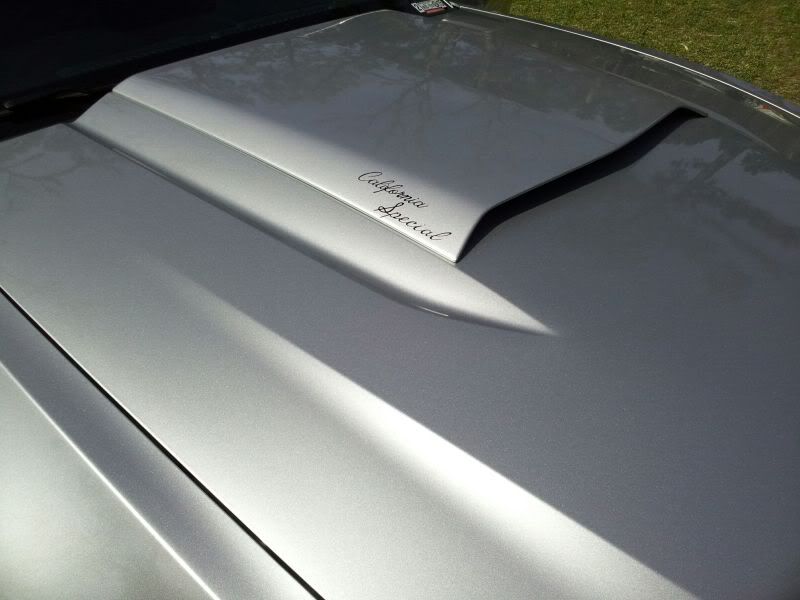
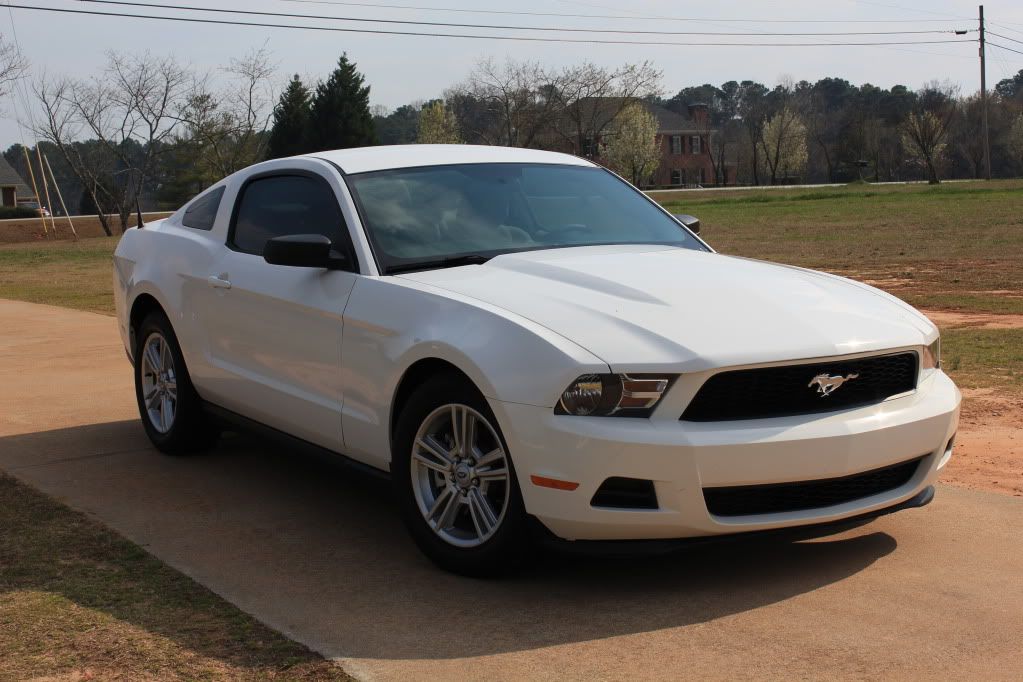
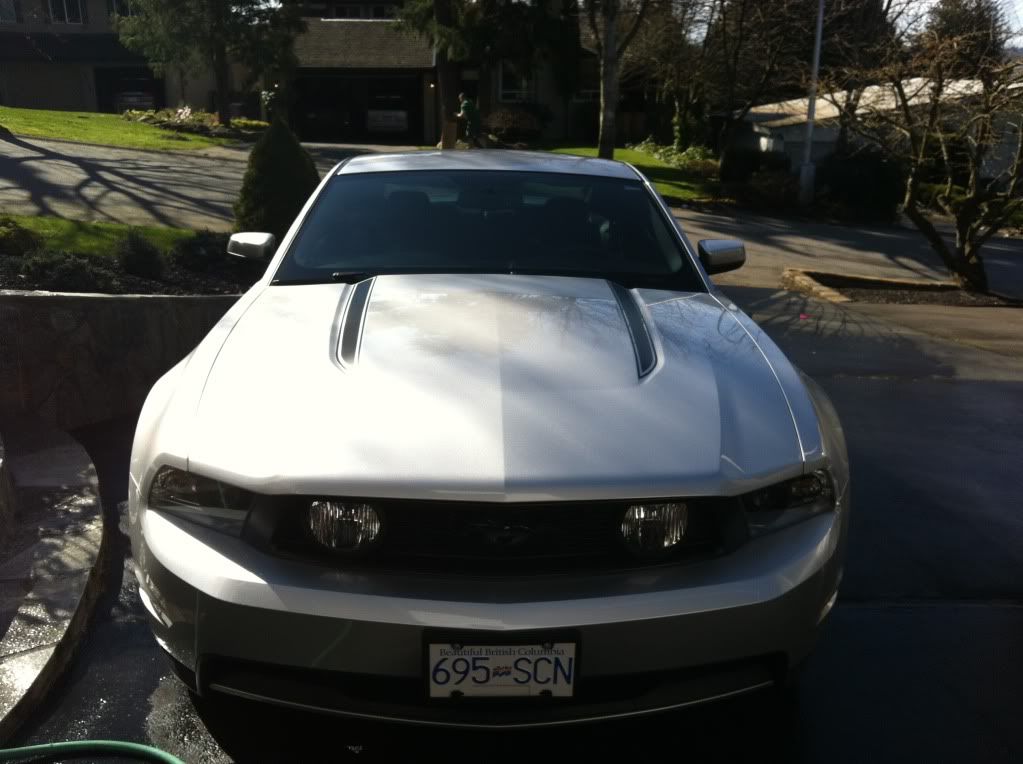
Here's before:
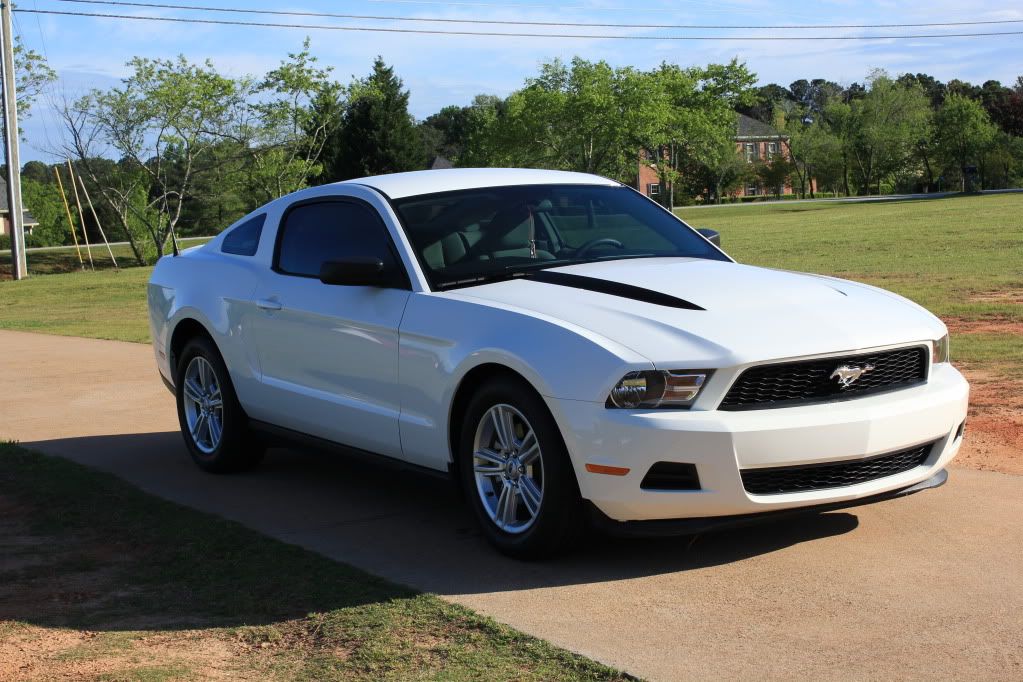
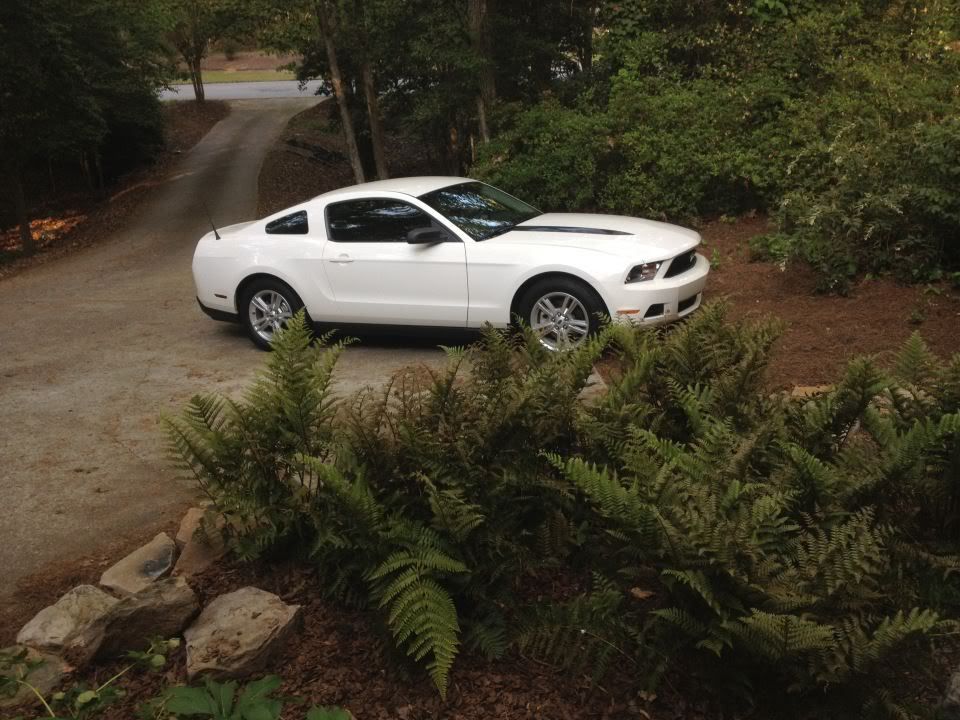
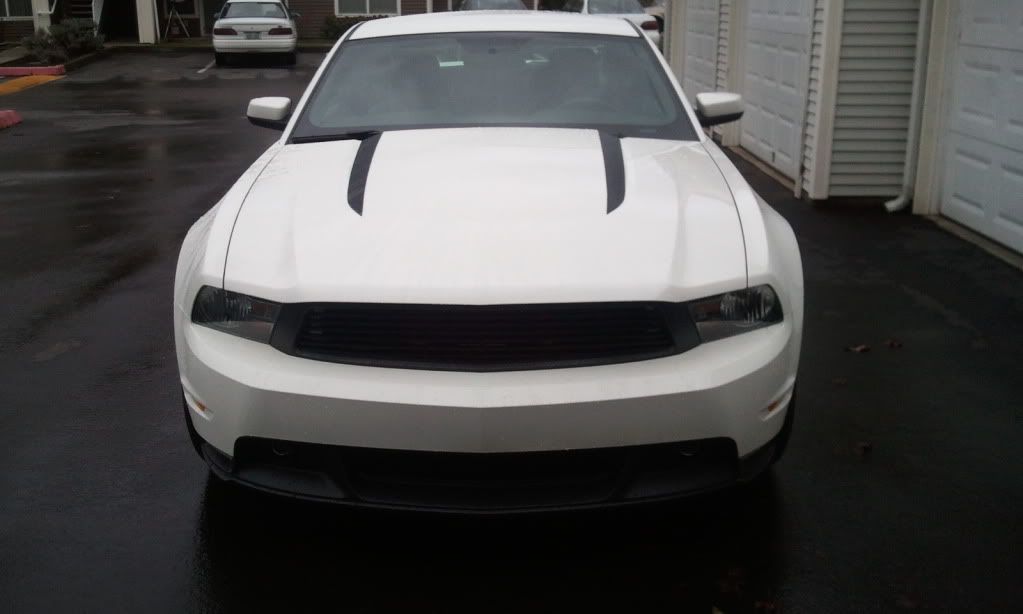
And after. THOUGHTS?:

INSTALLATION
Install went easy as pie! You can do this by yourself, but it's nice to have a helping hand to lay it out straight with no issues. To make sure I had it lined up correctly, I peaked under the pointy front part of the decal and made that straight. Then I ran my finger along where the bulge of the hood starts at the top and made sure the edge of the decal was aligned with that. Flawless. Then I performed the rest of the procedure with the squeegee and such and let it sit for like 10-15 minutes. When we peeled it back, I would spray the decal as we pulled it off, made it A LOT easier and my dad said he could feel a difference whenever I sprayed it while he peeled. Easy as pie. Did the same for the other side and waited about 30 minutes for it to settle and stick to the car for sure before trimming the access at the top. This was quite tricky to cut the extra 1" that was hanging over the top. You COULD tuck it under, but we felt it wouldn't stick very well so we trimmed it. Get an exacto knife and pull the decal tight then try to cut it as close as you can without hitting the paint. If the decal pulls up a little, that's okay! You just spray it and lay it back down and squeegee it good. You can get as close as you want to my car and won't notice the decal being cut at the top. Overall it was a breeze. And I'm a BEGINNER with this $H!T too. Definitely recommend these if you think they'll look good on your car.
http://www.americanmuscle.com/hood-a...lack-1012.html Here's before:
And after. THOUGHTS?:
INSTALLATION
Install went easy as pie! You can do this by yourself, but it's nice to have a helping hand to lay it out straight with no issues. To make sure I had it lined up correctly, I peaked under the pointy front part of the decal and made that straight. Then I ran my finger along where the bulge of the hood starts at the top and made sure the edge of the decal was aligned with that. Flawless. Then I performed the rest of the procedure with the squeegee and such and let it sit for like 10-15 minutes. When we peeled it back, I would spray the decal as we pulled it off, made it A LOT easier and my dad said he could feel a difference whenever I sprayed it while he peeled. Easy as pie. Did the same for the other side and waited about 30 minutes for it to settle and stick to the car for sure before trimming the access at the top. This was quite tricky to cut the extra 1" that was hanging over the top. You COULD tuck it under, but we felt it wouldn't stick very well so we trimmed it. Get an exacto knife and pull the decal tight then try to cut it as close as you can without hitting the paint. If the decal pulls up a little, that's okay! You just spray it and lay it back down and squeegee it good. You can get as close as you want to my car and won't notice the decal being cut at the top. Overall it was a breeze. And I'm a BEGINNER with this $H!T too. Definitely recommend these if you think they'll look good on your car.


Thread Starter
3rd Gear Member
Joined: Feb 2012
Posts: 578
From: GA
Yes sir! yours seem a little skinnier too. If I failed epicly with these I was just gonna have a body shop do it also. But they came out great! I'm excited to join the cowl hood decal club ;p