polishing cobra intake and accersory brackets


Thread Starter
4th Gear Member
Joined: Jun 2006
Posts: 1,892
From:
ORIGINAL: dman302
Using white rouge and a sewn buff would do a much better job of bringing out the shine than a powerball. I would estimate 12-16 hours to complete an intake and 2-3 hours for accessory brackets. Polishing alum is a hobby of mine...it takes alot of effort and time but the results are really worth while. As for sanding...I usually start at 80 work to 120 then 240 and finish with 320...anything else is just wasted effort and product...the white rouge will remove the fine scratches and provide the smooth flat surface that's required in order to achieve a mirror finish.
Using white rouge and a sewn buff would do a much better job of bringing out the shine than a powerball. I would estimate 12-16 hours to complete an intake and 2-3 hours for accessory brackets. Polishing alum is a hobby of mine...it takes alot of effort and time but the results are really worth while. As for sanding...I usually start at 80 work to 120 then 240 and finish with 320...anything else is just wasted effort and product...the white rouge will remove the fine scratches and provide the smooth flat surface that's required in order to achieve a mirror finish.
ORIGINAL: Blue Oval
anything after the 320 is overkill just use this buffing compound calledtripoli on a high speed dremel
anything after the 320 is overkill just use this buffing compound calledtripoli on a high speed dremel
ORIGINAL: nitrous_bob
i would say that 2000 grit is overkill unless it's a show car.
1000 will be a mirror once it's polished
use power tools as much as possible !!!!!! the original finish is pianted, so it needs to be ground, stripped or sanded off. a belt sander does wonders to hog off the first layers
i would say that 2000 grit is overkill unless it's a show car.
1000 will be a mirror once it's polished
use power tools as much as possible !!!!!! the original finish is pianted, so it needs to be ground, stripped or sanded off. a belt sander does wonders to hog off the first layers
do u think i can use a sander for the wet sanding or is that a bad idea???
also do u think i should go up to 1000?? 80 120 240 and 320 seems like everyone does... should i do a 600 800 and 1000 or stop at 320???

4th Gear Member
Joined: Jun 2005
Posts: 1,077
From:
i got all my polishing stuff from www.eastwoodco.comthey have the compounds there and for the applicator i used a cotton wheel like this one http://www.eastwoodco.com/shopping/p...iProductID=878
youll need a shank to put the wheel on the dremel http://www.eastwoodco.com/shopping/p...iProductID=902
and heres the compounds
tripoli goes on first
http://www.eastwoodco.com/shopping/p...roductID=15302
and the white rouge makes it really shine
http://www.eastwoodco.com/shopping/p...roductID=15303
youll need a shank to put the wheel on the dremel http://www.eastwoodco.com/shopping/p...iProductID=902
and heres the compounds
tripoli goes on first
http://www.eastwoodco.com/shopping/p...roductID=15302
and the white rouge makes it really shine
http://www.eastwoodco.com/shopping/p...roductID=15303
Thread Starter
4th Gear Member
Joined: Jun 2006
Posts: 1,892
From:
ORIGINAL: Blue Oval
i got all my polishing stuff from www.eastwoodco.comthey have the compounds there and for the applicator i used a cotton wheel like this one http://www.eastwoodco.com/shopping/p...iProductID=878
youll need a shank to put the wheel on the dremel http://www.eastwoodco.com/shopping/p...iProductID=902
and heres the compounds
tripoli goes on first
http://www.eastwoodco.com/shopping/p...roductID=15302
and the white rouge makes it really shine
http://www.eastwoodco.com/shopping/p...roductID=15303
would applying a black emery compund befores those to help or is that an unneeded step??
also does that website have like a starter kit??? i mean i need all of the stuff to get started so a start kit would be more simplier... i found one on a different website but i dunno how good they are... i would rather go with a site i have heard feedbak on
4th Gear Member
Joined: Jun 2005
Posts: 1,077
From:
i got a starter kit from there, and it came with sanding rolls but i like doing it by hand better cause you could mess up with the dremel and it would just cut a groove into the metal. and i never used emery so id say dont worry about it

3rd Gear Member
Joined: Dec 2006
Posts: 959
From:
I would recomend and pneumatic sander, with the stick on sanding pads, and i would use at least 1000 toi finsih before polishing, unless you you 2 or 3 different grit buffing compounds. Anyway that looks nice(the intake) maybe one day id do this to mine but im not too worried about show right now........just my opinions
Thread Starter
4th Gear Member
Joined: Jun 2006
Posts: 1,892
From:
ORIGINAL: 90Lxstanger
I would recomend and pneumatic sander, with the stick on sanding pads, and i would use at least 1000 toi finsih before polishing, unless you you 2 or 3 different grit buffing compounds. Anyway that looks nice(the intake) maybe one day id do this to mine but im not too worried about show right now........just my opinions
I would recomend and pneumatic sander, with the stick on sanding pads, and i would use at least 1000 toi finsih before polishing, unless you you 2 or 3 different grit buffing compounds. Anyway that looks nice(the intake) maybe one day id do this to mine but im not too worried about show right now........just my opinions
and what are these stick on sanding pads.... and why use them??

3rd Gear Member
Joined: Dec 2006
Posts: 621
From:
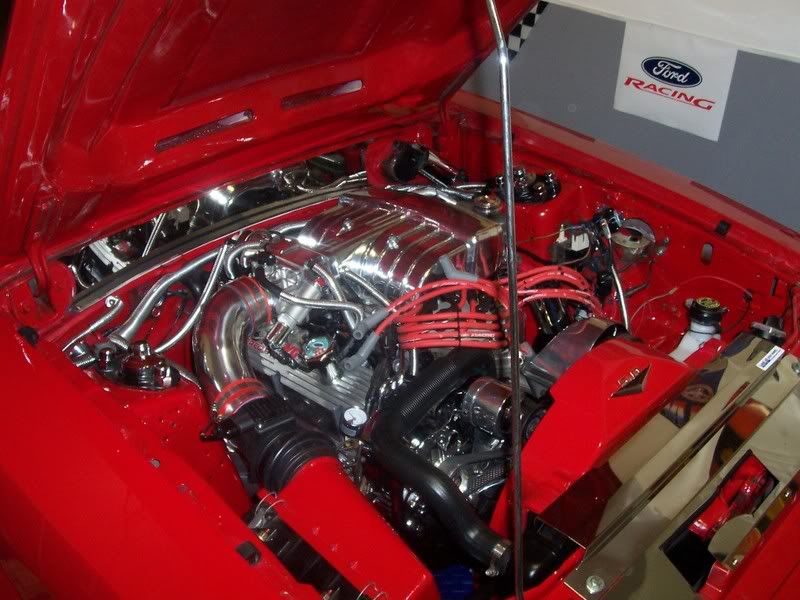
anything over 320 is a waste...320 is used untill you've knocked out any significant sanding gouges and all scratches remaining are light in nature. At that point apply the white rouge to the buff wheel and in uniform up and down motions (no circles and back and forth) work small medum areas untill you have the mirror finish you're after. Doing it right takes time...alum finishes will always show fine lines in sunlight but take your time and WORK it. Nice thing about aluminum...the more you work the area...the more shine you will get. Guys who go crazy with the fine grits will have no better luck than ones who stop at 320...once the surface is flat and no imperections exist...the surface can be polished nicely. My bay is made up of mostly polished aluminum pcs and I will tell you that when parts are done correctly they are quite often confussed with chrome by people at the shows...which really justifies all the hard work. It's VERY messy...takes quite a good bit of time, and it's only going to look as good as the time you're willing to put into it.
Ah yes...let me see if i have a pic here anywhere...um here we are...by the way though i did repolish the typoon upper the finishe was quite good out of the box.
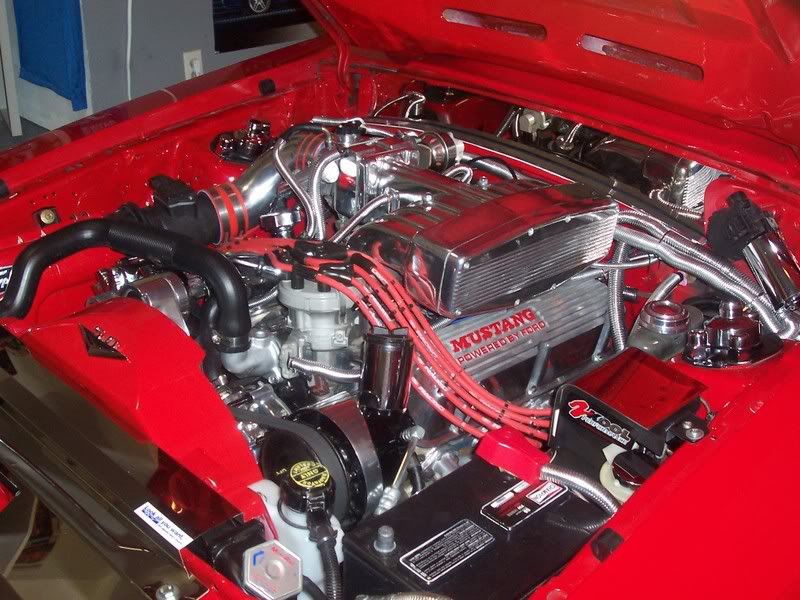
Ah yes...let me see if i have a pic here anywhere...um here we are...by the way though i did repolish the typoon upper the finishe was quite good out of the box.