


Got The Runs? (Cut and Buff Tech)

Thread Starter
6th Gear Member
Joined: Jan 2007
Posts: 5,469
From: AR
 Got The Runs? (Cut and Buff Tech)
Ok, it ain't a Mustang, but it could be if you use your imagination.
I painted the coupe body earlier this week and was doing pretty good until I got a little cocky on the last coat of clear and left a few runs, no matter I was going to cut and buff anyway.
I took some pic as I was cutting it to 1000 grit today so I am going to make a brief tech post for any home painters.
Step one, make sure you put plenty of clear (or paint) on the car, I know there is plenty on this car so with a little care, the chance of "burning through" is reduced.
As sprayed, except for the runs and sags, it came out "ok"... good enough for a work truck, not for a cool car though.
Kind of hard to see in the pic, but there is a huge sag right in the middle of the panel.

Here is the first "tool" I used. Simply a piece of a mixing stick wrapped in sandpaper. I started with 400 wet or dry and then moved to 600.

The second tool I used is a regular old bondo spreader. I use this to frequently wipe off the water and sanding debris so I can see what I am doing.

Ok, where is the paint too thick? Well the run is too thick for sure, and the paint above the run is going to be thicker than the paint below the run. Start by sanding the run and the area above the run, trying to make the IMMEDIATE AREA level while working very carefully.

Use the piece of the paint stick to PRIMARILY sand the high spots, the run and the area above the run, be careful to keep the stick flat against the run so you can sand where you need to sand and not the areas you need to leave alone.

After sanding some, it becomes apparent that the sag/run was bigger than it appeared, ouch, at this point I have moved from 400 grit to 600.

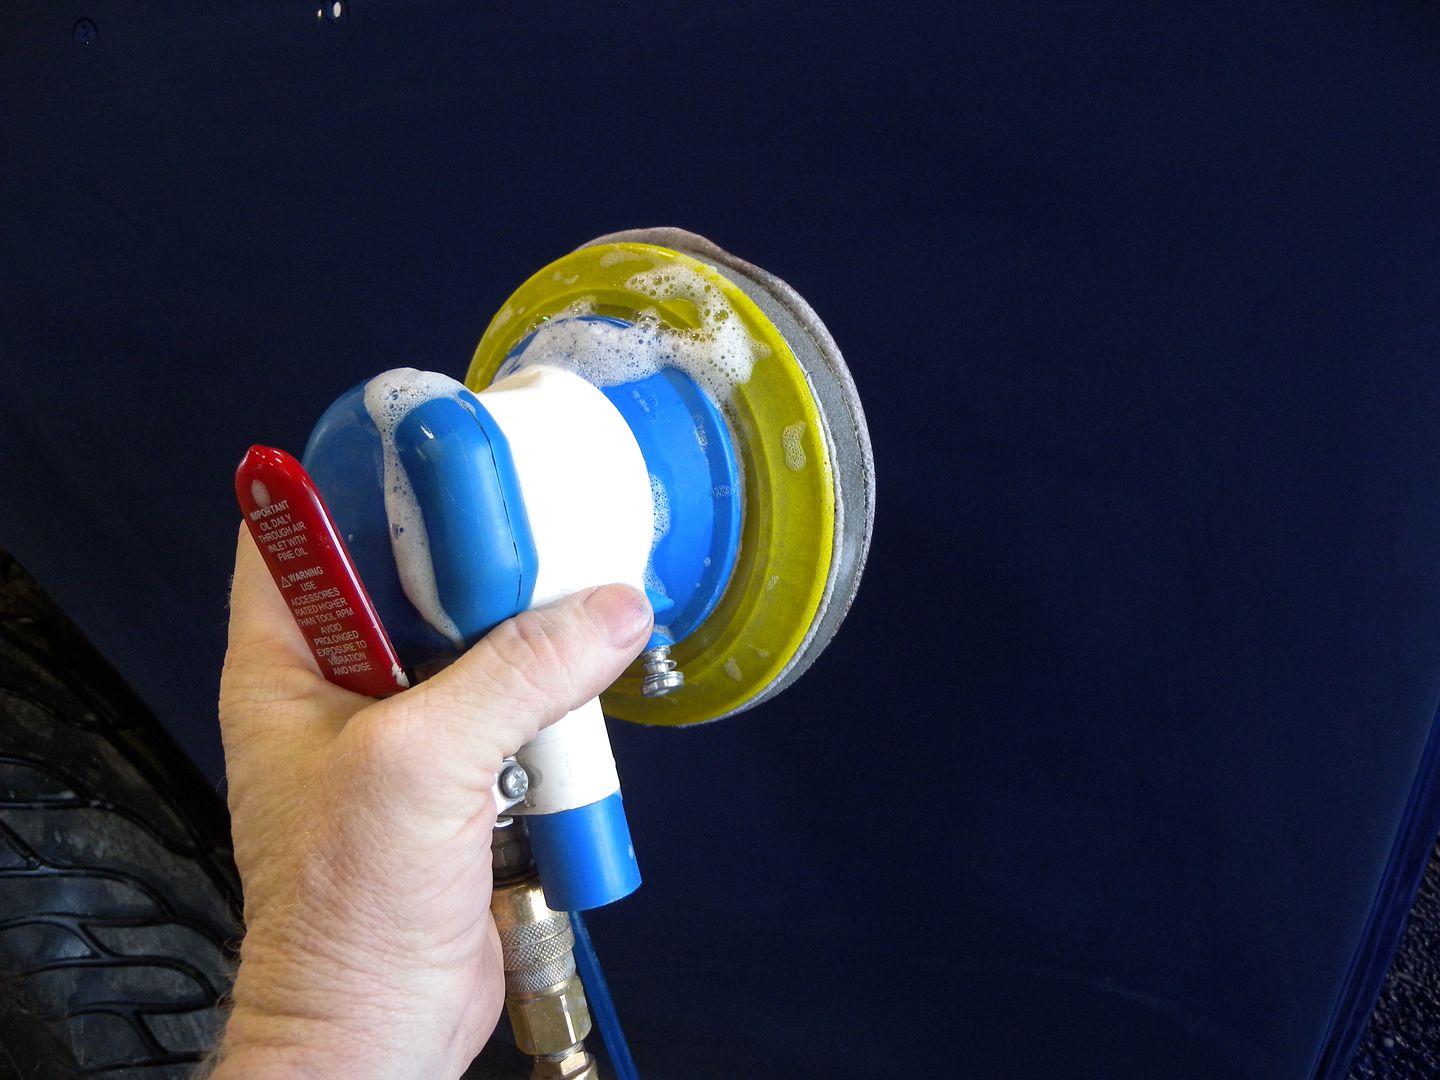
Here is tool #3, This is a Hutchins D/A sander that automatically draws water for wet sanding. What a great tool! At almost $300, it is an expensive buy, but I really like it. I could have worked with blocks and done just fine, but I would not have gotten so much done today. I used this sander with 1000 grit paper today.
At this point I began using the d/a over the entire panel, finding more sags everywhere!

Not much to say here except I just stayed with it, watching the EDGES really close, it only takes a moment to burn through on an edge. Keep working the area in a consistent and expanding pattern, clean look, and adjust.

Here is the side finished at 1000 grit.

I intend to add to this thread right up to the final polish, it should look bitchin...
I painted the coupe body earlier this week and was doing pretty good until I got a little cocky on the last coat of clear and left a few runs, no matter I was going to cut and buff anyway.
I took some pic as I was cutting it to 1000 grit today so I am going to make a brief tech post for any home painters.
Step one, make sure you put plenty of clear (or paint) on the car, I know there is plenty on this car so with a little care, the chance of "burning through" is reduced.
As sprayed, except for the runs and sags, it came out "ok"... good enough for a work truck, not for a cool car though.
Kind of hard to see in the pic, but there is a huge sag right in the middle of the panel.
Here is the first "tool" I used. Simply a piece of a mixing stick wrapped in sandpaper. I started with 400 wet or dry and then moved to 600.
The second tool I used is a regular old bondo spreader. I use this to frequently wipe off the water and sanding debris so I can see what I am doing.
Ok, where is the paint too thick? Well the run is too thick for sure, and the paint above the run is going to be thicker than the paint below the run. Start by sanding the run and the area above the run, trying to make the IMMEDIATE AREA level while working very carefully.
Use the piece of the paint stick to PRIMARILY sand the high spots, the run and the area above the run, be careful to keep the stick flat against the run so you can sand where you need to sand and not the areas you need to leave alone.
After sanding some, it becomes apparent that the sag/run was bigger than it appeared, ouch, at this point I have moved from 400 grit to 600.
Here is tool #3, This is a Hutchins D/A sander that automatically draws water for wet sanding. What a great tool! At almost $300, it is an expensive buy, but I really like it. I could have worked with blocks and done just fine, but I would not have gotten so much done today. I used this sander with 1000 grit paper today.
At this point I began using the d/a over the entire panel, finding more sags everywhere!
Not much to say here except I just stayed with it, watching the EDGES really close, it only takes a moment to burn through on an edge. Keep working the area in a consistent and expanding pattern, clean look, and adjust.
Here is the side finished at 1000 grit.
I intend to add to this thread right up to the final polish, it should look bitchin...

Thread Starter
6th Gear Member
Joined: Jan 2007
Posts: 5,469
From: AR


5th Gear Member
Joined: Nov 2006
Posts: 2,106
From:
One thing that I learned to use is a "California Water Blade" to remove the water between sanding. Give it a try and you will be spoiled. Good write up.
http://www.californiacardusters.com/12waterblade.html
http://www.californiacardusters.com/12waterblade.html


Thread Starter
6th Gear Member
Joined: Jan 2007
Posts: 5,469
From: AR
Ok, I got too lazy to actually take pictures during the buffing process, but it is kind of boring anyway, so it will be ok.
Once I started buffing, some of the runs and sags once again became visible, so where needed, I sanded a little more, being careful to work the high parts only.
Still, I could do a little more work in a couple of spots, if a person looks really hard, evidence of a prior run is slightly visible. I may or may not revisit these spots later. They are minor enough that they will not photograph.
I started the buffing with a Milwaukee electric buffer, a WOOL bonnet, and 3M heavy cut compound. I went around the car once and then I moved to a foam pad with the same compound and went around again.

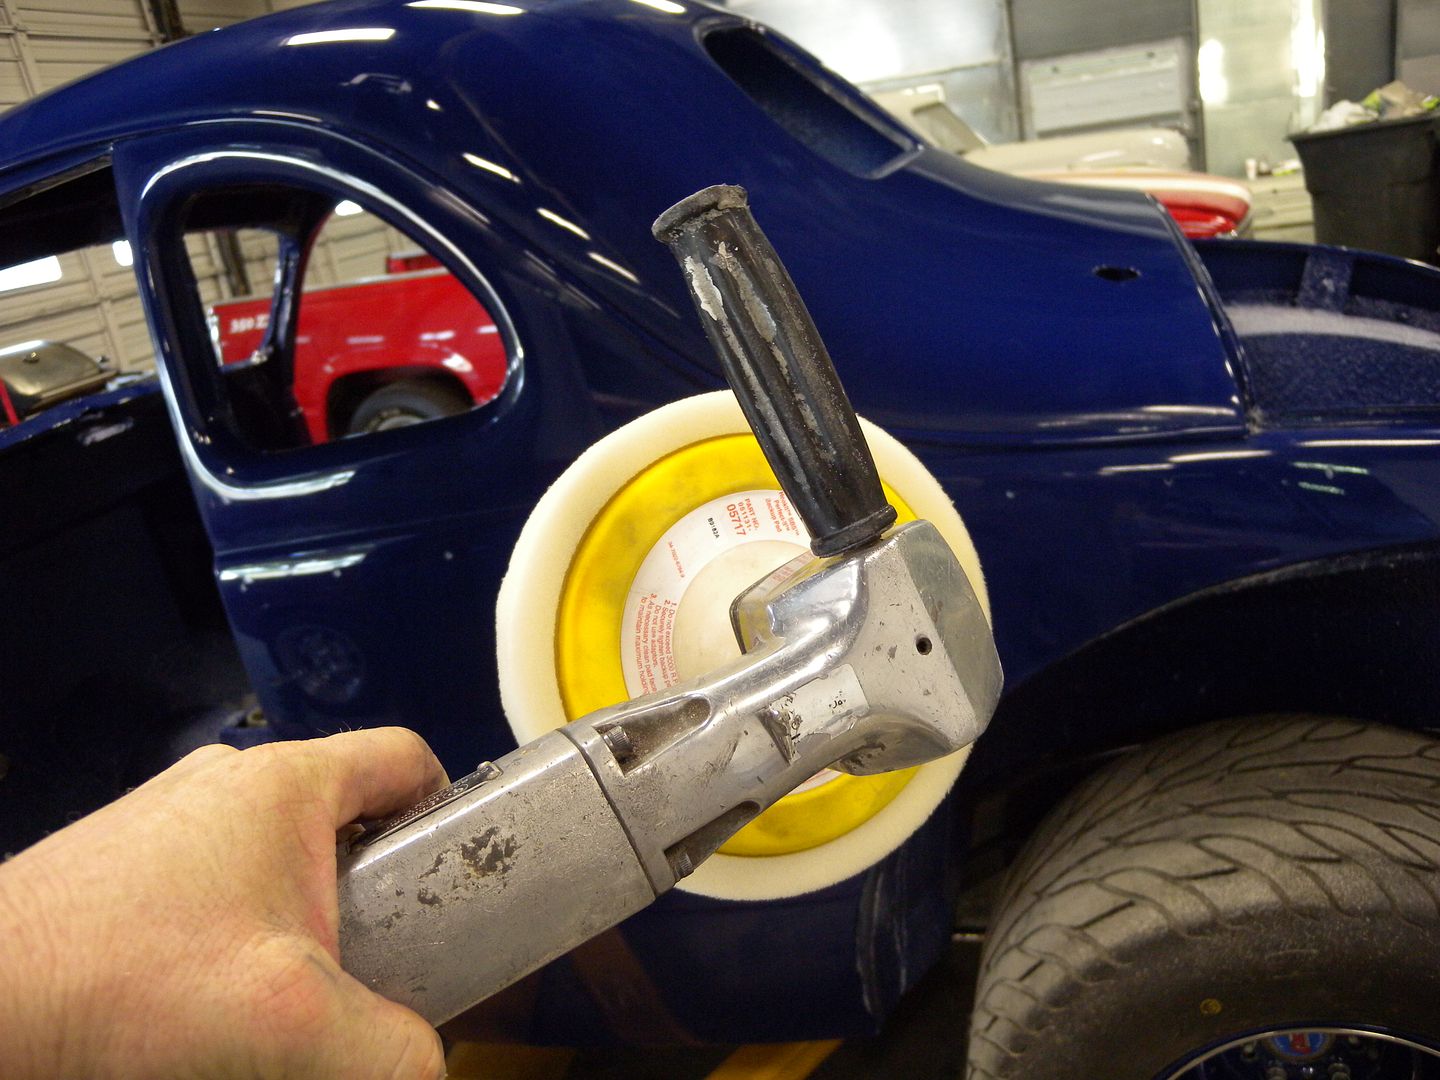
I had bought the electric buffer on some internet advise, it is a good tool well suited to production work. IMO it is too heavy for the detail work I was trying to do on this car. So I switched to the I/R air buffer that I have had for years. Not as much power, but if a person has a big enough compressor, it is the way to go IMO. I don't mind the work of the big buffer, but the fact that the air buffer is easier to maneuver means that I do a better job, plain and simple.
Anyway, the following pictures are after the first buffing has been largely accomplished. I will need to work some of the edges where the buffer won't reach.


I have to finish the first buffing and then do another with a lighter compound and then a glaze. I am pretty happy with the results to this point.
It looks way better than "as sprayed" already.
Once I started buffing, some of the runs and sags once again became visible, so where needed, I sanded a little more, being careful to work the high parts only.
Still, I could do a little more work in a couple of spots, if a person looks really hard, evidence of a prior run is slightly visible. I may or may not revisit these spots later. They are minor enough that they will not photograph.
I started the buffing with a Milwaukee electric buffer, a WOOL bonnet, and 3M heavy cut compound. I went around the car once and then I moved to a foam pad with the same compound and went around again.
I had bought the electric buffer on some internet advise, it is a good tool well suited to production work. IMO it is too heavy for the detail work I was trying to do on this car. So I switched to the I/R air buffer that I have had for years. Not as much power, but if a person has a big enough compressor, it is the way to go IMO. I don't mind the work of the big buffer, but the fact that the air buffer is easier to maneuver means that I do a better job, plain and simple.
Anyway, the following pictures are after the first buffing has been largely accomplished. I will need to work some of the edges where the buffer won't reach.
I have to finish the first buffing and then do another with a lighter compound and then a glaze. I am pretty happy with the results to this point.
It looks way better than "as sprayed" already.