
DIY - Grease Zerk Install Aftermarket LCA


Thread Starter
1st Gear Member
Joined: Jul 2012
Posts: 126
From: Illinois
I had a set of J&M Lower Control arms for my 2013 Mustang that started squeaking. The new versions do not come serviceable with a grease zerks. Over time the grease will dry up and wear away and cause squeaking and creaking. Doing this will make your control arm serviceable and eliminate squeaking.
A couple of things first. Take your time and use the right tools for the job. Make sure you are using the right grease for the right application. J&M stopped installing grease zerks on the lower control arms due to people using wrong grease and it deteriorated the bushings.
I will not go over installing the arms on the car, this has already been covered many times and is easy to do.
Tools needed:
SAFETY GLASSES (I cannot stress this enough, I witnessed someone lose there vision from drilling)
4 short length grease zerks.
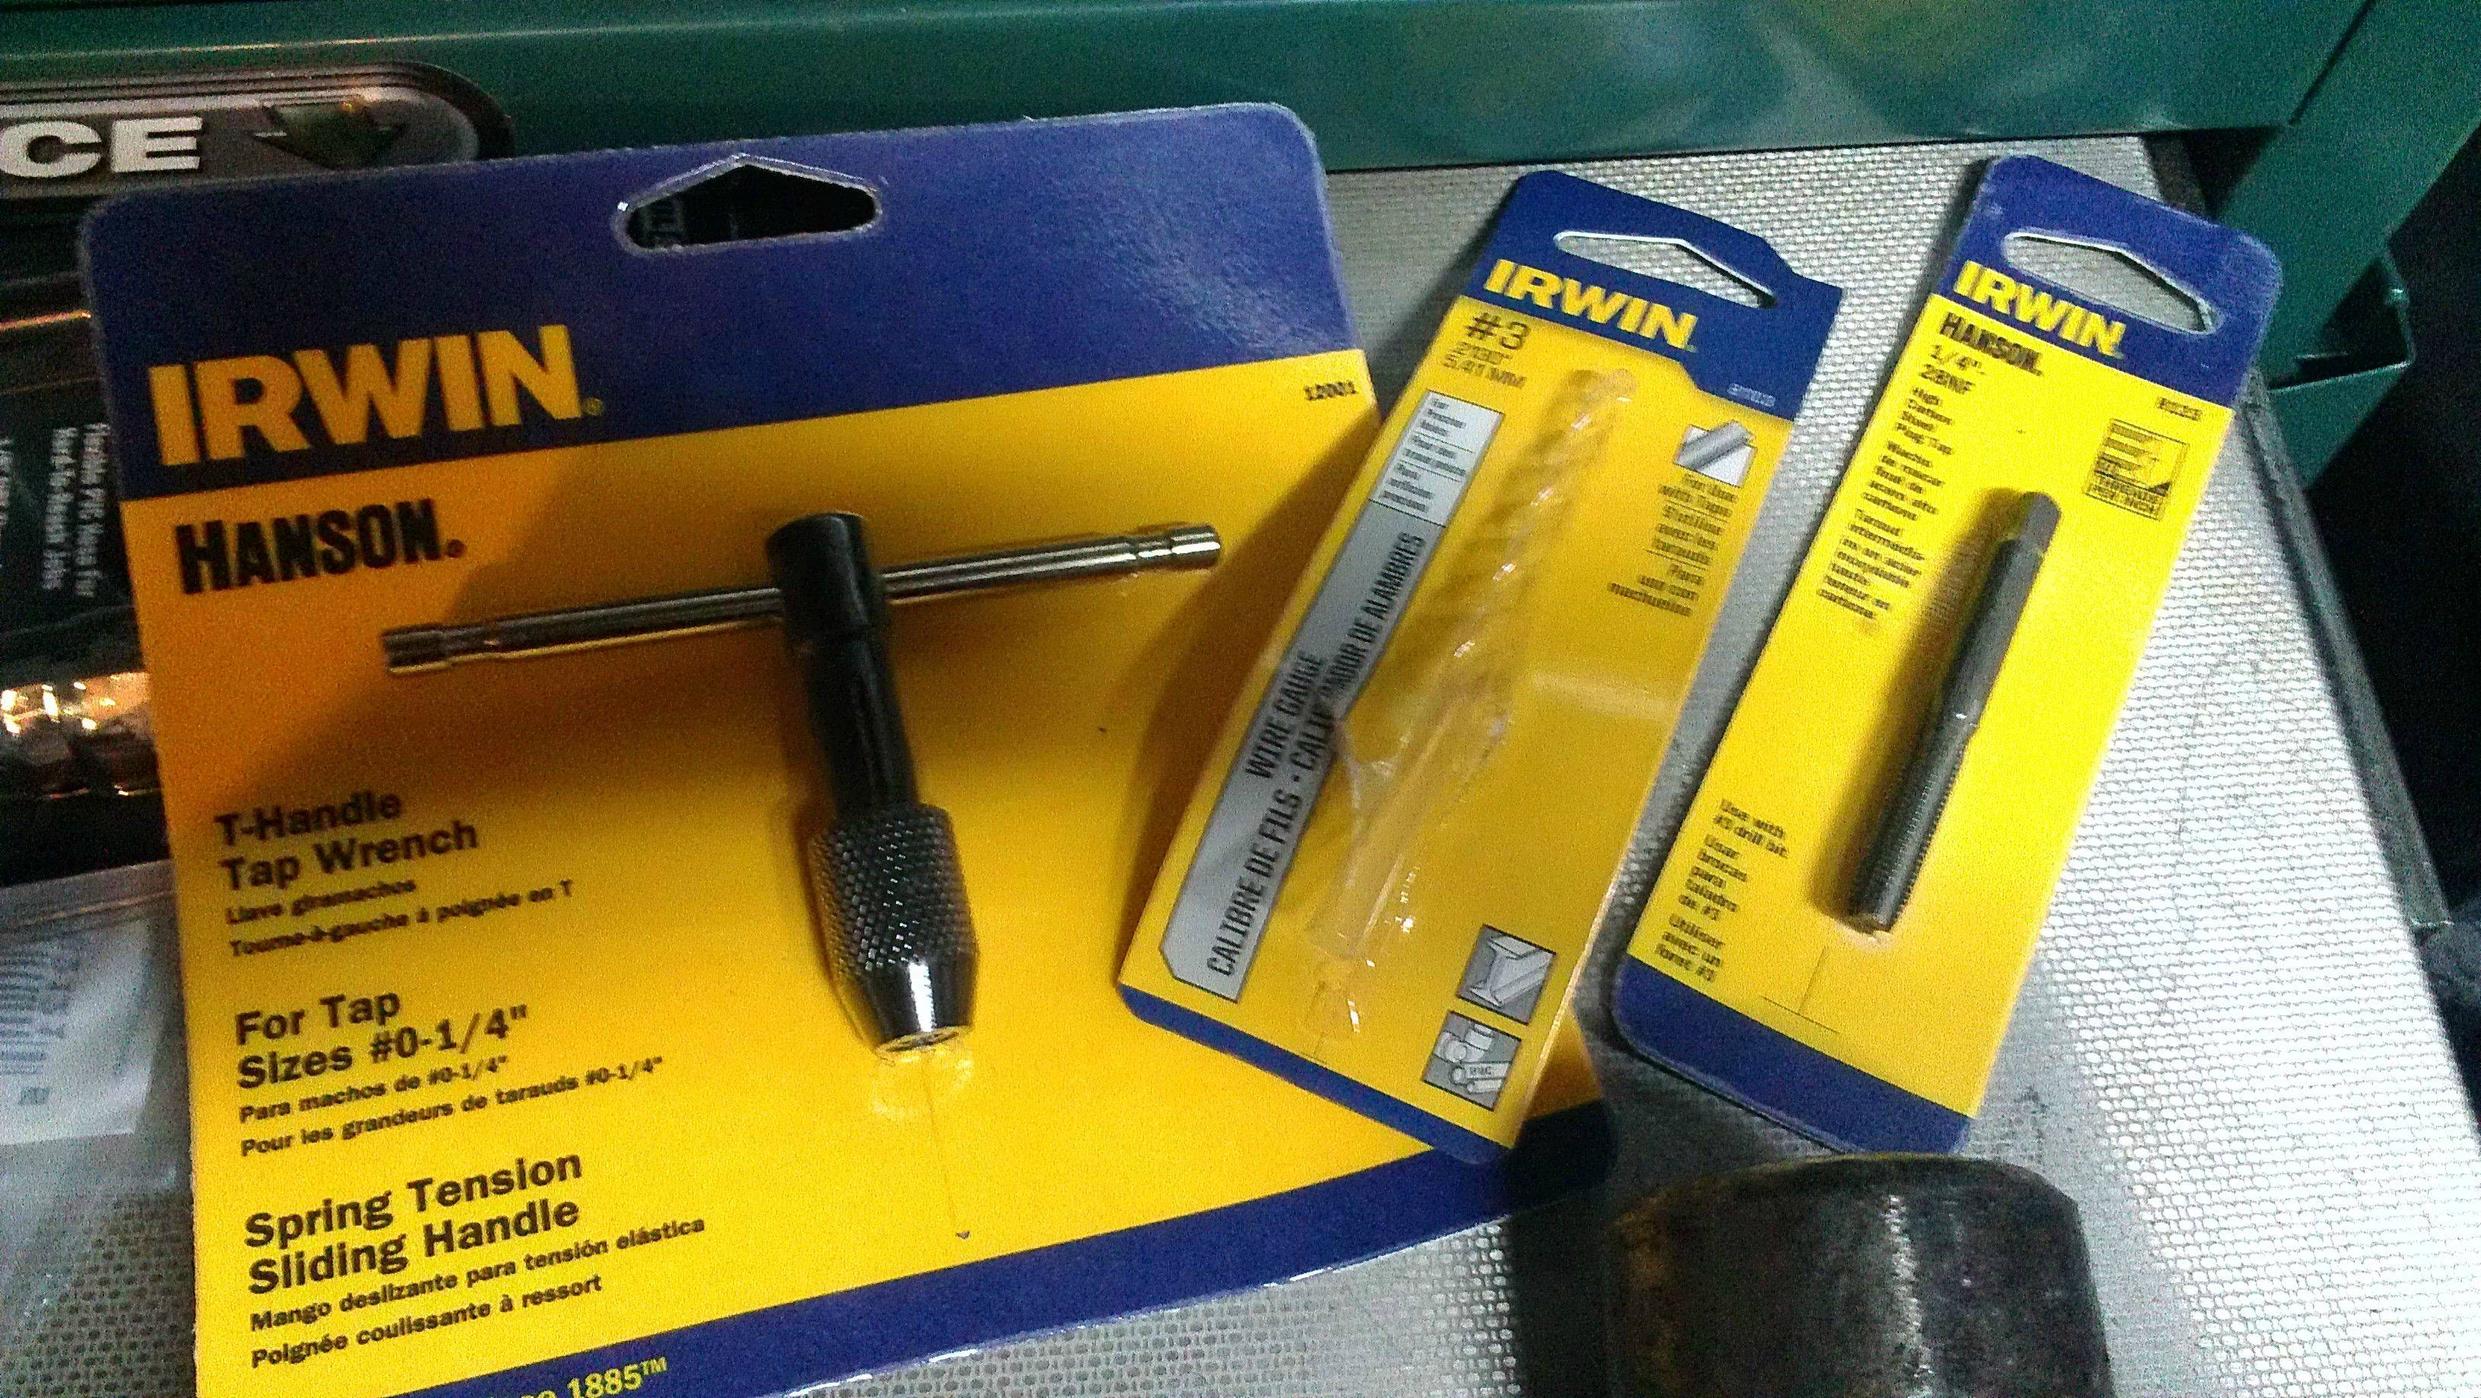
Drill bit and Tap for grease zerk (in my case #3 drill bit and 1/4" 28 Tap)
T-Handle (for tap)
Hammer and punch (to help center drill bit)
Tape measure (Mark center for drill)
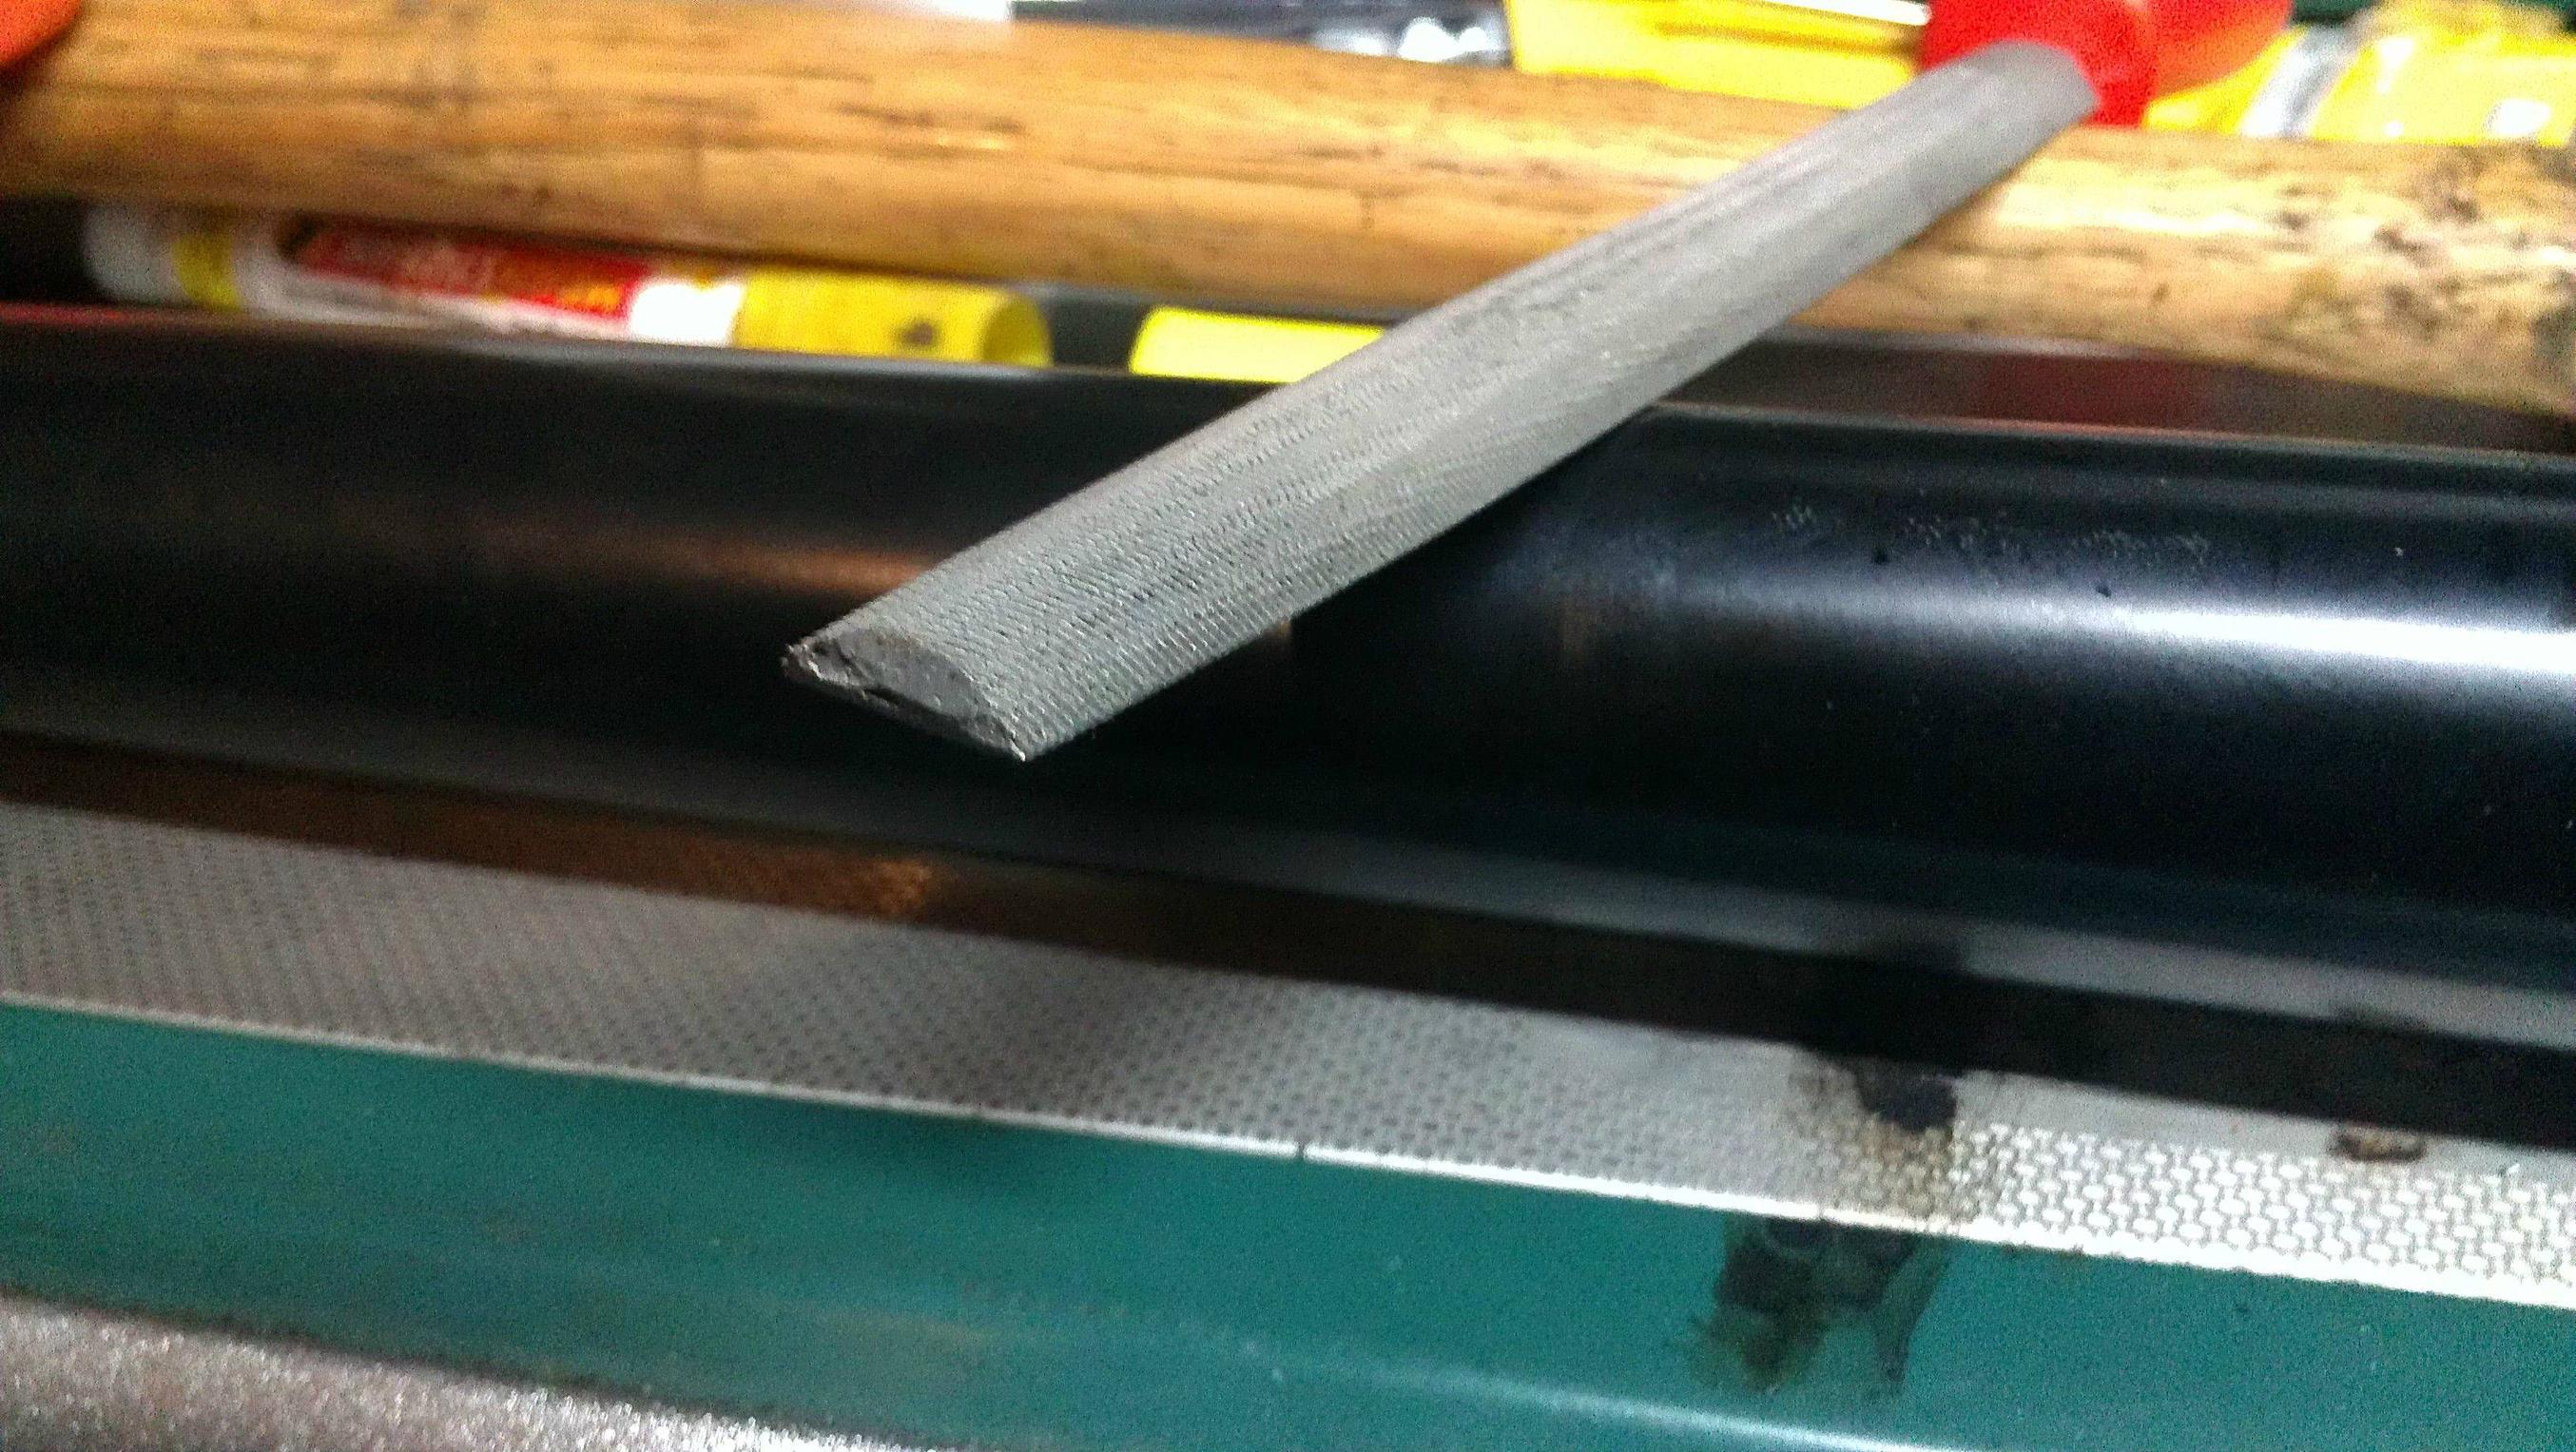
Rounded File (Remove burs)
Rags (clean debris)
Wrench or Socket (install zerk fitting)
Application specific grease.
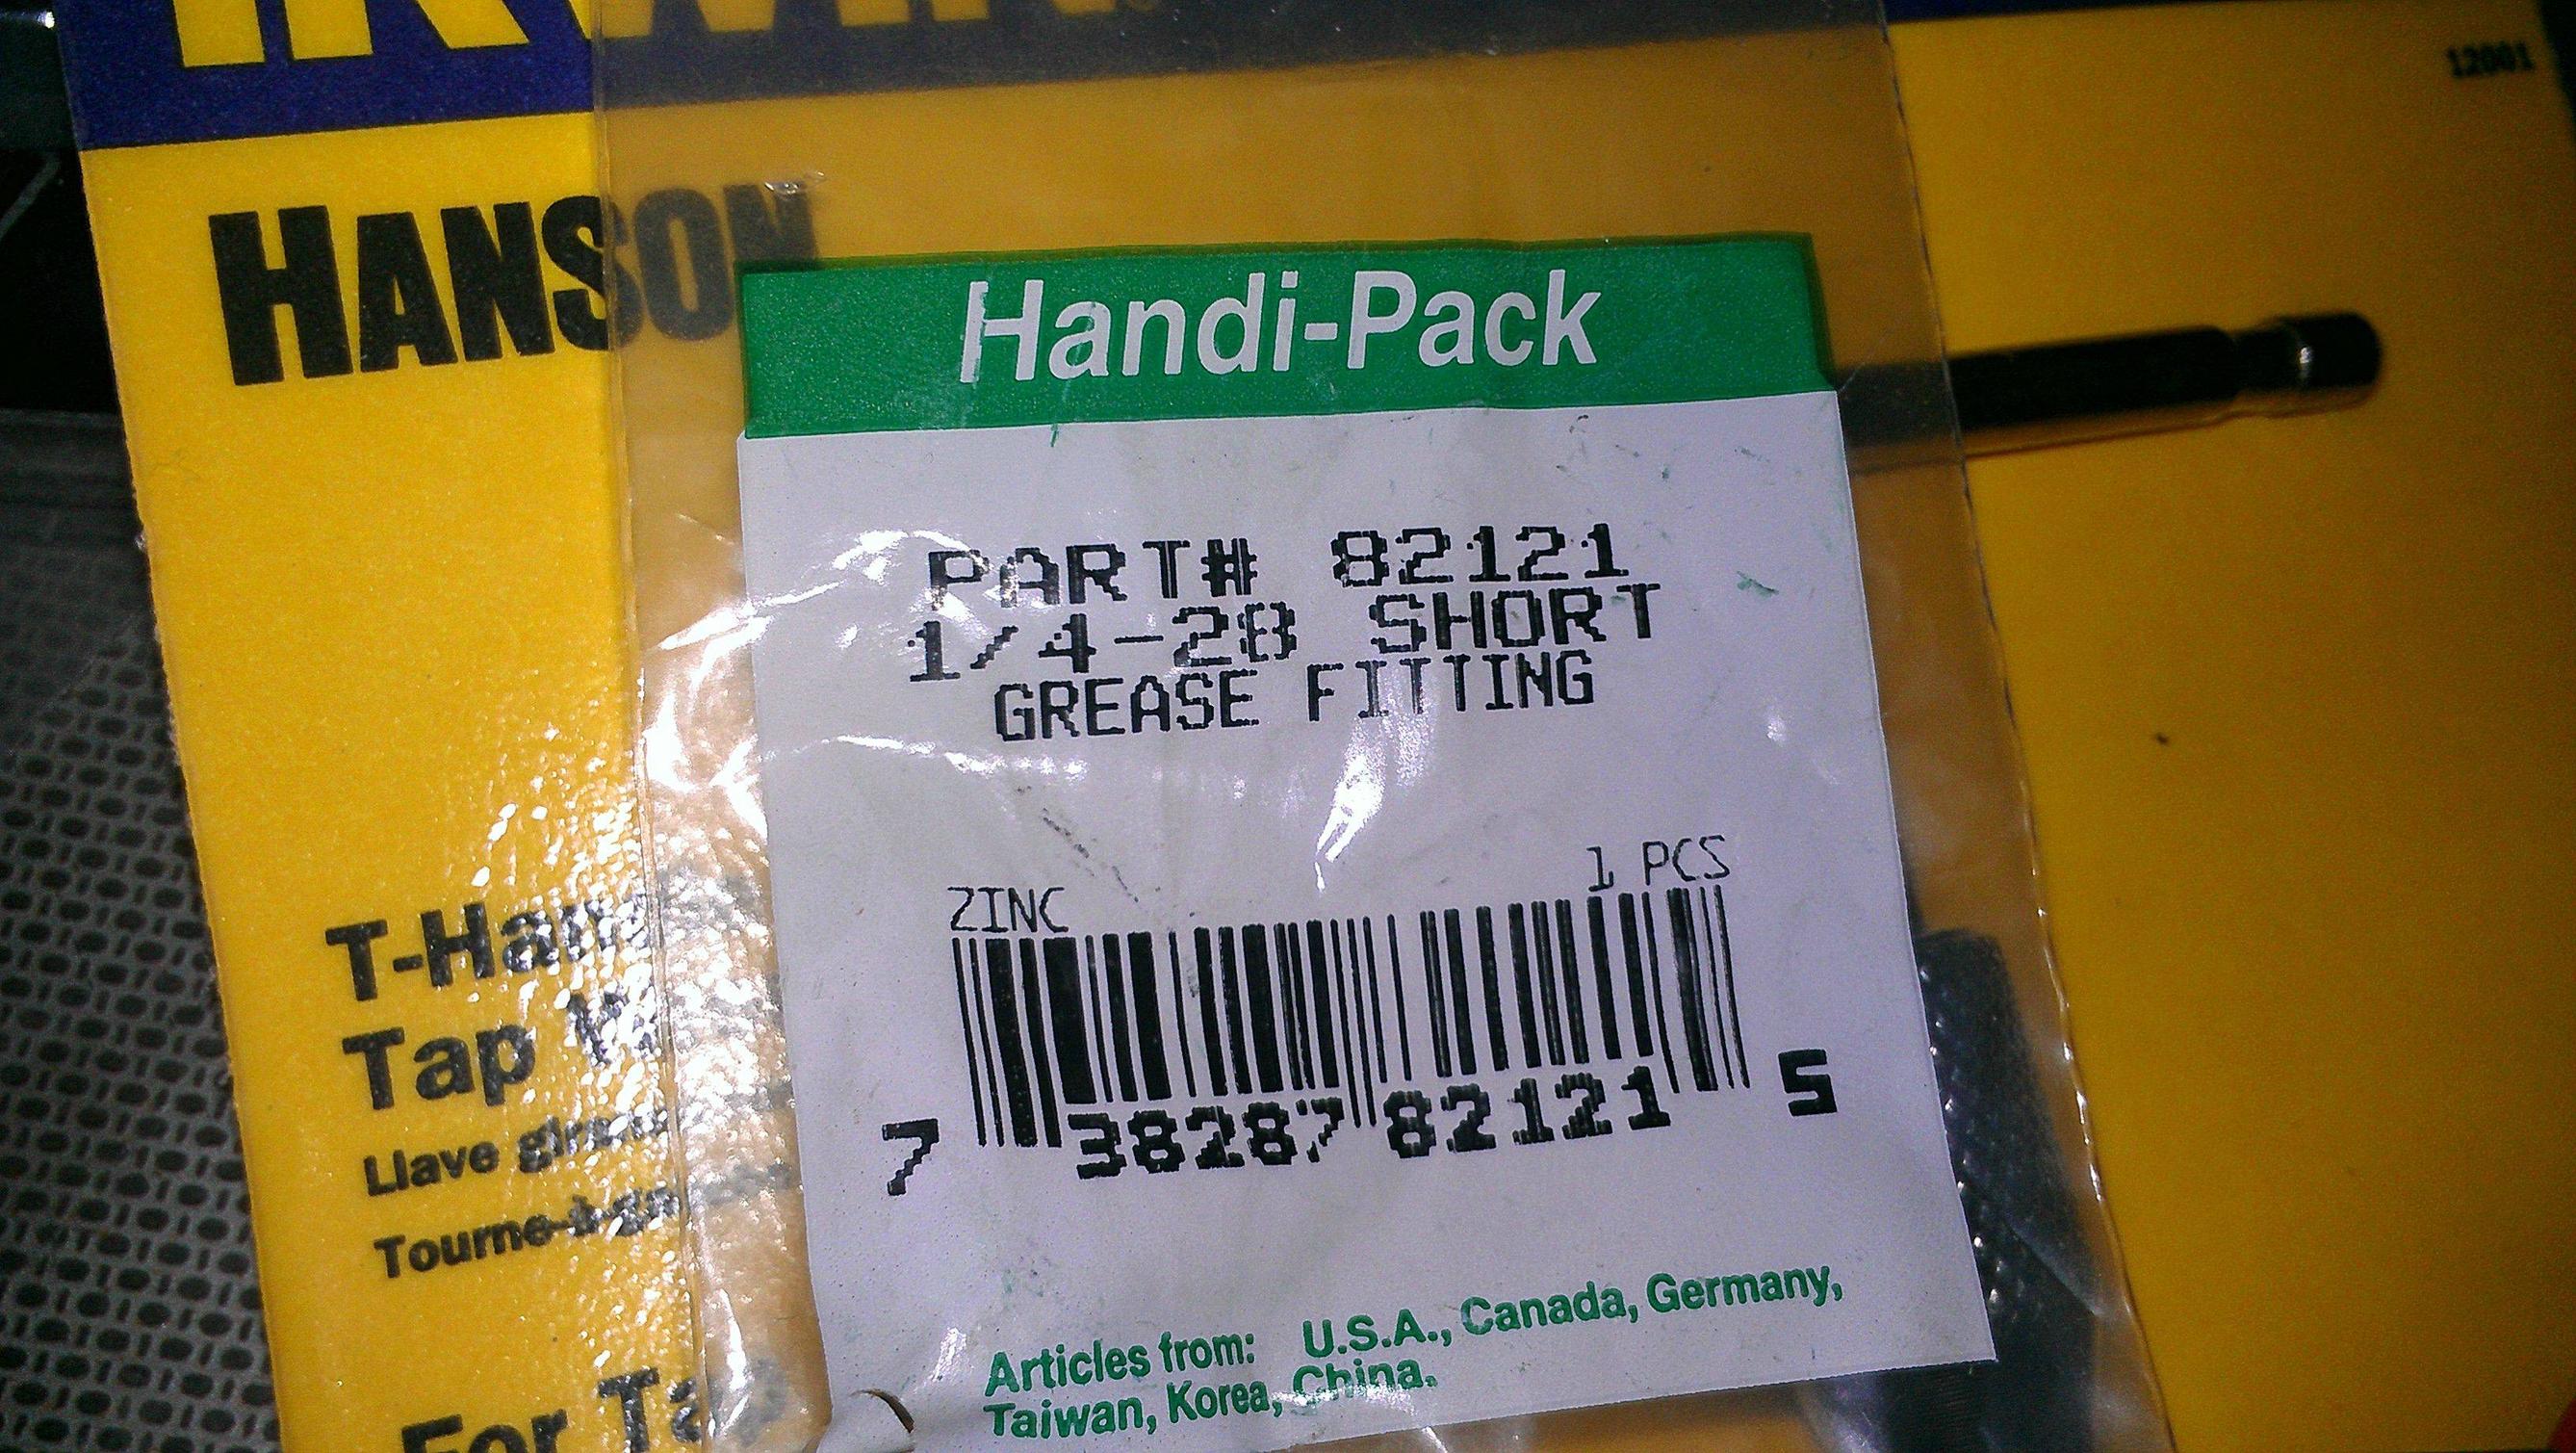
You do not want the zerk fitting to jab into the bushing. Having a short fitting is required. I got mine at Menards.
This type of zerk fitting will require a drill and tap into the control arm to be installed. Here is the drill bit and tap I used. When using a tap be sure to apply light downward pressure and please use a damn T-Handle to hold the tap.
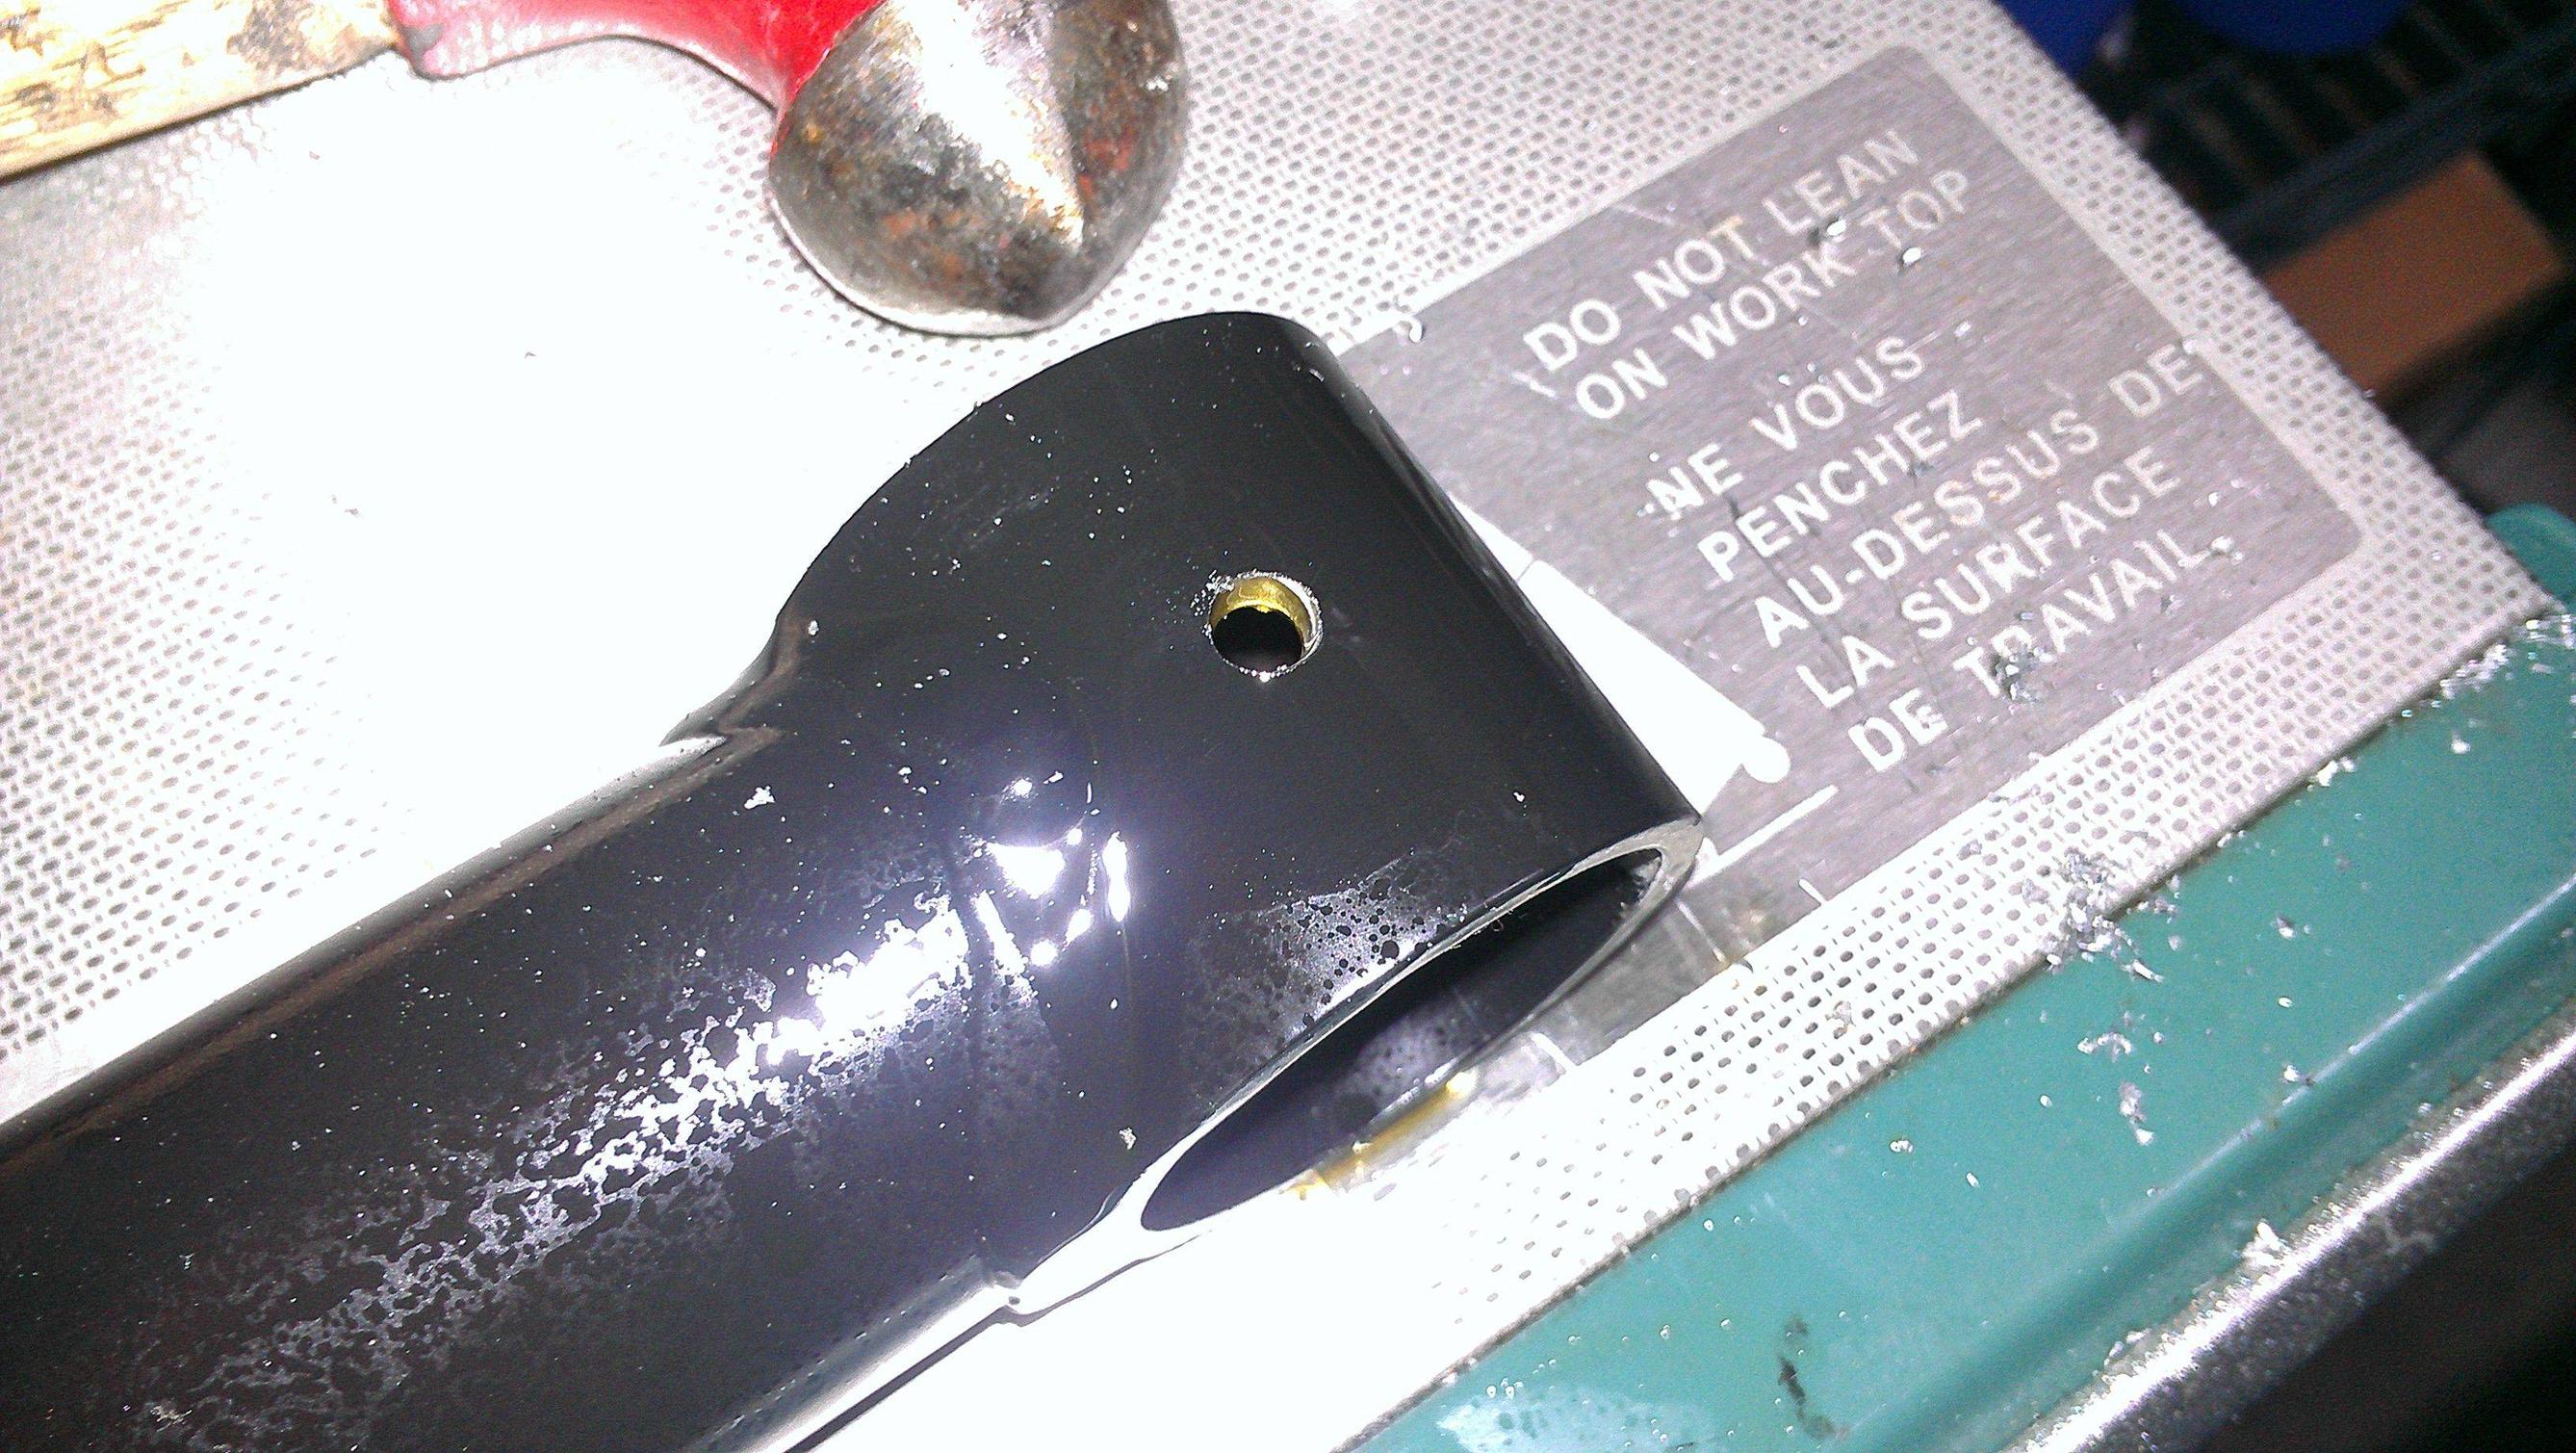
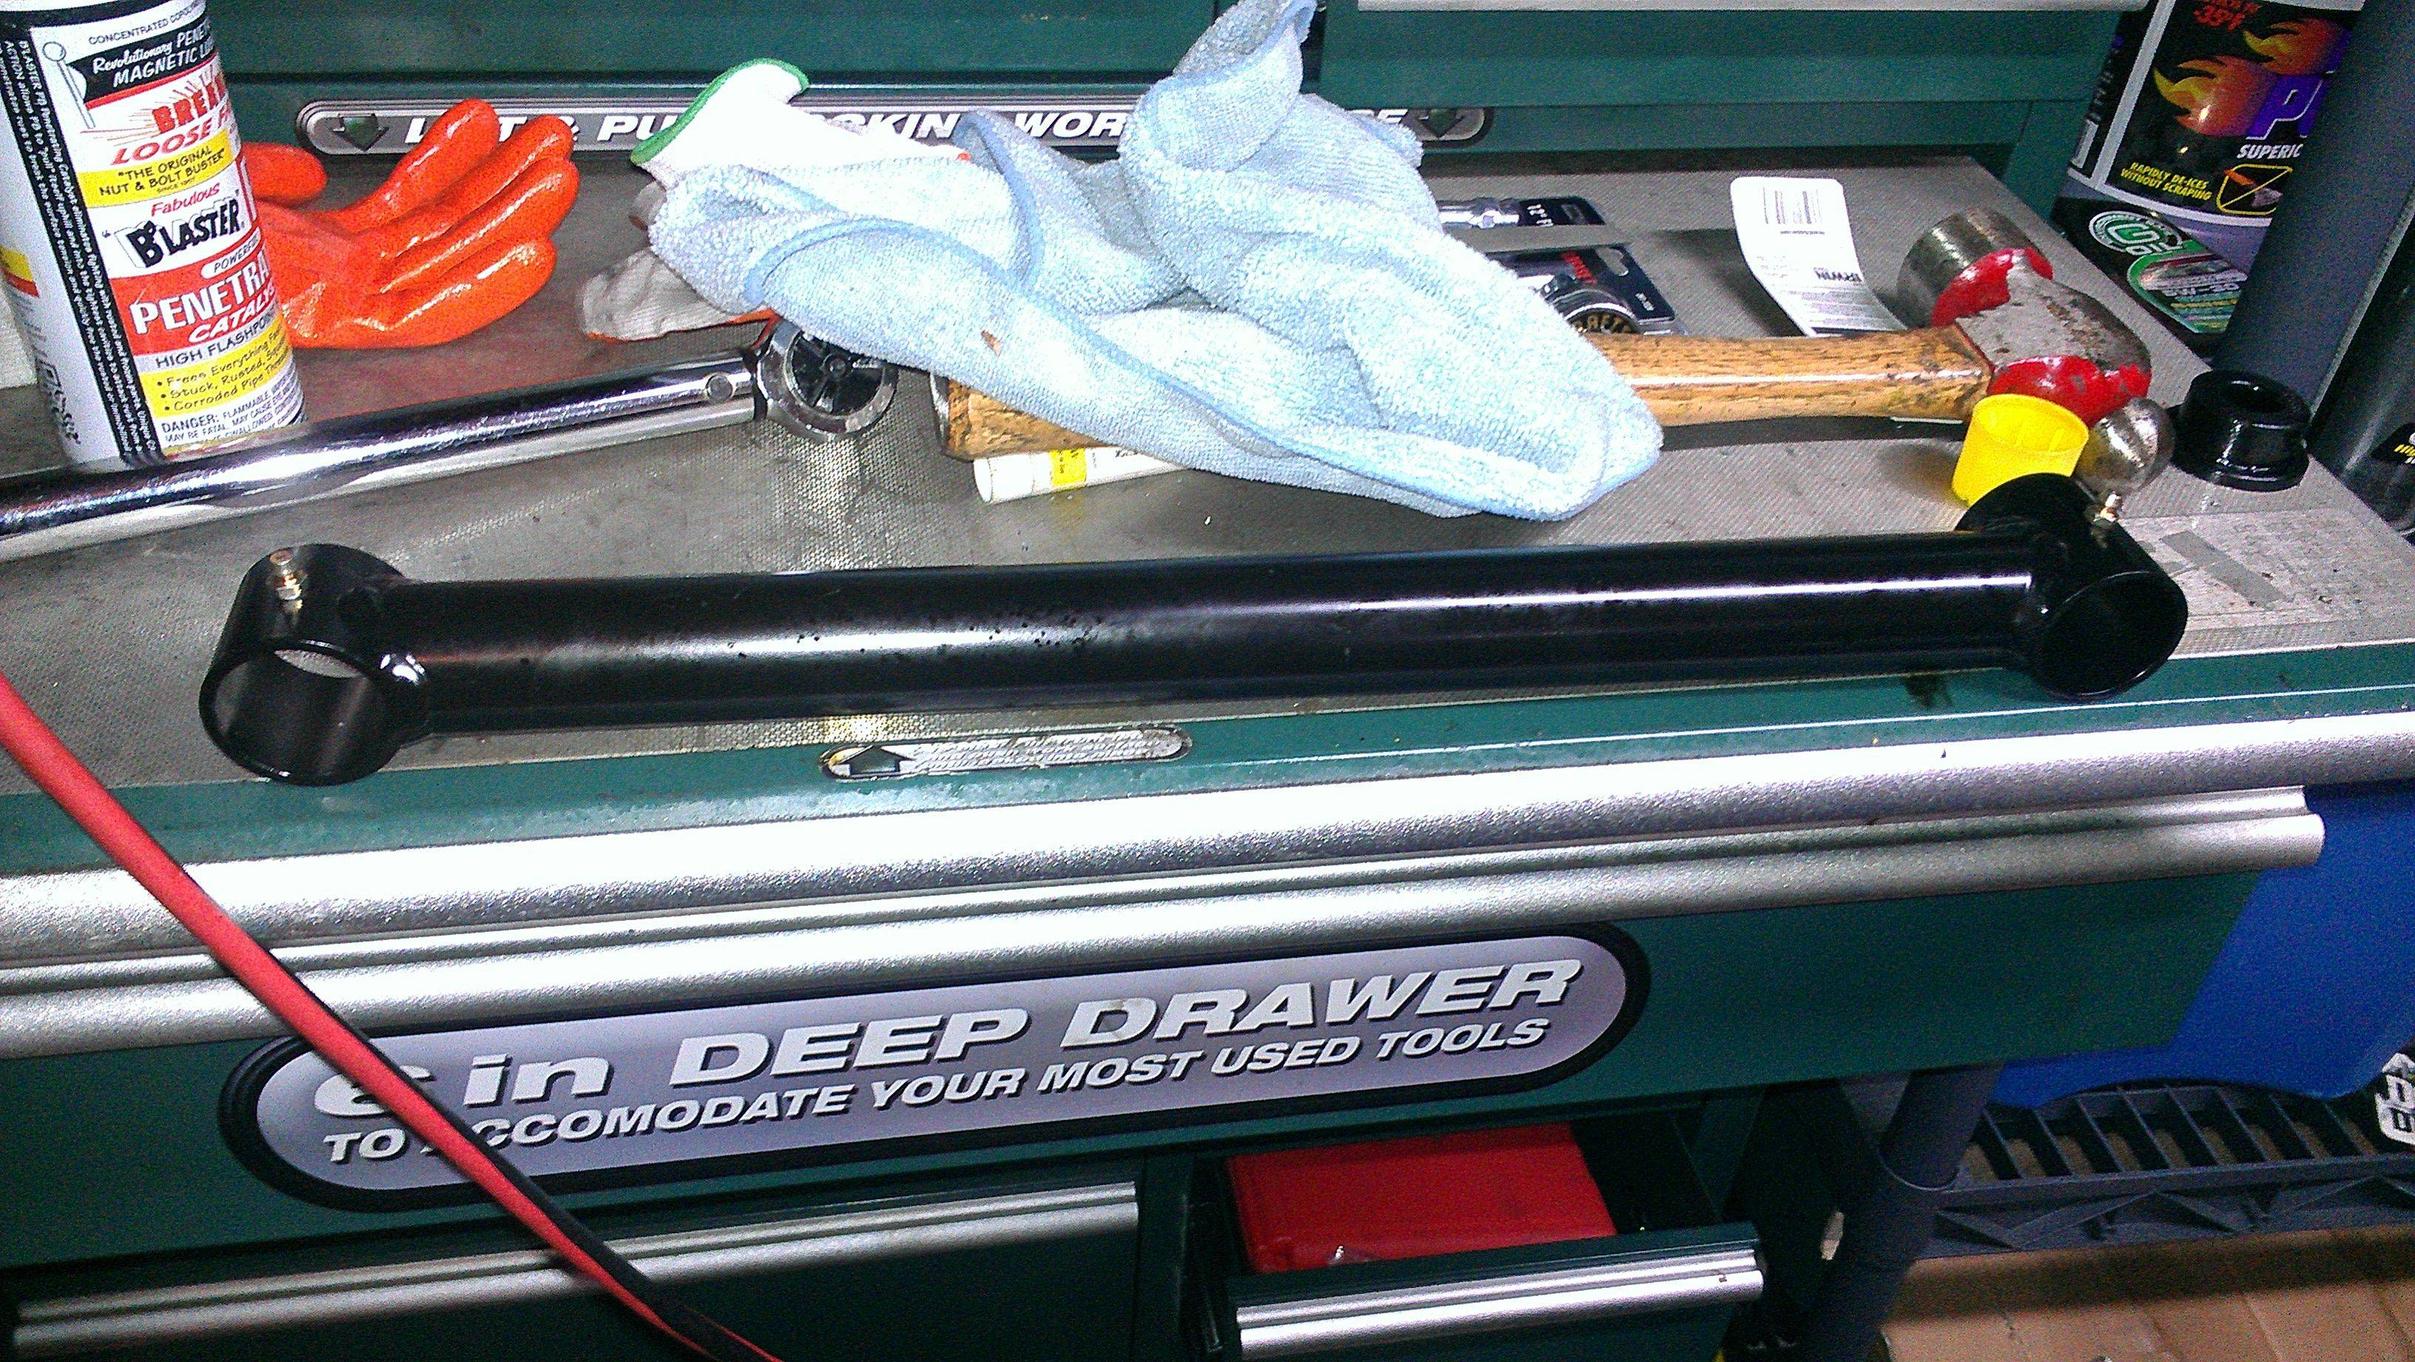
The lower control arms on a S197 Mustang are offset in the rear. The long side on the rear faces inward toward the differential. The holes were drilled so the grease zerks would be facing down at the ground.
When installing the grease zerks be sure to measure so the zerks are centered. Mark the area to be drilled then take a punch and hammer to make a indentation to help start the drill bit so it does not walk.
Drilled Hole
Tap
After drilling and tapping use a file to remove the burs. Be sure to clean the part to remove any debris left over.
Rounded file I used.
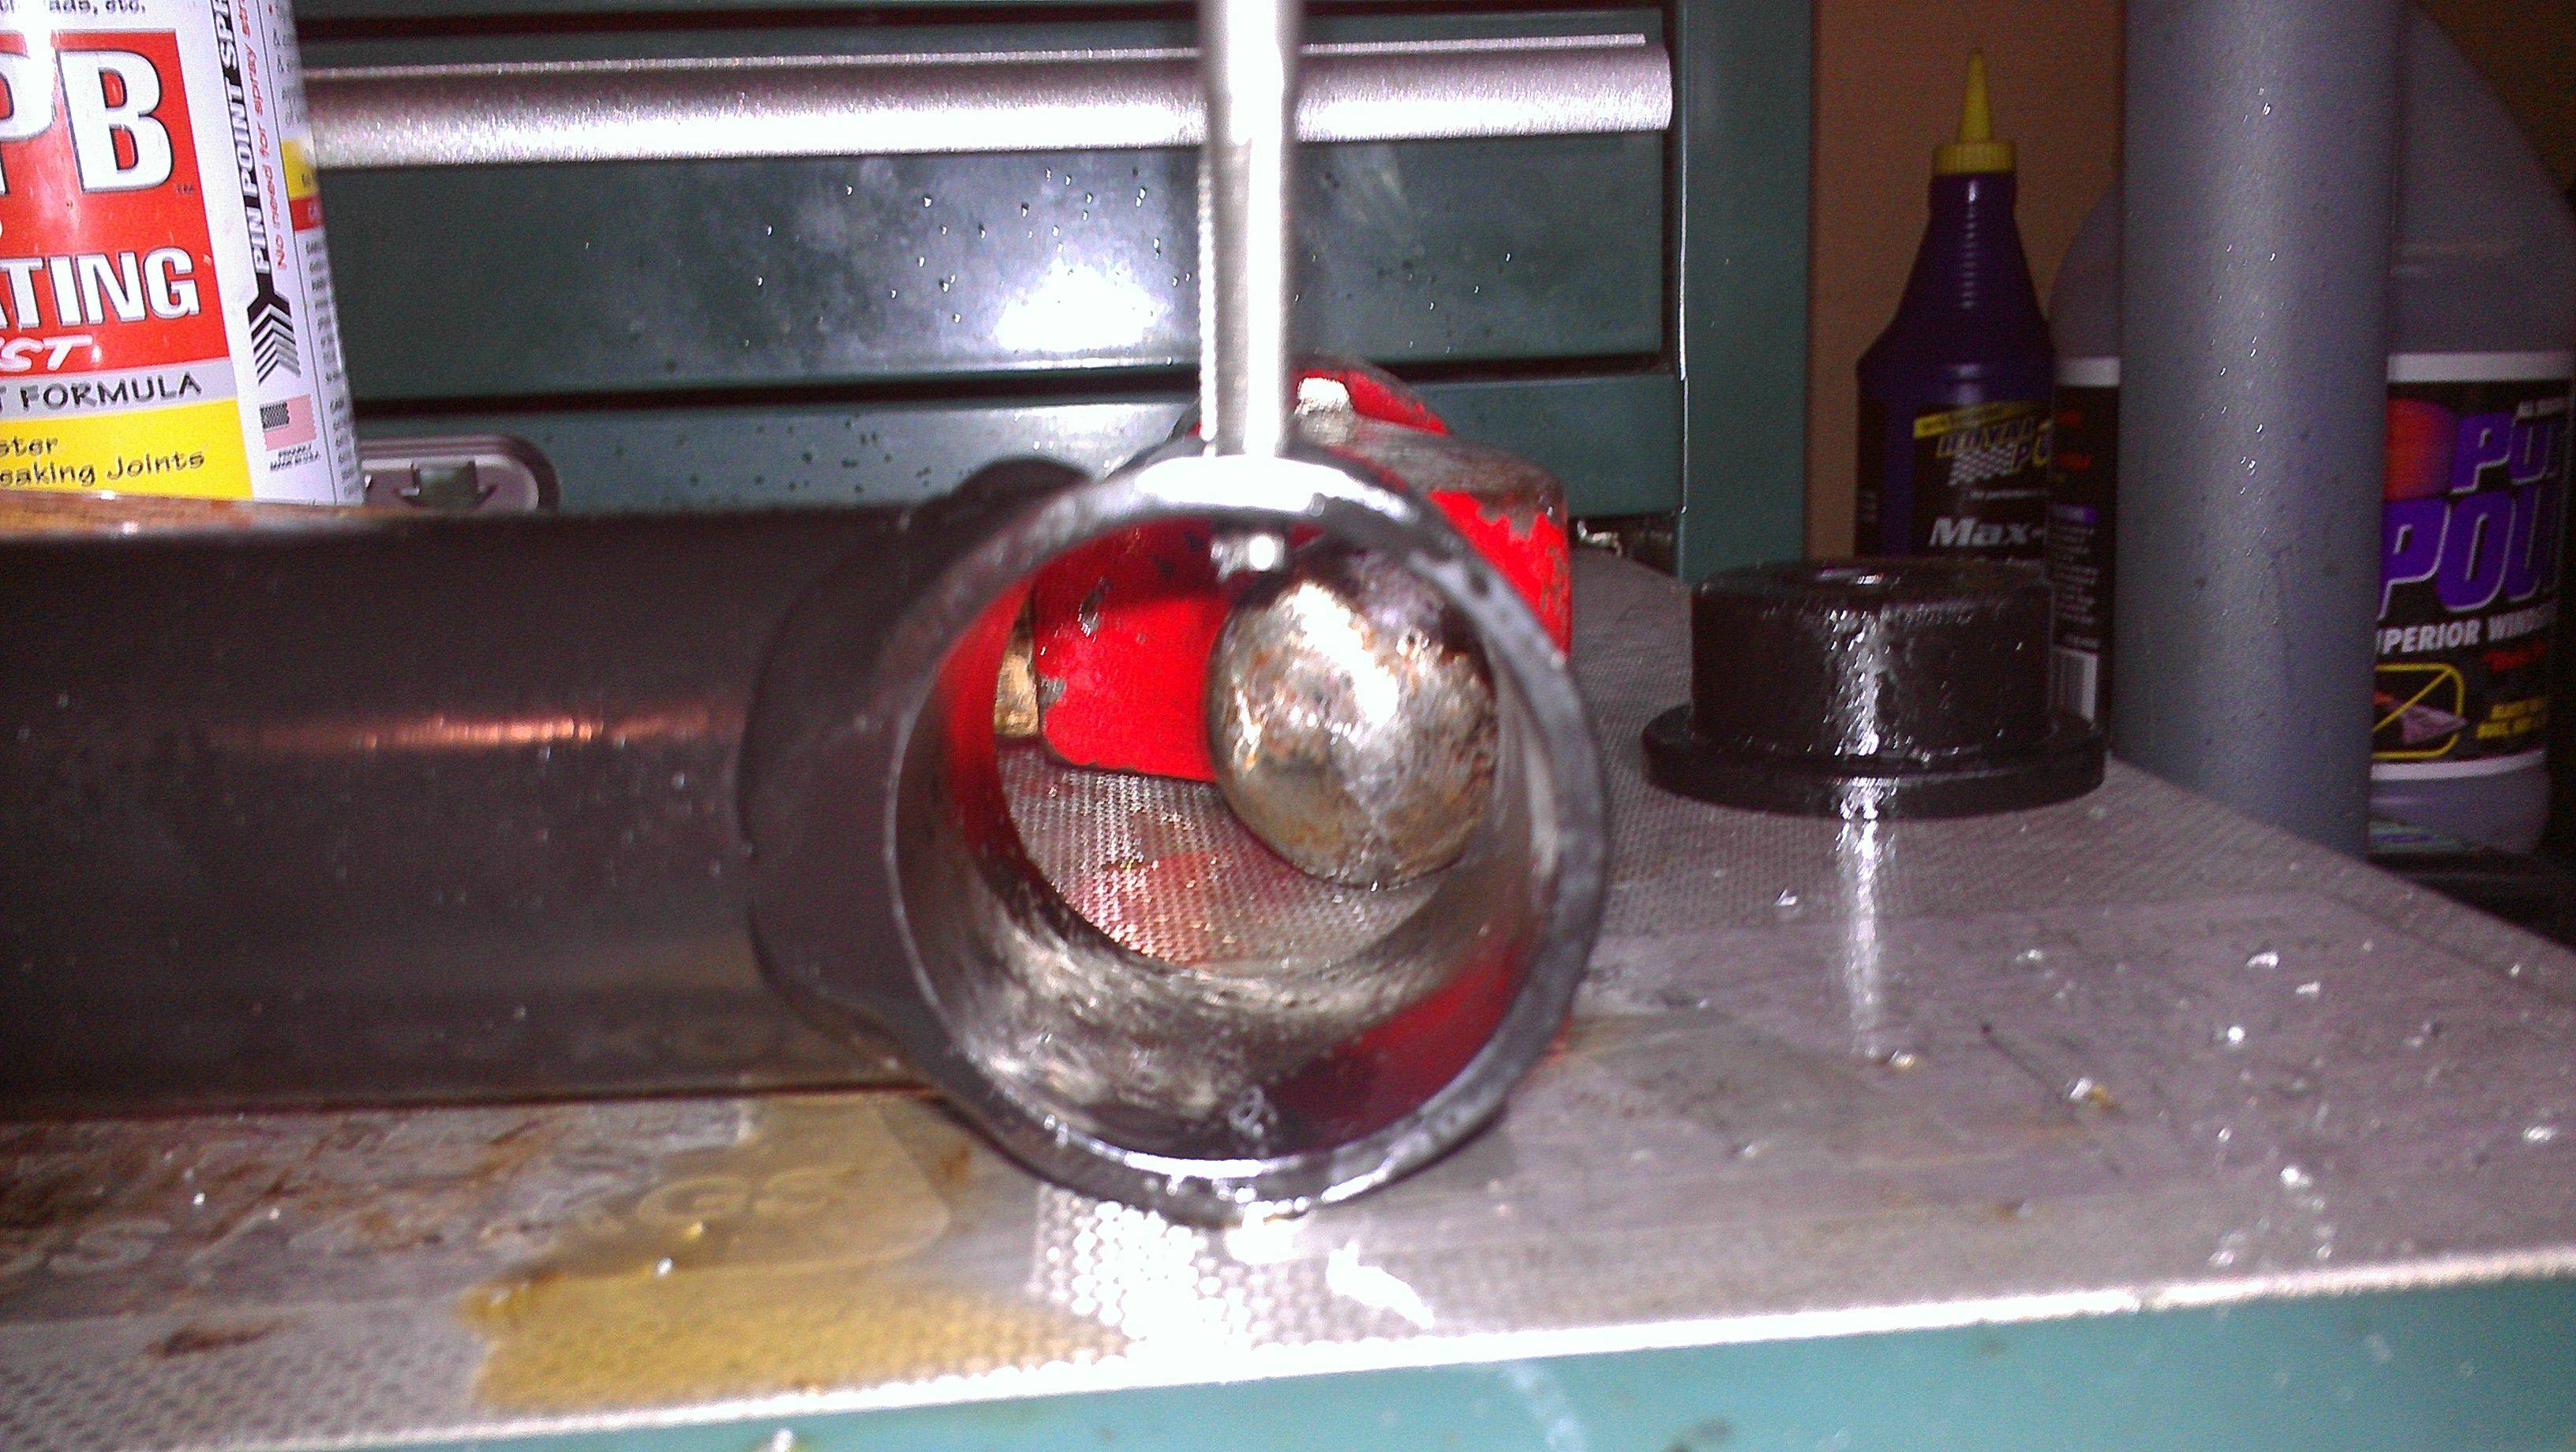
Once the part is clean install the grease zerks. Do not over tighten, just make them seat flush and that is all you will need to do.
Finished product.
Then just put it all together and you have serviceable lower control arms!
Feel free to ask any questions.
-Nyke
A couple of things first. Take your time and use the right tools for the job. Make sure you are using the right grease for the right application. J&M stopped installing grease zerks on the lower control arms due to people using wrong grease and it deteriorated the bushings.
I will not go over installing the arms on the car, this has already been covered many times and is easy to do.
Tools needed:
SAFETY GLASSES (I cannot stress this enough, I witnessed someone lose there vision from drilling)
4 short length grease zerks.
Drill bit and Tap for grease zerk (in my case #3 drill bit and 1/4" 28 Tap)
T-Handle (for tap)
Hammer and punch (to help center drill bit)
Tape measure (Mark center for drill)
Rounded File (Remove burs)
Rags (clean debris)
Wrench or Socket (install zerk fitting)
Application specific grease.
You do not want the zerk fitting to jab into the bushing. Having a short fitting is required. I got mine at Menards.
This type of zerk fitting will require a drill and tap into the control arm to be installed. Here is the drill bit and tap I used. When using a tap be sure to apply light downward pressure and please use a damn T-Handle to hold the tap.
The lower control arms on a S197 Mustang are offset in the rear. The long side on the rear faces inward toward the differential. The holes were drilled so the grease zerks would be facing down at the ground.
When installing the grease zerks be sure to measure so the zerks are centered. Mark the area to be drilled then take a punch and hammer to make a indentation to help start the drill bit so it does not walk.
Drilled Hole
Tap
After drilling and tapping use a file to remove the burs. Be sure to clean the part to remove any debris left over.
Rounded file I used.
Once the part is clean install the grease zerks. Do not over tighten, just make them seat flush and that is all you will need to do.
Finished product.
Then just put it all together and you have serviceable lower control arms!
Feel free to ask any questions.
-Nyke
1st Gear Member
Joined: Jul 2012
Posts: 118
From: Illinois
It's interesting that you should post this since I'm getting ready to do the same thing.
I have a set of Steeda LCA/UCA's ready to go in and have purchased the same fittings (from the same place!) as you've chosen.
As a machinist, I'll say that your process is spot on!
The only thing I might add is to use a small amount of light oil when drilling then tapping.
Also for those considering this, keeping the tap straight is essential!
I've gotten where I can tap with a cordless drill being steady (very) and precise with the reverse switch.
For some, it may take practice which I recommend on some scrap metal.

Thread
Thread Starter
Forum
Replies
Last Post