Ford Mustang GT 1996-2014: How to Replace Brake Fluid
If you don't remember replacing your Ford Mustang GT's brake fluid in the last two years, then it is time to do so now. Read on to learn how to quickly replace your brake fluid from the comfort of your own garage.
This article applies to the Ford Mustang GT (1996-2014).
The brake fluid should be replaced every two years in the Ford Mustang GT. If your brake pedal feels soft, that is the a sign of old brake fluid; however, the ultimate sign is if you don't remember replacing it. The procedure takes about an hour and is relatively simple. Read on to learn how to replace the brake fluid yourself, which will ensure better braking and safer drives.

Materials Needed
- DOT 3/4 brake fluid
- 10mm wrench
- Hose
- Turkey baster
- bottle or container
- A friend
Step 1 – Drain the brake fluid
Open the hood, locate the brake reservoir, open its cap, and suck the old brake fluid out using a turkey baster. Keep pulling out the old fluid and dumping it in a container until the brake reservoir appears empty. Then, refill the reservoir back with fresh brake fluid until you hit the max line.

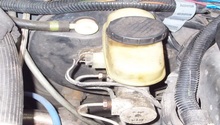
Figure 1. Brake fluid reservoir in front of driver's side. 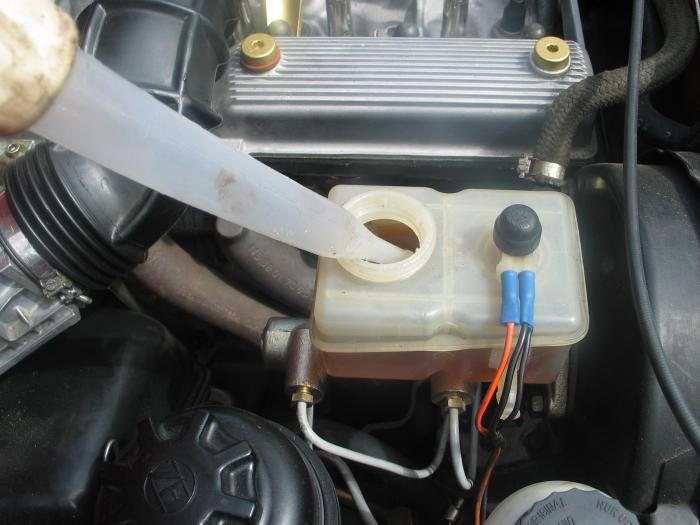
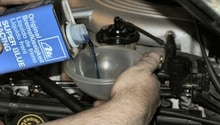
Figure 2. Suck old fluid out.
Pro Tip
Keep a rag under while you work with brake fluid. It's corrosive and can easily hurt your car's paint.
Step 2 – Bleed your brake system
Raise the car and secure it with jack stands. You don't have to raise the car if you can reach the bleeder valve on each calipers; however, the Mustang is low to the ground and could make the process annoying.
Start with the wheel farthest away from the master cylinder. So start with the passenger side's rear wheel, the driver side's rear wheel, the passenger side's front wheel, and finally the driver side's front wheel.
Remove the wheel or work from behind it, locate the bleeder valve on the caliper, and then install the hose on it. Connect the other side of the hose into a bottle or a container. Ask your willing assistant to pump the brake pedal several times, until it becomes firm, and then hold the pedal down. With the pedal pushed down, crack open the bleeder valve. After two to three seconds, or when the flow slows down, close the valve. Repeat this process several times for each caliper until the fluid coming out is clean, and free of air bubbles. The air bubbles are the enemy, and the cause of the soft brake pedal!
Periodically check the fluid level in the brake fluid reservoir. If the fluid gets too low in the reservoir, you will introduce air into the system, and thus repeating the whole process again.

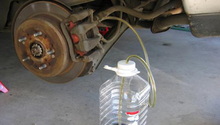
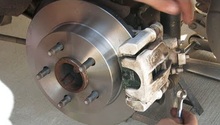
Figure 3. Bleeder valve attached to each caliper. 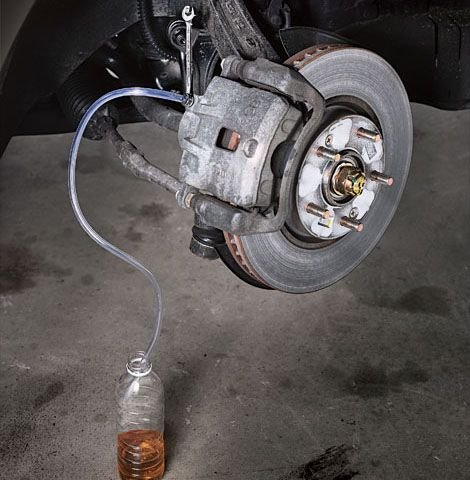
Figure 4. Bleed the brakes.
Step 3 – Top off master cylinder
Once all four sides have been completed, top off the master cylinder/brake fluid reservoir with brake fluid until it's just below the max line. Do not overfill the brake fluid.Lower your car and take it for a careful test drive. If the pedal feels firm and responsive, then you are done.
Featured Video: How to Bleed Your Brakes, or Flush Brake Fluid
Related Discussions
- Changing Brake Fluid - MustangForums.com
- How to Choose Brake Fluid and Bleed Brakes - MustangForums.com
- Brake Fluid/Clutch Fluid Change - MustangForums.com