Ford Emblem
 08-25-2009, 12:07 PM
#11
4th Gear Member
Join Date: Jan 2006
Location: NY
Posts: 1,061
Sixx hasn't answered so I'll jump in.
It's a Ford Racing double bar brace. It is stock on the Bullitt.
Really sweet brace....I have one too.
Beware though if your car is not a 2007 or newer then this bar may rub on the hood liner. The 2007 and newer has 2 channel grooves in the hoodliner to accomodate this strut brace.
Sorry to OP....not trying to jack your thread.
On topic though Shelby GT's have an emblem on the front fenders like the one you pictured only beefier looking....a more modern interpretation of it.
I bought two (281) emblems and was wondering what to use to cover the second hole when I take the GT off ???
 08-25-2009, 07:15 PM
#12
2nd Gear Member
Join Date: Jan 2009
Location: Christiansburg, Virginia
Posts: 178
Step by step method for removing the badges:
Step 1. Gather your ingredients:
A: New badges
B: Rubbing alcohol
C: About 10 inches of fishing string
D: Hair dryer or heat gun
E: Something to sit on.
F: Beer
Step 2. Open beer.
Step 3. Use the hair dryer or heat gun to heat the old badge until the paint is about as warm as it would be if you left your car in the sun, on a hot day.
Step 4. Use the fishing line to slip *between* the black tape that holds the badge to the car and the painted surface of the car.
When you get to the pins, rotate the fishing line around them and then give a slight lift and the badge will pop right off. It will land in the dirt and get ants glued to it. That's just how these things are. For that same reason, don't let your daughter play with the badges. Sticky badges + long hair = tears.
Now look at the paint. You can see where the badge was. There will be a small line of dirt around it's old outline. Ghost badges!
Step 5: Use rubbing alcohol to remove any old residue, dirt and wax to prepare the surface for the new badge. Get a feel for where you are going to put the new badge, if the new ones do not have locating pins. You will want to cover the holes with the new badges. If your new badges have pins, they should fit directly into the old holes.
Some old model badges have pins that do not line up!
If you are using new, "running pony" badges make certain you have them "running" in the right direction
Step 6: Allow the alcohol to completely dry. You can speed things along with a hair dryer [hint hint, there's one next to your foot!]
Step 7: Remove the white paper that protects the 3m tape on the new badge. Carefully place it where you want and press firmly for a few seconds.
Step 8. Finish beer. Apply satisfied smile/look to your face. Small nods are optional.
Step 9. Adjust ingredients to "2 Beers".
Lather, rinse, repeat, on the other side.
Post pics.
09-21-2009, 09:58 PM
#14
1st Gear Member
Join Date: Nov 2007
Location: IL
Posts: 128

Not to hyjack..
 BUT the paint on my fuel rail covers started cracking after the 1st year. We pulled them off in August and shipped them back to Unique where they are repairing them. How long have you had yours? Unique has been really good about it...haven't said I owe them anything they have a 2 yr warranty. But they are really beautiful
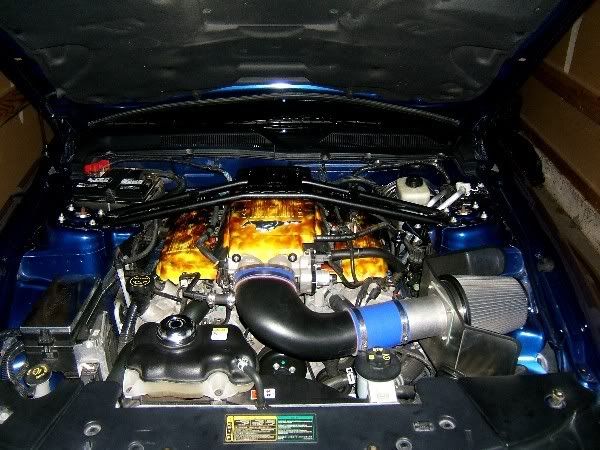
Had to pull them to see it wasn't the part that cracked it was the paint


Thread
Thread Starter
Forum
Replies
Last Post
AMAlexLazarus
AmericanMuscle.com
21
04-04-2020 02:16 PM