
Map Light Color!!!

2nd Gear Member
Joined: Jun 2008
Posts: 186
if you take needle nose pliers, you can do it. I did. And i'm not that talented. Just kind of wiggle the bulb back to front while putting very little pressure on the bulb. After say like 10 or so time of back and forth, it will free up. And although if it broke that would suck, you wouldnt hurt yourself. I get shocked all the time at work with way more power than a car light gives. Just be careful, take your time, and you'll be fine. And yea, I basically keep the cobalt interior color on all the time now, to go with the map lights. But I have that whole problem of wanting all the green to be blue now to, and although theres a really good how to, it looks nerve racking as sh&T! Seriously easiest mod ever.


4th Gear Member
Joined: Oct 2008
Posts: 1,636
From: Henry County, Georgia
I love the look of the blue gauges on the dash at night, but since i drive a redfire i rock the red gauges. Still looks sick at night, but during the day its pink or just white. Maybe ill order some dome lights to match! To bad we cant make it selectable like the gauges...
4th Gear Member
Joined: Jun 2008
Posts: 1,259
From: Newark, Delaware
Hey guys! Here are the pics I promised. I'll do my best to explain what you're looking at.
Tools I used:
Hands/fingers
Long flat-head screwdriver (with a narrow tip)
Short flat-head screwdriver (with a wider tip)
^^^ On each side of the dome light assembly, there are two clips that you can disengage to remove the whole thing from the ceiling of the car. THIS MAKES THE INSTALL 1000% EASIER!
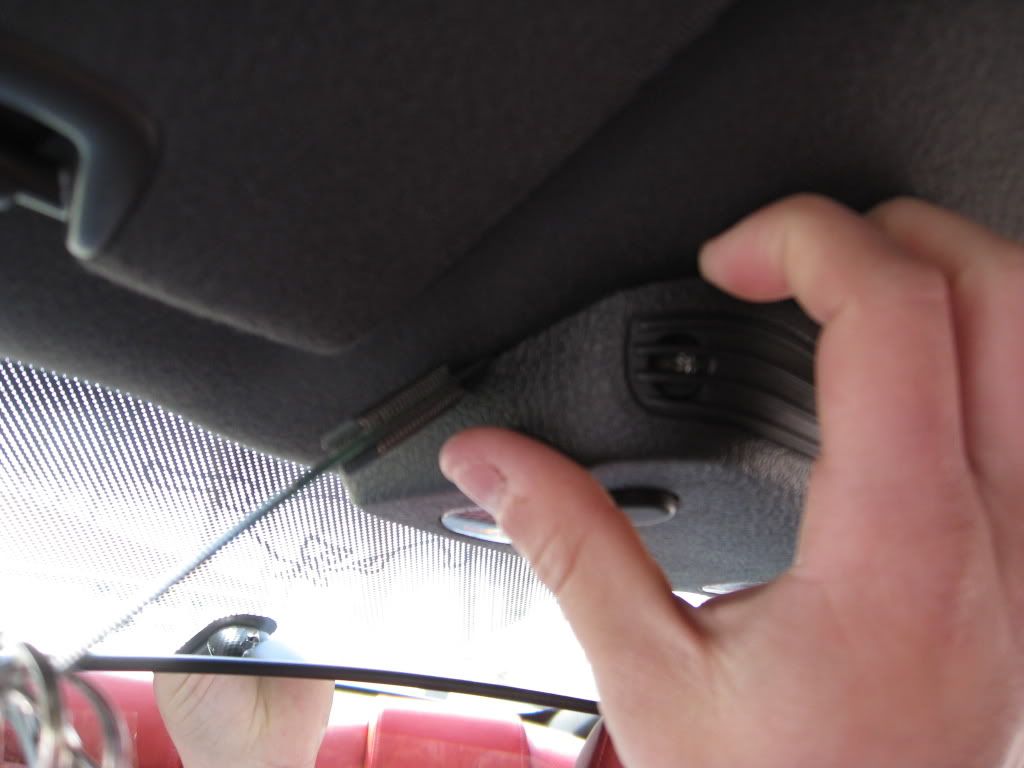
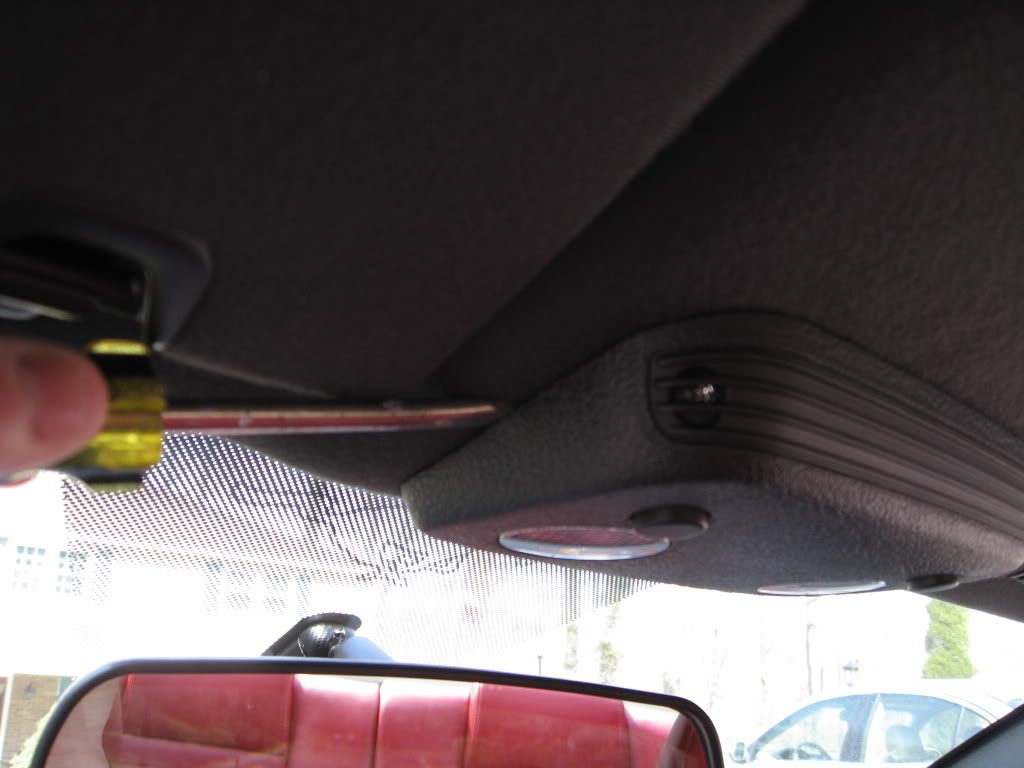
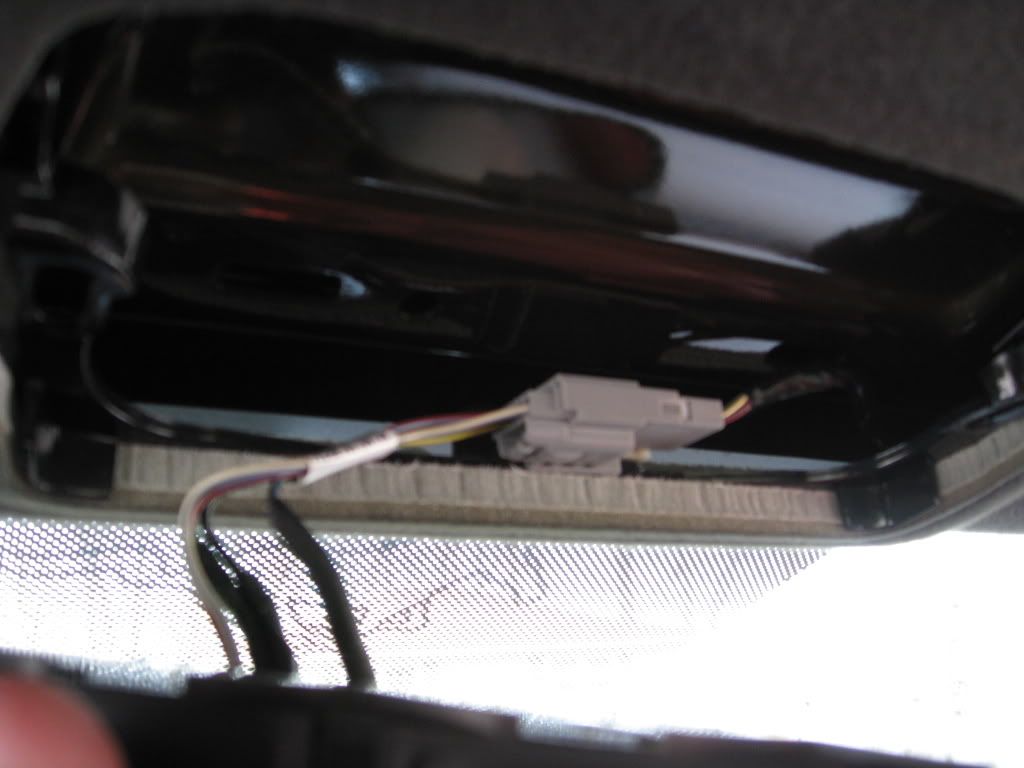
^^^ While attempting to get at the clips, I recommend you place your fingers here to pull the dome light housing out. If you pull the housing far enough, you can see the clips you're trying to get at. Otherwise you're just fumbling for the clip blindly. I couldn't show you a picture of my left hand getting at the clip and my right hand pulling the housing down. Merge these first two pictures together, and you'll get what I'm saying.
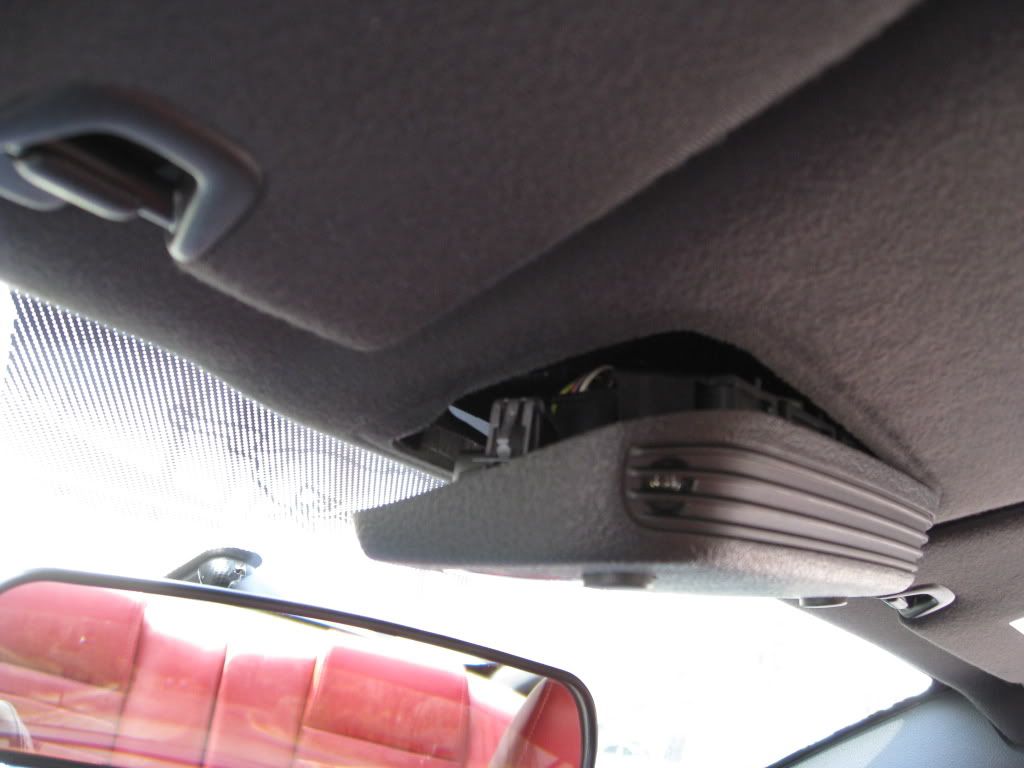
^^^ This is what happens when you disengage one of the clips. You can see roughly where these clips are.
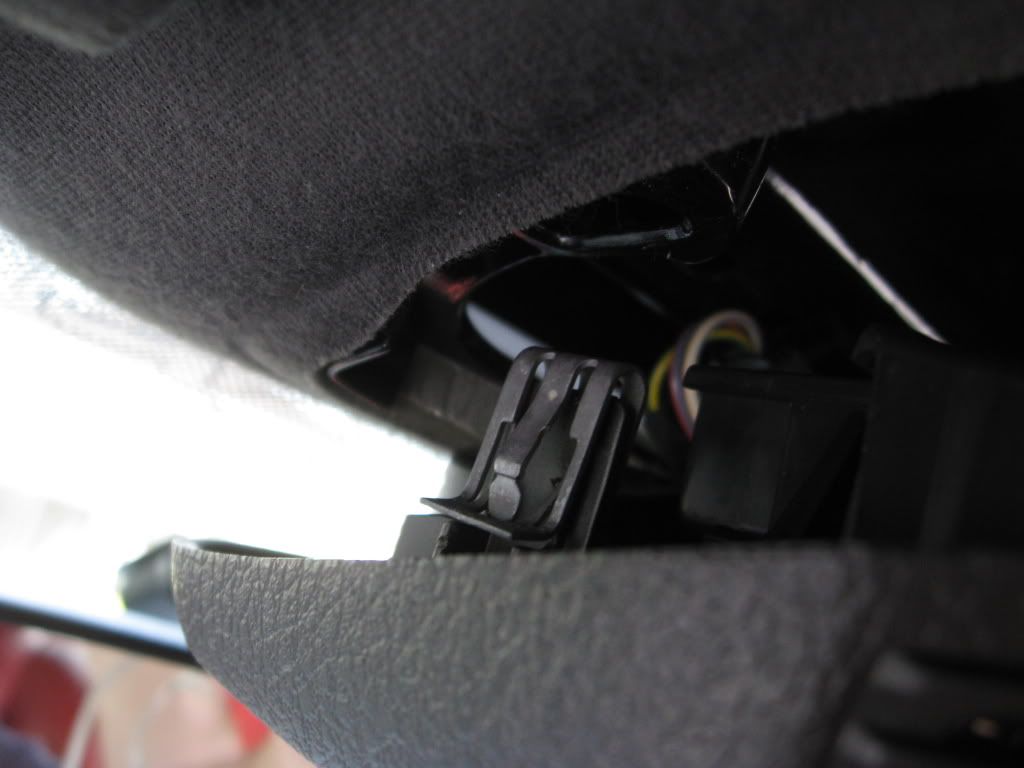
^^^ This is a closer-up pic of the clip. The bowed-out portion of the clip is where you need to get the wedged tip of the screwdriver to catch.
^^^ This is how the dome lights are connected electrically. Undo this clip so you can hold the entire assembly in your hand.
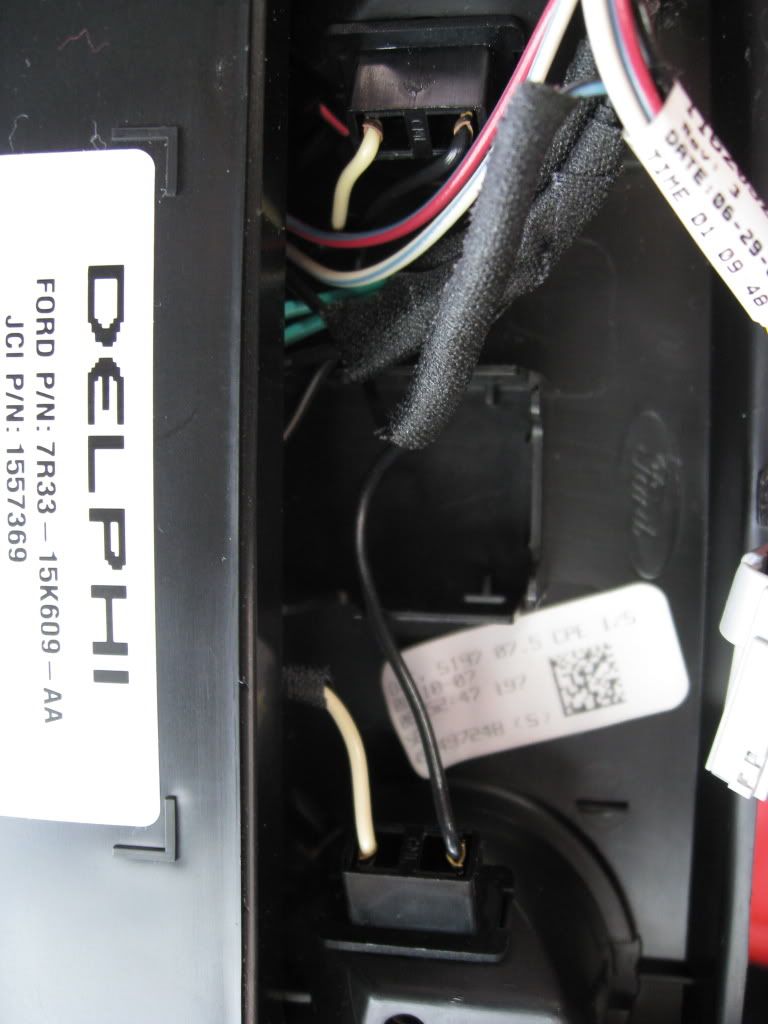
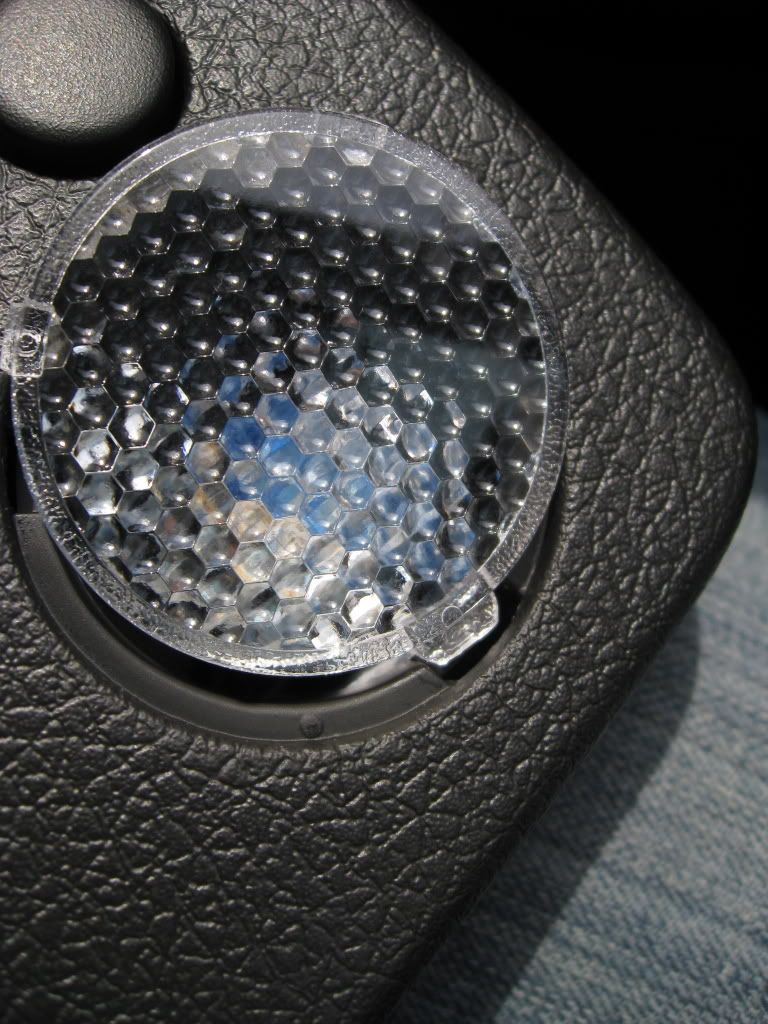
^^^ This is a picture of the bulb sockets from behind. They are located at the top and bottom of this picture. In order to remove the stock bulbs safely, simply pull these sockets out, and you can most easily get at the bulbs. No pliers required. The sockets clip right back in place. After you remove the stock bulbs, clip the sockets back as they were. The bulbs from eAuto will not fit unless the sockets are clipped back in place in the dome light housing assembly.

^^^ Now you have to remove the lenses. This only LOOKS harder than it is. Each lens is held in place by three tabs. Each tab is a different size. I used the long screwdriver with the narrow head to pop the SMALLEST tab. I couldn't take a well-lit picture of where exactly that tab was, but the screwdriver in this picture is directly on it. The tab you'll need to pop is the one closest to the ceiling clip on that side of the housing. The next picture illustrates this idea more clearly.
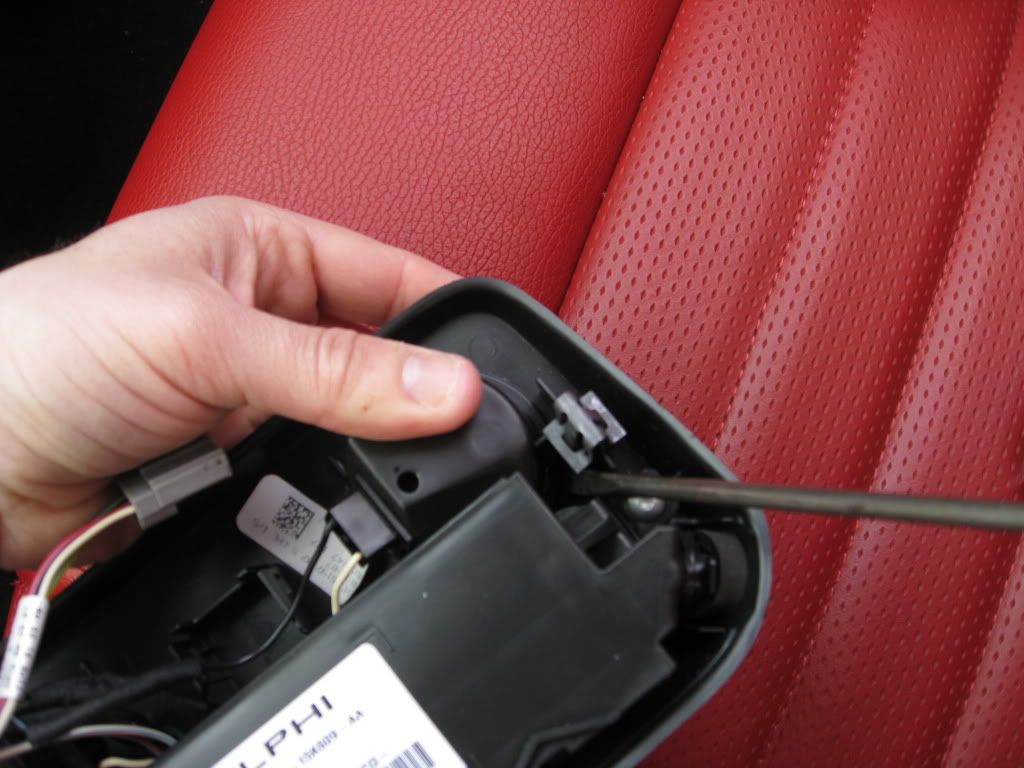
^^^ When I held the assembly this way, the lens came out with minimal effort. Use your index and middle finger underneath to help the lens come out gently. Even though you're prying (aka pushing) the lens out, there is no danger of it (or the lens tabs) breaking if you're gentle. This picture also shows where the tab is that you need to push in to pop the lens out.
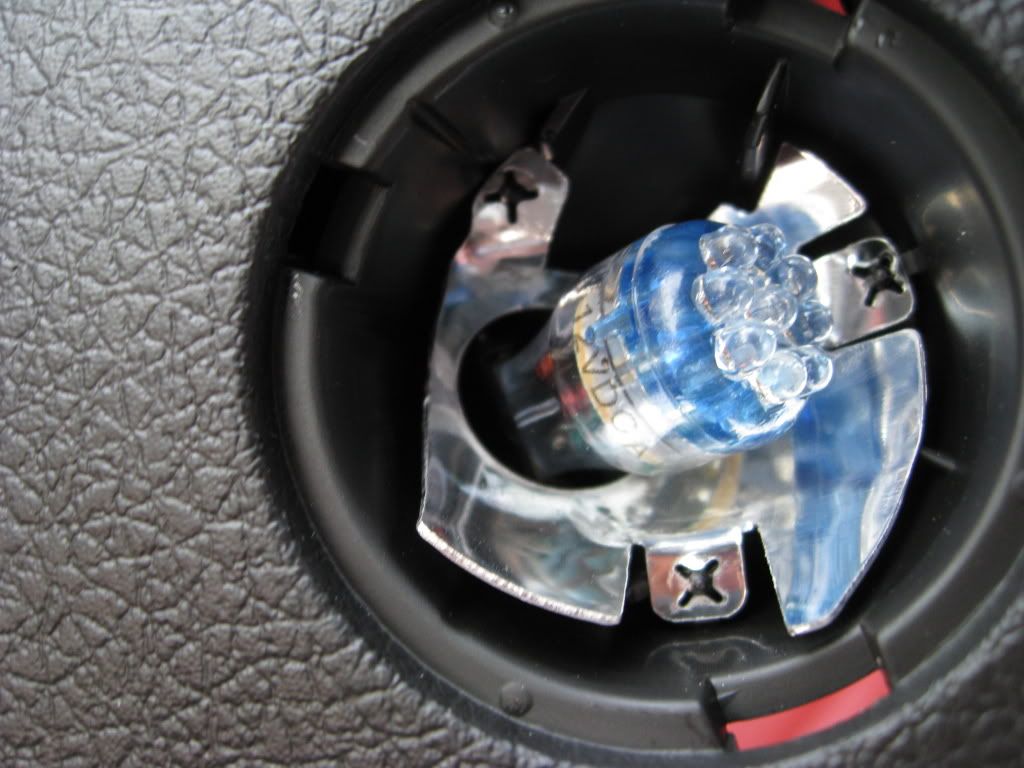
^^^ Viola! Once the lens is popped out, simply slide the bulb into the socket. **MAKE SURE YOU PLUG THE ASSEMBLY BACK INTO THE CEILING TO CHECK IF THE BULB WORKS** I had placed a bulb in backwards (it's impossible to tell which is the right way), and it wouldn't light. I thought I had received a dead bulb. I took the bulb out and rotated it 180 degrees, and it worked. Check the fitment and placement!
^^^ As you can see now, the lens's three different sized tabs can make popping the lens back into place a bit tricky. Simply slide the largest tab in place FIRST, and popping the lens back in becomes infinitely easier. After you've replaced the lenses, check the bulbs once more by plugging in the assembly. If everything is good, simply clip the dome light housing back into the ceiling and ENJOY THE COOLNESS!
*EDIT*
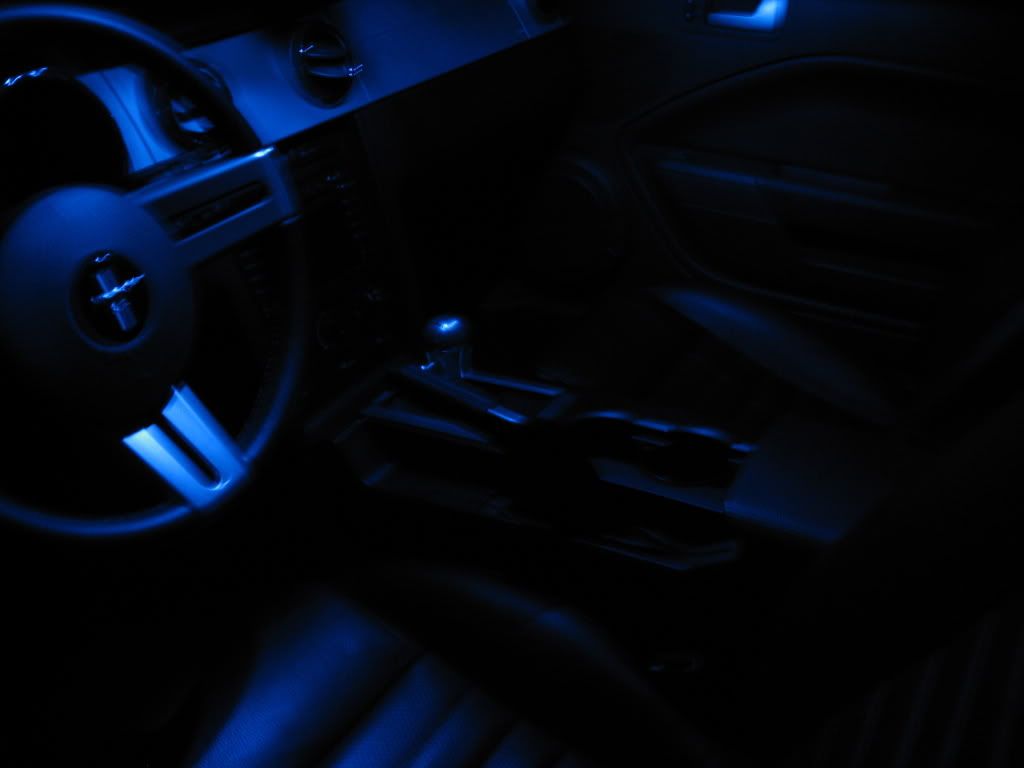
Here are some pics of the new bulbs in a pitch black garage. Sorry for the crappy quality haha. You can't really tell I have red leather, but the look is AWESOME.

Tools I used:
Hands/fingers
Long flat-head screwdriver (with a narrow tip)
Short flat-head screwdriver (with a wider tip)
^^^ On each side of the dome light assembly, there are two clips that you can disengage to remove the whole thing from the ceiling of the car. THIS MAKES THE INSTALL 1000% EASIER!
^^^ While attempting to get at the clips, I recommend you place your fingers here to pull the dome light housing out. If you pull the housing far enough, you can see the clips you're trying to get at. Otherwise you're just fumbling for the clip blindly. I couldn't show you a picture of my left hand getting at the clip and my right hand pulling the housing down. Merge these first two pictures together, and you'll get what I'm saying.
^^^ This is what happens when you disengage one of the clips. You can see roughly where these clips are.
^^^ This is a closer-up pic of the clip. The bowed-out portion of the clip is where you need to get the wedged tip of the screwdriver to catch.
^^^ This is how the dome lights are connected electrically. Undo this clip so you can hold the entire assembly in your hand.
^^^ This is a picture of the bulb sockets from behind. They are located at the top and bottom of this picture. In order to remove the stock bulbs safely, simply pull these sockets out, and you can most easily get at the bulbs. No pliers required. The sockets clip right back in place. After you remove the stock bulbs, clip the sockets back as they were. The bulbs from eAuto will not fit unless the sockets are clipped back in place in the dome light housing assembly.
^^^ Now you have to remove the lenses. This only LOOKS harder than it is. Each lens is held in place by three tabs. Each tab is a different size. I used the long screwdriver with the narrow head to pop the SMALLEST tab. I couldn't take a well-lit picture of where exactly that tab was, but the screwdriver in this picture is directly on it. The tab you'll need to pop is the one closest to the ceiling clip on that side of the housing. The next picture illustrates this idea more clearly.
^^^ When I held the assembly this way, the lens came out with minimal effort. Use your index and middle finger underneath to help the lens come out gently. Even though you're prying (aka pushing) the lens out, there is no danger of it (or the lens tabs) breaking if you're gentle. This picture also shows where the tab is that you need to push in to pop the lens out.
^^^ Viola! Once the lens is popped out, simply slide the bulb into the socket. **MAKE SURE YOU PLUG THE ASSEMBLY BACK INTO THE CEILING TO CHECK IF THE BULB WORKS** I had placed a bulb in backwards (it's impossible to tell which is the right way), and it wouldn't light. I thought I had received a dead bulb. I took the bulb out and rotated it 180 degrees, and it worked. Check the fitment and placement!
^^^ As you can see now, the lens's three different sized tabs can make popping the lens back into place a bit tricky. Simply slide the largest tab in place FIRST, and popping the lens back in becomes infinitely easier. After you've replaced the lenses, check the bulbs once more by plugging in the assembly. If everything is good, simply clip the dome light housing back into the ceiling and ENJOY THE COOLNESS!
*EDIT*
Here are some pics of the new bulbs in a pitch black garage. Sorry for the crappy quality haha. You can't really tell I have red leather, but the look is AWESOME.
Last edited by East87; Mar 21, 2009 at 08:23 PM.
4th Gear Member
Joined: Jun 2008
Posts: 1,259
From: Newark, Delaware
Aw it's really not hard at all! You should go for it! In all honesty, I didn't even know where to begin myself. The whole process was very intuitive though. Once I got through one step, the next task became clear. The whole thing took me less than 15 minutes and is TOTALLY worth it!
1st Gear Member
Joined: Jan 2009
Posts: 89
From: southern foothills
Great install pics.
You can also get the 9 LED bulbs in 5 colors for $6.99 each plus $4.00 shipping for a total of $18.00 a pair at autolumination.com A little cheaper and better selection.
Here is link: http://autolumination.com/906.htm
You can also get the 9 LED bulbs in 5 colors for $6.99 each plus $4.00 shipping for a total of $18.00 a pair at autolumination.com A little cheaper and better selection.
Here is link: http://autolumination.com/906.htm
2nd Gear Member
Joined: Jun 2008
Posts: 186
i'm telling you, if I can get those out with needle nose pliers, anyone can. That way above is a tad harder, but really it can be done easier. That hardest part is popping off the plastics lens. Then just wiggle with the needle nose. It will come out. Trust me! And you will appreciate the look. Dont be scared by this, i'm really a clutz and if I can do it, it can be done. By the way, the best part of this mod is when you are walking upto the car at night with someone and hit the unlock button on the key fob, and the lights turn on, and whoevers with you, always, always will step back when they see the color. Looks badas@$#$S!!!!