
Map Light Color!!!


Joined: Mar 2009
Posts: 39
From: Mass.
Thanks for the great pics. I got my bulbs today and did the install. First attempted to just pop the lense off and pull the old bulb out but after not being able to do it with my fingers and not trusting myself with metal tools on a glass bulb I went ahead and followed your pics. Although nerve racking at first since I have no faith in anything I do mechanically the whole process went smooth after I was able to see the two clips witha flashlight. finished the job in under 15 minutes and it looks great!!
(also took your advice to try it out before putting everything in place and good thing I did since one of the bulbs was in backwards)
(also took your advice to try it out before putting everything in place and good thing I did since one of the bulbs was in backwards)
Thread Starter
2nd Gear Member
Joined: Jan 2009
Posts: 178
From: Christiansburg, Virginia
I got them out with the small pliers with no problem, just have to be careful, and yes after its done it looks awesome!!!
Thread Starter
2nd Gear Member
Joined: Jan 2009
Posts: 178
From: Christiansburg, Virginia
This is what I did took 15 min maybe:
Get the wedge type LEDs in what ever your color you like for the 05-09's, I took a very small flat blade screwdriver to carefully pop the lens off, then I needed some small pliers or fingers, my fingers are to big to get the old ones out ( FYI: remember the old ones get hot real fast so watch out ) be careful not to break them while trying to remove them , I didnt have any trouble, they came out real easy, used my fingers to install the new LED ones, snapped the lens caps back in place and then you have awesome blue lighting.
Get the wedge type LEDs in what ever your color you like for the 05-09's, I took a very small flat blade screwdriver to carefully pop the lens off, then I needed some small pliers or fingers, my fingers are to big to get the old ones out ( FYI: remember the old ones get hot real fast so watch out ) be careful not to break them while trying to remove them , I didnt have any trouble, they came out real easy, used my fingers to install the new LED ones, snapped the lens caps back in place and then you have awesome blue lighting.
3rd Gear Member
Joined: Mar 2009
Posts: 950
From: Texas
Hey guys! Here are the pics I promised. I'll do my best to explain what you're looking at.
Tools I used:
Hands/fingers
Long flat-head screwdriver (with a narrow tip)
Short flat-head screwdriver (with a wider tip)
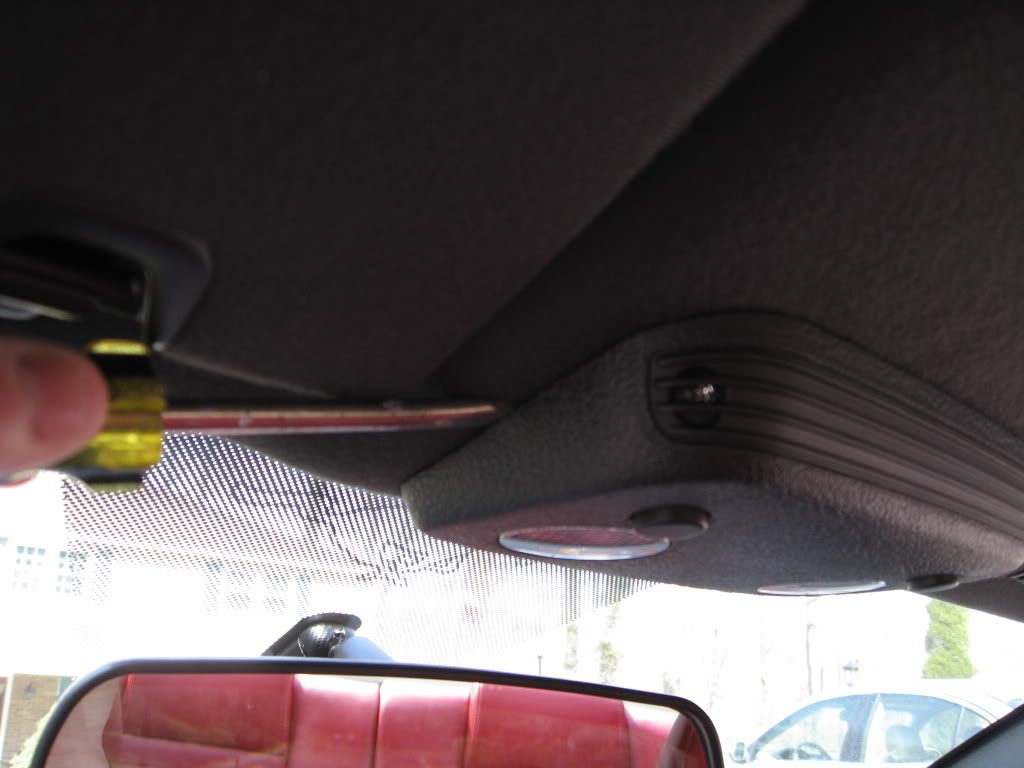
^^^ On each side of the dome light assembly, there are two clips that you can disengage to remove the whole thing from the ceiling of the car. THIS MAKES THE INSTALL 1000% EASIER!
^^^ While attempting to get at the clips, I recommend you place your fingers here to pull the dome light housing out. If you pull the housing far enough, you can see the clips you're trying to get at. Otherwise you're just fumbling for the clip blindly. I couldn't show you a picture of my left hand getting at the clip and my right hand pulling the housing down. Merge these first two pictures together, and you'll get what I'm saying.
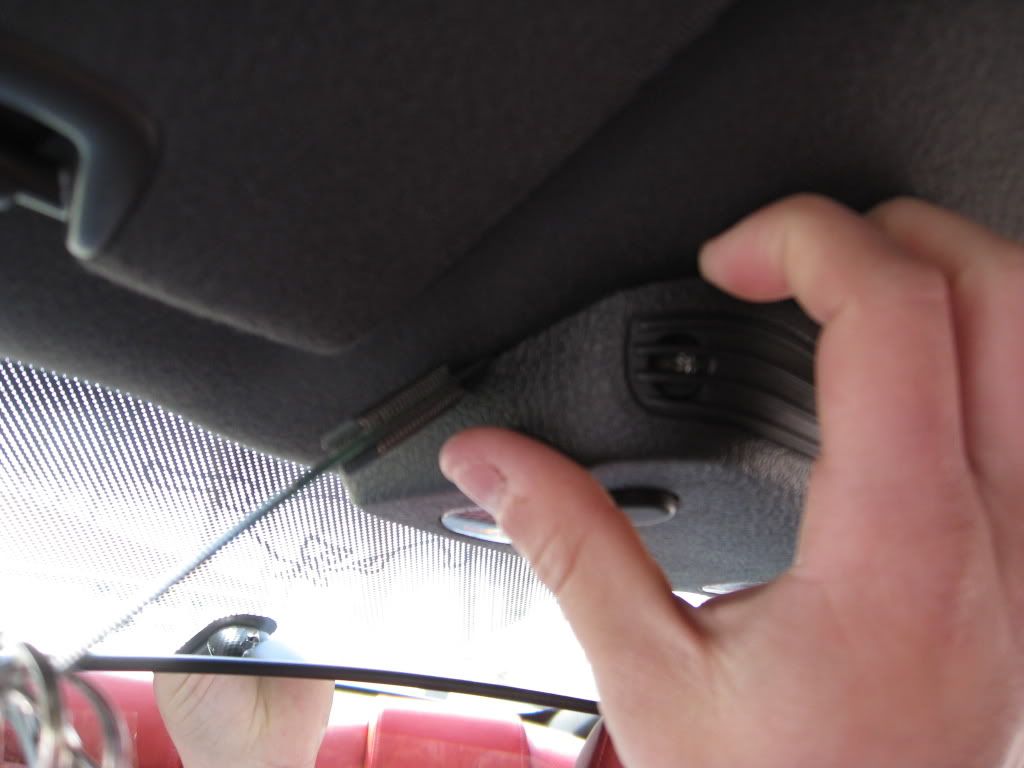
^^^ This is what happens when you disengage one of the clips. You can see roughly where these clips are.
^^^ This is a closer-up pic of the clip. The bowed-out portion of the clip is where you need to get the wedged tip of the screwdriver to catch.
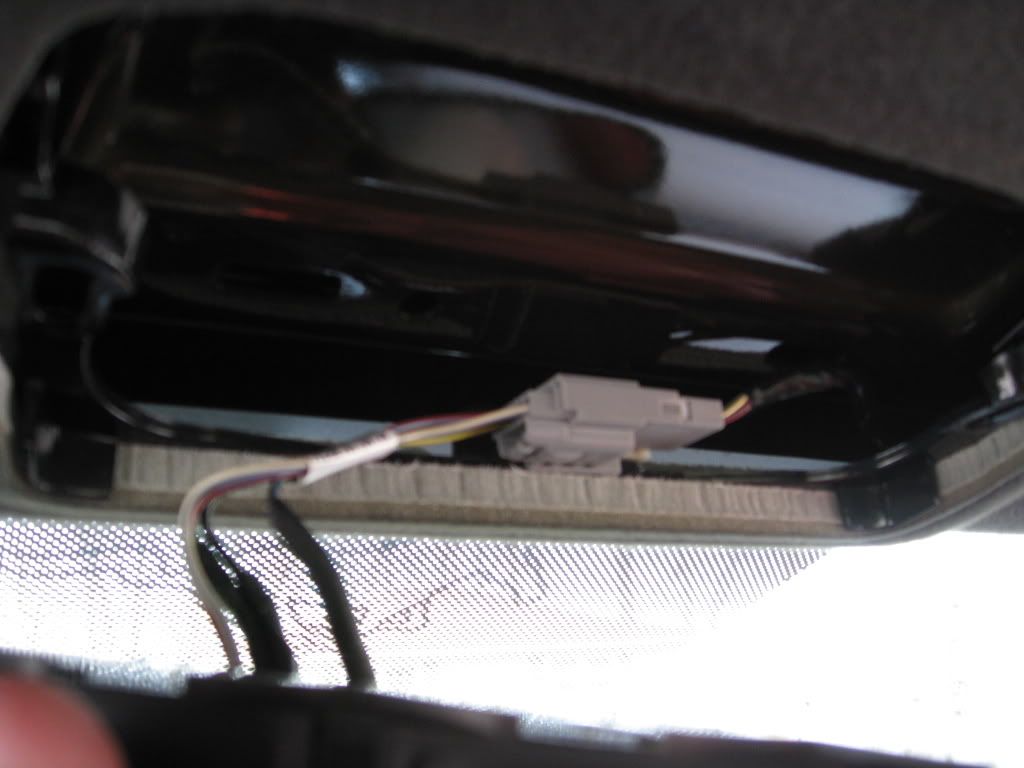
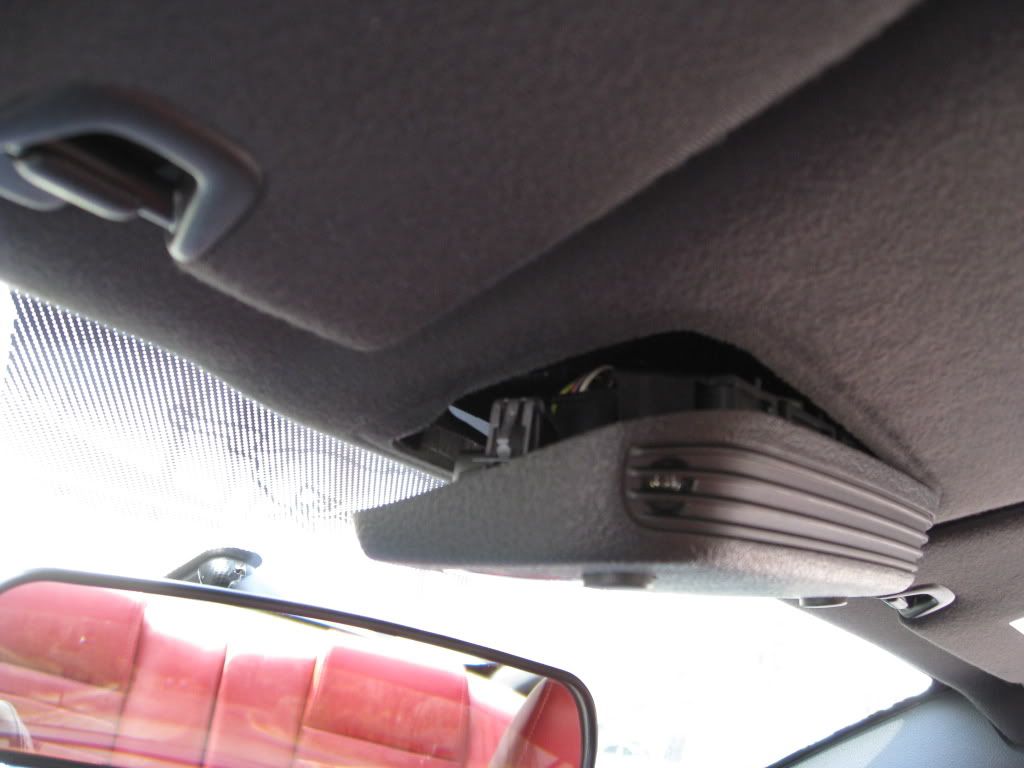
^^^ This is how the dome lights are connected electrically. Undo this clip so you can hold the entire assembly in your hand.
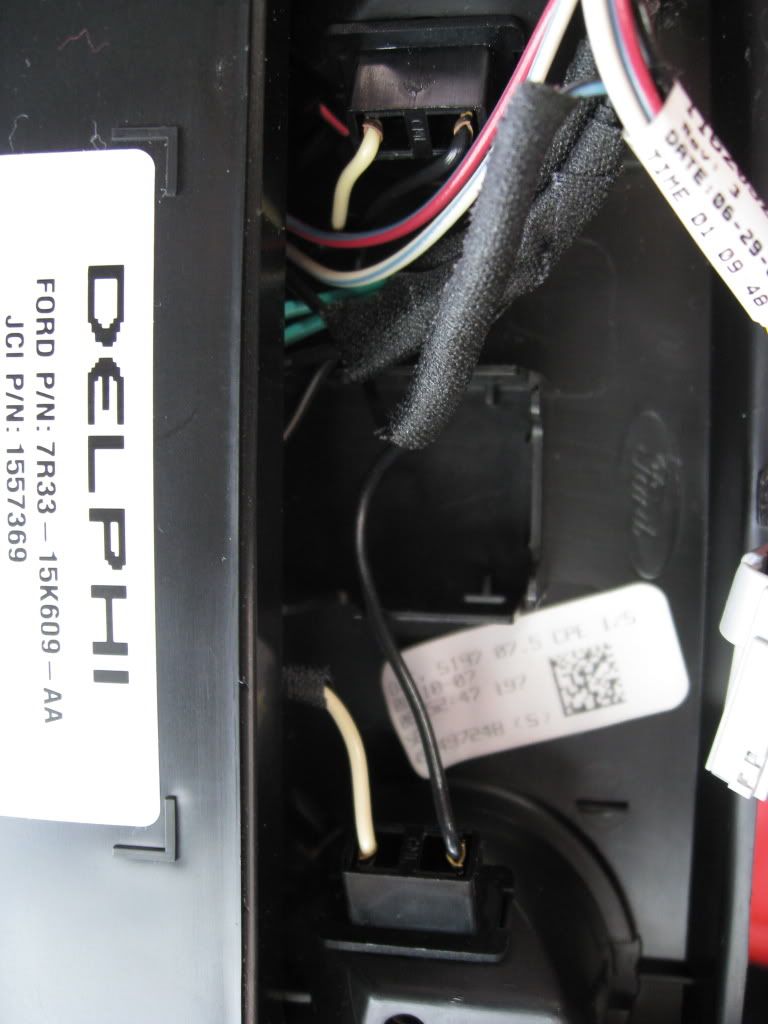
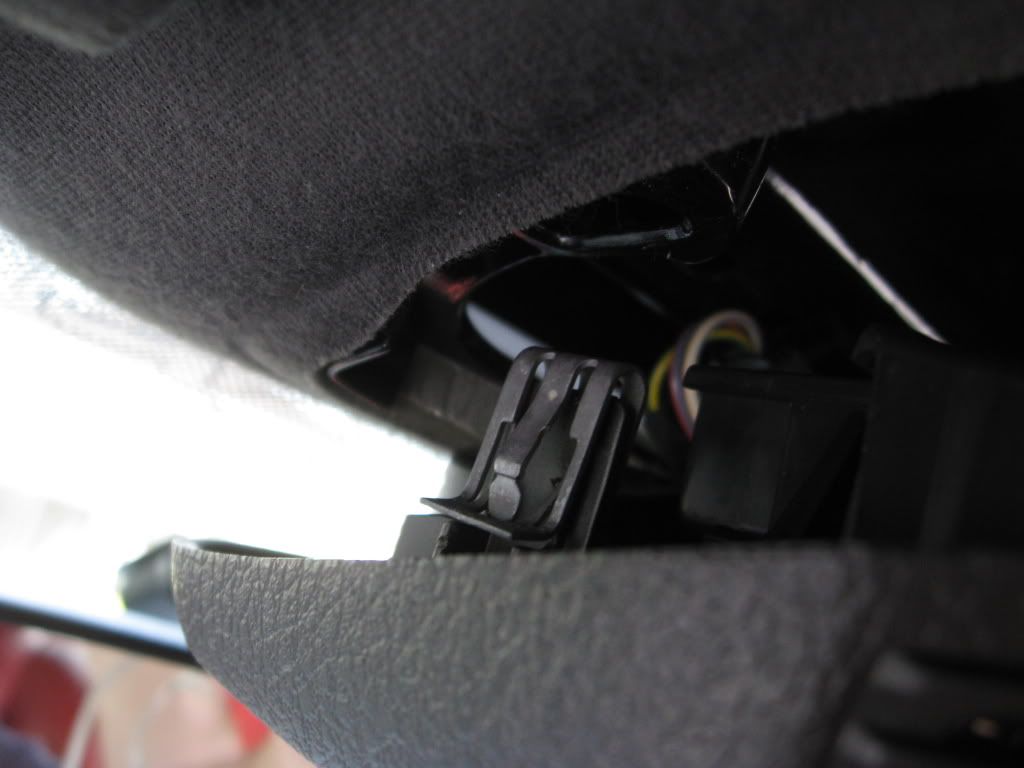
^^^ This is a picture of the bulb sockets from behind. They are located at the top and bottom of this picture. In order to remove the stock bulbs safely, simply pull these sockets out, and you can most easily get at the bulbs. No pliers required. The sockets clip right back in place. After you remove the stock bulbs, clip the sockets back as they were. The bulbs from eAuto will not fit unless the sockets are clipped back in place in the dome light housing assembly.

^^^ Now you have to remove the lenses. This only LOOKS harder than it is. Each lens is held in place by three tabs. Each tab is a different size. I used the long screwdriver with the narrow head to pop the SMALLEST tab. I couldn't take a well-lit picture of where exactly that tab was, but the screwdriver in this picture is directly on it. The tab you'll need to pop is the one closest to the ceiling clip on that side of the housing. The next picture illustrates this idea more clearly.
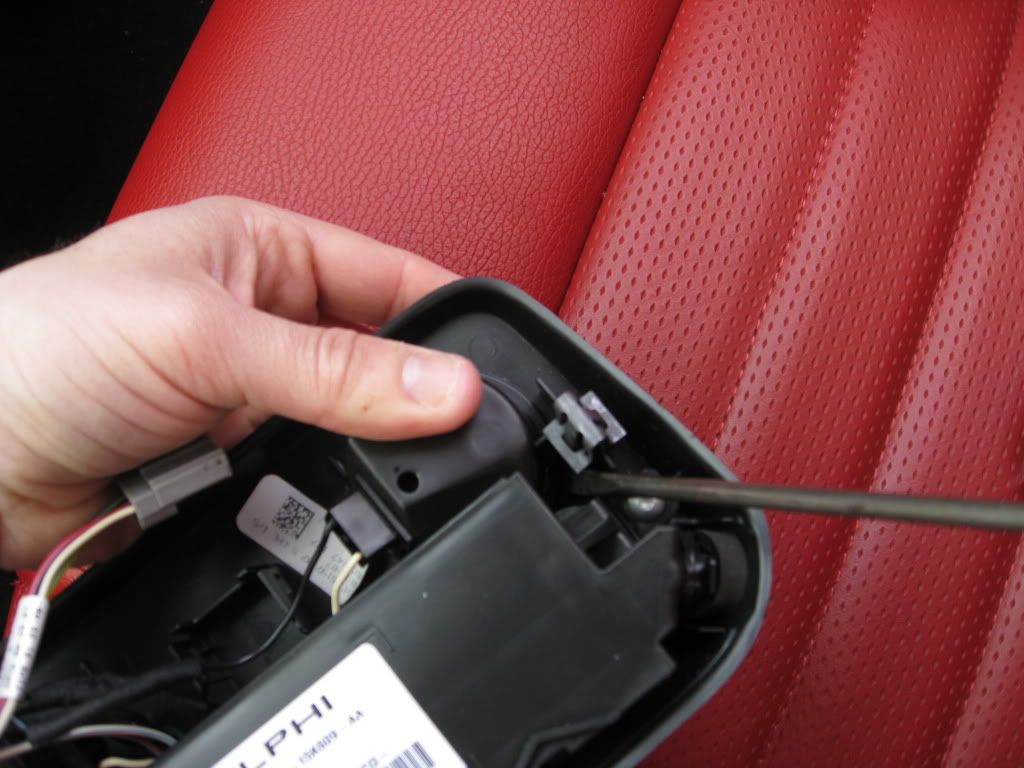
^^^ When I held the assembly this way, the lens came out with minimal effort. Use your index and middle finger underneath to help the lens come out gently. Even though you're prying (aka pushing) the lens out, there is no danger of it (or the lens tabs) breaking if you're gentle. This picture also shows where the tab is that you need to push in to pop the lens out.
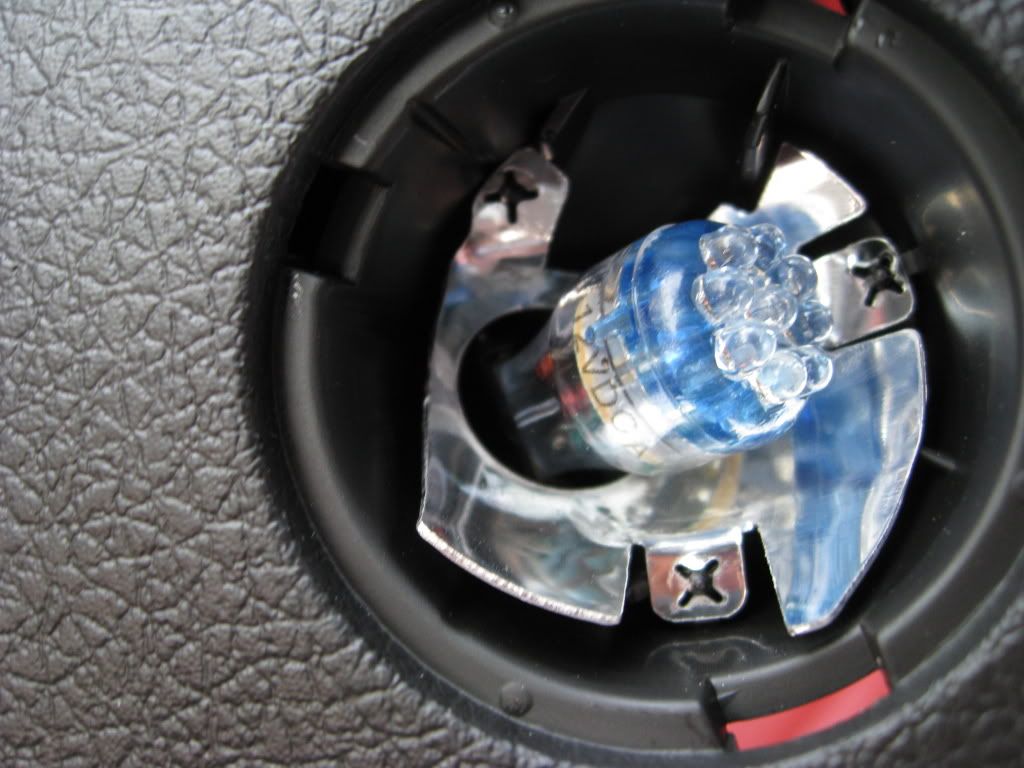
^^^ Viola! Once the lens is popped out, simply slide the bulb into the socket. **MAKE SURE YOU PLUG THE ASSEMBLY BACK INTO THE CEILING TO CHECK IF THE BULB WORKS** I had placed a bulb in backwards (it's impossible to tell which is the right way), and it wouldn't light. I thought I had received a dead bulb. I took the bulb out and rotated it 180 degrees, and it worked. Check the fitment and placement!
^^^ As you can see now, the lens's three different sized tabs can make popping the lens back into place a bit tricky. Simply slide the largest tab in place FIRST, and popping the lens back in becomes infinitely easier. After you've replaced the lenses, check the bulbs once more by plugging in the assembly. If everything is good, simply clip the dome light housing back into the ceiling and ENJOY THE COOLNESS!
*EDIT*
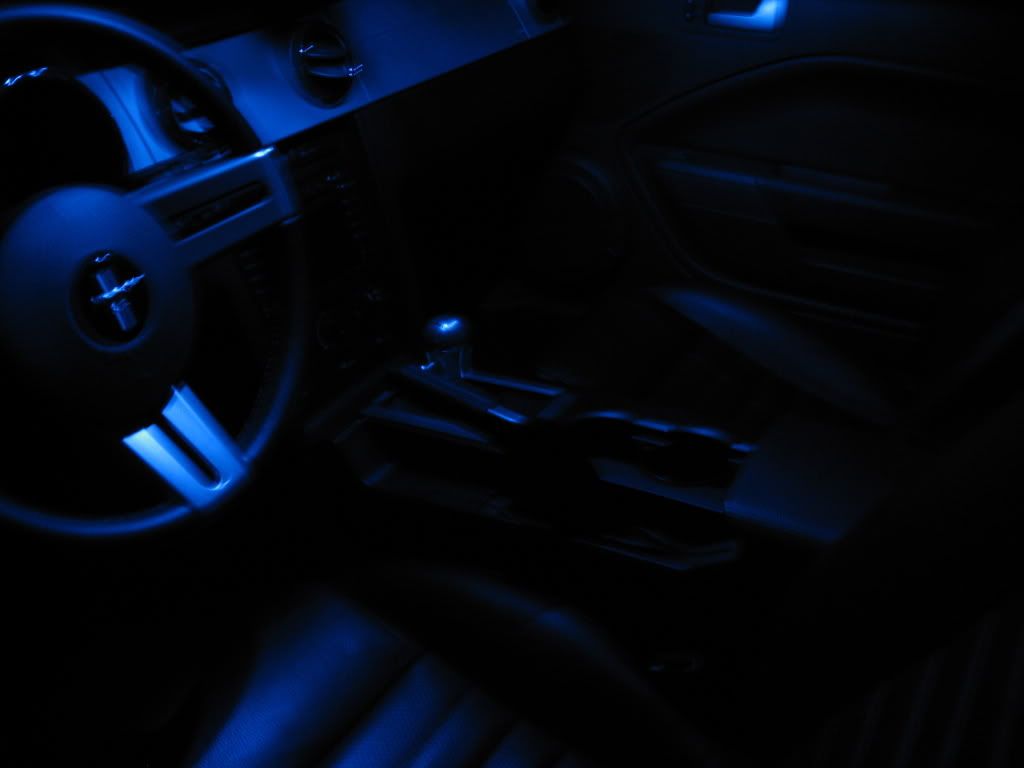
Here are some pics of the new bulbs in a pitch black garage. Sorry for the crappy quality haha. You can't really tell I have red leather, but the look is AWESOME.

Tools I used:
Hands/fingers
Long flat-head screwdriver (with a narrow tip)
Short flat-head screwdriver (with a wider tip)
^^^ On each side of the dome light assembly, there are two clips that you can disengage to remove the whole thing from the ceiling of the car. THIS MAKES THE INSTALL 1000% EASIER!
^^^ While attempting to get at the clips, I recommend you place your fingers here to pull the dome light housing out. If you pull the housing far enough, you can see the clips you're trying to get at. Otherwise you're just fumbling for the clip blindly. I couldn't show you a picture of my left hand getting at the clip and my right hand pulling the housing down. Merge these first two pictures together, and you'll get what I'm saying.
^^^ This is what happens when you disengage one of the clips. You can see roughly where these clips are.
^^^ This is a closer-up pic of the clip. The bowed-out portion of the clip is where you need to get the wedged tip of the screwdriver to catch.
^^^ This is how the dome lights are connected electrically. Undo this clip so you can hold the entire assembly in your hand.
^^^ This is a picture of the bulb sockets from behind. They are located at the top and bottom of this picture. In order to remove the stock bulbs safely, simply pull these sockets out, and you can most easily get at the bulbs. No pliers required. The sockets clip right back in place. After you remove the stock bulbs, clip the sockets back as they were. The bulbs from eAuto will not fit unless the sockets are clipped back in place in the dome light housing assembly.
^^^ Now you have to remove the lenses. This only LOOKS harder than it is. Each lens is held in place by three tabs. Each tab is a different size. I used the long screwdriver with the narrow head to pop the SMALLEST tab. I couldn't take a well-lit picture of where exactly that tab was, but the screwdriver in this picture is directly on it. The tab you'll need to pop is the one closest to the ceiling clip on that side of the housing. The next picture illustrates this idea more clearly.
^^^ When I held the assembly this way, the lens came out with minimal effort. Use your index and middle finger underneath to help the lens come out gently. Even though you're prying (aka pushing) the lens out, there is no danger of it (or the lens tabs) breaking if you're gentle. This picture also shows where the tab is that you need to push in to pop the lens out.
^^^ Viola! Once the lens is popped out, simply slide the bulb into the socket. **MAKE SURE YOU PLUG THE ASSEMBLY BACK INTO THE CEILING TO CHECK IF THE BULB WORKS** I had placed a bulb in backwards (it's impossible to tell which is the right way), and it wouldn't light. I thought I had received a dead bulb. I took the bulb out and rotated it 180 degrees, and it worked. Check the fitment and placement!
^^^ As you can see now, the lens's three different sized tabs can make popping the lens back into place a bit tricky. Simply slide the largest tab in place FIRST, and popping the lens back in becomes infinitely easier. After you've replaced the lenses, check the bulbs once more by plugging in the assembly. If everything is good, simply clip the dome light housing back into the ceiling and ENJOY THE COOLNESS!
*EDIT*
Here are some pics of the new bulbs in a pitch black garage. Sorry for the crappy quality haha. You can't really tell I have red leather, but the look is AWESOME.
3rd Gear Member
Joined: Mar 2009
Posts: 950
From: Texas
Pic below- some advice for install- pry the lens from the outside not from the inside, be gentle and they come right out. Awesome looks and easy install thanks to the pics and direction provided by the pioneer who installed first above.


1st Gear Member
Joined: Mar 2007
Posts: 81
From: Bay Area, CA
I really love the look of these, and was wondering if there are green LED bulbs that would fit? I dont have the mycolor so my gauges are green and plus i just love green and think it would look sick!