
WebElectric Sequentials installed (w/pics & vid)
 04-17-2007, 02:36 PM
#1
2nd Gear Member
Thread Starter
Join Date: Jun 2006
Location:
Posts: 415
Here'show I installed theWebElectric Sequentials. I got the whole plug and play harness, no cutting or splicing of wires were necessary with this kit.
Install time was under 1 hour. Could have been quicker, but I was in no rush and took time out to take pics of the install.[/align][/align]Note: I have the Shaker 500, so access to the passenger side was no problem. For those with the Shaker 1000, I've read that removal of the sub box is not necessary, but doing so will make access much easier. I believe it's just a couple fasteners that hold the sub box down, so removing it out of the way to better access the rear panel may be a good idea.
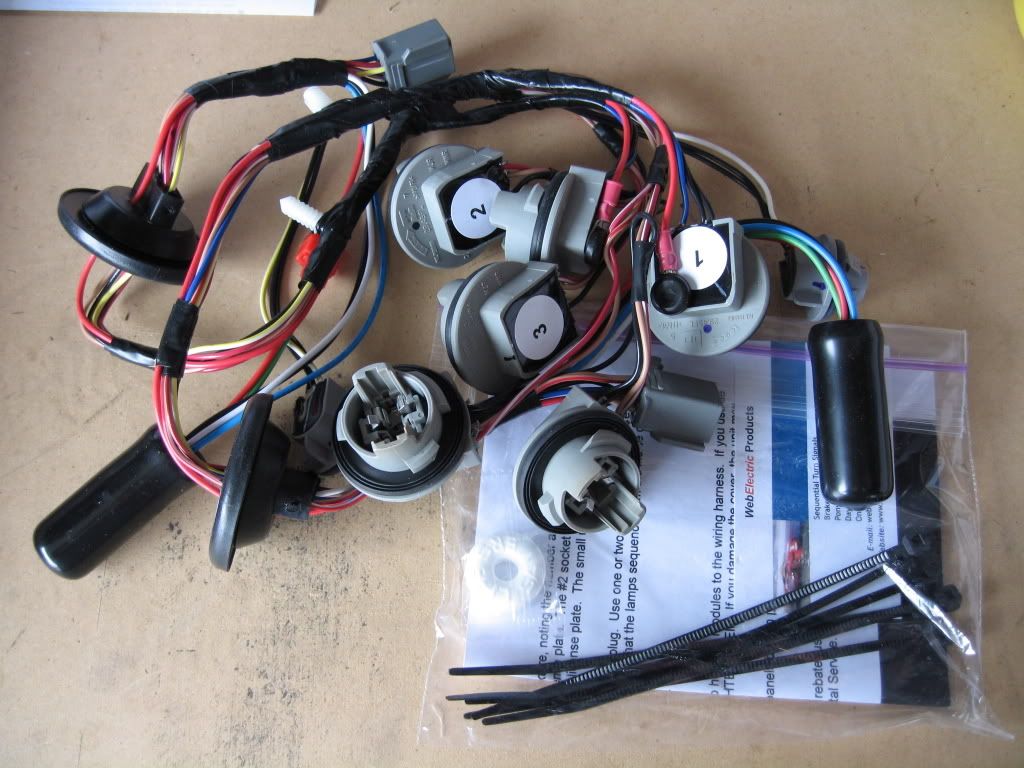
OUT OF THE BOX - 2 SEPERATE HARNESSES, ZIP-TIES, AND INSTRUCTIONS.
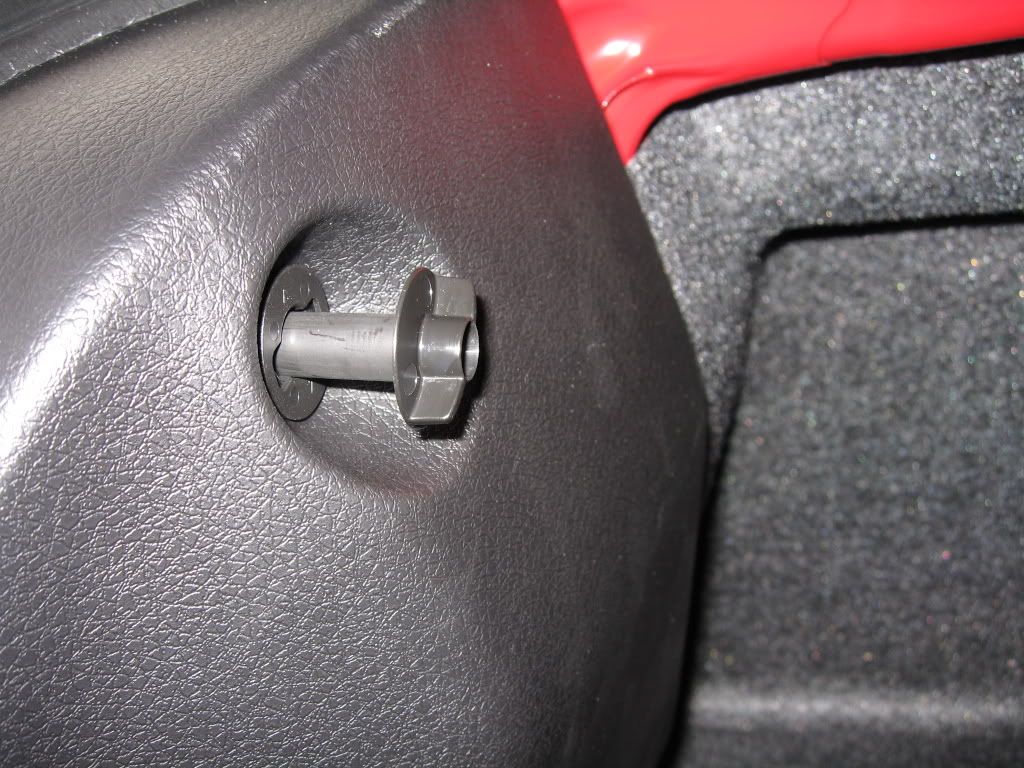
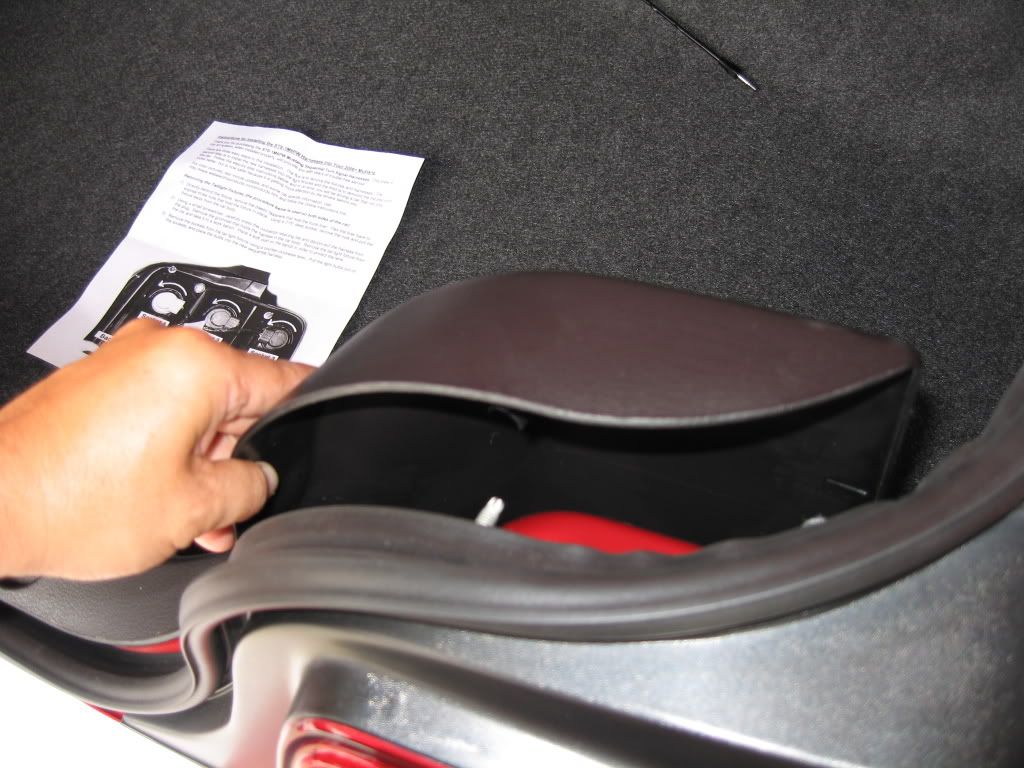
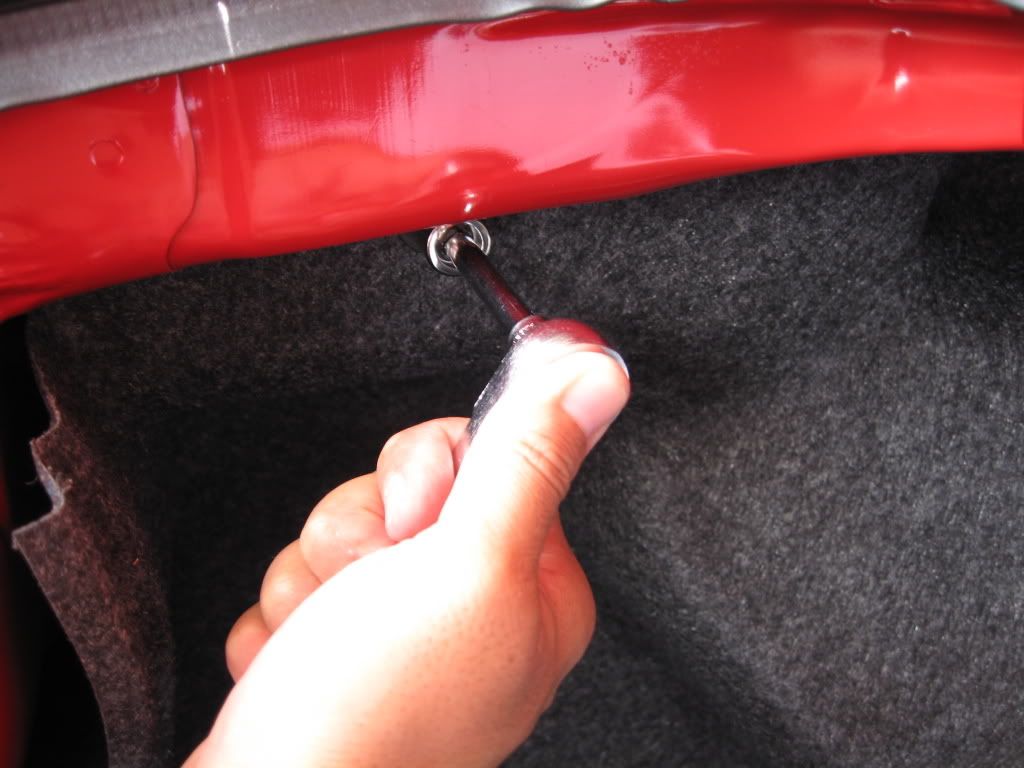
REAR TRUNK PANEL REMOVAL: UNSCREW THE 2 (1 EA SIDE) PLASTIC FASTENERS.
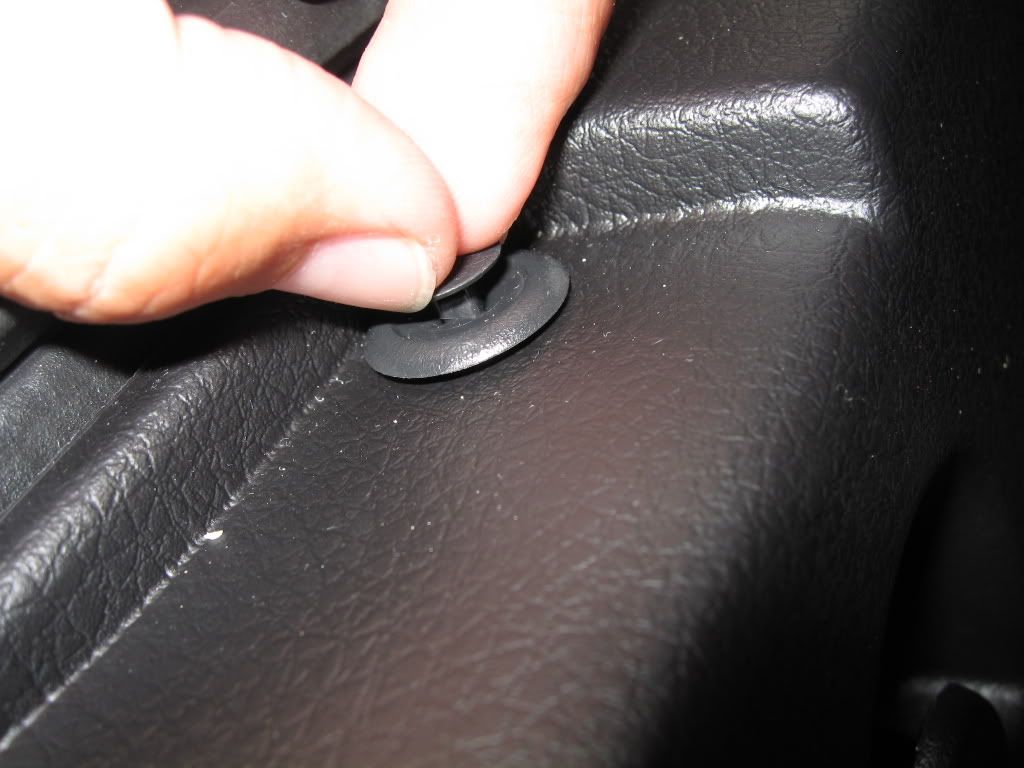
REMOVE THE 4 PLASTIC RETAINERS (2 EA SIDE) BY PULLING UP ON THE CENTER PART.
GENTLY PULL BACK THE REAR PANEL. THE CENTER SECTION AROUND THE TRUNK LATCH MUST BE PULLED UP AND OVER.
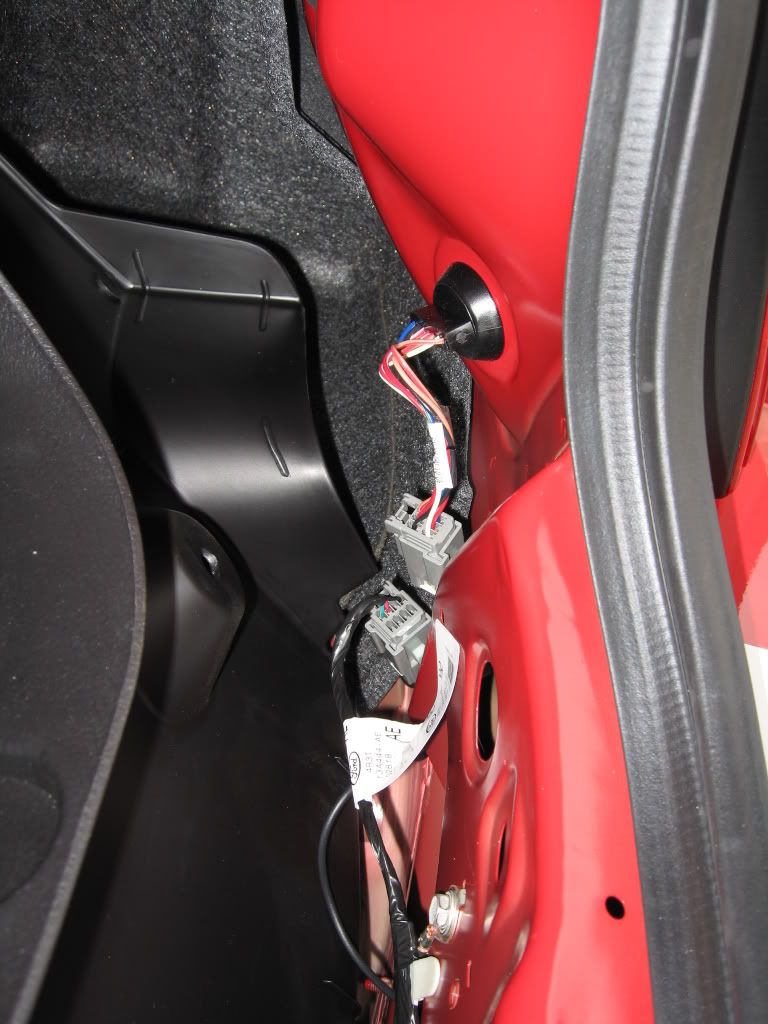
STOCK WIRE HARNESS EXPOSED.
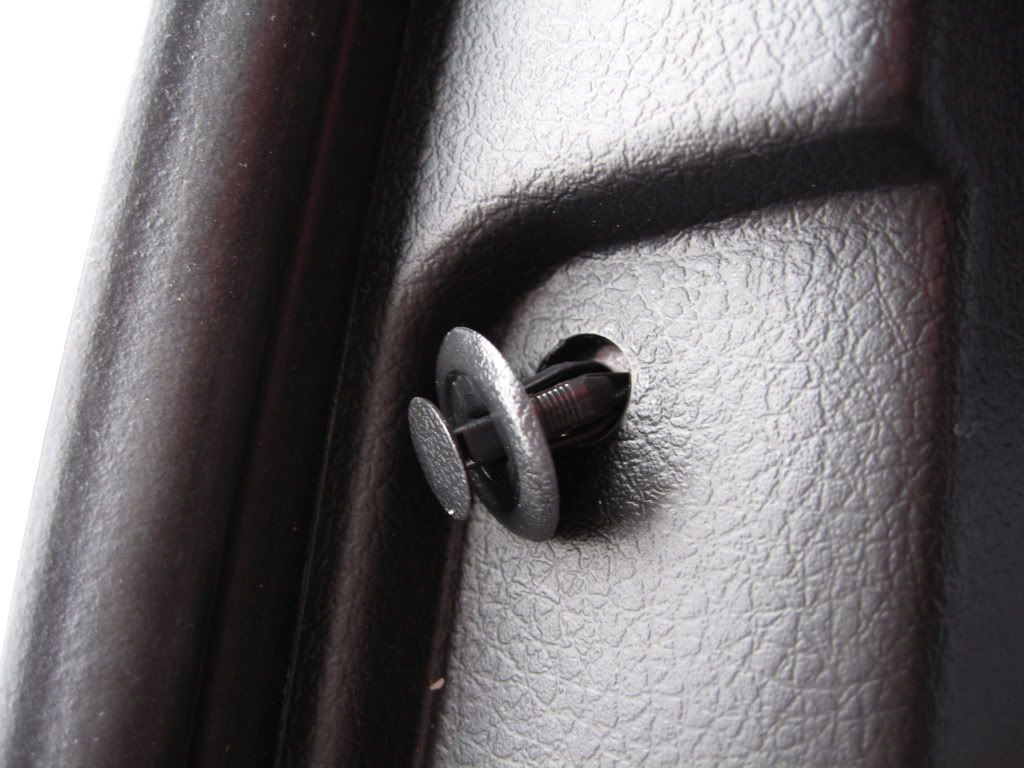
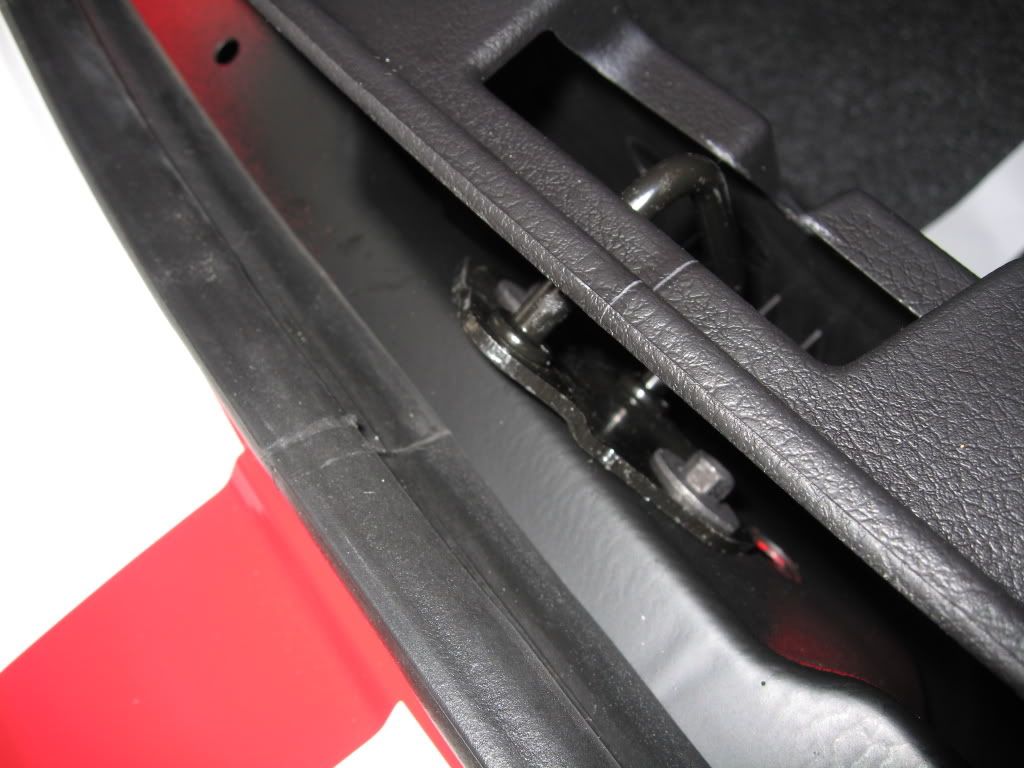
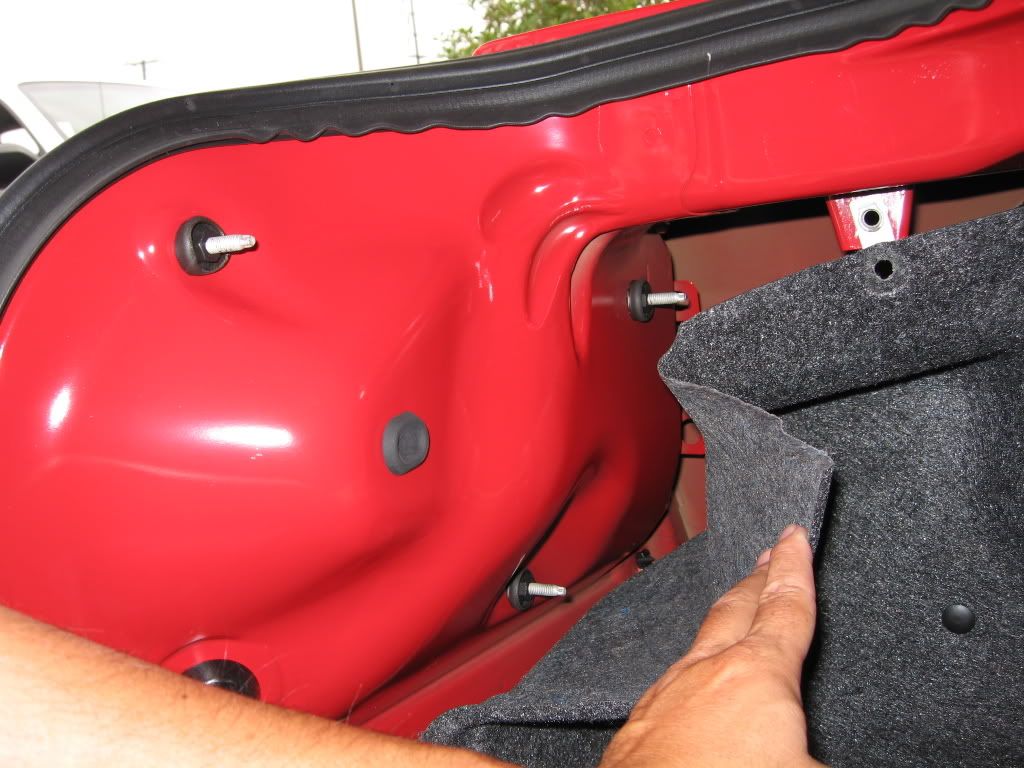
REMOVE THE UPPER 2 BOLTS (1 EA SIDE) THAT HOLD THE CARPET UP AT THE REAR. MAY NOT BE NECESSARY, BUT MAKES ACCESS TO THE OUTBOARD NUTS MUCH EASIER.
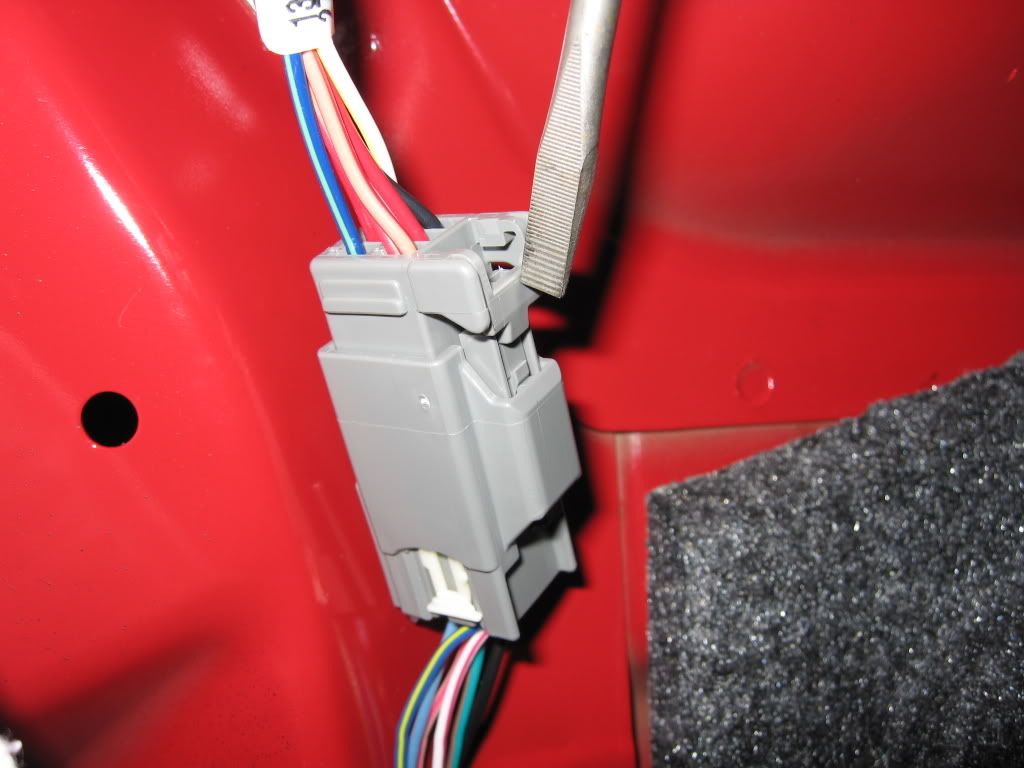
UNPLUG THE MAIN HARNESS PLUG BY PRESSING DOWN ON THE RELEASE TAB.
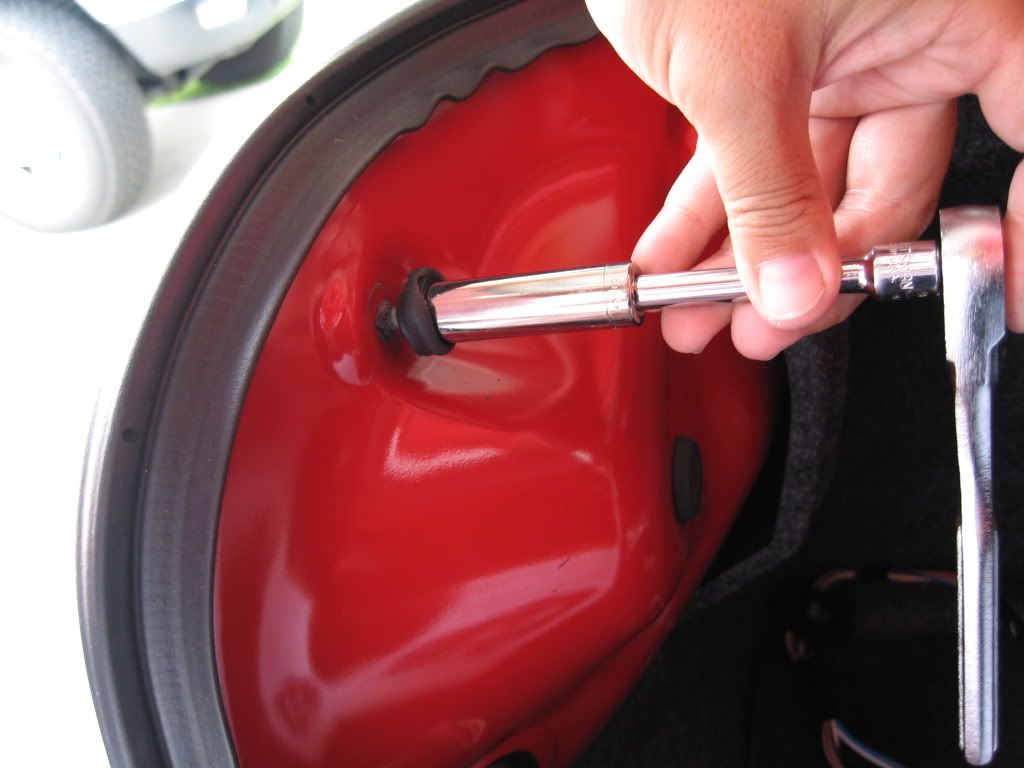
REMOVE THE 6 NUTS (3 EA SIDE) THAT HOLD THE LIGHT ASSEMBLY TO THE BODY. THERE WERE SOME WEAK LOOKING RUBBER SEALS (IF YOU CAN CALL THEM THAT) AROUND EACH OF THE NUTS THAT PRETTY MUCH FALL OFF WHEN REMOVING THE NUTS. I THREW THEM AWAY, BUT FOR WEATHERPROOFING, IT MAY BE A GOOD IDEA TO TRY AND SALVAGE THEM FOR RE-INSTALLATION.
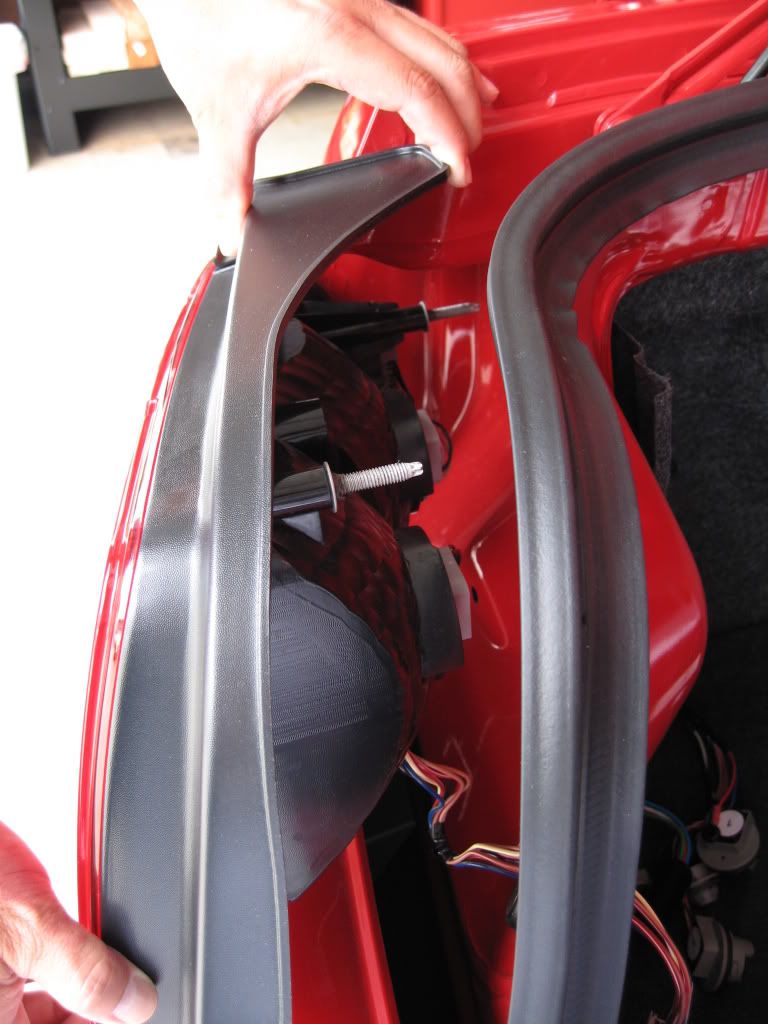
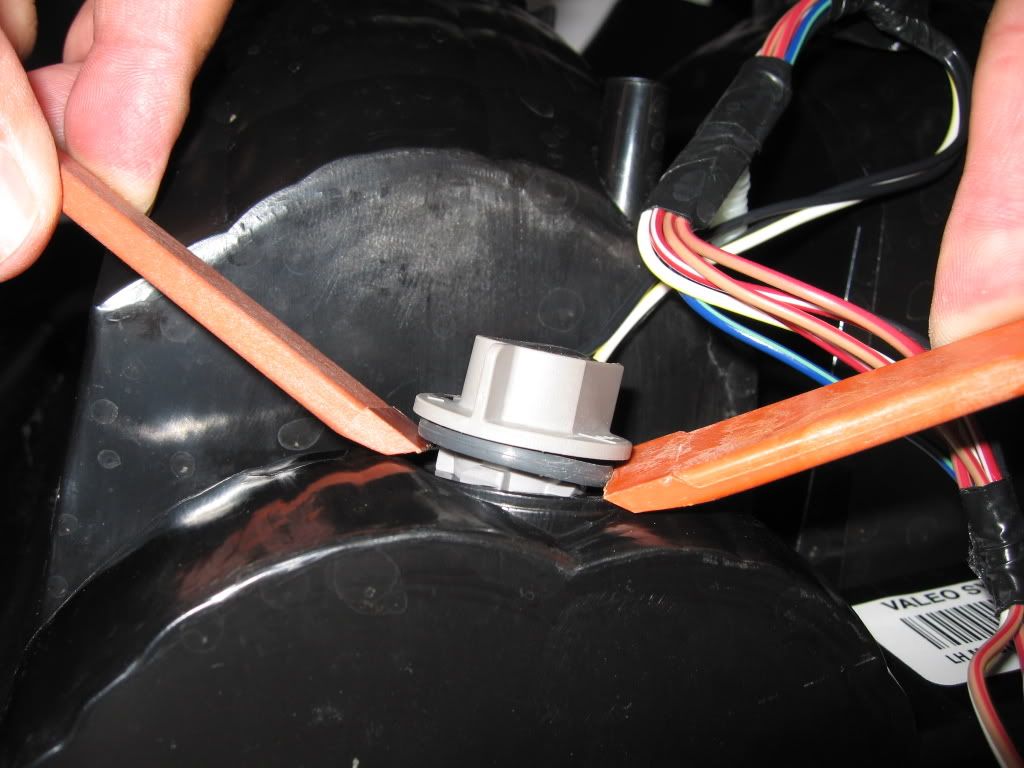
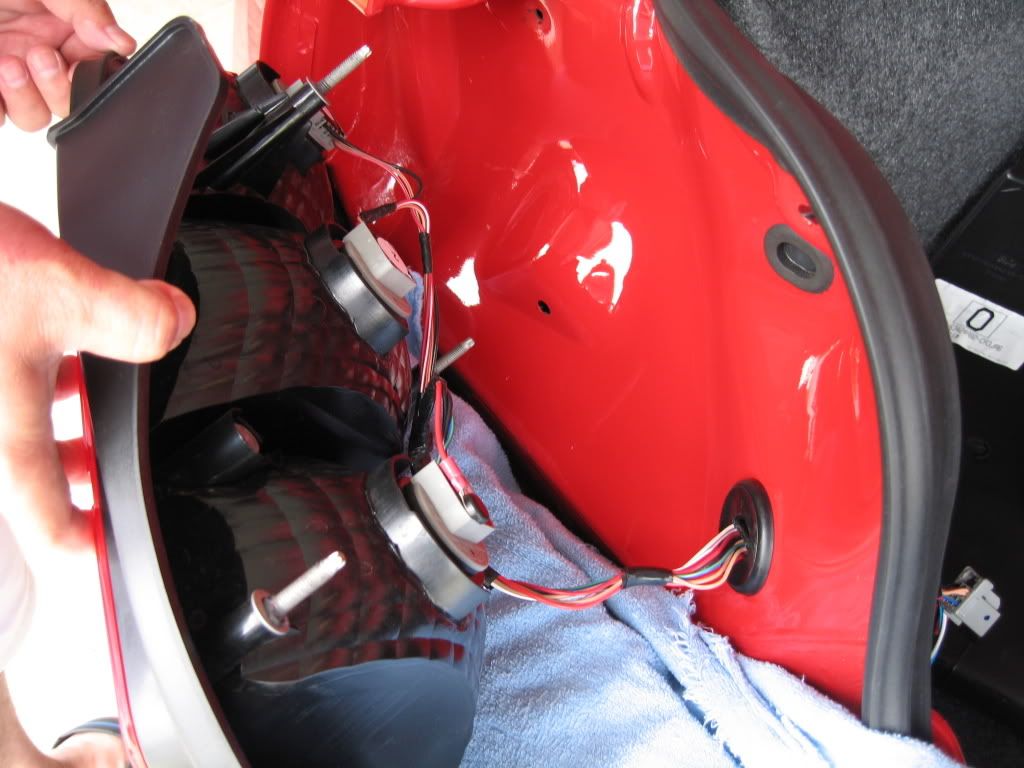
PULL BACK THE LENS ASSEMBLY, CAREFUL NOT TO LET THE STUDS HIT THE PAINT.
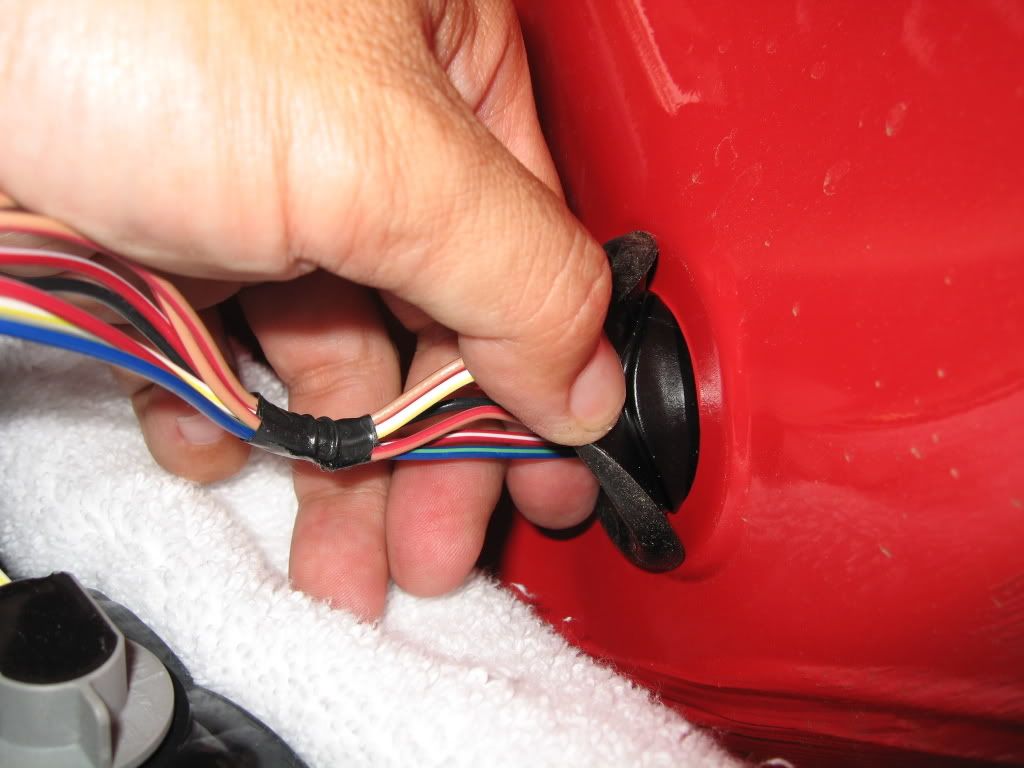
GENTLY PEEL THE GROMMET AWAY FROM THE BODY.
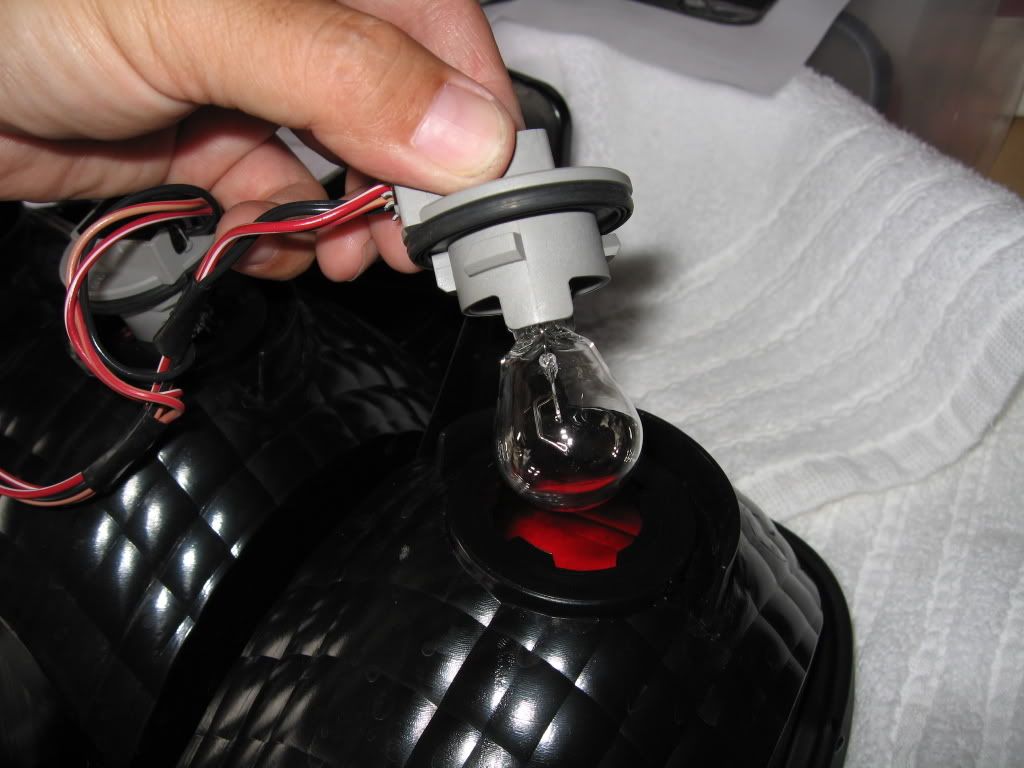
PER THE DIRECTIONS, ROTATE EACH BULB SOCKET COUNTER-CLOCKWISE TO RELEASE THEM FROM THE LENS ASSEMBLY. EACH OF THE BULBS (EXCEPT REVERSE) HAS A RETAINER ON EACH SIDE THAT MUST BE PULLED SLIGHTLY APART TO RELEASE THE BULB (I HEARD YOU CAN WIGGLE THEM OUT TOO).
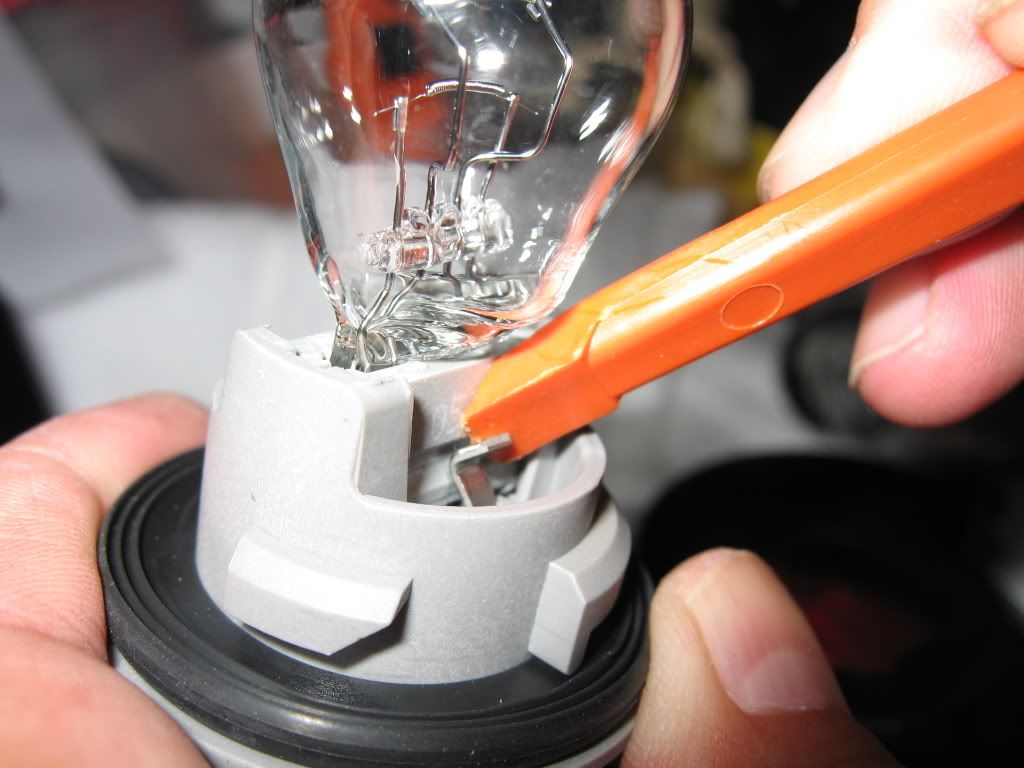
THE REVERSE SOCKETS WERE A BIT MORE DIFFICULT TO REMOVE. I HAD TO PRY THEM UP; CAREFUL NOT TO DAMAGE THE O-RING.
HARNESS INSTALLED COMPLETE TO LENS ASSEMBLY.
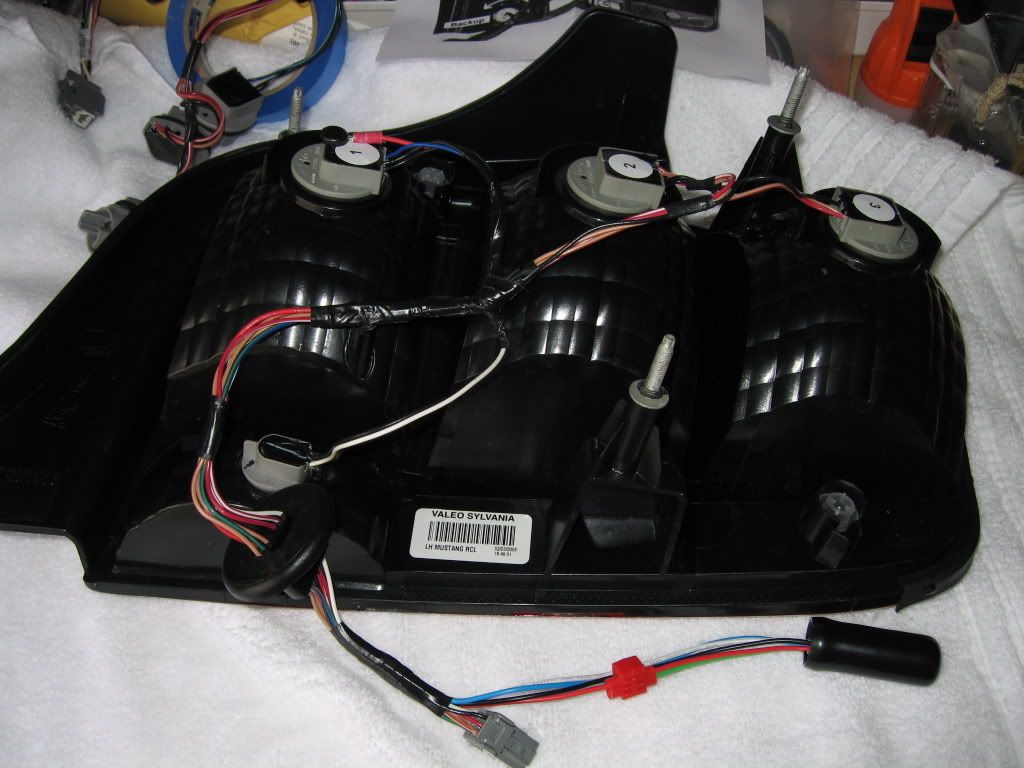
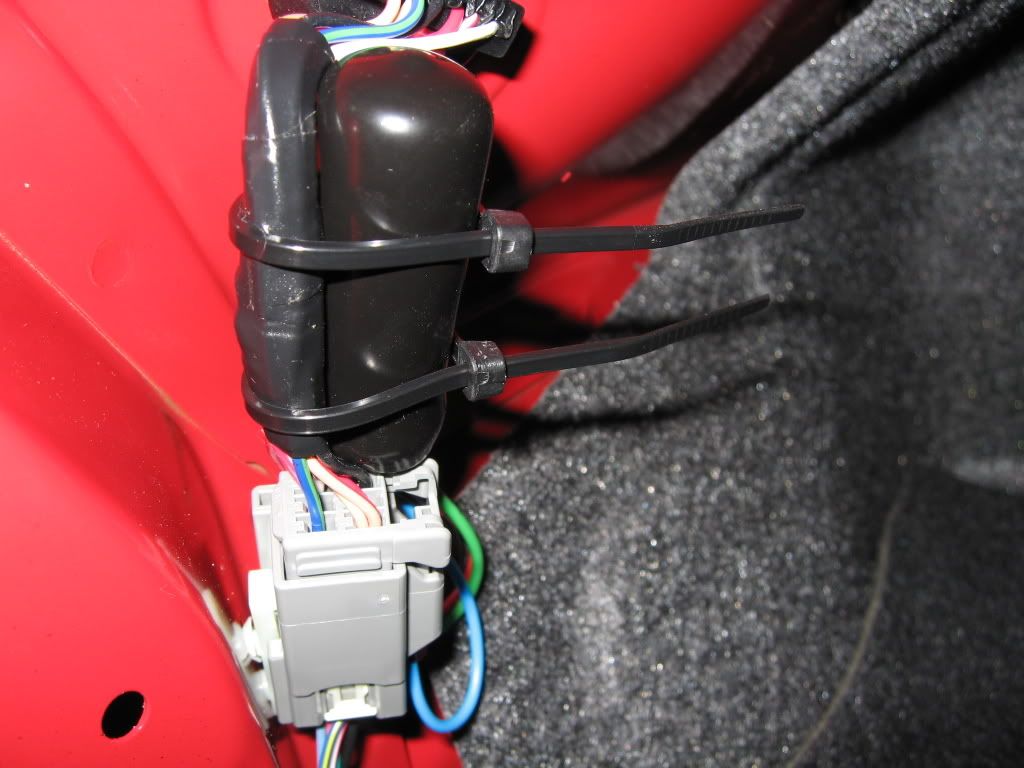
RE-INSTALL LENS ASSEMBLY AND CONNECT THE HARNESS PLUG. PER THE DIRECTIONS, SECURE THE SEQUENTIAL RELAY TO THE WIRE HARNESS WITH THE SUPPLIED ZIP-TIES, BUT DO NOT OVER TIGHTEN THEM.
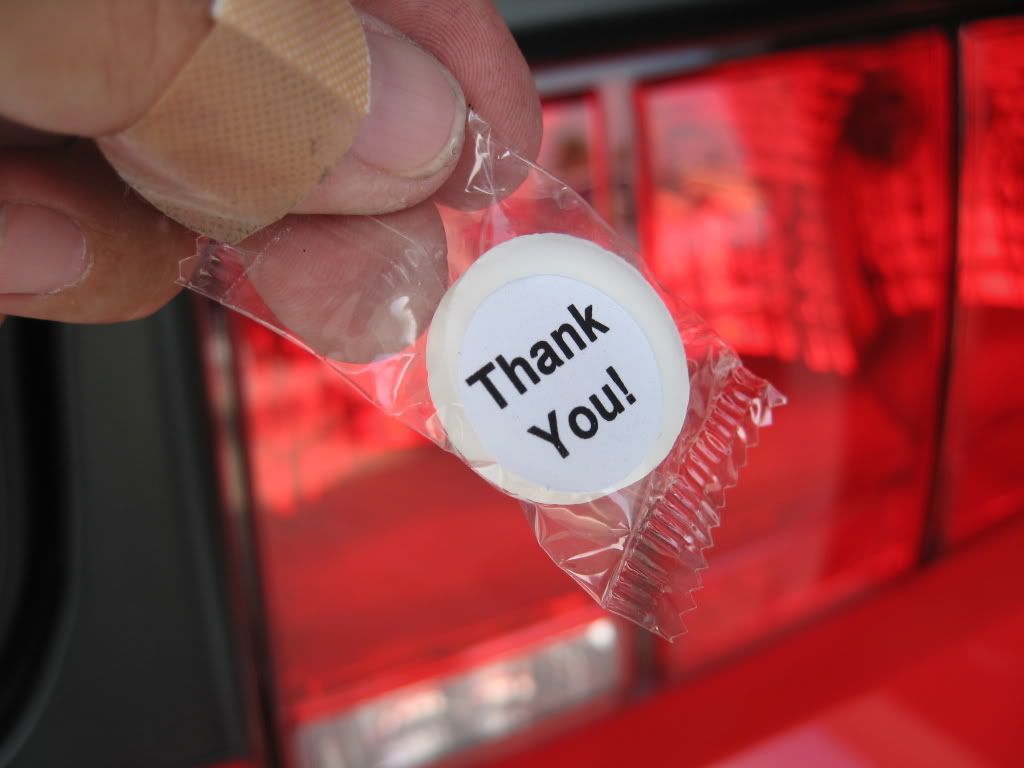
NOW SIT BACK AND ENJOY YOUR FREE (INCLUDED) LIFESAVER MINT!
Sequentials in action (VIDEO)[/align]
Install time was under 1 hour. Could have been quicker, but I was in no rush and took time out to take pics of the install.[/align][/align]Note: I have the Shaker 500, so access to the passenger side was no problem. For those with the Shaker 1000, I've read that removal of the sub box is not necessary, but doing so will make access much easier. I believe it's just a couple fasteners that hold the sub box down, so removing it out of the way to better access the rear panel may be a good idea.
OUT OF THE BOX - 2 SEPERATE HARNESSES, ZIP-TIES, AND INSTRUCTIONS.
REAR TRUNK PANEL REMOVAL: UNSCREW THE 2 (1 EA SIDE) PLASTIC FASTENERS.
REMOVE THE 4 PLASTIC RETAINERS (2 EA SIDE) BY PULLING UP ON THE CENTER PART.
GENTLY PULL BACK THE REAR PANEL. THE CENTER SECTION AROUND THE TRUNK LATCH MUST BE PULLED UP AND OVER.
STOCK WIRE HARNESS EXPOSED.
REMOVE THE UPPER 2 BOLTS (1 EA SIDE) THAT HOLD THE CARPET UP AT THE REAR. MAY NOT BE NECESSARY, BUT MAKES ACCESS TO THE OUTBOARD NUTS MUCH EASIER.
UNPLUG THE MAIN HARNESS PLUG BY PRESSING DOWN ON THE RELEASE TAB.
REMOVE THE 6 NUTS (3 EA SIDE) THAT HOLD THE LIGHT ASSEMBLY TO THE BODY. THERE WERE SOME WEAK LOOKING RUBBER SEALS (IF YOU CAN CALL THEM THAT) AROUND EACH OF THE NUTS THAT PRETTY MUCH FALL OFF WHEN REMOVING THE NUTS. I THREW THEM AWAY, BUT FOR WEATHERPROOFING, IT MAY BE A GOOD IDEA TO TRY AND SALVAGE THEM FOR RE-INSTALLATION.
PULL BACK THE LENS ASSEMBLY, CAREFUL NOT TO LET THE STUDS HIT THE PAINT.
GENTLY PEEL THE GROMMET AWAY FROM THE BODY.
PER THE DIRECTIONS, ROTATE EACH BULB SOCKET COUNTER-CLOCKWISE TO RELEASE THEM FROM THE LENS ASSEMBLY. EACH OF THE BULBS (EXCEPT REVERSE) HAS A RETAINER ON EACH SIDE THAT MUST BE PULLED SLIGHTLY APART TO RELEASE THE BULB (I HEARD YOU CAN WIGGLE THEM OUT TOO).
THE REVERSE SOCKETS WERE A BIT MORE DIFFICULT TO REMOVE. I HAD TO PRY THEM UP; CAREFUL NOT TO DAMAGE THE O-RING.
HARNESS INSTALLED COMPLETE TO LENS ASSEMBLY.
RE-INSTALL LENS ASSEMBLY AND CONNECT THE HARNESS PLUG. PER THE DIRECTIONS, SECURE THE SEQUENTIAL RELAY TO THE WIRE HARNESS WITH THE SUPPLIED ZIP-TIES, BUT DO NOT OVER TIGHTEN THEM.
NOW SIT BACK AND ENJOY YOUR FREE (INCLUDED) LIFESAVER MINT!
Sequentials in action (VIDEO)[/align]


 04-18-2007, 12:03 PM
#7
1st Gear Member

Join Date: Feb 2007
Location:
Posts: 100
[align=left]I installed a set yesterday too, but went with the splice in kit. Also I ran the optional wire (supplied, a nice touch) to the SJB so that the lights wouldn't sequence when the brake lights come on. I did not use the supplied Scotchlock splices, but instead used another 3M Scotch product called UR Butt Splice connectors. They were made for the phone company to use outdoors in J boxes, and have vasoline like jelly gunk inside that seals out moisture when you squeeze it down to make the connection. I've had these for years, but I'll bet they're still around. I would have prefered to solder the connections, but couldn't find any heat shrink tubing in my work shop!
[/align]
[/align]
