
K&N AirCharger CAI Install (w/pics & vid)
 04-19-2007, 02:36 PM
#1
2nd Gear Member
Thread Starter
Join Date: Jun 2006
Location:
Posts: 415
Review: This is a great CAI system that doesn't require a tune (However, your tuner can provide you with a custom tune that'll maximize this CAI's potential). It doesn't produce as much HP gains as some of the CAI kits currently on the market, but I still like this K&N system as it's a definite improvement over stock.K&N CAI install
63-2565
This K&N AirCharger kit does not require a tune and will provide you with a gain of 18-rwhp and 15-rwtq (reference Tech Article).
This install is pretty straight forward and shouldn't take more than an hour to complete.
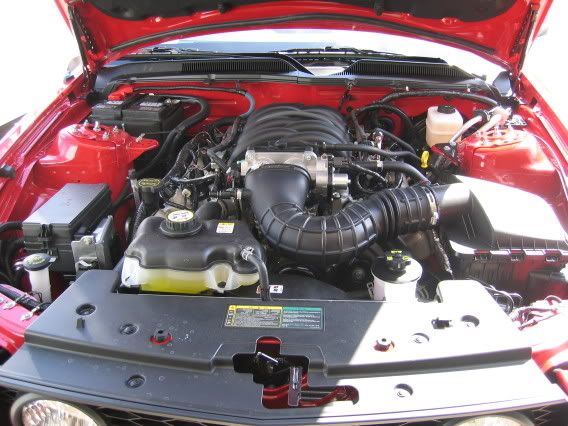
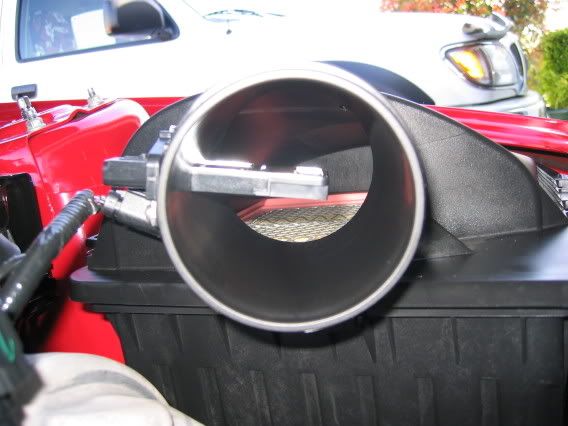
Stock set-up.
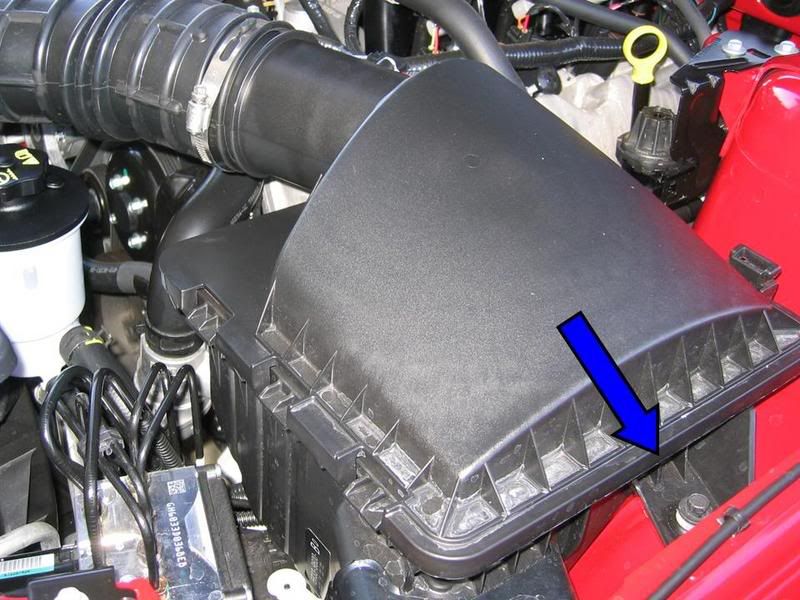
Remove the crankcase breather hose from the passenger side camcover by rotating the green locking tab. Loosen the hose clamp at the throttle body and at the factory air box. Note that both clamps are locked in via notches in the air duct. Once loose, just slip it over the notches.

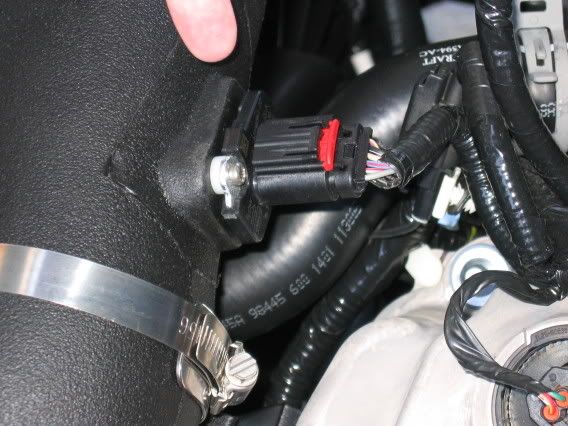
Once the air duct is removed, you’ll have a good view of the throttle body and MAF sensor. You can disconnect the MAF sensor plug at this time by sliding the red lock latch back.
Remove the factory airbox by removing the mounting bolt.
Remove the 2 camcover bolts as shown. Once these bolts are loose, you’ll need to yank up on them pretty hard because of the rubber inserts.


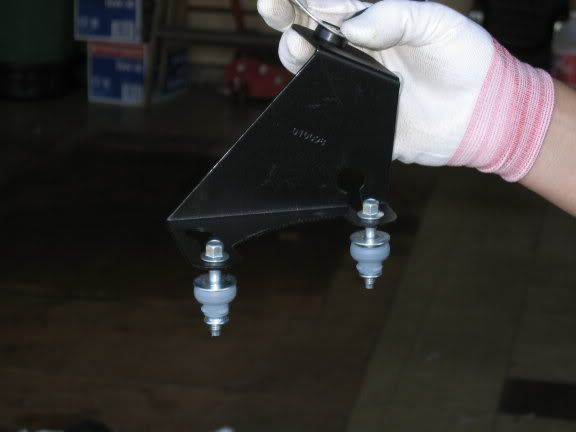
Assemble the air tube support saddle (per directions) to the black bracket and positions the 2 camcover bolts in it.
** Note: It has been brought to my attention that this particular bracket will NOT fit to the 2007 (and subsequent) camcover due to a redesign. Contact K&N to see if they can supply the correct bracket.

(At the time of write-up, I chose not to install the heatshield, but decided to install it when I did the Shaker)
At this point, assemble the supplied ‘L’ brackets to the heatshield and install it per the supplied directions.
Couple notes, installing the foam edge trim around the perimeter of the shield is a major pain. Sure you can just throw it on, but if you want it to come out show quality, forget it (main reason why I left it off, looks much cleaner without it).
The heatshield picks up one of the radiator shroud bolts. Re-installing this bolt can be another pain, just take your time and watch for cross-threading.
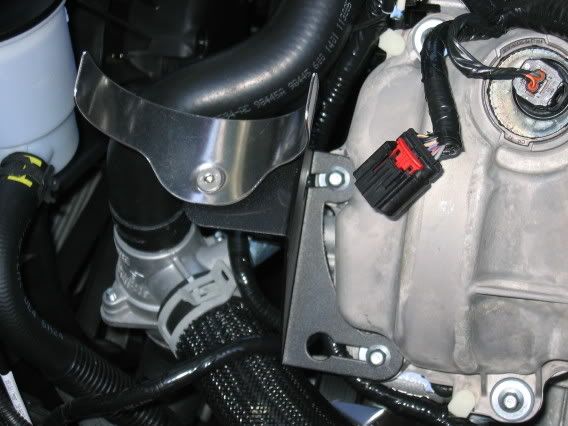
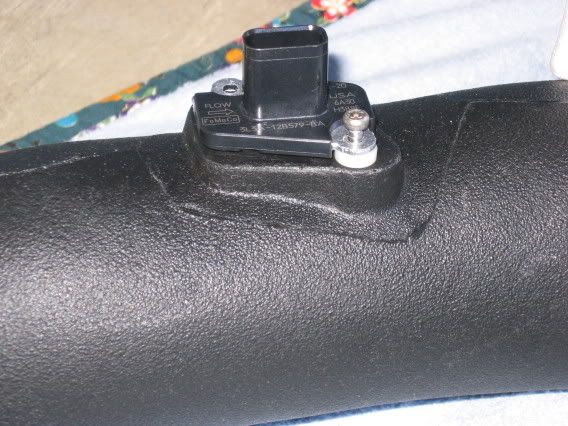
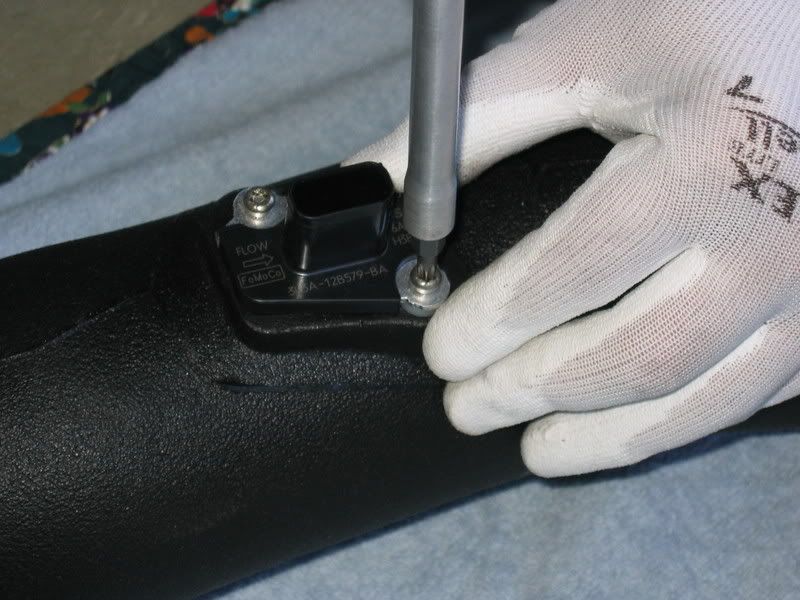
Carefully transfer the MAF sensor from the factory airbox to the K&N air tube.
Take note of the ‘Flow’ direction and transfer it exactly the same.

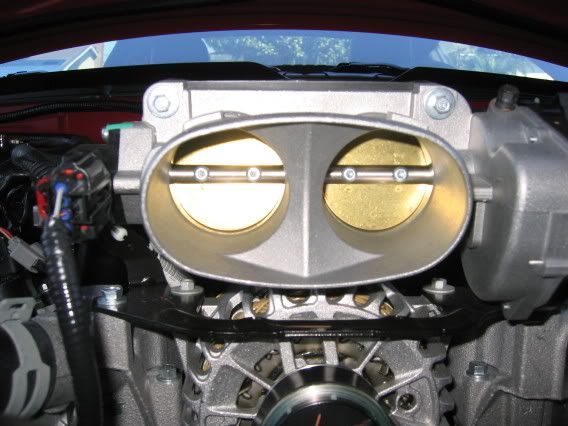
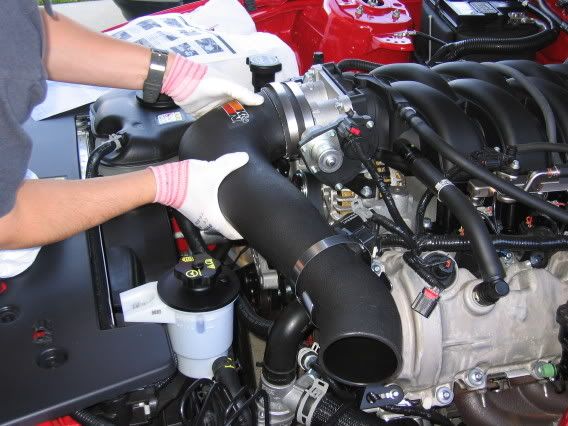
Install the silicone sleeve/hose onto the throttle body and position the 2 supplied clamps, keep them loose.
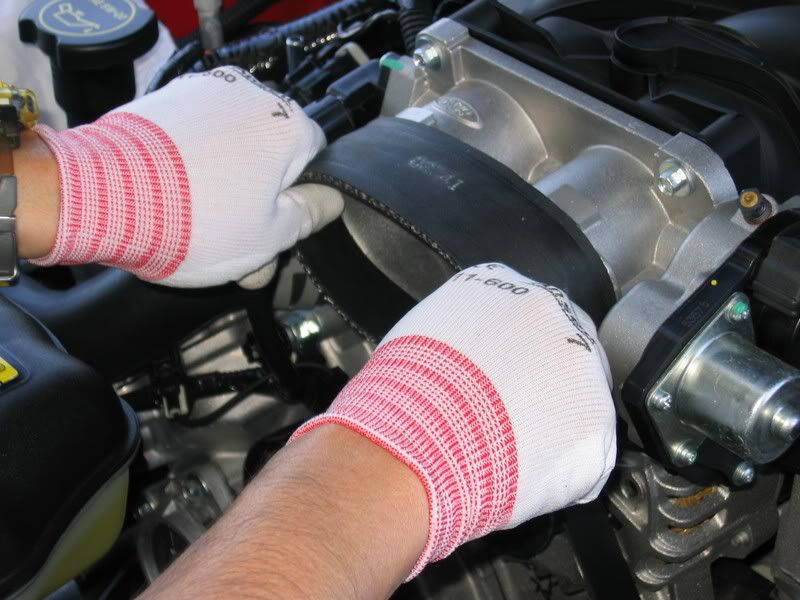
Slip the other supplied clamp over the air tube that will attach it to the saddle support and position it into the throttle body sleeve.
Once in position, tighten down the 3 hose clamps.
Note: Do not over tighten the hose clamps on the throttle body. If you do, the airtube will compress (remember it’s plastic) and may pop out (this is a bad thing).


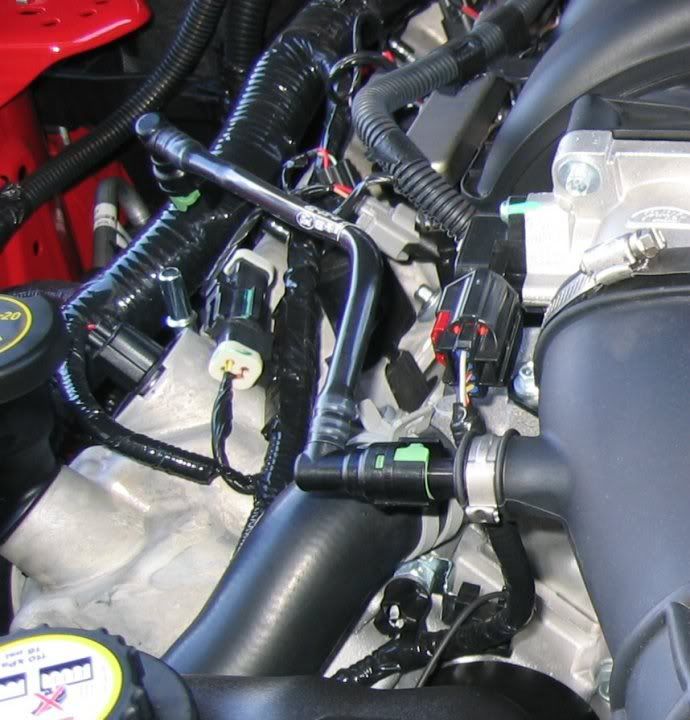
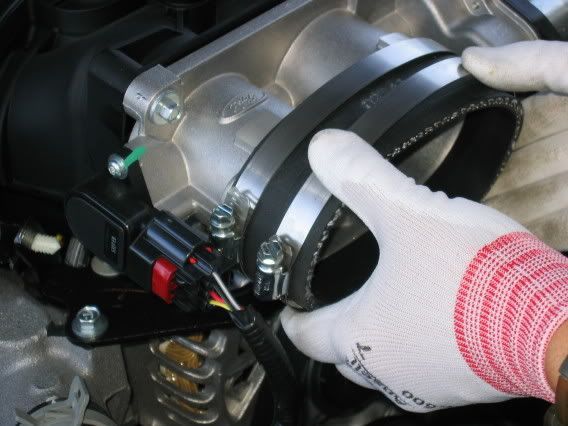
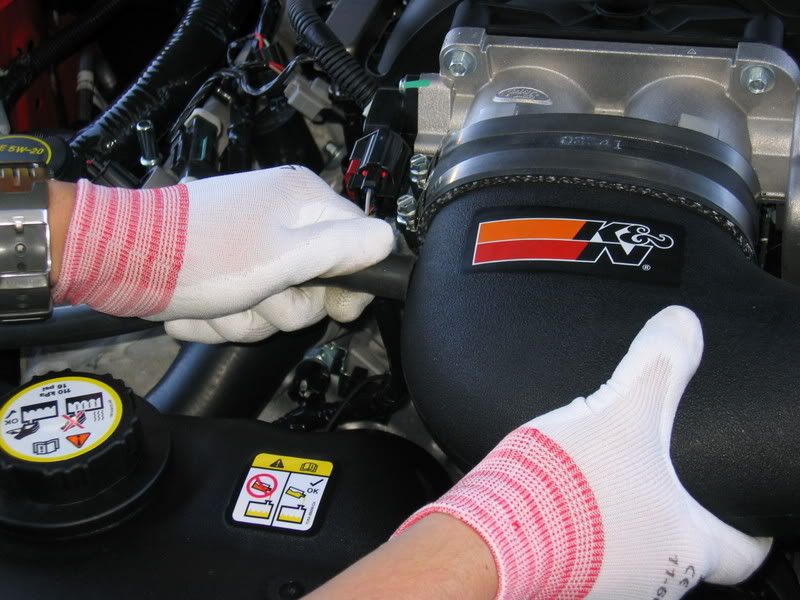
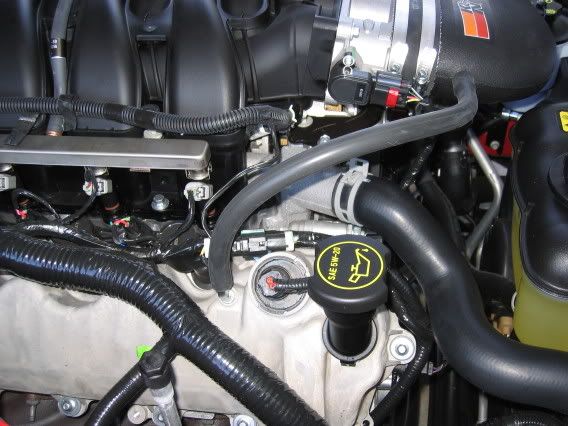
Install the supplied vent hose to the side of the airtube and the other end to the breather valve on the camcover.
Note: In the early release airtubes (incase you bought old stock or a used unit), the connector on the side of the airtube had a manufacturing defect. When molded, the hole was blocked or was too small. This will throw a CEL and cause the engine to not run right. If blocked, get a drill about the same size of the inside diameter and drill through the blockage. Make sure you remove all the plastic shavings when done.


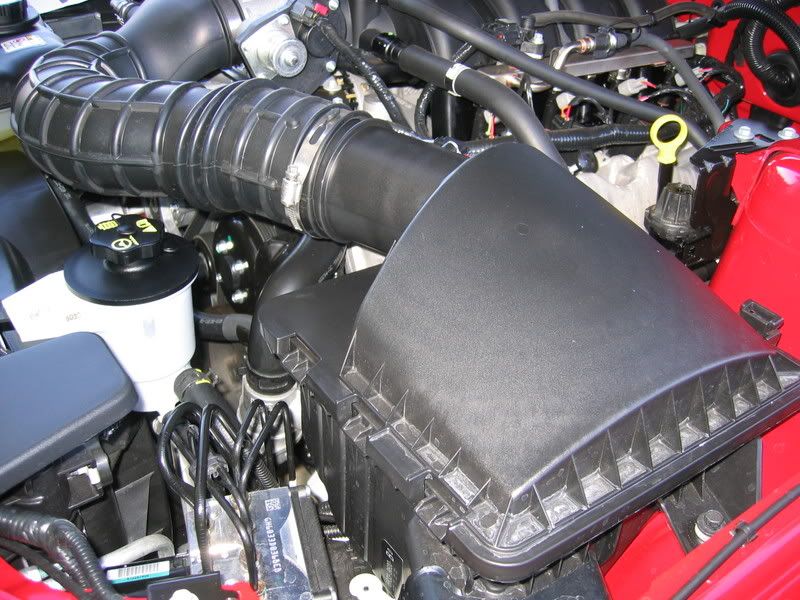
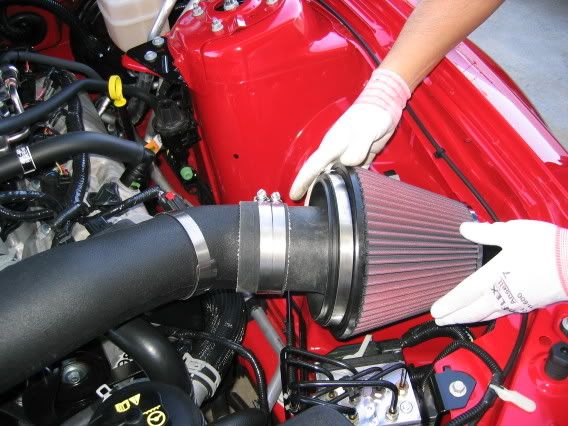
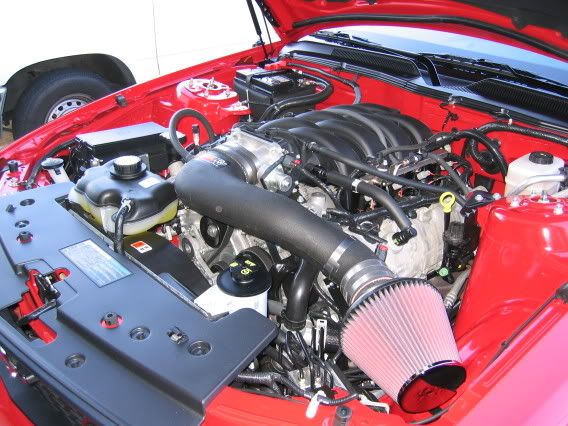
Install the cone air filter onto the adapter then install it onto the airtube.

Re-connect the MAF plug into the sensor.
Installation complete.


63-2565
This K&N AirCharger kit does not require a tune and will provide you with a gain of 18-rwhp and 15-rwtq (reference Tech Article).
This install is pretty straight forward and shouldn't take more than an hour to complete.
Stock set-up.
Remove the crankcase breather hose from the passenger side camcover by rotating the green locking tab. Loosen the hose clamp at the throttle body and at the factory air box. Note that both clamps are locked in via notches in the air duct. Once loose, just slip it over the notches.
Once the air duct is removed, you’ll have a good view of the throttle body and MAF sensor. You can disconnect the MAF sensor plug at this time by sliding the red lock latch back.
Remove the factory airbox by removing the mounting bolt.
Remove the 2 camcover bolts as shown. Once these bolts are loose, you’ll need to yank up on them pretty hard because of the rubber inserts.
Assemble the air tube support saddle (per directions) to the black bracket and positions the 2 camcover bolts in it.
** Note: It has been brought to my attention that this particular bracket will NOT fit to the 2007 (and subsequent) camcover due to a redesign. Contact K&N to see if they can supply the correct bracket.
(At the time of write-up, I chose not to install the heatshield, but decided to install it when I did the Shaker)
At this point, assemble the supplied ‘L’ brackets to the heatshield and install it per the supplied directions.
Couple notes, installing the foam edge trim around the perimeter of the shield is a major pain. Sure you can just throw it on, but if you want it to come out show quality, forget it (main reason why I left it off, looks much cleaner without it).
The heatshield picks up one of the radiator shroud bolts. Re-installing this bolt can be another pain, just take your time and watch for cross-threading.
Carefully transfer the MAF sensor from the factory airbox to the K&N air tube.
Take note of the ‘Flow’ direction and transfer it exactly the same.
Install the silicone sleeve/hose onto the throttle body and position the 2 supplied clamps, keep them loose.
Slip the other supplied clamp over the air tube that will attach it to the saddle support and position it into the throttle body sleeve.
Once in position, tighten down the 3 hose clamps.
Note: Do not over tighten the hose clamps on the throttle body. If you do, the airtube will compress (remember it’s plastic) and may pop out (this is a bad thing).
Install the supplied vent hose to the side of the airtube and the other end to the breather valve on the camcover.
Note: In the early release airtubes (incase you bought old stock or a used unit), the connector on the side of the airtube had a manufacturing defect. When molded, the hole was blocked or was too small. This will throw a CEL and cause the engine to not run right. If blocked, get a drill about the same size of the inside diameter and drill through the blockage. Make sure you remove all the plastic shavings when done.
Install the cone air filter onto the adapter then install it onto the airtube.
Re-connect the MAF plug into the sensor.
Installation complete.


 04-19-2007, 06:20 PM
#10
2nd Gear Member
Thread Starter
Join Date: Jun 2006
Location:
Posts: 415
ORIGINAL: thxultra
Nice directions and looks great. How is she running?
Nice directions and looks great. How is she running?
http://www.youtube.com/watch?v=CeZ-j9po80Q
ORIGINAL: s2k
Hey great write-up but i only have one concern, I have heard that the K&N CAI makes you run Lean is it true?
Hey great write-up but i only have one concern, I have heard that the K&N CAI makes you run Lean is it true?
However, I'm runninga custom tune from Dougand he's taken the K&N into considerationin writingmy tune.
ORIGINAL: Aziraphale
He said he opted not to install it originally. Read the post 
ORIGINAL: kenthicken
Where is the heat sheild? Didn't it come with one? Mine did.
Where is the heat sheild? Didn't it come with one? Mine did.