
CDC Shaker Hood Install (w/pic & vid)

Thread Starter
2nd Gear Member
Joined: Jun 2006
Posts: 415
From:
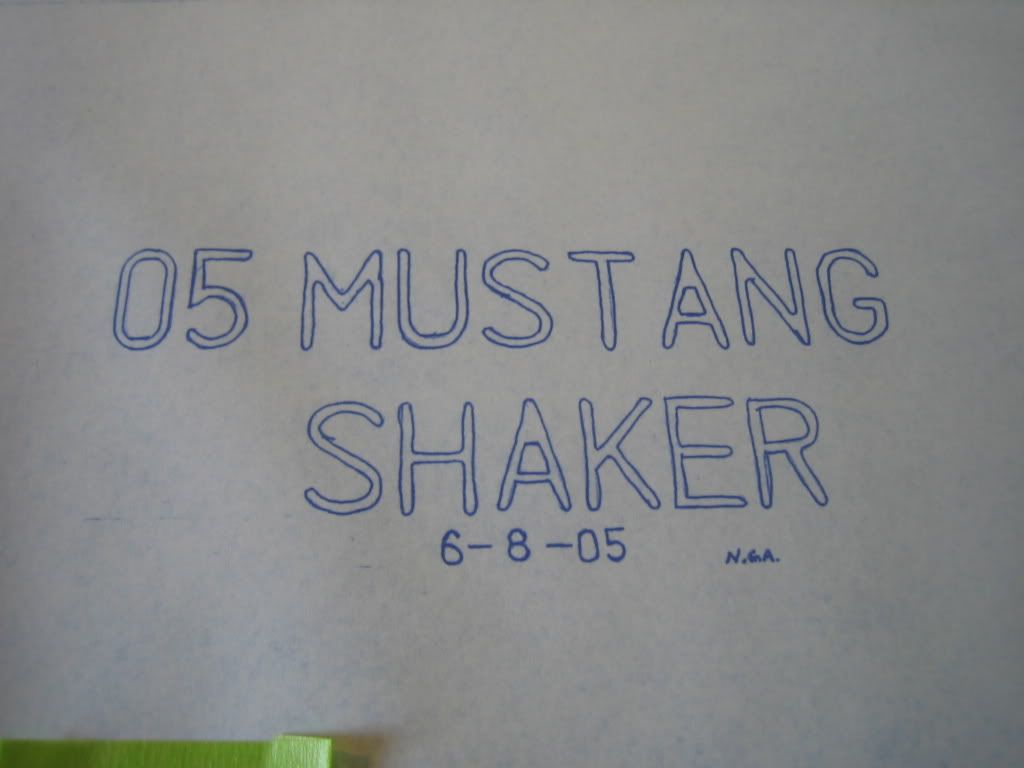
CDC Shaker Hood System Install
I purchased this Shaker system primarily for cosmetic reasons. As it does provide additional ‘ram air’ to the air filter (at highway speeds), the HP gains are minimal at best. However, I do consider this a functional hood scoop versus the blocked off ones.
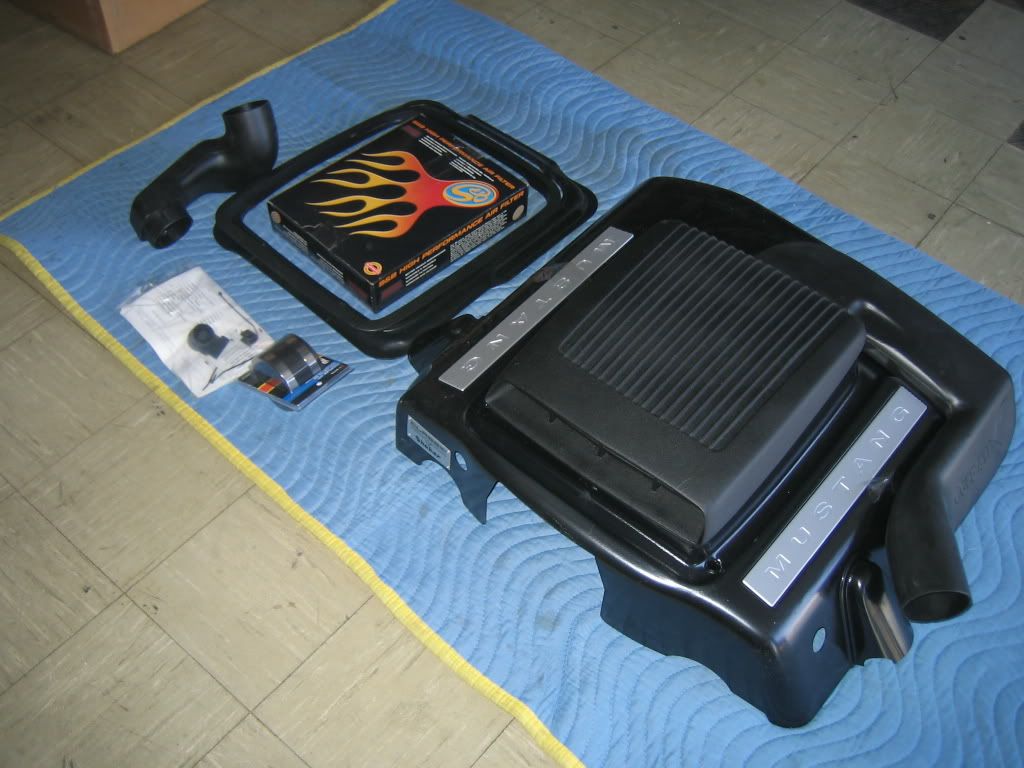
One note about this installation, I already had the K&N CAI installed. So, any step regarding fitment of the ductwork to air box will be a deviation from the CDC instructions. I will include a few file photos of the modification on the OEM air box for those adapting this Shaker to the factory intake.
If you have a different CAI, the install will basically be the same with the exception of the duct routing (to heat shield).
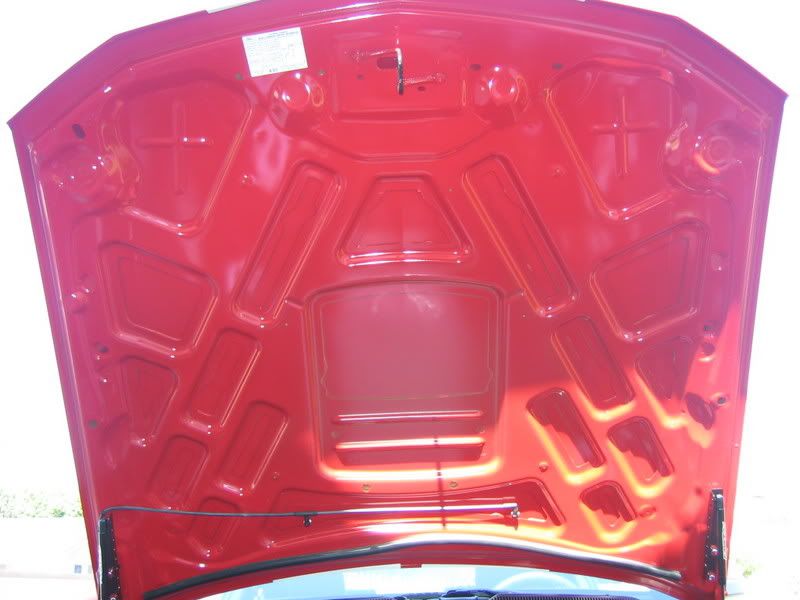
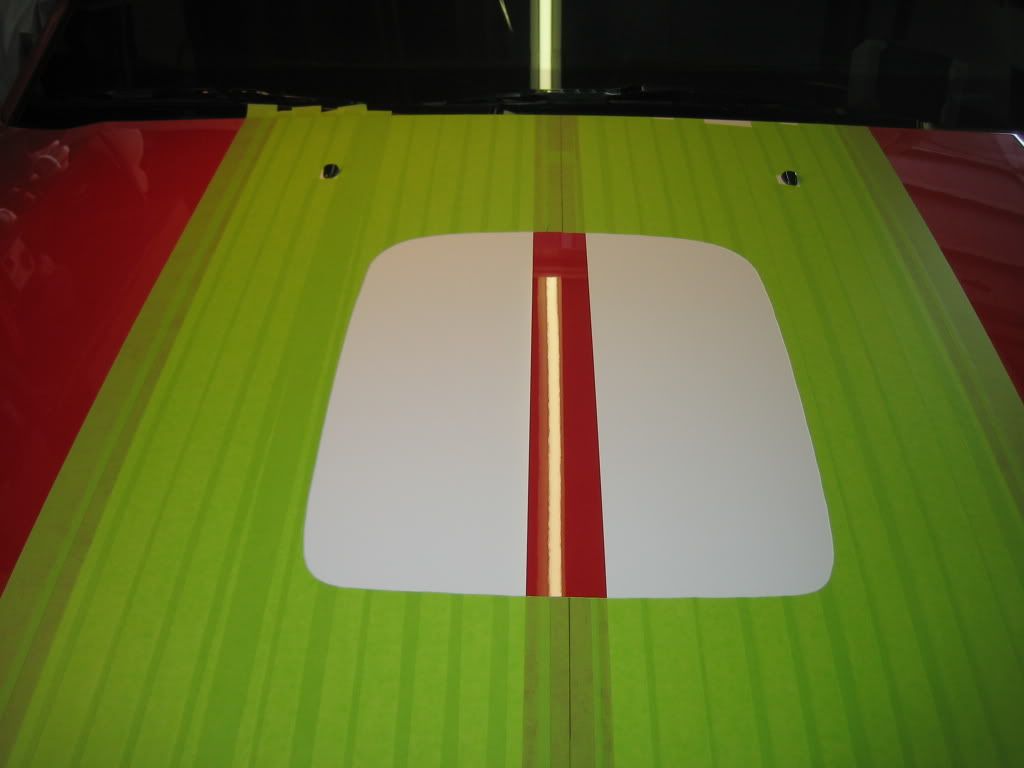
As you see, Ford has accommodated a section in the hood specifically for a hood scoop.
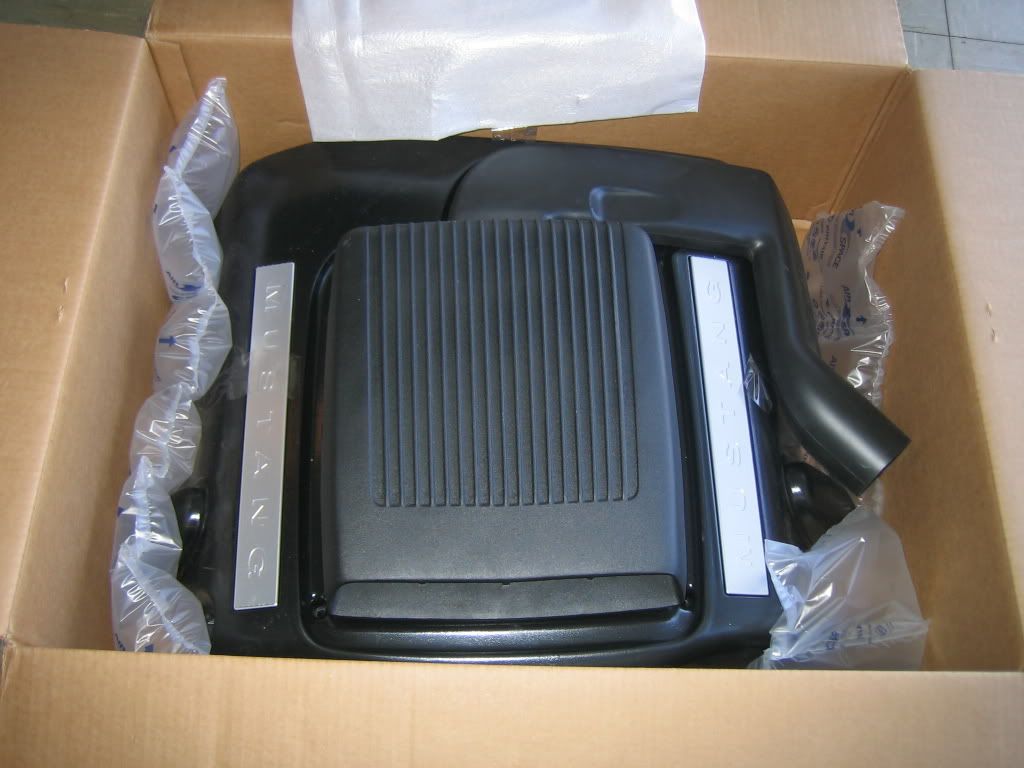
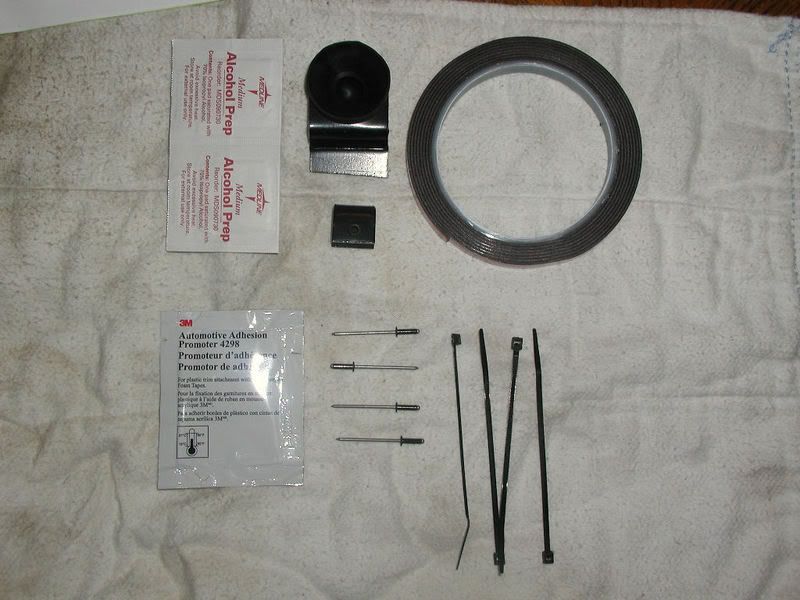
Out of the box.
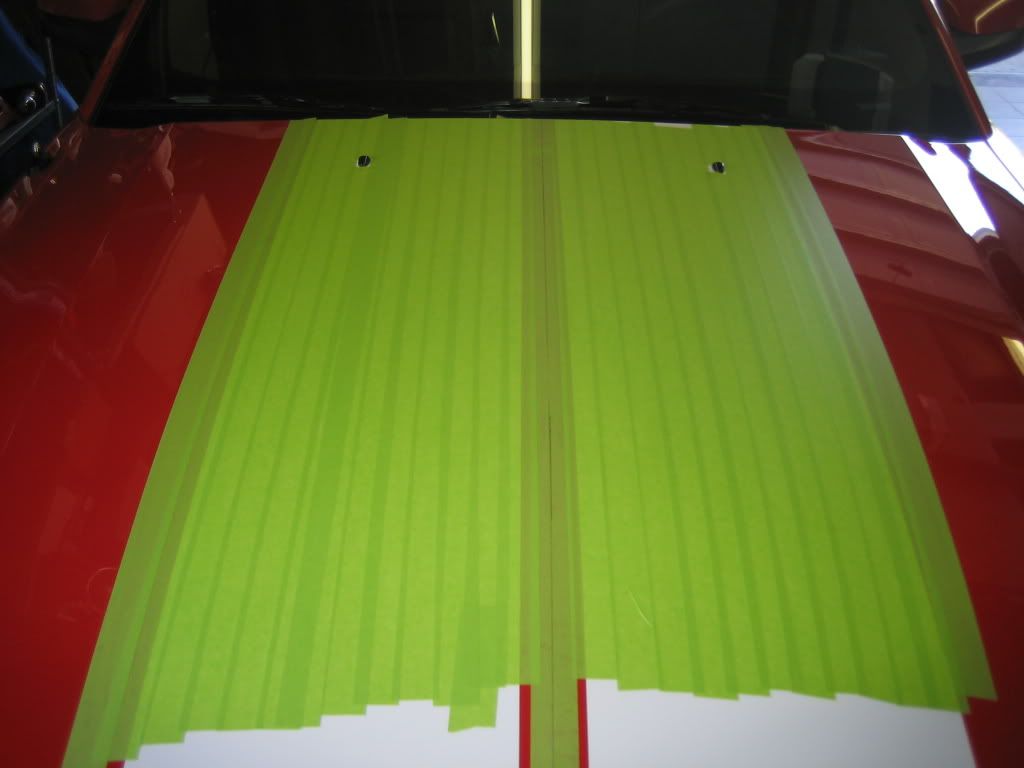
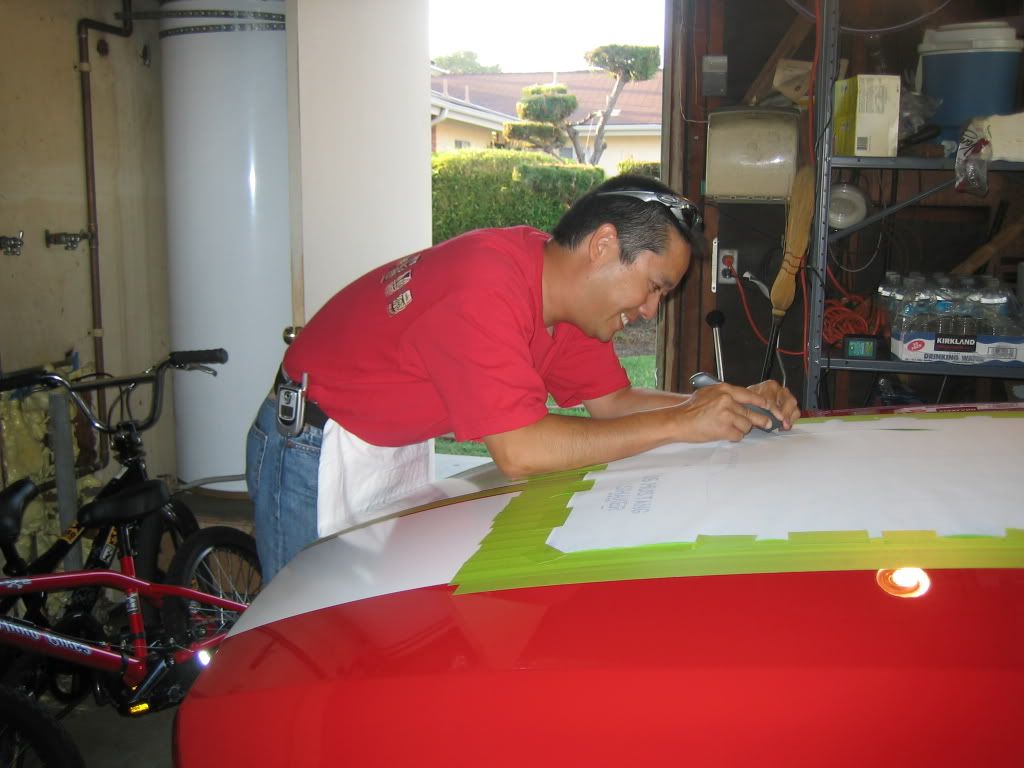
1. Lay down a strip of masking tape (I used the green 1.4” wide 3M Paint & Body tape, stronger than the blue 3M Painters tape) down the center of the hood, then mark the centerline.[/b]
[/b]
Hint: The nose of the hood has a centerline crease. To find center on the back, split the distance between the washer nozzles.[/b]
[/b]
Once done, lay several strips of masking tape on each side of the centerline tape. Be sure to go wider than the area to be cut out.[/b]

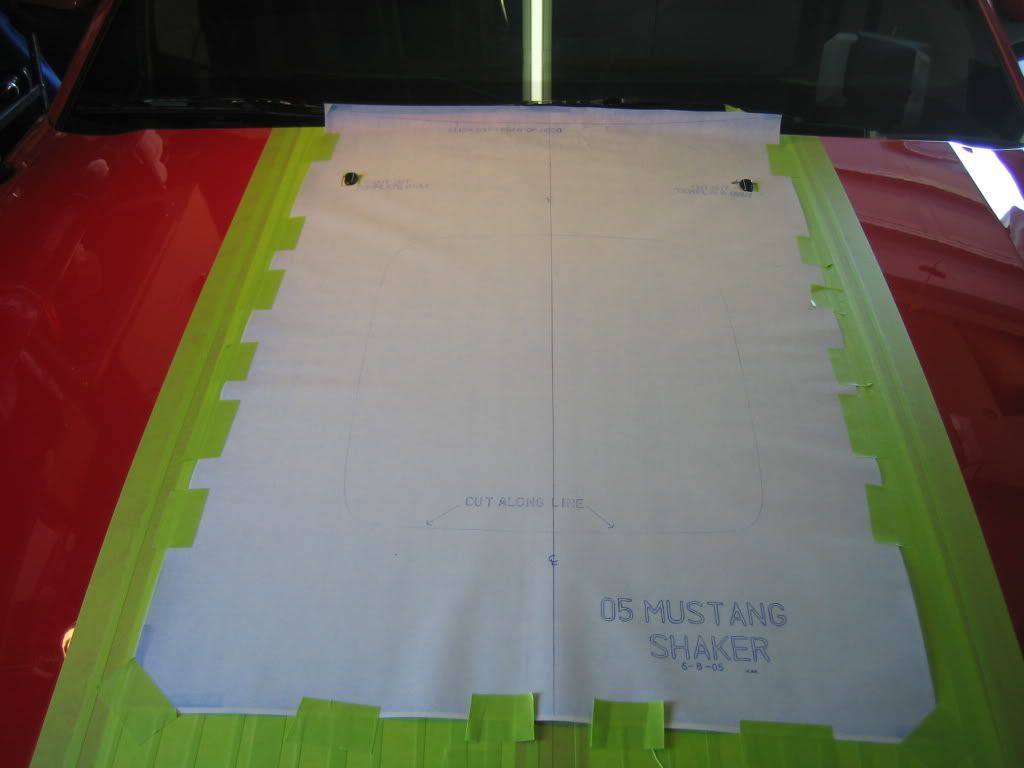
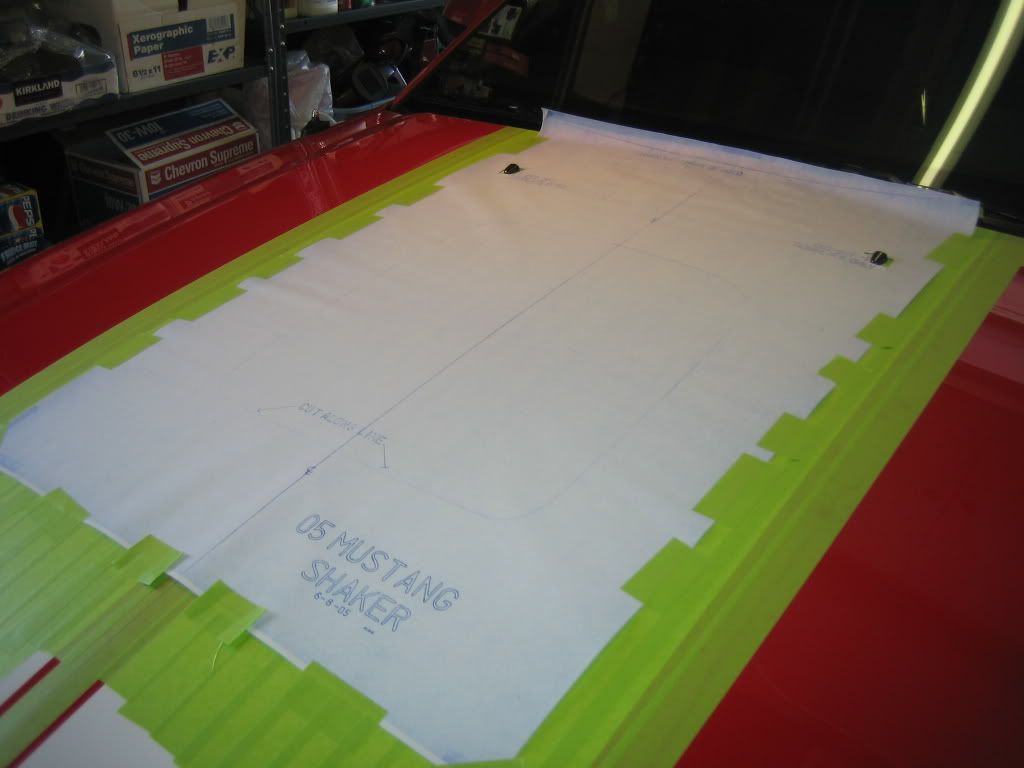
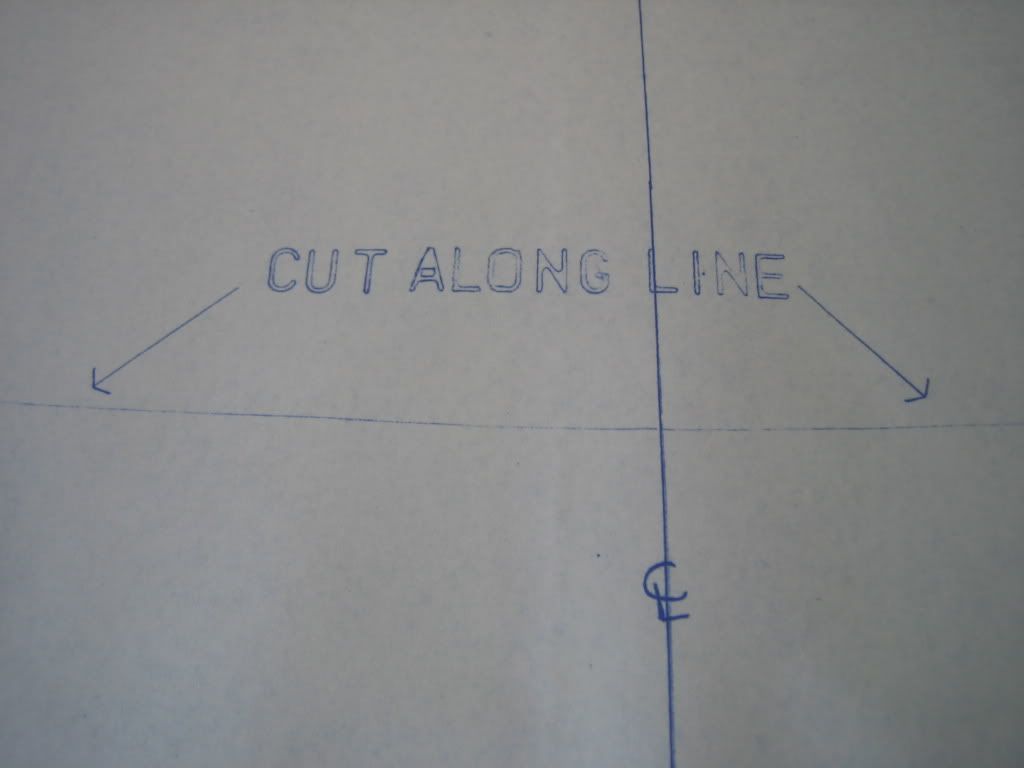
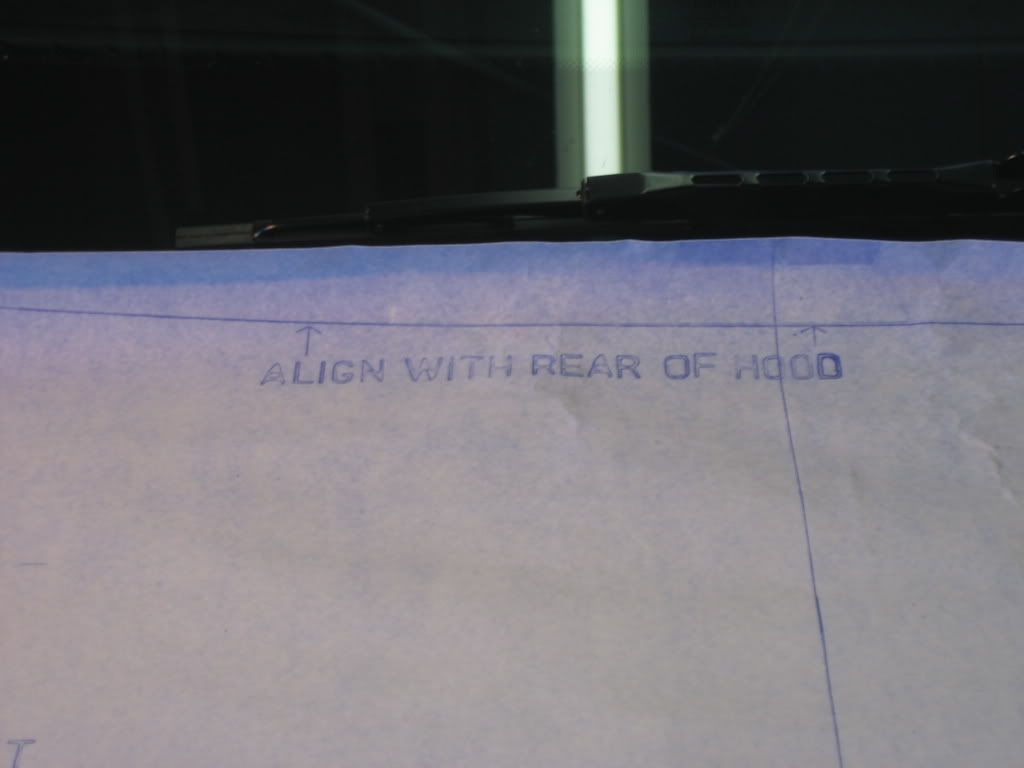
2. Unroll the template out and tape it to the hood.[/b]
[/b]
Aligning points on the templateare the rear curvature of the hood’s edge and its centerline.[/b]
[/b]
Try and lay the template as flat as possible. I know it’ll be hard to get it to lay perfectly flat, so concentrate on the centerline and edge of hood marks to make sure they’re spot on.[/b]
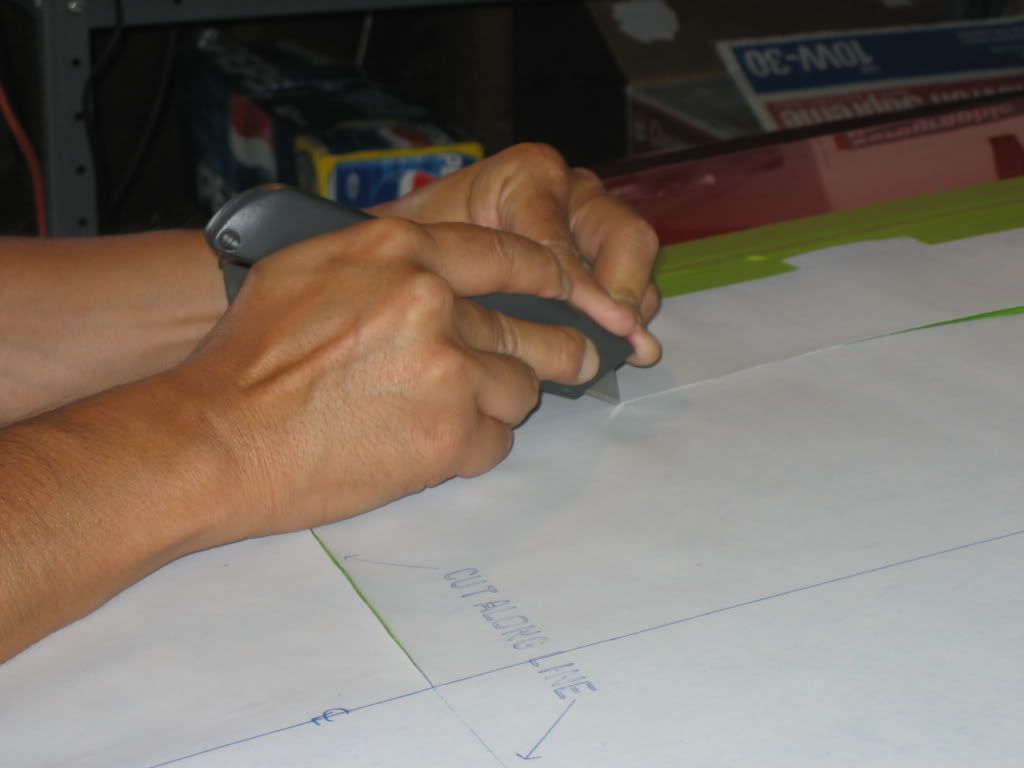
3. Using a utility knife (with a NEW blade), carefully press hard into the cut line of the template. You MUST press hard enough to go through the template, vinyl stripes (if applicable), and score the paint past the clear coat and into the base.[/b]
[/b]
This is what’s called, “Beyond the point of no return!”.[/b]
The idea behind this is to reduce any chance of the paint flaking during the cutting process.[/b]
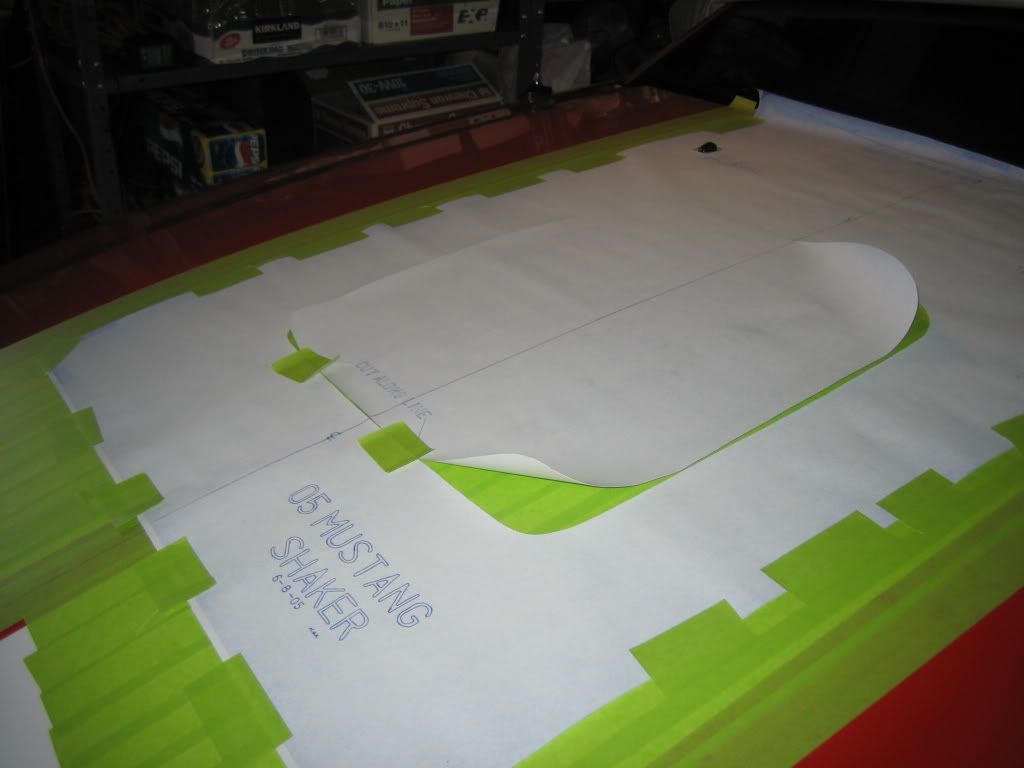
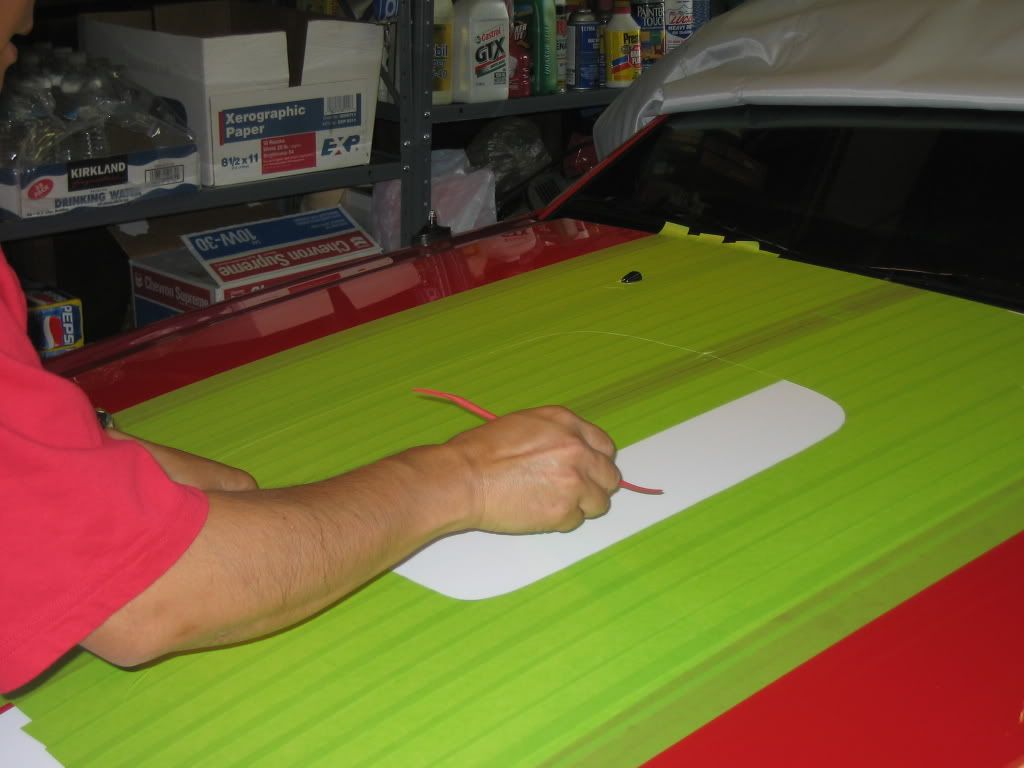
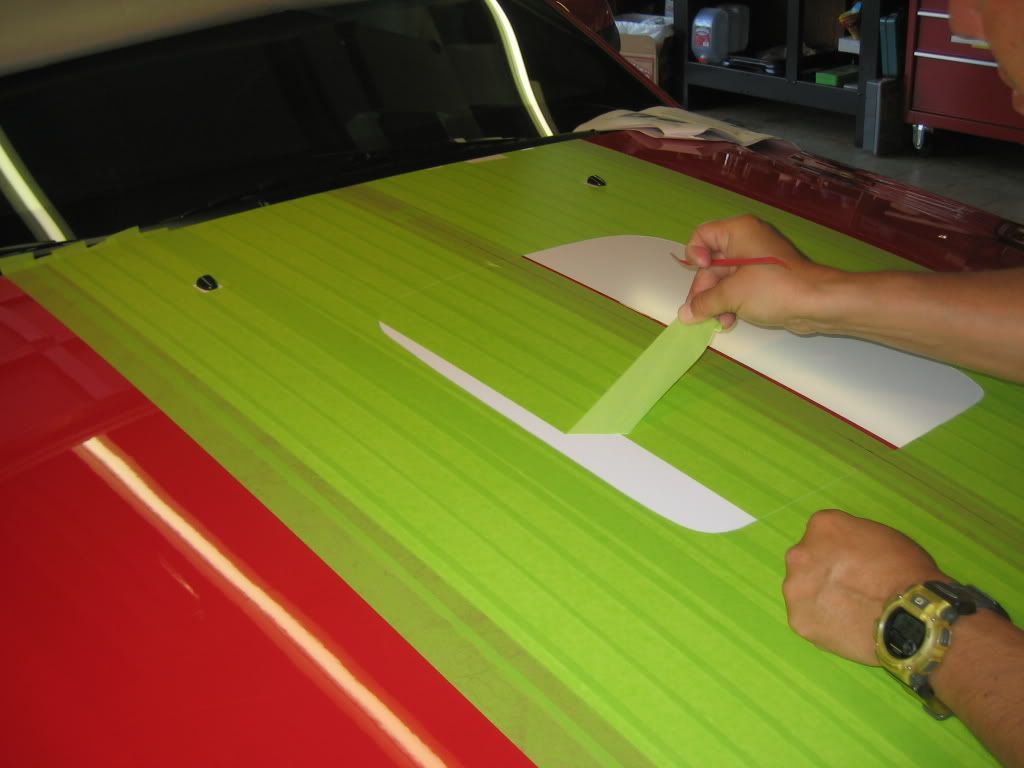
4. Once the template is cut out, peel away the inner masking tapes, exposing the area where you’re about to cut.[/b]
The look on my son’s face on what we’re about to do.. priceless!

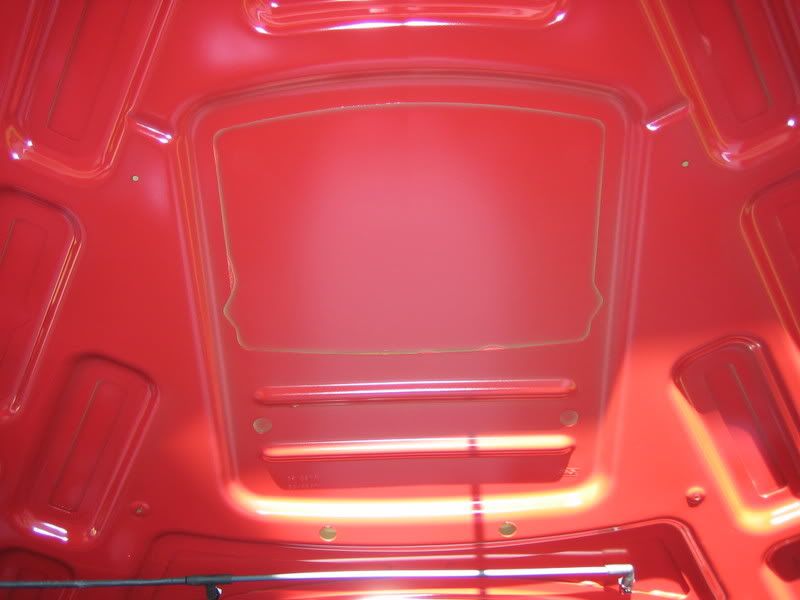
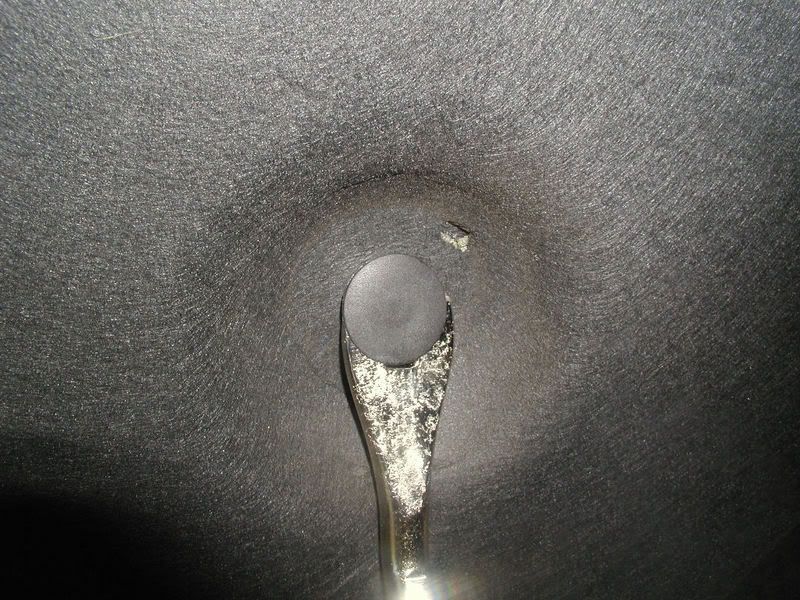
5. Open the hood and remove the hood liner.
The plastic fasteners holding the liner up are the push-in type. Carefully pry them up, the liner can easily tear. Cup your hand beneath the clip as your prying them off, I lost 2 somewhere in the engine bay! (Autozone has replacements)
(file photo)
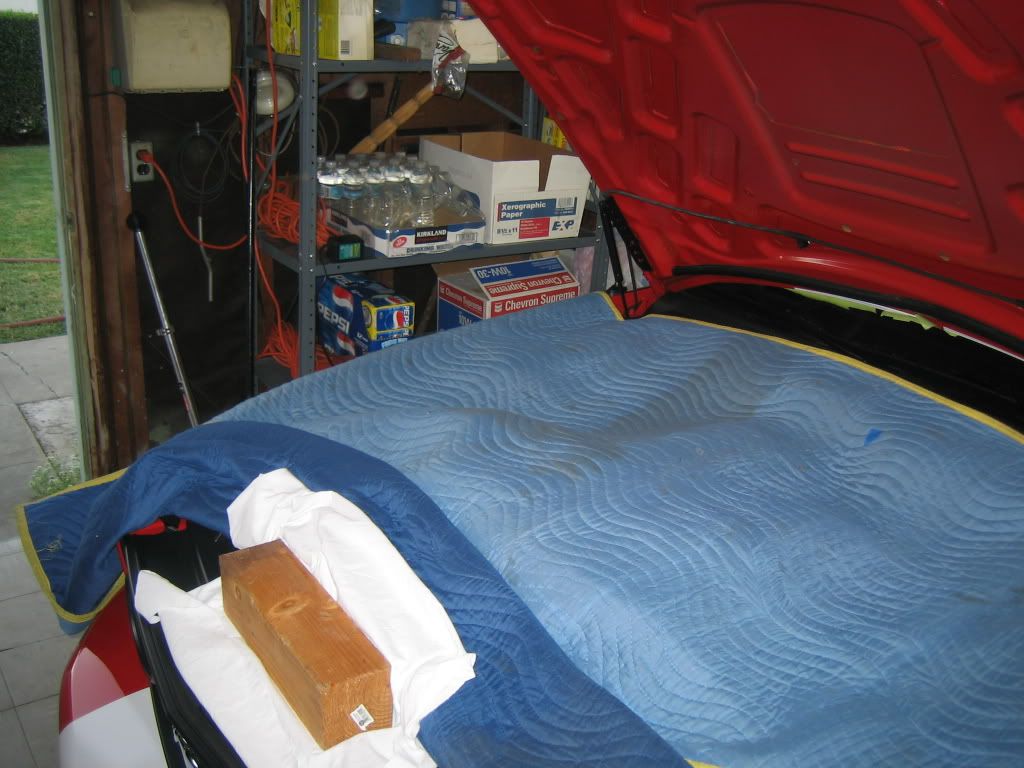
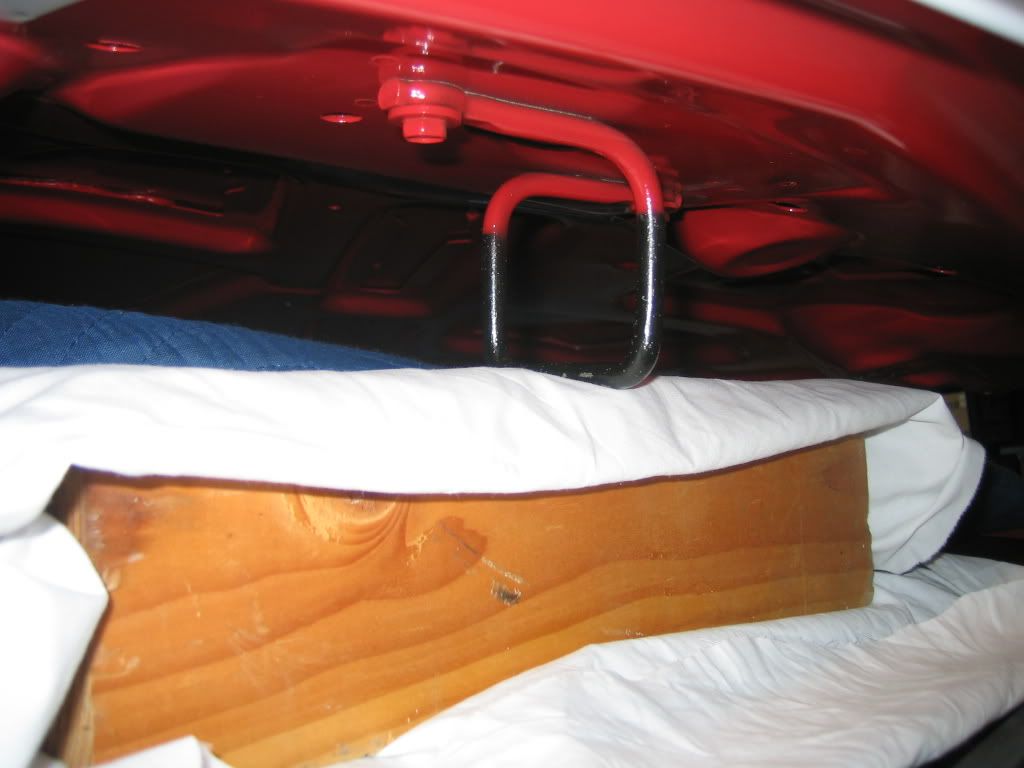
6. Use a large moving blanket or sheet of plastic and cover the entire engine bay, even drape it over the fenders for added protection.[/b]
[/b]
I used a 4x4 piece of wood to support the hood solid and to give it the additional height when drilling and cutting[/b].
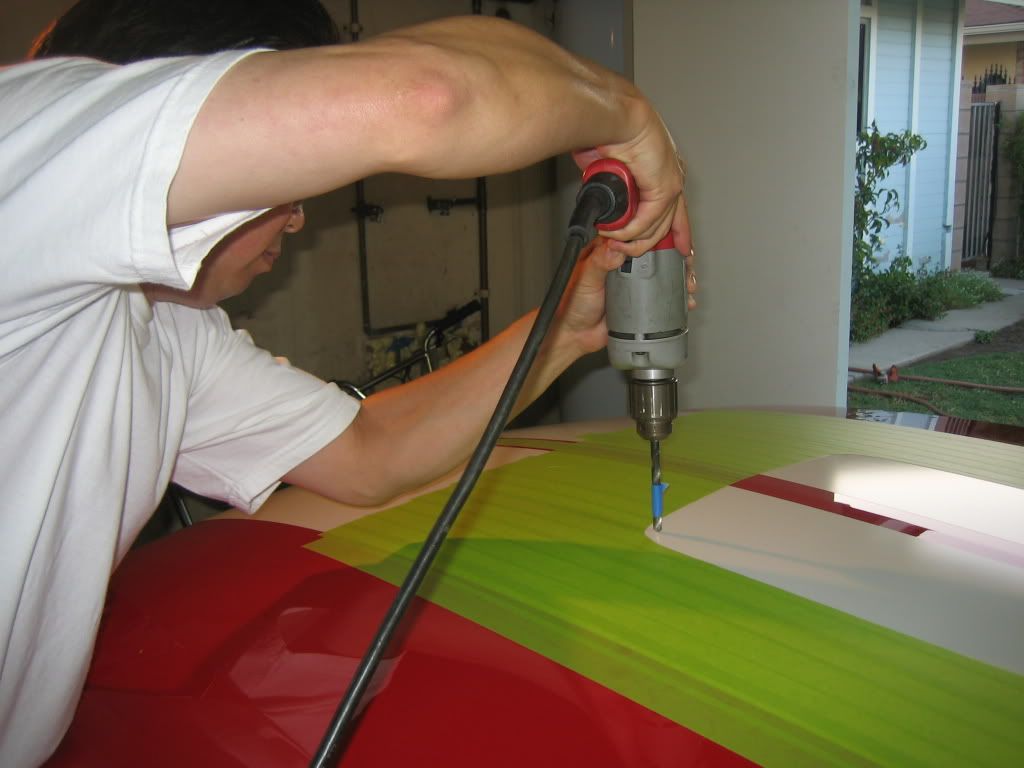
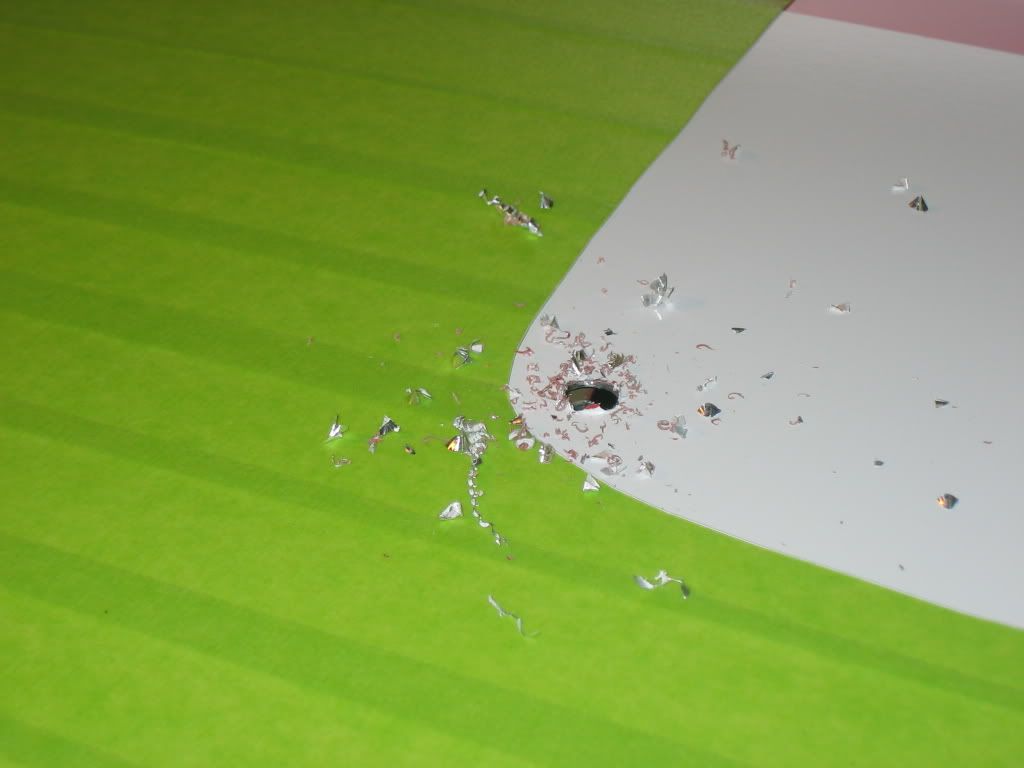
7. Now comes the 2nd point of no return.. Get a punch and mark your drill spot approximately ¾” – 1” away from the tape’s edge.[/b]
[/b]
Using a ¼” drill or larger (or step drill if you prefer), make yourself a makeshift drill-stop by wrapping several layers of masking tape about a ¾” up then drill your hole into the hood using the punch dimple as your mark.[/b]
[/b]
Important: You must use the punch prior to drilling or risk the drill bit walking onto your hood paint! [/b]

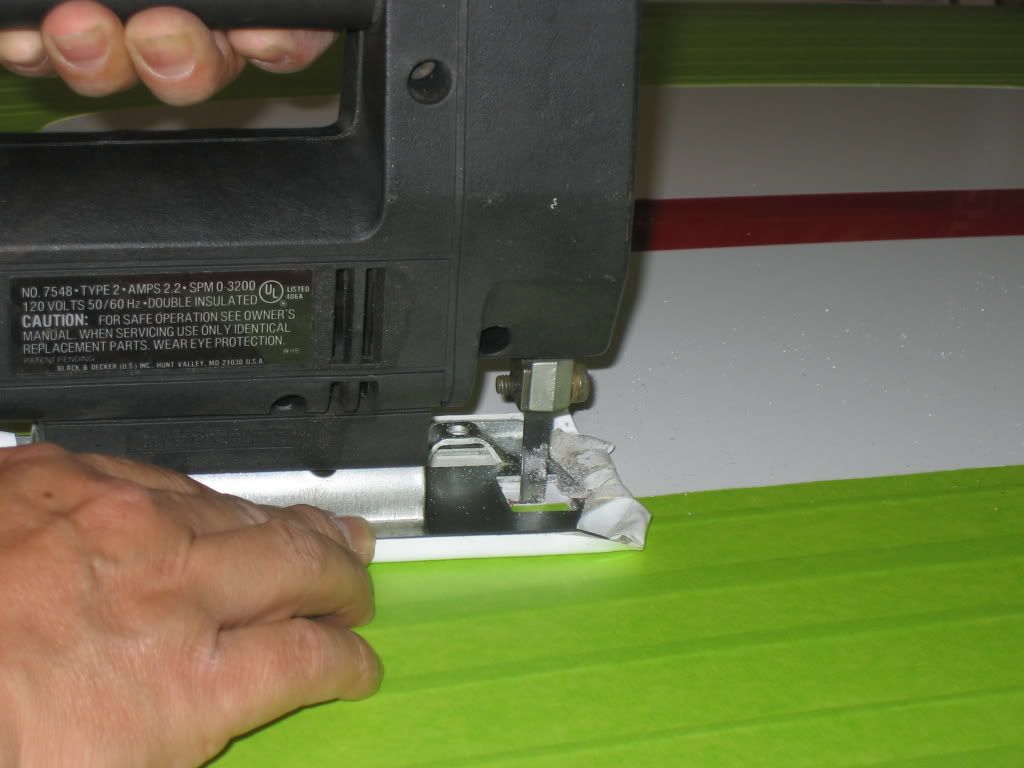
8. Using a jigsaw with a NEW blade (at least a 14TPI or finer (up to 24), drop it into the hole you drilled and start cutting. Don’t rush the cut. Let the blade do it’s cutting.[/b]
[/b]
Stop every several inches and lay some masking tape across the cut area to reduce any chattering and/or bouncing.[/b]
[/b]
Tip: Chips and shavings will start to fly everywhere! Learn from my mistake, drape something over the whole windshield, most of the roof, and outside the masking lines on the hood.[/b]
**** edit ****
I don't know what happened to the rest of the write-up.. it vanished! [:@]
Obvious snafu from MF. I'll have to rebuild this tutorial at a later date.. sorry guys.
I purchased this Shaker system primarily for cosmetic reasons. As it does provide additional ‘ram air’ to the air filter (at highway speeds), the HP gains are minimal at best. However, I do consider this a functional hood scoop versus the blocked off ones.
One note about this installation, I already had the K&N CAI installed. So, any step regarding fitment of the ductwork to air box will be a deviation from the CDC instructions. I will include a few file photos of the modification on the OEM air box for those adapting this Shaker to the factory intake.
If you have a different CAI, the install will basically be the same with the exception of the duct routing (to heat shield).
As you see, Ford has accommodated a section in the hood specifically for a hood scoop.
Out of the box.
1. Lay down a strip of masking tape (I used the green 1.4” wide 3M Paint & Body tape, stronger than the blue 3M Painters tape) down the center of the hood, then mark the centerline.[/b]
[/b]
Hint: The nose of the hood has a centerline crease. To find center on the back, split the distance between the washer nozzles.[/b]
[/b]
Once done, lay several strips of masking tape on each side of the centerline tape. Be sure to go wider than the area to be cut out.[/b]
2. Unroll the template out and tape it to the hood.[/b]
[/b]
Aligning points on the templateare the rear curvature of the hood’s edge and its centerline.[/b]
[/b]
Try and lay the template as flat as possible. I know it’ll be hard to get it to lay perfectly flat, so concentrate on the centerline and edge of hood marks to make sure they’re spot on.[/b]
3. Using a utility knife (with a NEW blade), carefully press hard into the cut line of the template. You MUST press hard enough to go through the template, vinyl stripes (if applicable), and score the paint past the clear coat and into the base.[/b]
[/b]
This is what’s called, “Beyond the point of no return!”.[/b]
The idea behind this is to reduce any chance of the paint flaking during the cutting process.[/b]
4. Once the template is cut out, peel away the inner masking tapes, exposing the area where you’re about to cut.[/b]
The look on my son’s face on what we’re about to do.. priceless!
5. Open the hood and remove the hood liner.
The plastic fasteners holding the liner up are the push-in type. Carefully pry them up, the liner can easily tear. Cup your hand beneath the clip as your prying them off, I lost 2 somewhere in the engine bay! (Autozone has replacements)
(file photo)
6. Use a large moving blanket or sheet of plastic and cover the entire engine bay, even drape it over the fenders for added protection.[/b]
[/b]
I used a 4x4 piece of wood to support the hood solid and to give it the additional height when drilling and cutting[/b].
7. Now comes the 2nd point of no return.. Get a punch and mark your drill spot approximately ¾” – 1” away from the tape’s edge.[/b]
[/b]
Using a ¼” drill or larger (or step drill if you prefer), make yourself a makeshift drill-stop by wrapping several layers of masking tape about a ¾” up then drill your hole into the hood using the punch dimple as your mark.[/b]
[/b]
Important: You must use the punch prior to drilling or risk the drill bit walking onto your hood paint! [/b]
8. Using a jigsaw with a NEW blade (at least a 14TPI or finer (up to 24), drop it into the hole you drilled and start cutting. Don’t rush the cut. Let the blade do it’s cutting.[/b]
[/b]
Stop every several inches and lay some masking tape across the cut area to reduce any chattering and/or bouncing.[/b]
[/b]
Tip: Chips and shavings will start to fly everywhere! Learn from my mistake, drape something over the whole windshield, most of the roof, and outside the masking lines on the hood.[/b]
**** edit ****
I don't know what happened to the rest of the write-up.. it vanished! [:@]
Obvious snafu from MF. I'll have to rebuild this tutorial at a later date.. sorry guys.


3rd Gear Member
Joined: Jun 2006
Posts: 515
From: Phoenix, AZ
ORIGINAL: 06blueovalblueGT
Why can't we all live next door to Bill !!!
GREAT STUFF,
Why can't we all live next door to Bill !!!
GREAT STUFF,
You do great work, keep the mods coming and the "How to's" too

-DG


