
Gauges?


1st Gear Member
Joined: Aug 2007
Posts: 75
From:
[/quote]
Ok, so I didnt know what a wideband was, googled it, and came up with this
http://www.v8power.com/cat--Mustang-...ter--afrm.html
So something like that?
Whats a good brand?
[/quote]
Autometer - they have the guages in several different styles and pillar mounting solutions for single, double and triple gauge setups.

Thread Starter
2nd Gear Member
Joined: Sep 2007
Posts: 224
From:
ORIGINAL: Thurman
It is a lot, but look what you have spent already. Is $600.00 going to kill you?
I say while it is their, get it hooked up.
It is a lot, but look what you have spent already. Is $600.00 going to kill you?
I say while it is their, get it hooked up.
I think I will have them do the gauges, then add the other ones to the pillar later
4th Gear Member
Joined: Feb 2007
Posts: 1,726
From: Illinois
Forget those Saleen gauges. 600 dollars is way too much labor for installing them. Go with Autometer Cobalt or Nexus. Install them yourself.
The wideband requires you have a bung welded on the exhaust in front of the drivers side cat. I paid 60.00 for a muffler shop to weld in the bung.
That is where the sensor will thread in.
Oil pressure is the next important gauge. The one you have stock is an idiot gauge and only has one position when it senses oil pressure.
Thread Starter
2nd Gear Member
Joined: Sep 2007
Posts: 224
From:
ORIGINAL: zkiller
Forget those Saleen gauges. 600 dollars is way too much labor for installing them. Go with Autometer Cobalt or Nexus. Install them yourself.
The wideband requires you have a bung welded on the exhaust in front of the drivers side cat. I paid 60.00 for a muffler shop to weld in the bung.
That is where the sensor will thread in.
Oil pressure is the next important gauge. The one you have stock is an idiot gauge and only has one position when it senses oil pressure.
Is it just connecting the wires and running them, or do I have to install all the sensors also?

3rd Gear Member
Joined: Nov 2006
Posts: 681
From:
ORIGINAL: Shredder
So what connections are on the supercharger already? do I have to install the sensors on it, or are they already there?
Is it just connecting the wires and running them, or do I have to install all the sensors also?
ORIGINAL: zkiller
Forget those Saleen gauges. 600 dollars is way too much labor for installing them. Go with Autometer Cobalt or Nexus. Install them yourself.
The wideband requires you have a bung welded on the exhaust in front of the drivers side cat. I paid 60.00 for a muffler shop to weld in the bung.
That is where the sensor will thread in.
Oil pressure is the next important gauge. The one you have stock is an idiot gauge and only has one position when it senses oil pressure.
Forget those Saleen gauges. 600 dollars is way too much labor for installing them. Go with Autometer Cobalt or Nexus. Install them yourself.
The wideband requires you have a bung welded on the exhaust in front of the drivers side cat. I paid 60.00 for a muffler shop to weld in the bung.
That is where the sensor will thread in.
Oil pressure is the next important gauge. The one you have stock is an idiot gauge and only has one position when it senses oil pressure.
Is it just connecting the wires and running them, or do I have to install all the sensors also?
[IMG]local://upfiles/54455/7D217B75955B4111AF7E3B02776BFE8F.jpg[/IMG]
[IMG]local://upfiles/54455/74B5270AD72E480DAEC868C43A03A627.jpg[/IMG]
Thread Starter
2nd Gear Member
Joined: Sep 2007
Posts: 224
From:
Sawyer, I like the gauge right in the dash between the vents!
I personally am a little scared to cut into my car at this point.. its only a week old so far lol
Is it important to have the wideband right away.. or is it ok to wait a couple months?
I havnt even made my first car payment yet, besides the down payment, and I am already in for 10K extra.. and I dont have my rims yet
3rd Gear Member
Joined: Nov 2006
Posts: 681
From:
Here is a step by step (I actually removed everything including the pasenger air bag[&o]). PM sent.
A/F is the most important gauge IMO, you do not want to go lean on a SC application, although most of the tunes for the latest SC's are right on.
I know how you feel, inside the first 6 months I spent 12k in extras, but I have zero buyers remorse.
A/F is the most important gauge IMO, you do not want to go lean on a SC application, although most of the tunes for the latest SC's are right on.
I know how you feel, inside the first 6 months I spent 12k in extras, but I have zero buyers remorse.

3rd Gear Member
Joined: Nov 2006
Posts: 681
From:
Here it is, 98saleen posted this on m o d u l a r f o r d s..... I didn't use the "tilt" bezel and I can see it fine.
A real nice write up and the easier way to go.
Yep,
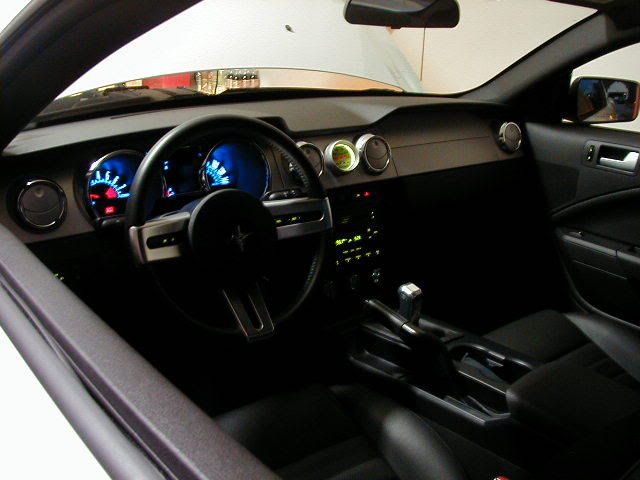
I took the plunge and installed a boost gauge in my center dash section.
Not hard to do at all and not very time consuming either!
I love it!
Looks factory installed!
Here's the photo journal.....enjoy.
Ryan
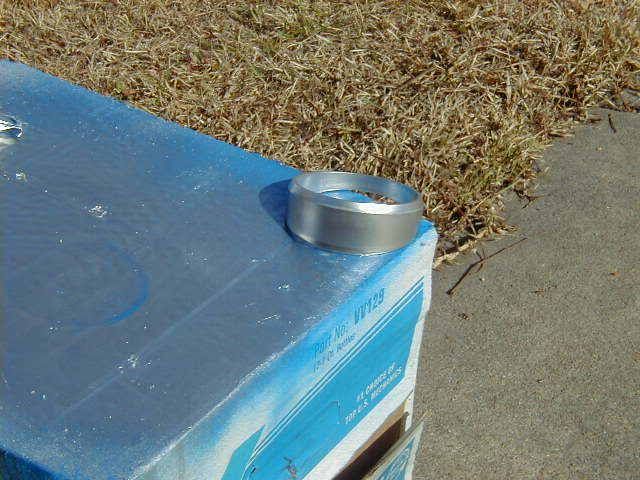
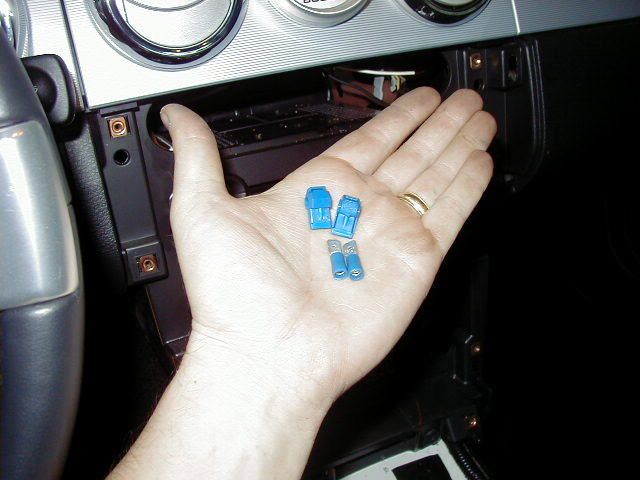
Pic 1 - Parts

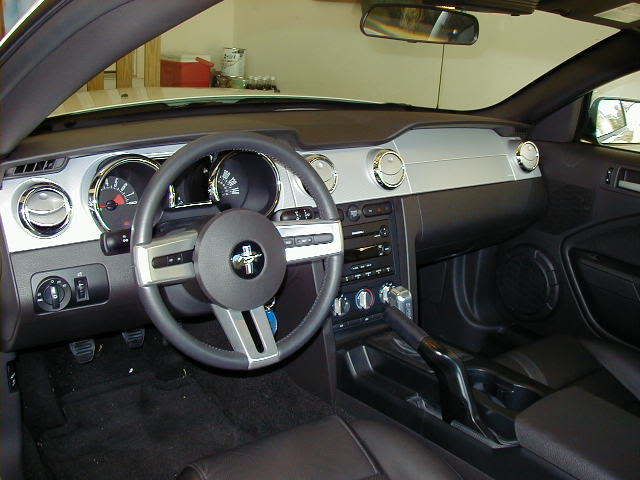
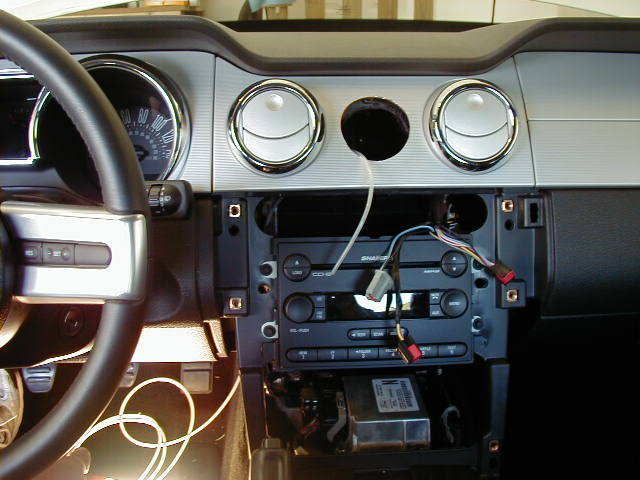
Pic 2 - Stock dash before any mods
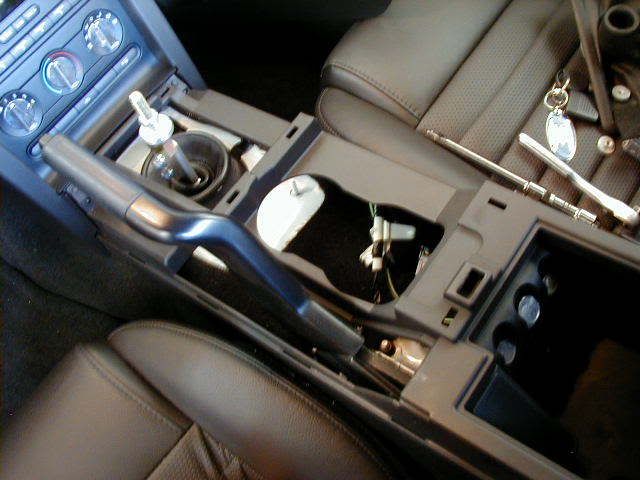
Pic 3 - Remove console
There are 2 phillips screws in the arm rest.
Pull up and the rest of the top half of the console will come off.
Pic 4 - Mark area and drill hole. This is the "hold your breath and take the plunge" part.

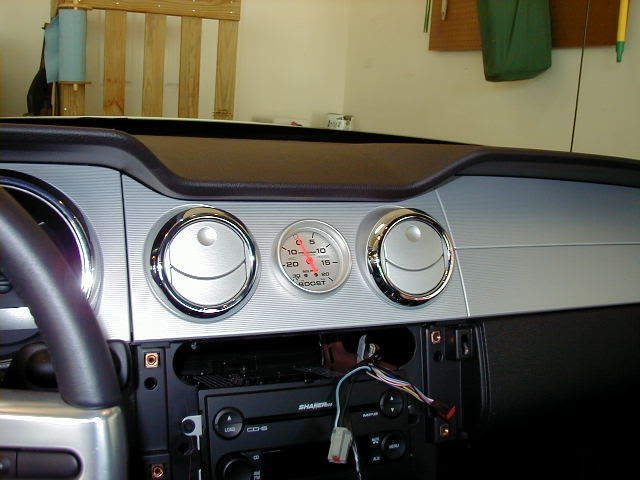
Pic 5 - Test fitting gauge only (no tilt pod yet. This looks OK too, but I wanted more angle to me when driving.
Pic 6 & 7 - Painting the black tilt pod to match dash.

Pic 8 - Running boost signal line
Pic 9, 10, & 11 - Tapping into factory harness for light power


Pic 12, 13, & 14 - Mounting of gauge (final)
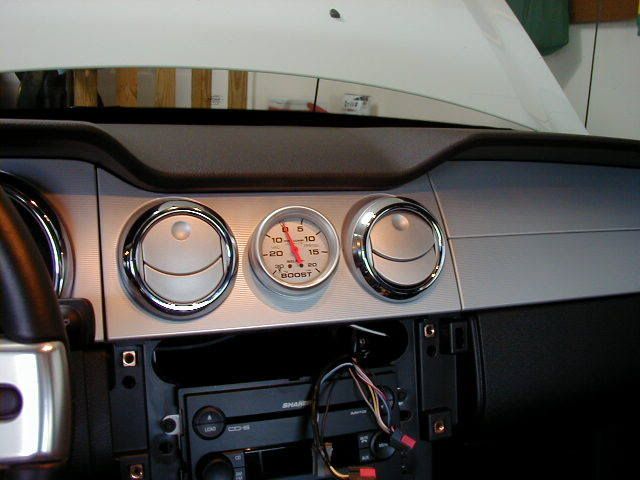


Final product (NOTE: I am going to install a Blue LED soon).
Contents to do this mod -
7mm socket
10mm socket (deep well)
#2 phillips screwdriver
2-5/8" hole saw
Wire cutters/strippers
Crimpers
Assorted wire connectors
1 - Disturbed CD
1 - Godsmack CD
1 - Quiet Riot CD
 [/align]__________________
727 rwhp 695 rwtq

Modified Mustangs Magazine Feature Car - July 2007 [/align]


A real nice write up and the easier way to go.
Yep,
I took the plunge and installed a boost gauge in my center dash section.
Not hard to do at all and not very time consuming either!
I love it!
Looks factory installed!
Here's the photo journal.....enjoy.
Ryan
Pic 1 - Parts
Pic 2 - Stock dash before any mods
Pic 3 - Remove console
There are 2 phillips screws in the arm rest.
Pull up and the rest of the top half of the console will come off.
Pic 4 - Mark area and drill hole. This is the "hold your breath and take the plunge" part.
Pic 5 - Test fitting gauge only (no tilt pod yet. This looks OK too, but I wanted more angle to me when driving.
Pic 6 & 7 - Painting the black tilt pod to match dash.
Pic 8 - Running boost signal line
Pic 9, 10, & 11 - Tapping into factory harness for light power
Pic 12, 13, & 14 - Mounting of gauge (final)
Final product (NOTE: I am going to install a Blue LED soon).
Contents to do this mod -
7mm socket
10mm socket (deep well)
#2 phillips screwdriver
2-5/8" hole saw
Wire cutters/strippers
Crimpers
Assorted wire connectors
1 - Disturbed CD
1 - Godsmack CD
1 - Quiet Riot CD
[/align]__________________727 rwhp 695 rwtq
Modified Mustangs Magazine Feature Car - July 2007 [/align]