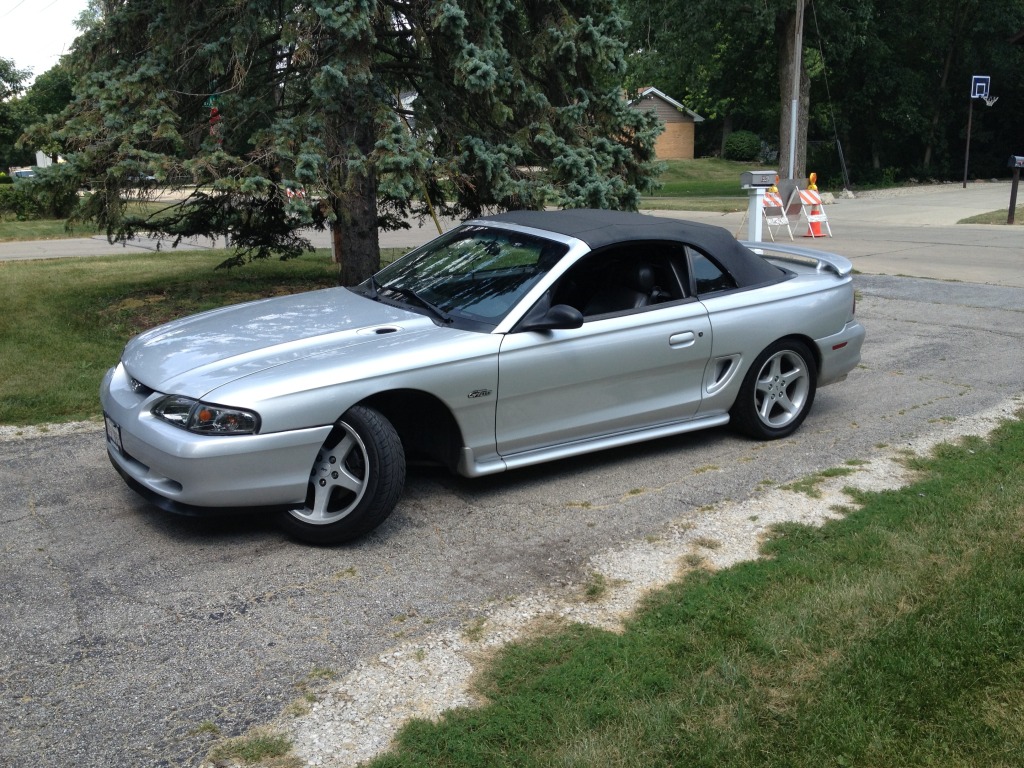
The Evolution/Future Build of My Car (Pics and Vids Galore)

 04-01-2013, 07:36 PM
#12

very nice! it's nice seeing someone in their younger years loving a mustang this much and putting so much of their time into it, and doing very tasteful mods at that! keep the mods coming piece by piece and you'll get your dream mods eventually!
05-17-2013, 11:07 PM
#13
2nd Gear Member
Thread Starter
Join Date: Aug 2010
Location: IL
Posts: 173
Thanks a lot for the kind words guys! Im definitely taking my time and doing my dream mods as I can afford them.
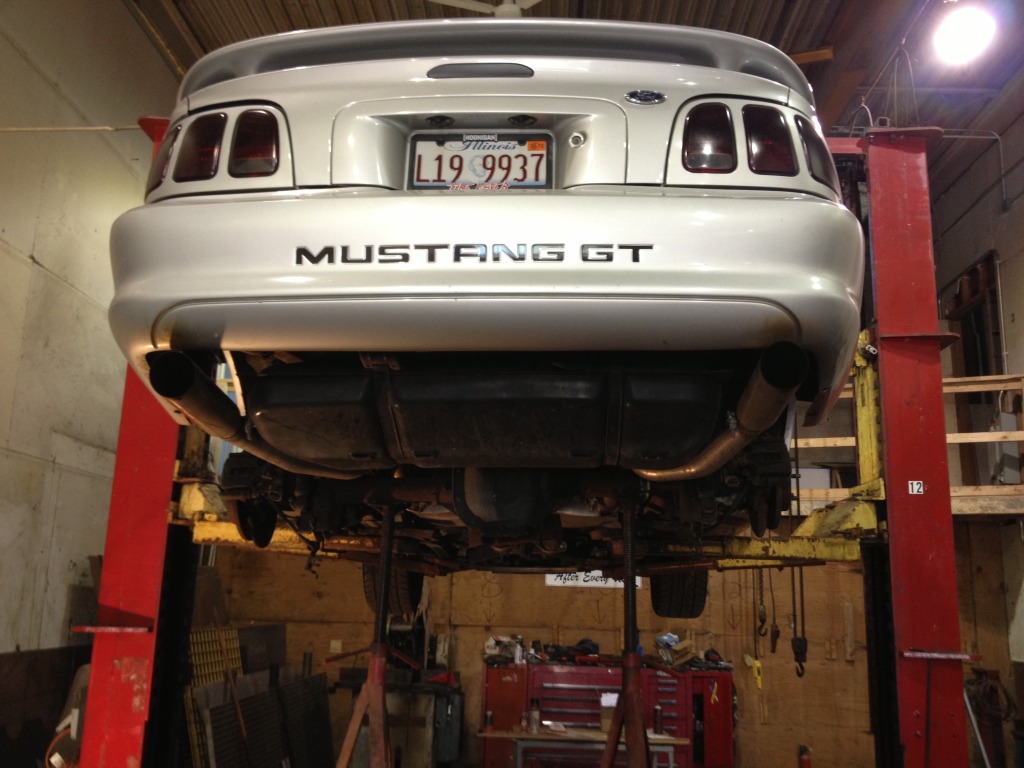
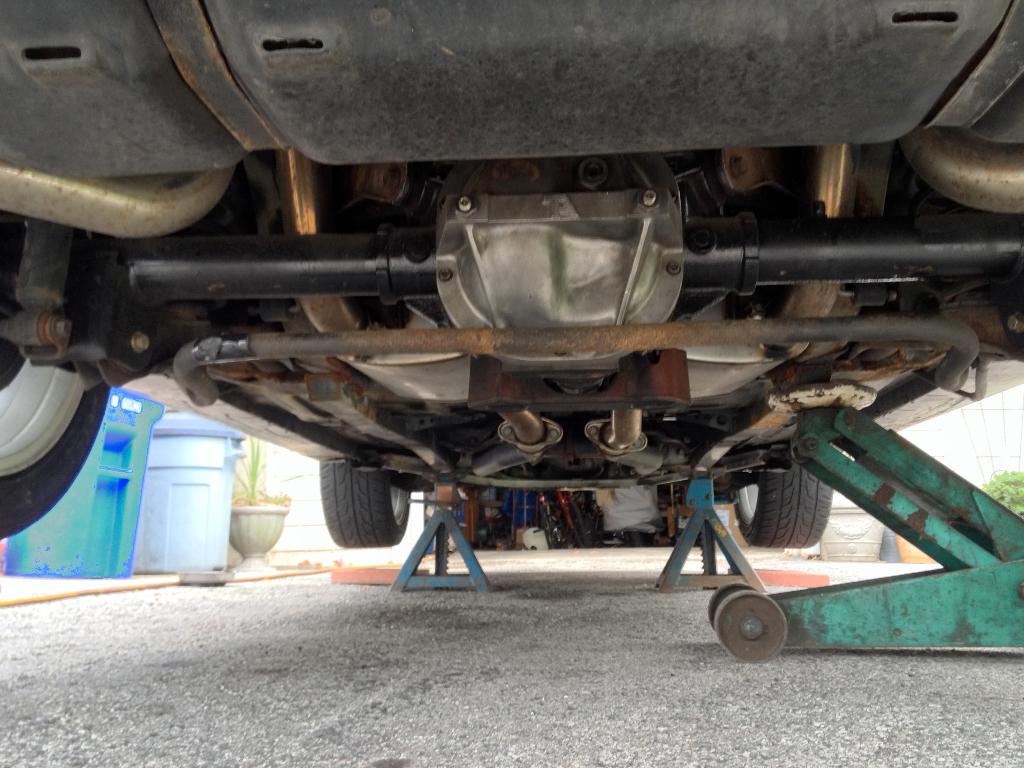
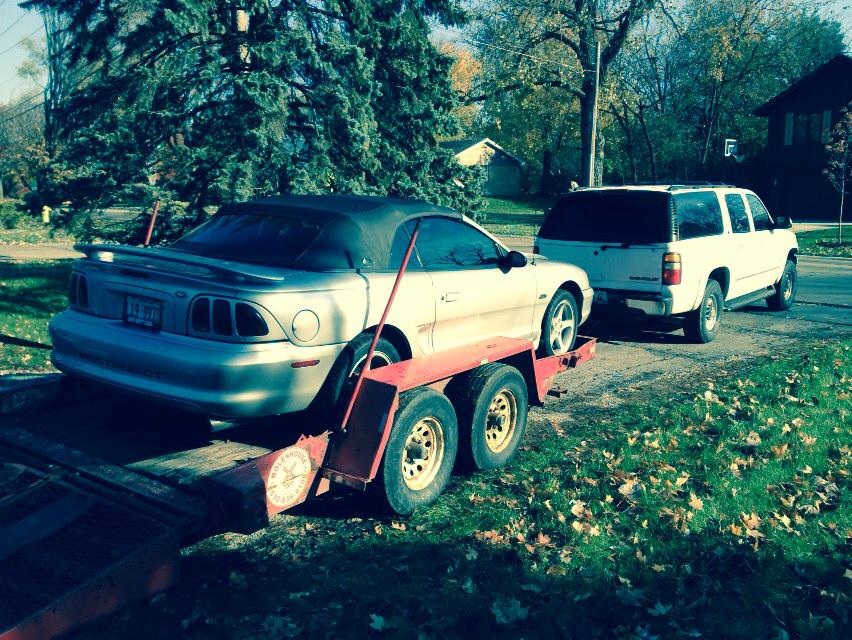
Well the 3.73s/new diff is in! Holy mother of god the car is 100x more fun to drive now. I just spent a whole day doing the install I got the car on the lift around 12pm and finished the install entirely at 10pm (I also had to eat lunch and dinner in that time frame so total time for the install ended up being around 8 hours probably)
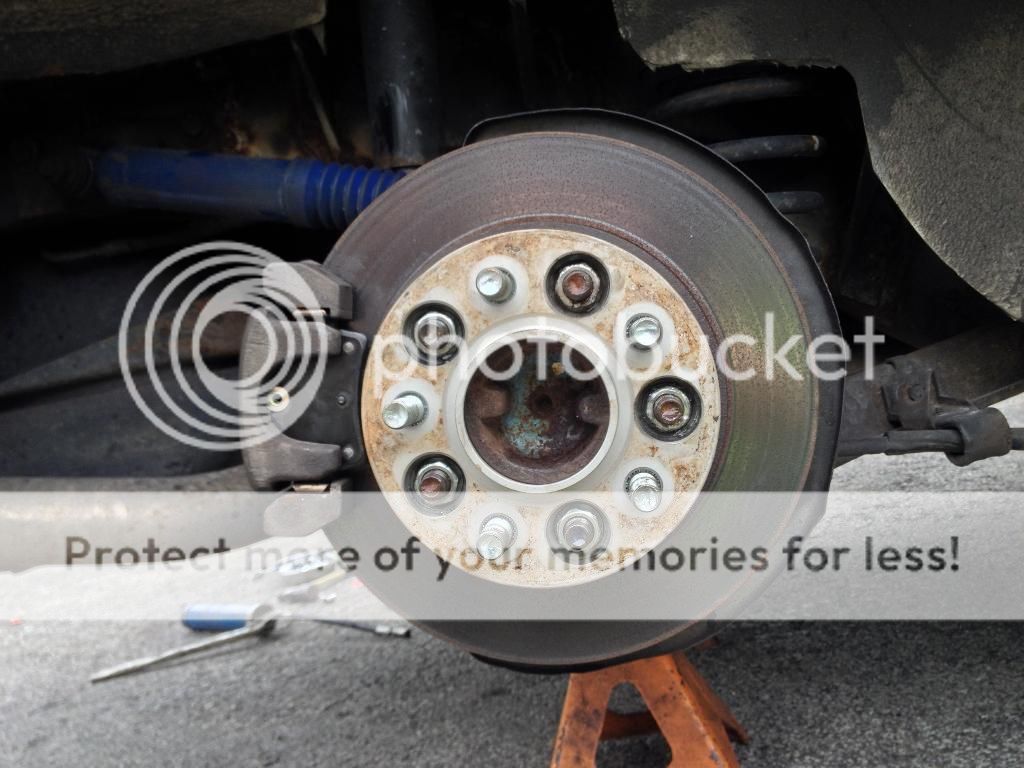
Here's the car up on the lift with the wheels removed:
Here the old diff is ready to come out completely but I ran into some trouble getting the LCA bolt out of the differential (they were rusted in place).

After finally getting those bolts out, the whole diff came out without much of an issue. I also checked and it appears that my springs were definitely cut and arent actual lowering springs which means those are next on my mod list.

And here's the new diff in all of it's glory. I also soldered in a Ford Racing Speed Cal to adjust the speedometer and now I finally have an almost perfect speedometer reading.
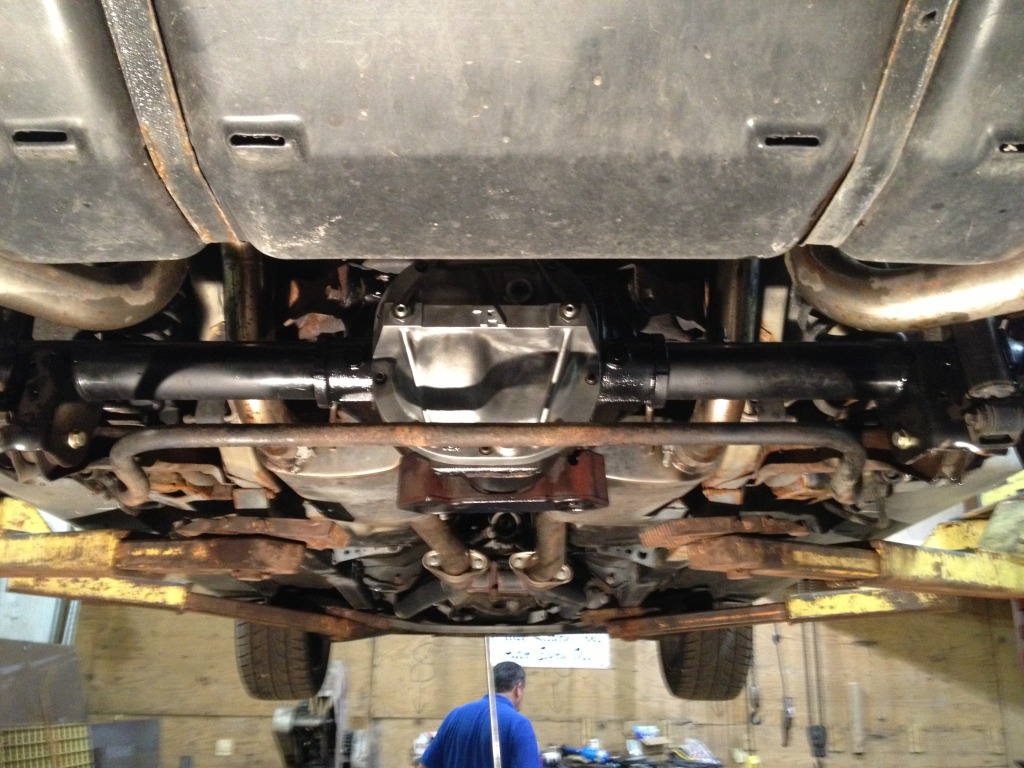
Overall extremely happy with the 3.73 gear choice. It's the perfect amount of gear in my opinion, pulls really hard (compared to the stock 2.73s for sure) but isnt over the top. My first gear still does something lets just put it that way.
Well the 3.73s/new diff is in! Holy mother of god the car is 100x more fun to drive now. I just spent a whole day doing the install I got the car on the lift around 12pm and finished the install entirely at 10pm (I also had to eat lunch and dinner in that time frame so total time for the install ended up being around 8 hours probably)
Here's the car up on the lift with the wheels removed:

Here the old diff is ready to come out completely but I ran into some trouble getting the LCA bolt out of the differential (they were rusted in place).

After finally getting those bolts out, the whole diff came out without much of an issue. I also checked and it appears that my springs were definitely cut and arent actual lowering springs which means those are next on my mod list.

And here's the new diff in all of it's glory. I also soldered in a Ford Racing Speed Cal to adjust the speedometer and now I finally have an almost perfect speedometer reading.

Overall extremely happy with the 3.73 gear choice. It's the perfect amount of gear in my opinion, pulls really hard (compared to the stock 2.73s for sure) but isnt over the top. My first gear still does something lets just put it that way.
09-02-2013, 01:21 AM
#14
2nd Gear Member
Thread Starter
Join Date: Aug 2010
Location: IL
Posts: 173
So now just an update on what I did to the car this summer. I have been trying to save my money for college so I didnt spend a whole lot on my car, but I did some worthwhile things.
Summer 2013
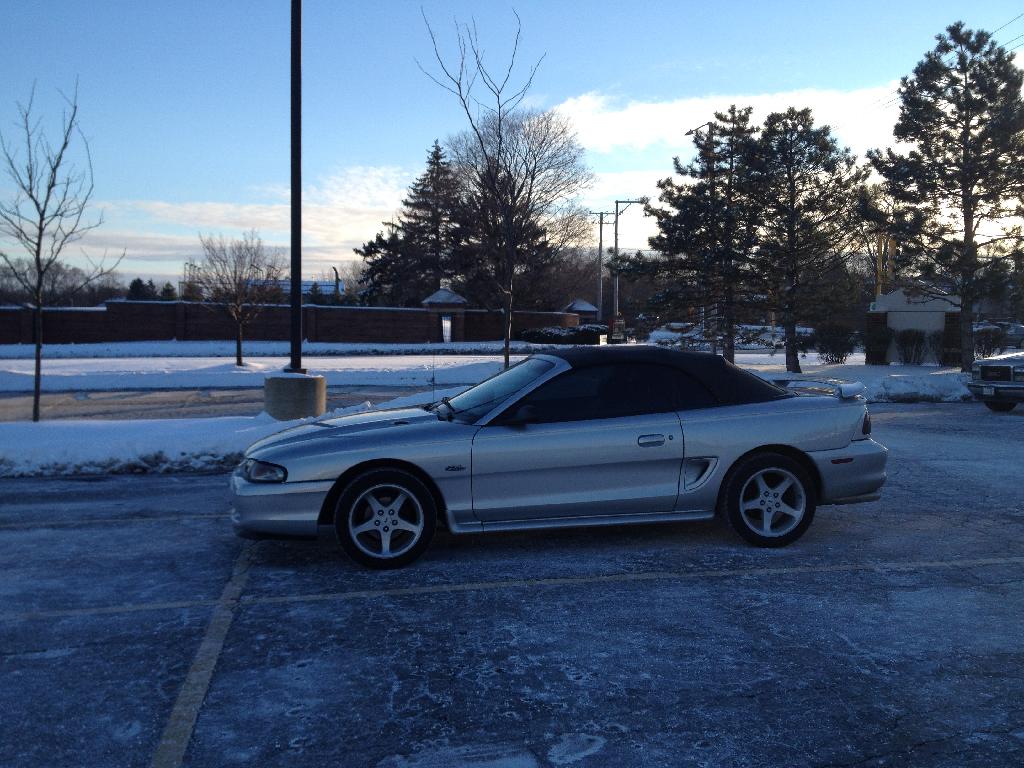
The first thing I did this summer was the new differential. I posted an update above with pictures of the swap. After driving the car all summer and I can say that I am extremely happy with the 3.73 gears. I am happy I did not go with 4.10s just because I think that would be a little bit too much gear for a daily driver with weekly-monthly highway driving.
A side note with the diff, I am getting much better traction in rain and slippery conditions with the differential. It is odd because with the gears I thought it would be a lot worse. I think it is the Auburn Differential which is doing a much better job handling the power than the traction lok that was probably worn out anyways in the old diff.
Also my E-brake is now fully functioning, where as before it did not do anything. This was because one of my rear brake calipers was seized and not working.
The next major modification I did was I installed new brake calipers. Nothing too interesting here. I was hoping this would fix the problem of the car pulling to the left when I hit the brakes, which it did not.
Now for the good stuff.
I got my windows tinted at the beginning of the summer to try and reduce the interior heat and make the car actually bearable to drive in the summer. It is amazing I love it! I went with 20% ceramic tint all the way around, and a ceramic 70% windshield tint. It is amazing it was worth the money.
This is one of those mods that I just simply didnt trust myself to do, I would mess it up. So I had it professionally done and it turned out awesome. The one thing that sucked was my passanger side has a very small nick in the tint because something inside the door hit it when I rolled the windows down
Next thing isnt really a mod, but I pulled apart my old engine to see what was making the ticking noise. Turns out it was a combination of a few things. First and foremost, I had a spun rod bearing on cylinder 8.
Its a little hard to see, but the bearing on the right is long gone and the one on the left was about to go as well. You can kind of see the difference in thickness.
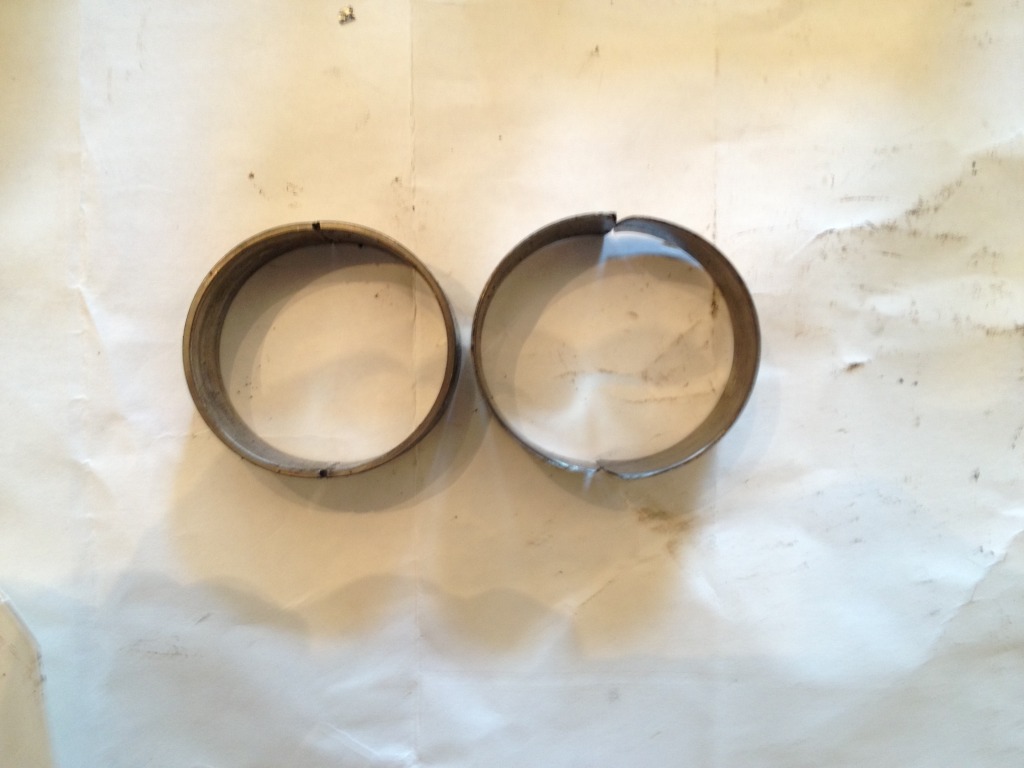
The spun bearing (right) was as shown in this picture when I pulled the engine apart. This explains why the ticking would go away some times.

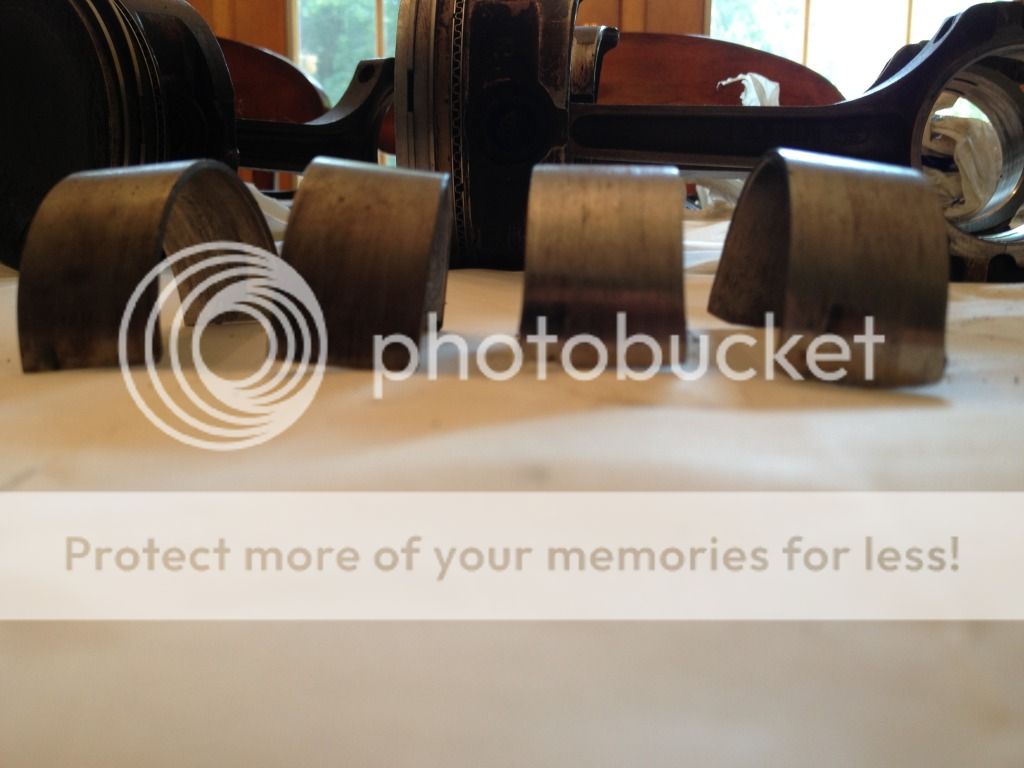
So the source of the ticking was actually the piston (piston #8) hitting the crankshaft, as far as I can tell. In this picture there are three pistons, the two right ones were still "good" (Although not in very good shape as you can tell). The one on the left has marks where the crankshaft was hitting. My guess is that when the bearing spun to one side, the clearance was off and the piston hit.
Close up of the piston skirt that was hitting:
Heres the inside of the rod with the spun bearing, hard to tell in the picture but it is very rough and not smooth like it should be:
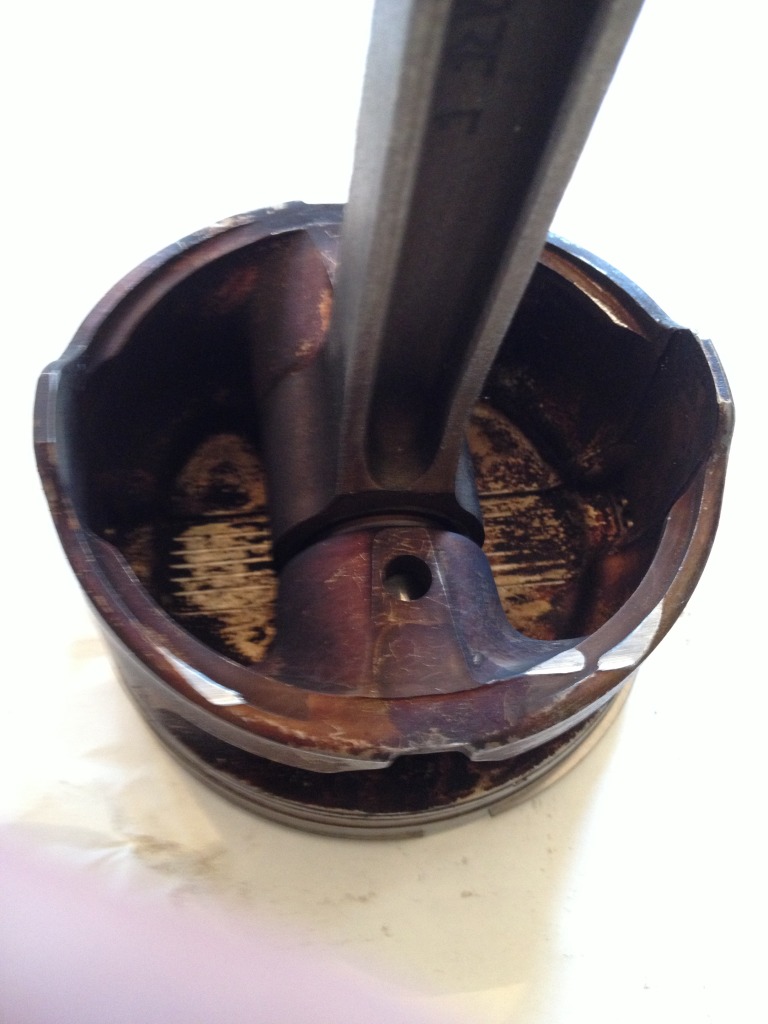
Another thing I noticed on the bad piston, it looks like there was some sort of loss of compression if you look at the build up on the top of the piston, there is a clean path actually indented into the piston head.

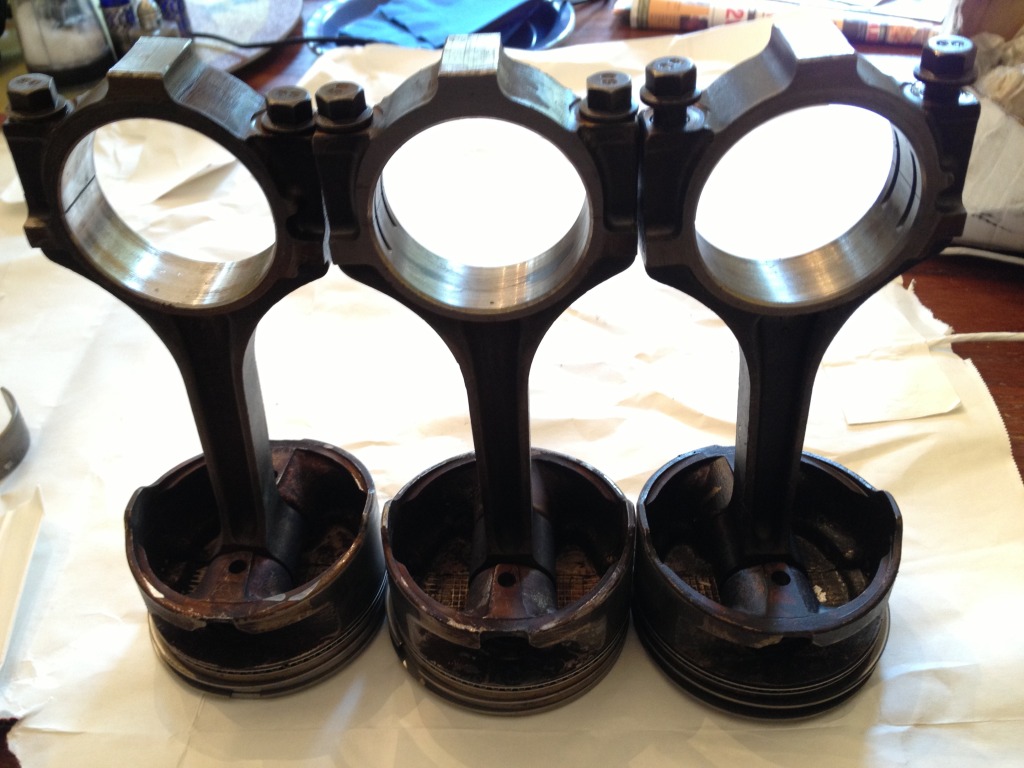
One more thing I found out about the engine was every single oil ring was bad, not just one or two...every single piston had a bad oil ring. You can see what appears to be some bad blow-by on these three pistons, and this is after I cleaned them off with a wire brush.
60DE5149-A862-4485-91D4-F6921B147A2E-2418-000002D8CE5C6CBD.jpg Photo by DutchManDann | Photobucket
And last but not least the engine had a blocked oil passage on the passanger side head.
The most recent thing to happen to the car occurred just a few days ago. I knew the driver's side ball joint needed to be replaced, but I couldnt find the time to do it. Well after driving on a bad ball joint for too long, I had this happen as I was pulling out of the drive way:
Looks pretty bad but there doesnt appear to be any significant damage done. The fenderwell got pushed in, easy to fix. The bracket that holds the horns bent up, but I just bent it back down and the horn works fine.
A few hours last night, and the car is back on the road. The balljoint really isnt too dificult to replace at all. here's the old one, keep in mind the ball was completely seperated from the socket, hence the wheel falling off lol
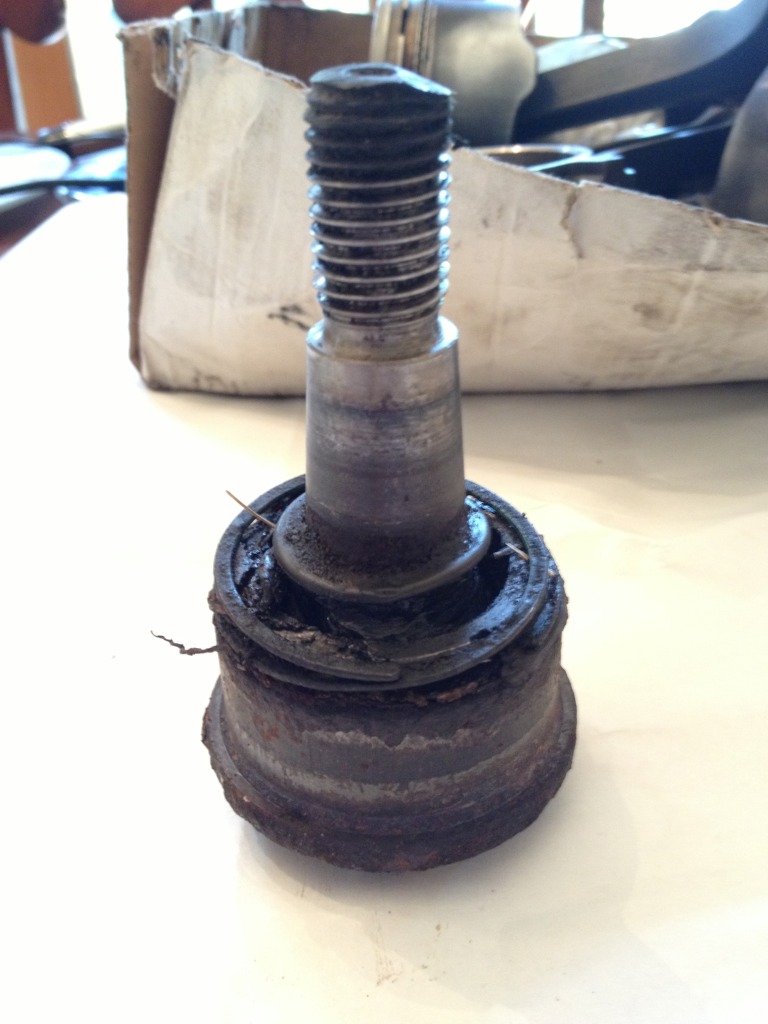
So I am going to use this as a reminder that when you know something is wrong on your ride...get it replaced ASAP. If this balljoint had gone while I was on the highway or something, I probably wouldnt be sitting here right now.
As it turned out, the balljoint was the source of many of my problems...first off, the car pulled to the left when I braked, which now it does not do that. Second, the car was higher off the ground on the drivers side (more space between the tire and the wheel well), and now its about even! And of course the car steers so smoothly now...like it completely changed how the car drives. I am pretty sure my balljoints were bad for the 3 years i have owned the car, because it has never driven this smooth before.
That's it for the summer. Nothing too major, not enough time or money to do anything major at the moment. The next mods are going to be CAI/Plenum/TB, and then I think I am going to save up my money for some cams to install next summer. But we will see what happens.
Thanks for reading!
~DMD
Summer 2013
The first thing I did this summer was the new differential. I posted an update above with pictures of the swap. After driving the car all summer and I can say that I am extremely happy with the 3.73 gears. I am happy I did not go with 4.10s just because I think that would be a little bit too much gear for a daily driver with weekly-monthly highway driving.
A side note with the diff, I am getting much better traction in rain and slippery conditions with the differential. It is odd because with the gears I thought it would be a lot worse. I think it is the Auburn Differential which is doing a much better job handling the power than the traction lok that was probably worn out anyways in the old diff.
Also my E-brake is now fully functioning, where as before it did not do anything. This was because one of my rear brake calipers was seized and not working.
The next major modification I did was I installed new brake calipers. Nothing too interesting here. I was hoping this would fix the problem of the car pulling to the left when I hit the brakes, which it did not.
Now for the good stuff.

I got my windows tinted at the beginning of the summer to try and reduce the interior heat and make the car actually bearable to drive in the summer. It is amazing I love it! I went with 20% ceramic tint all the way around, and a ceramic 70% windshield tint. It is amazing it was worth the money.

This is one of those mods that I just simply didnt trust myself to do, I would mess it up. So I had it professionally done and it turned out awesome. The one thing that sucked was my passanger side has a very small nick in the tint because something inside the door hit it when I rolled the windows down
Next thing isnt really a mod, but I pulled apart my old engine to see what was making the ticking noise. Turns out it was a combination of a few things. First and foremost, I had a spun rod bearing on cylinder 8.
Its a little hard to see, but the bearing on the right is long gone and the one on the left was about to go as well. You can kind of see the difference in thickness.


The spun bearing (right) was as shown in this picture when I pulled the engine apart. This explains why the ticking would go away some times.

So the source of the ticking was actually the piston (piston #8) hitting the crankshaft, as far as I can tell. In this picture there are three pistons, the two right ones were still "good" (Although not in very good shape as you can tell). The one on the left has marks where the crankshaft was hitting. My guess is that when the bearing spun to one side, the clearance was off and the piston hit.

Close up of the piston skirt that was hitting:

Heres the inside of the rod with the spun bearing, hard to tell in the picture but it is very rough and not smooth like it should be:

Another thing I noticed on the bad piston, it looks like there was some sort of loss of compression if you look at the build up on the top of the piston, there is a clean path actually indented into the piston head.

One more thing I found out about the engine was every single oil ring was bad, not just one or two...every single piston had a bad oil ring. You can see what appears to be some bad blow-by on these three pistons, and this is after I cleaned them off with a wire brush.
60DE5149-A862-4485-91D4-F6921B147A2E-2418-000002D8CE5C6CBD.jpg Photo by DutchManDann | Photobucket
And last but not least the engine had a blocked oil passage on the passanger side head.
The most recent thing to happen to the car occurred just a few days ago. I knew the driver's side ball joint needed to be replaced, but I couldnt find the time to do it. Well after driving on a bad ball joint for too long, I had this happen as I was pulling out of the drive way:

Looks pretty bad but there doesnt appear to be any significant damage done. The fenderwell got pushed in, easy to fix. The bracket that holds the horns bent up, but I just bent it back down and the horn works fine.
A few hours last night, and the car is back on the road. The balljoint really isnt too dificult to replace at all. here's the old one, keep in mind the ball was completely seperated from the socket, hence the wheel falling off lol

So I am going to use this as a reminder that when you know something is wrong on your ride...get it replaced ASAP. If this balljoint had gone while I was on the highway or something, I probably wouldnt be sitting here right now.
As it turned out, the balljoint was the source of many of my problems...first off, the car pulled to the left when I braked, which now it does not do that. Second, the car was higher off the ground on the drivers side (more space between the tire and the wheel well), and now its about even! And of course the car steers so smoothly now...like it completely changed how the car drives. I am pretty sure my balljoints were bad for the 3 years i have owned the car, because it has never driven this smooth before.
That's it for the summer. Nothing too major, not enough time or money to do anything major at the moment. The next mods are going to be CAI/Plenum/TB, and then I think I am going to save up my money for some cams to install next summer. But we will see what happens.
Thanks for reading!
~DMD
 09-05-2013, 10:55 AM
#17
2nd Gear Member
Thread Starter
Join Date: Aug 2010
Location: IL
Posts: 173
Oh and in the Summer 2013 post theres a broken link to a picture, here's the correct link, just shows some bad blow-by on the pistons:

Fall 2013
To start off the fall (its september now which is the fall in my book), I did a little mod that I have been wanting to do for a while now.
These J&M stainless steel brake lines were on sale on LMR so I pulled the trigger on em. I have wanted to make the upgrade to SS lines for a while, because I dont have ABS having a more precise pedal feel is important.

Installing the lines went really smoothly, no issues occurred. The old lines came off easily and the J&M lines are a perfect fit. And they look freaking sexy!

I ran into some trouble after the install though. I went to bleed the brakes, and I bled them wrong. It was pretty late and I was tired/not thinking straight.
Then I decided while I had the wheels off, I was gonna put some disc brake quiet on them. Well when I did the passenger side, I seated the pad wrong and ended up ruining the pad.
So today, I got new pads and put them back together, and everything seems in order now. The brakes feel great! I can threshold brake much more efficiently now and form what I can tell, I can stop a lot faster now just because I have much better feel in the pedal.
The old lines weren't very precise at all, and I would often end up just locking the tires up. It is definitely easier to threshold brake with the SS lines. Definitely worth the $60 I paid, and Late Model Restoration was awesome, super fast shipping and good pricing.
So if you are thinking of getting SS lines, I would definitely recommend the upgrade, particularly if you dont have ABS.
02-01-2014, 10:01 PM
#18
2nd Gear Member
Thread Starter
Join Date: Aug 2010
Location: IL
Posts: 173
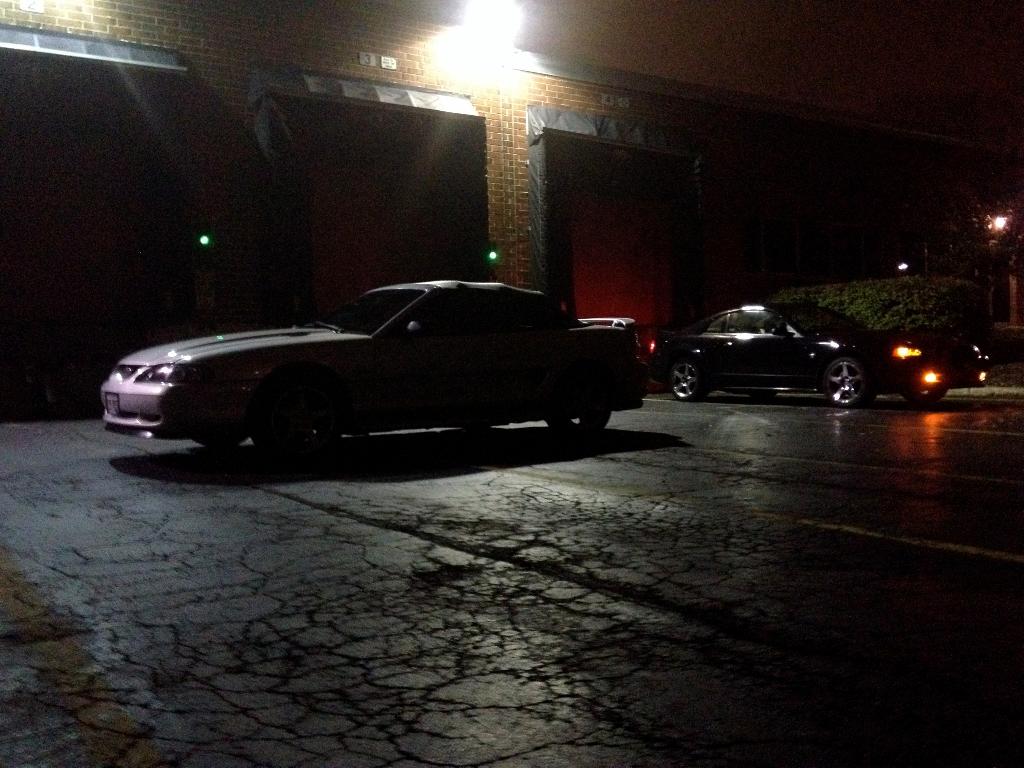
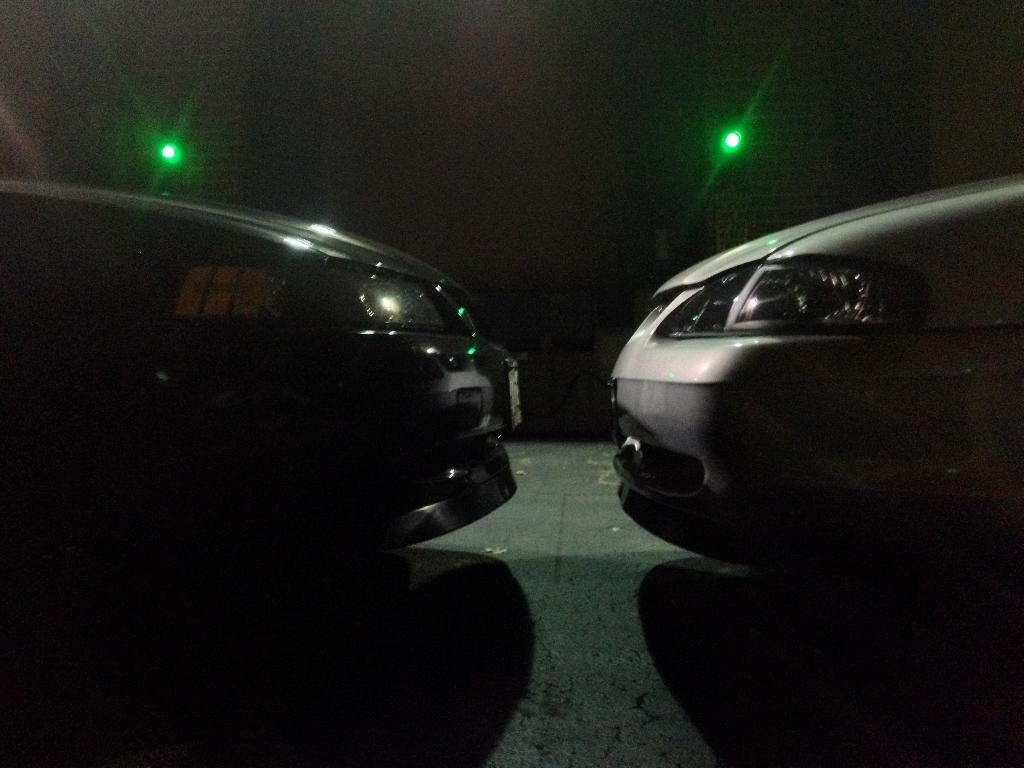
To continue the Fall 2013 portion of the build thread, I'll start off with a photoshoot I did with my friend and his 99 GT.
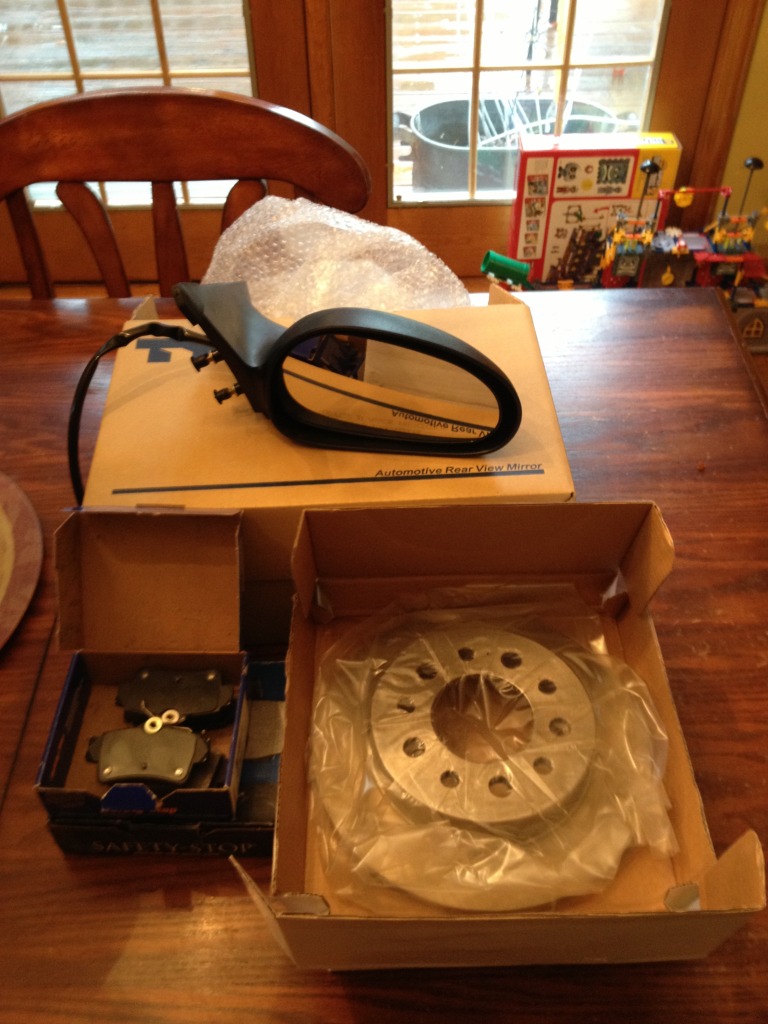
Alright so one of the first things that happened was I broke my driver's side mirror:
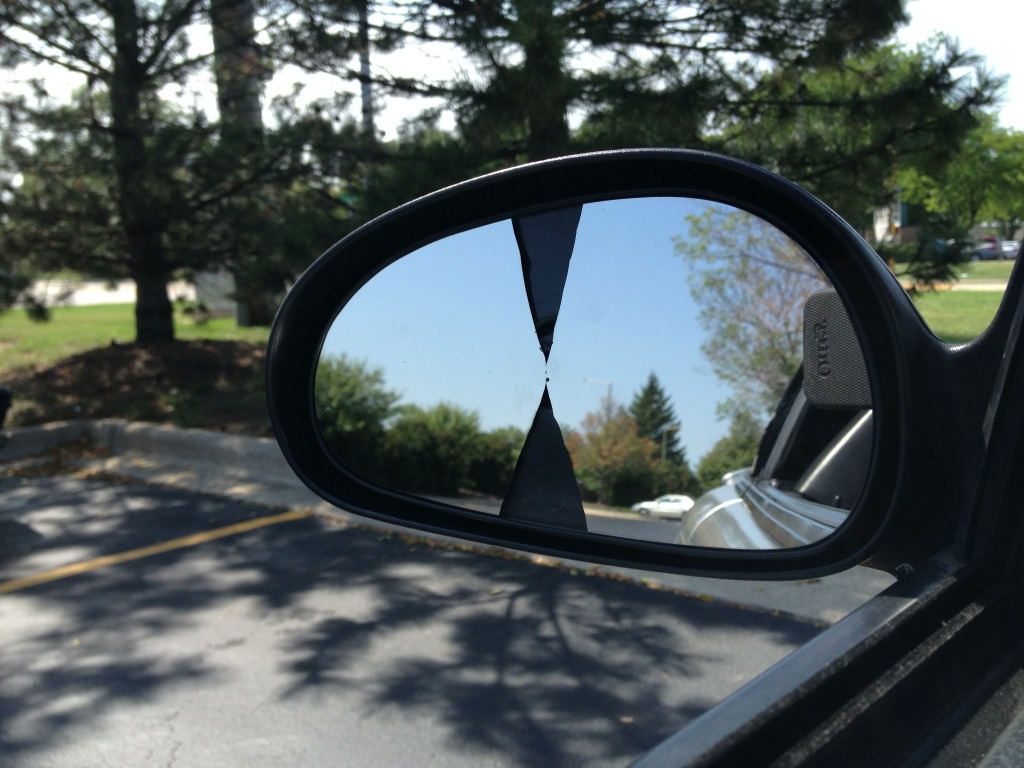
I decided to replace both side view mirrors because I'd rather keep them the same and have them replaced at the same time. I also attempted to replace my rear brake pads and rotors (more details on that in a moment)
So with the rear rotors, I have Eibach 25mm spacers on the rear of the car. Unfortunately when I was swapping the differential, I got a little trigger happy with their impact gun. It was an impact made for working on big diesel trucks and Im used to the little one I have at home.
But long story short, I hammered the lugs on waaaay too hard with the impact. The rear spacers are now stuck on, as I could not get a single one off. I actually broke a socket trying to do so. You can kind of see the now-stripped lugs on the spacers.
So the rotors did not get replaced but the pads did.
While I had the car in the air with all the wheels off, I cleaned out and waxed the inside of the rims. I will probably repeat this every summer from now on.
Before:
After:
On a side note, I just want to show how much of a difference the subframe connectors make on these convertibles. I had my car jacked up by the rear passanger side jack point and the whole car was lifted and almost perfectly straight....before the whole car would be twisted and mangled.
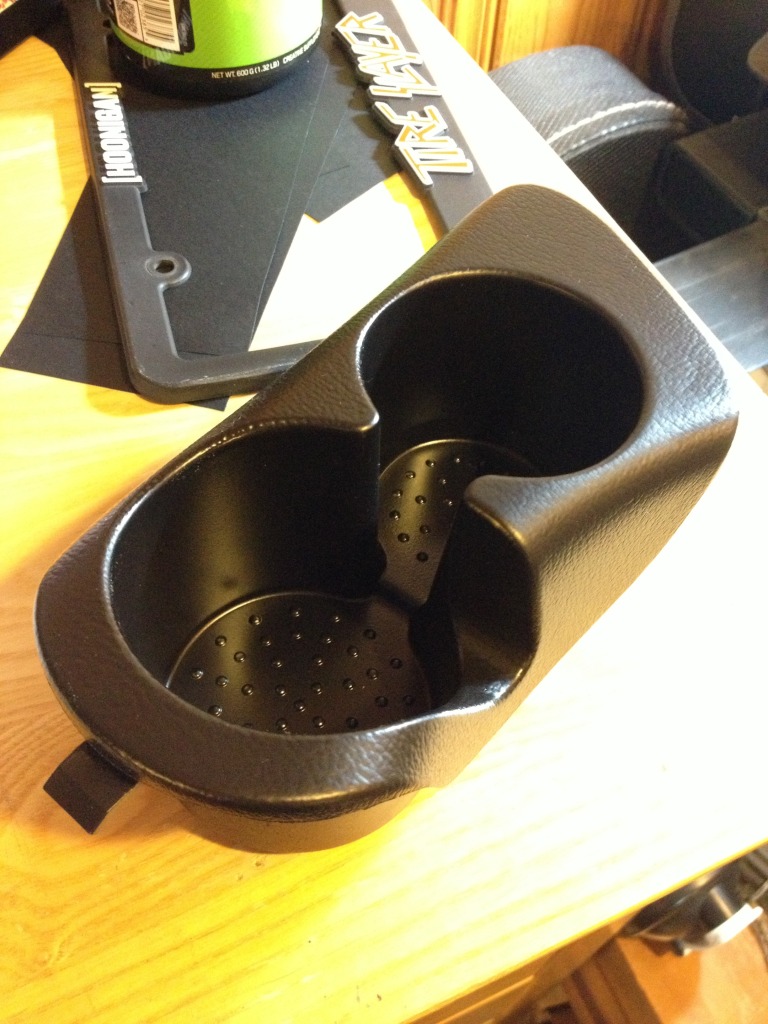
Next, I did probably the BEST mod I have ever done. I bought the cup holders off of a 99-01 mustang, painted them to match my car, and installed them. The 99-01 cup holders are wider and deeper than the stock 98 cupholders. Now I can actually bring a drink into my car almost...
One weekend my girlfriend and I decided to run to the junkyard, I needed to find a steering rack. My steering has been really messed up, the car seems to drift around by itself and it likes to wander with divots in the road. It's for sure not the balljoints since they are brand new, so I am left to believe it's either the rack or the bushings.
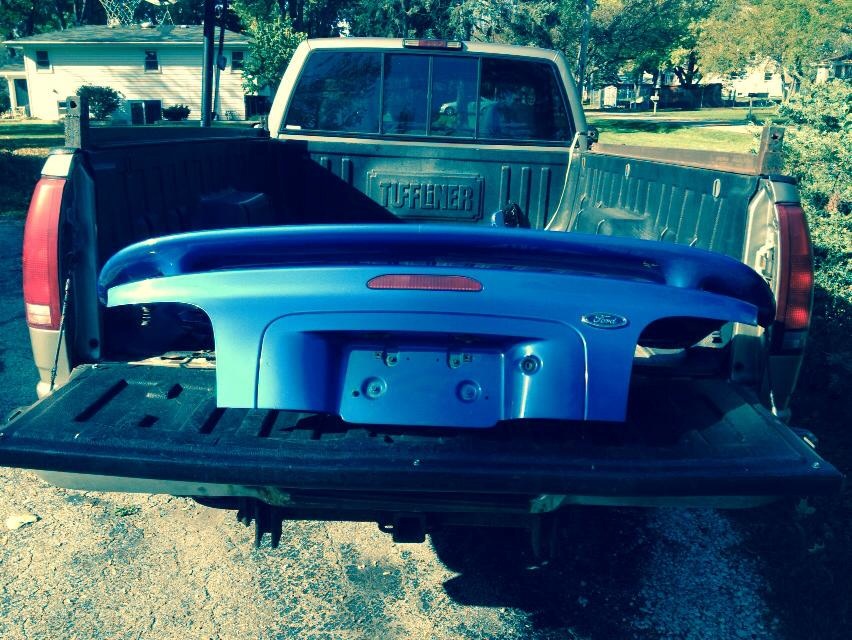
I didn't find a steering rack at the junkyard, but I did find a really nice trunk lid and got it for a steal (I think $25 out the door). My trunk lid is very badly rusting and i will need a new one some day, and I couldnt pass this one up. It'll need a repaint, but the bumper needs a repaint as well so I will just do them at the same time.
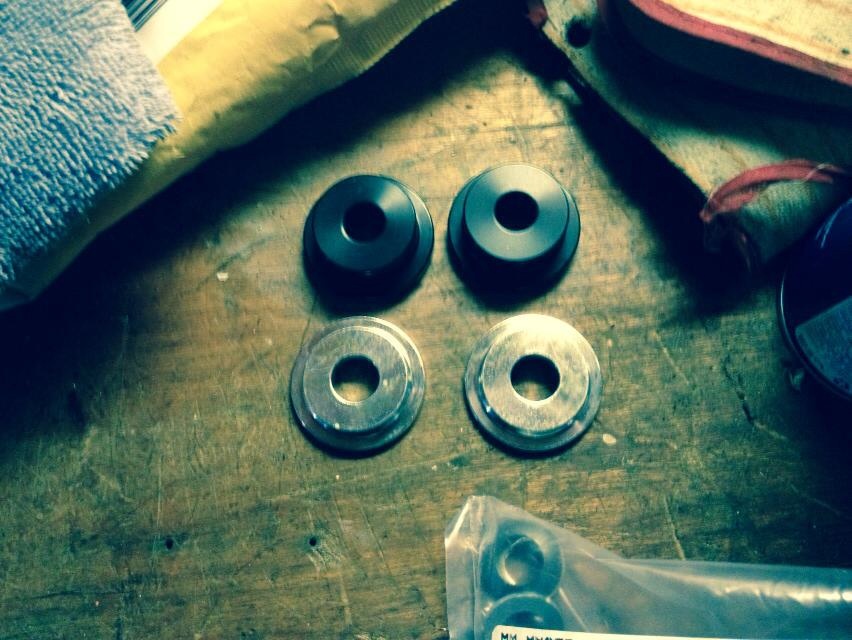
I also purchased some Maximum Motorsports solid steering rack bushings. I haven't installed them yet but they will go on the car eventually once I get everything running right again:
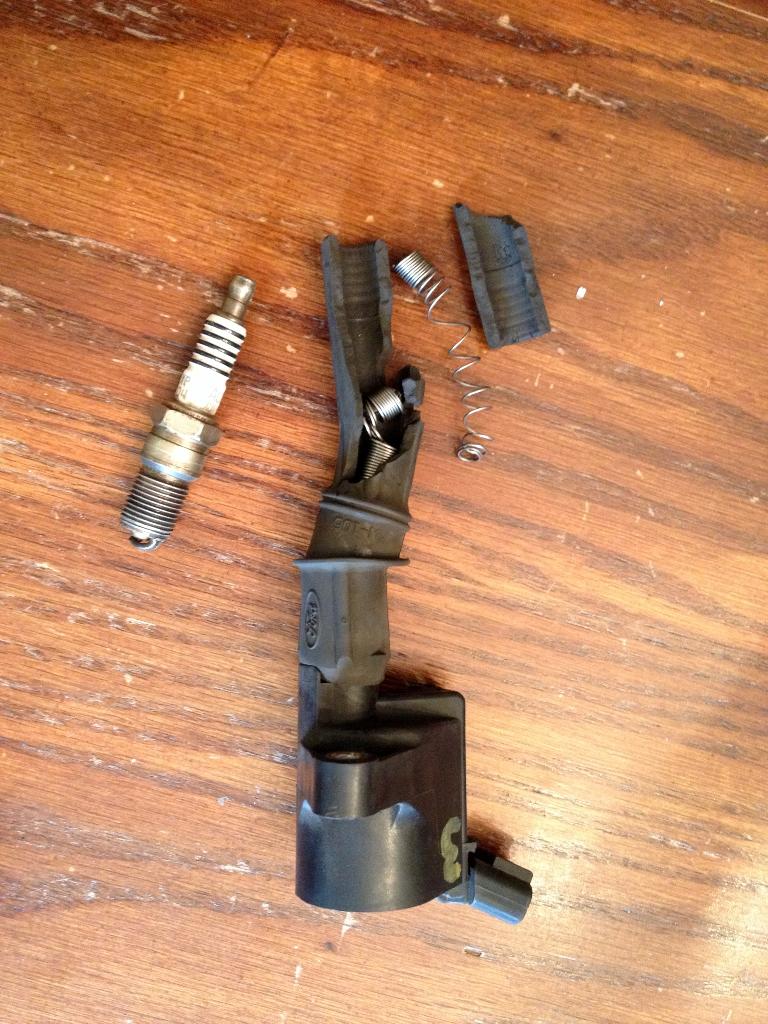
Alright so now for the bad. I already posted it up in this thread but around mid-fall, I blew a spark plug out of cylinder 3. The car sat for a month while I decided what I wanted to do. Here's the damage to the plug and coil.
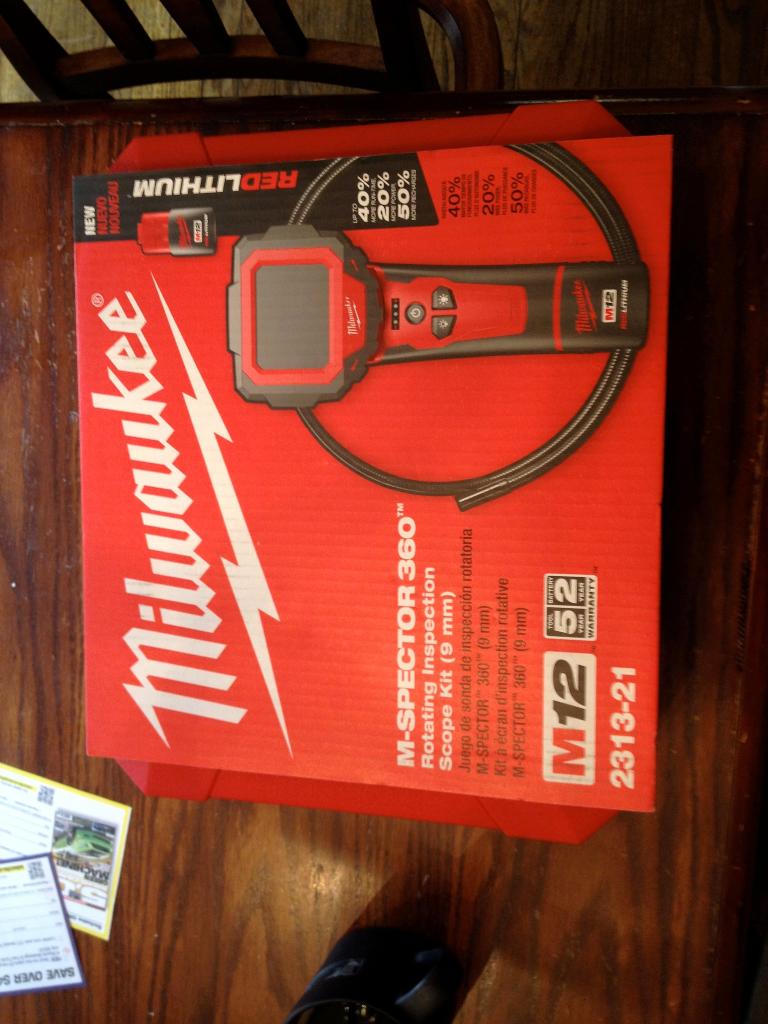
I checked the inside of the cylinder with a borescope to see if there was any damage. The cylinder walls seemed to be okay and I didn't see any loose chunks of metal or anything in the cylinder.
I was originally going to purchase a Time-Sert kit and repair the head myself, however the tool alone costs around $400. My dad knows a reliable machinist (same one who drilled and tapped my new engine's intake crossover for the swap to work) that already had the Time-Sert kit. He offered to do the job for around $200 which I couldnt pass up.
Taking the car to the shop to get ressurected :')
I finally got the car back after a couple weeks (the machinist didnt have time to work on my car for a couple weeks). The car ran okay, but it seems like it hasnt ran the same ever since. At low RPMs, it makes a humming/groaning type noise. It seems more prominant from standstill in 1st gear, but will still do it in 2nd.
Also occasionally when I start the car, it knocks REALLY loudly. Usually just three or four knocks and it stops, so the first few detonations are making it knock for some reason. I am hoping it is an isue with timing or electrical and not something worse.
Im still trying to figure out the issue at this moment.
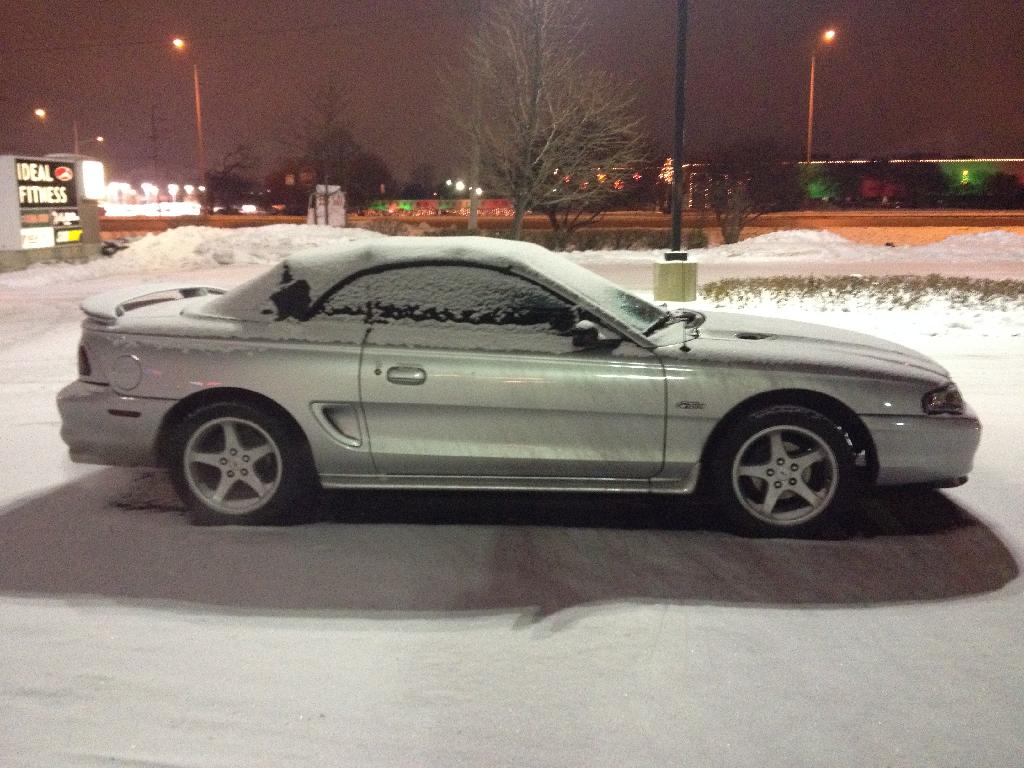
Winter 2013/2014
As of now, the car is for the most part garaged for the winter. I've been keeping her inside on wet/snowy days and have only driven it once or twice when it was dry.
She did get snowed on once, but I got her inside before they salted anything!
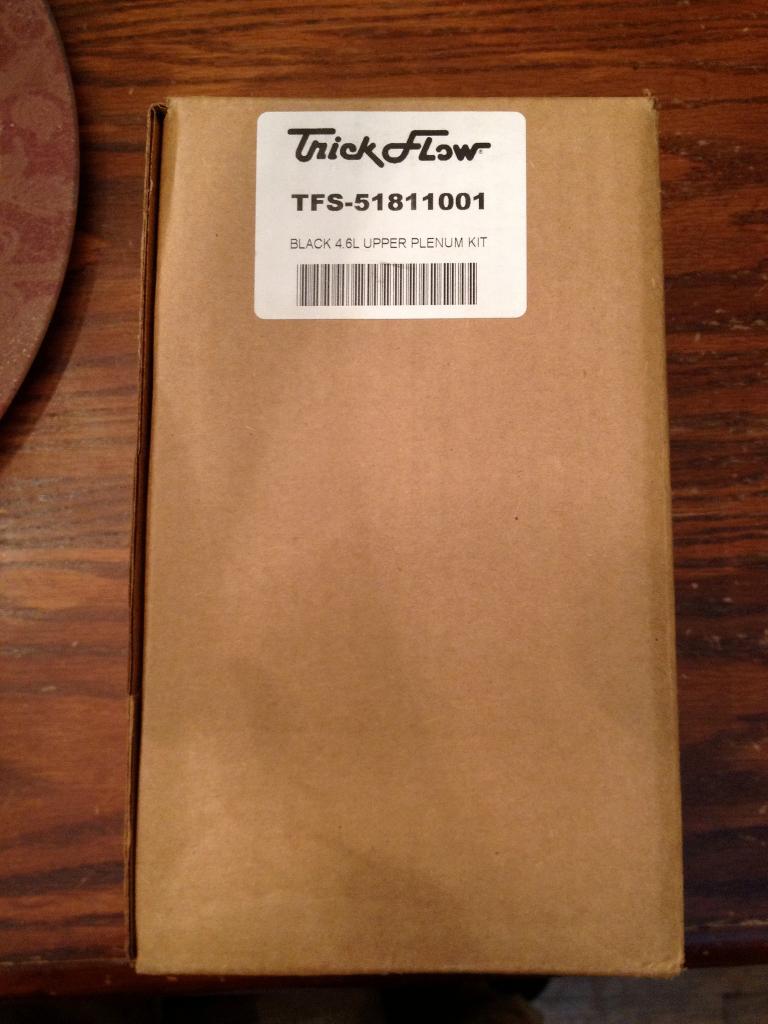
Around Christmas time, the mod bug was biting me. I asked for a trickflow plenum for Christmas and bought myself some 24lb-hr Ford Racing injectors.
And I got the plenum too!
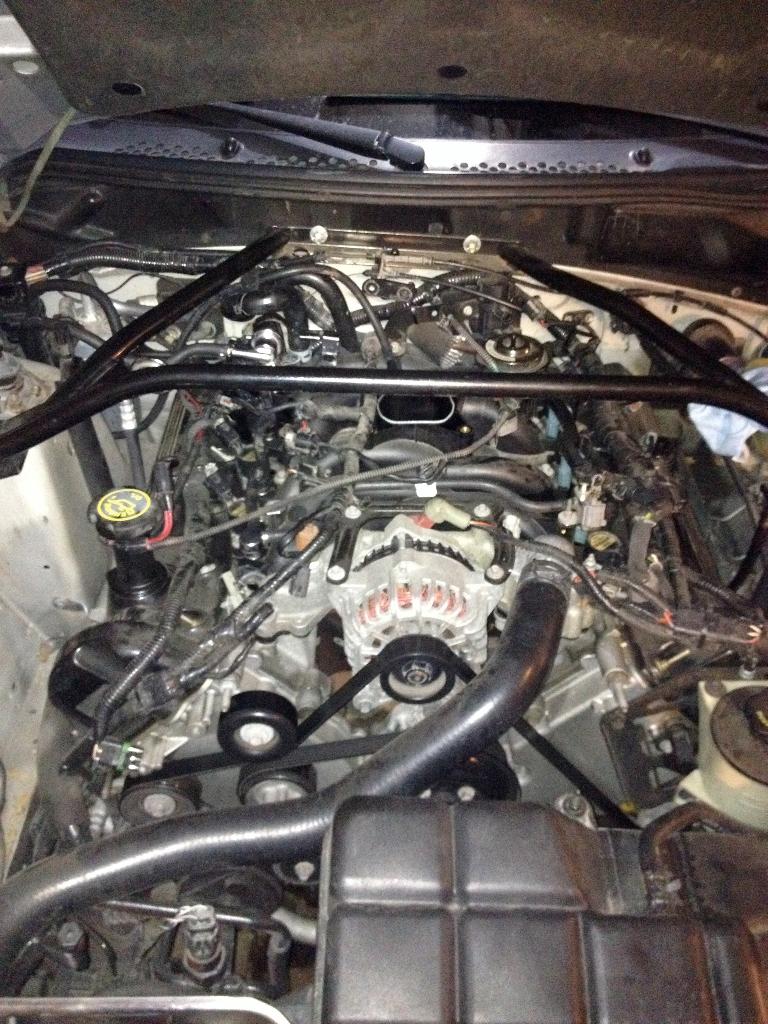
Installing everything was a breeze, really simple overall. I managed to install the injectors without removing the fuel rail because I left my fuel/AC line disconnector tools at my dad's shops. I also did a quick "port and polish" job on the plenum just to smooth it out inside, but I seriously doubt it made any difference. Just peace of mind for my sake.
Progress shot on the install:
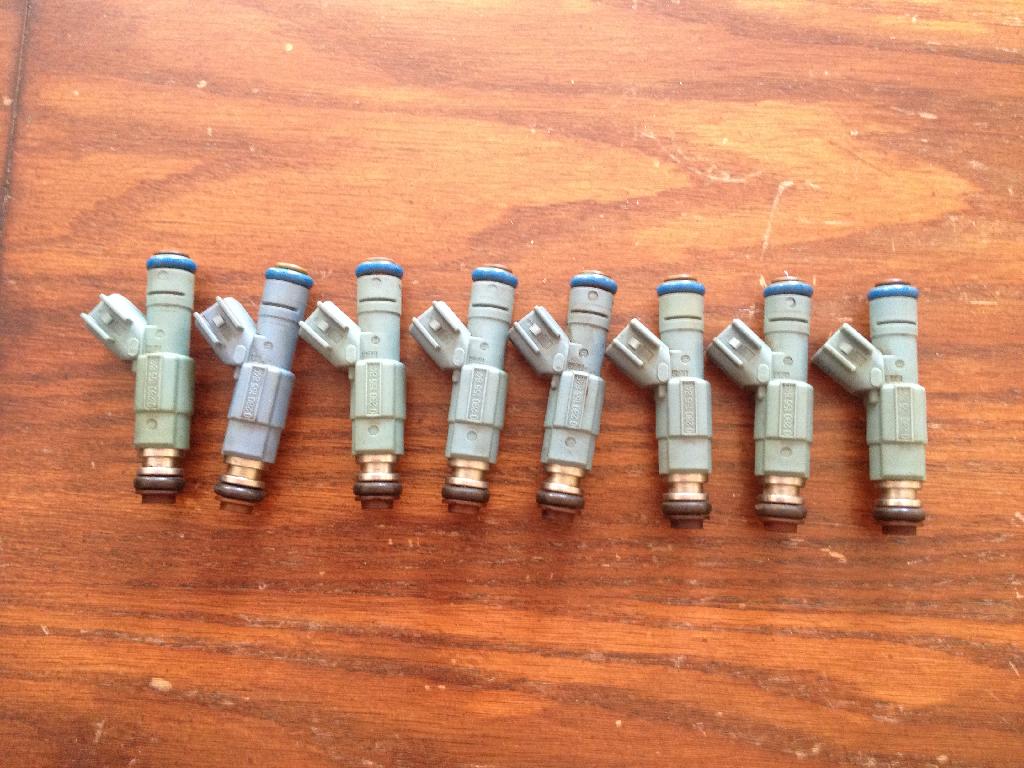
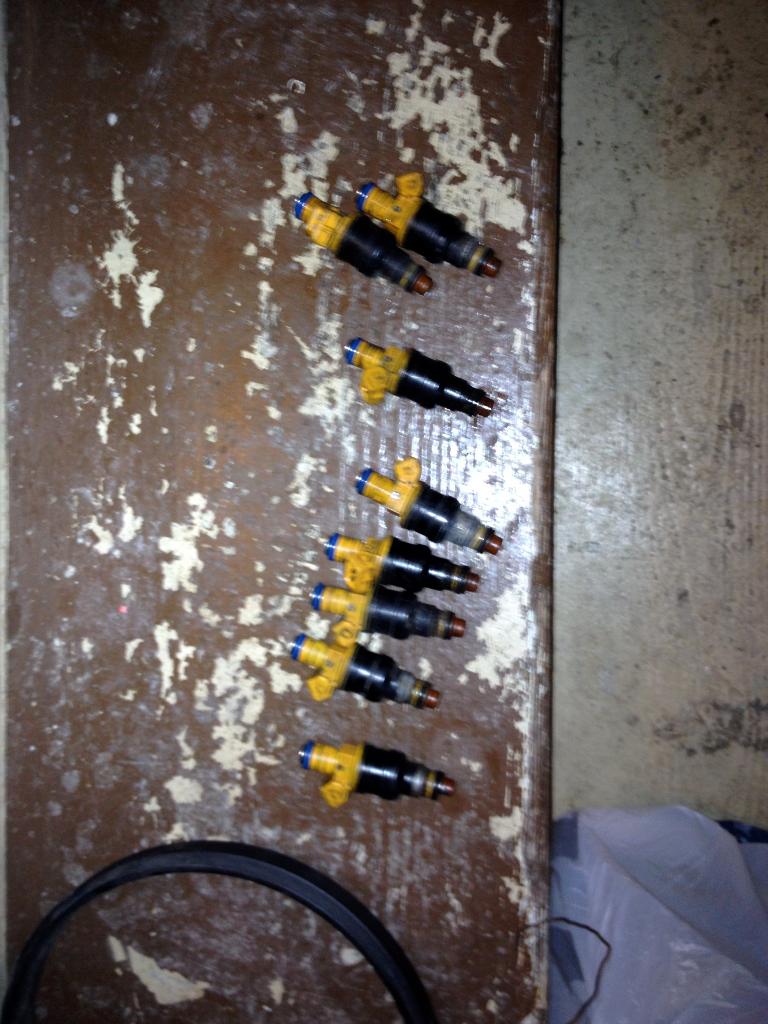
Here's the old injectors too, stock 19lbers
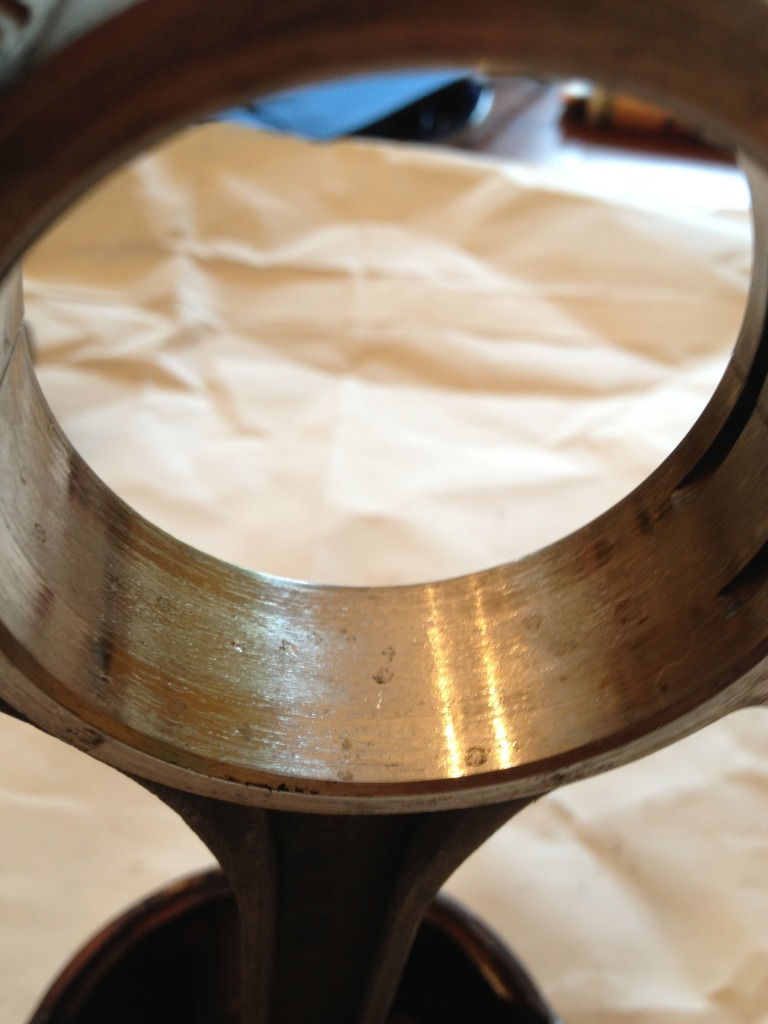
And the plenum installed, she's beautiful! Alot better than the old dented up stock one. I opted for the black coated one just to be different. Im not a fan of flashy chrome everywhere in the engine bay.
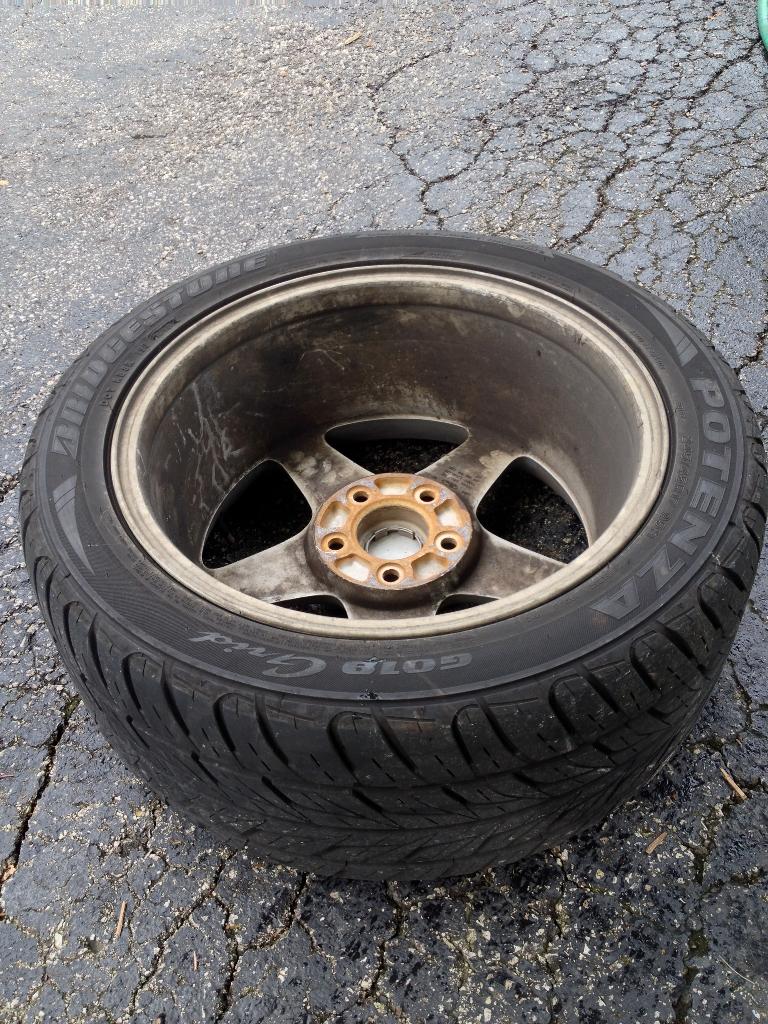
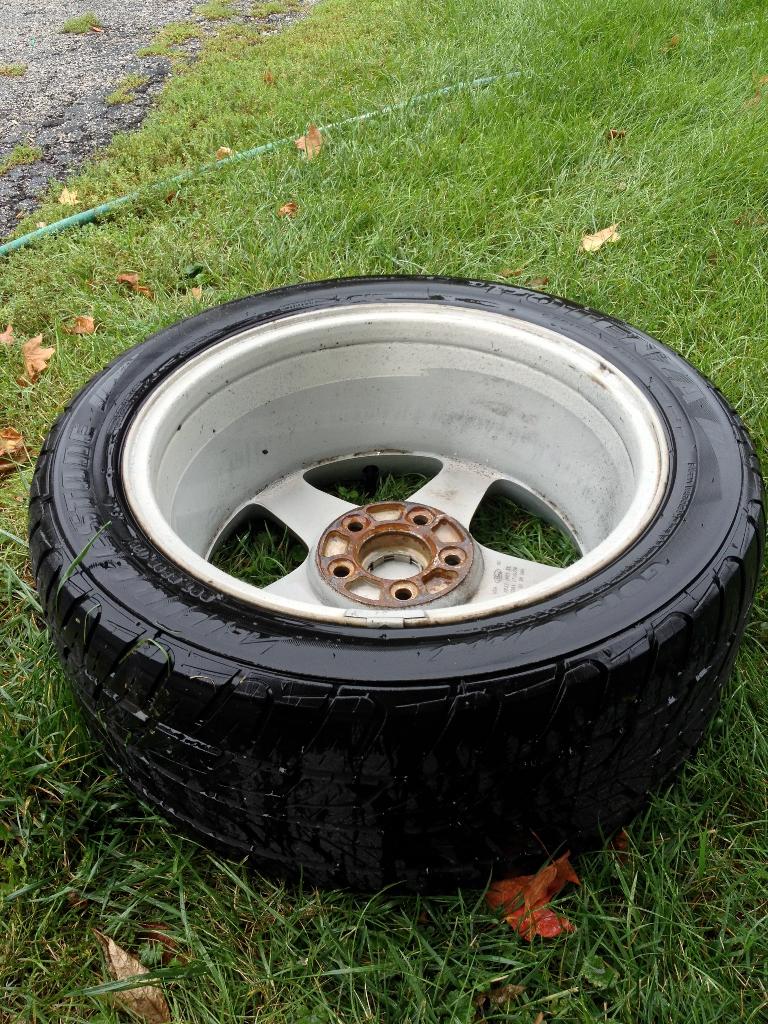
And that sums everything up for the winter so far. Today I am about to go pick up a set of extra wheels that have Blizzaks on them for the rest of the winter, if I do decide to take the car out of the garage.
I plan to get a couple of videos of the noises the car makes as I described at the end of the Fall 2013 section. I will post them up as soon as I get them.
As usual, thanks a lot for reading and I hope you enjoyed!


Alright so one of the first things that happened was I broke my driver's side mirror:

I decided to replace both side view mirrors because I'd rather keep them the same and have them replaced at the same time. I also attempted to replace my rear brake pads and rotors (more details on that in a moment)

So with the rear rotors, I have Eibach 25mm spacers on the rear of the car. Unfortunately when I was swapping the differential, I got a little trigger happy with their impact gun. It was an impact made for working on big diesel trucks and Im used to the little one I have at home.
But long story short, I hammered the lugs on waaaay too hard with the impact. The rear spacers are now stuck on, as I could not get a single one off. I actually broke a socket trying to do so. You can kind of see the now-stripped lugs on the spacers.
So the rotors did not get replaced but the pads did.

While I had the car in the air with all the wheels off, I cleaned out and waxed the inside of the rims. I will probably repeat this every summer from now on.
Before:

After:

On a side note, I just want to show how much of a difference the subframe connectors make on these convertibles. I had my car jacked up by the rear passanger side jack point and the whole car was lifted and almost perfectly straight....before the whole car would be twisted and mangled.

Next, I did probably the BEST mod I have ever done. I bought the cup holders off of a 99-01 mustang, painted them to match my car, and installed them. The 99-01 cup holders are wider and deeper than the stock 98 cupholders. Now I can actually bring a drink into my car almost...

One weekend my girlfriend and I decided to run to the junkyard, I needed to find a steering rack. My steering has been really messed up, the car seems to drift around by itself and it likes to wander with divots in the road. It's for sure not the balljoints since they are brand new, so I am left to believe it's either the rack or the bushings.
I didn't find a steering rack at the junkyard, but I did find a really nice trunk lid and got it for a steal (I think $25 out the door). My trunk lid is very badly rusting and i will need a new one some day, and I couldnt pass this one up. It'll need a repaint, but the bumper needs a repaint as well so I will just do them at the same time.

I also purchased some Maximum Motorsports solid steering rack bushings. I haven't installed them yet but they will go on the car eventually once I get everything running right again:

Alright so now for the bad. I already posted it up in this thread but around mid-fall, I blew a spark plug out of cylinder 3. The car sat for a month while I decided what I wanted to do. Here's the damage to the plug and coil.

I checked the inside of the cylinder with a borescope to see if there was any damage. The cylinder walls seemed to be okay and I didn't see any loose chunks of metal or anything in the cylinder.

I was originally going to purchase a Time-Sert kit and repair the head myself, however the tool alone costs around $400. My dad knows a reliable machinist (same one who drilled and tapped my new engine's intake crossover for the swap to work) that already had the Time-Sert kit. He offered to do the job for around $200 which I couldnt pass up.
Taking the car to the shop to get ressurected :')

I finally got the car back after a couple weeks (the machinist didnt have time to work on my car for a couple weeks). The car ran okay, but it seems like it hasnt ran the same ever since. At low RPMs, it makes a humming/groaning type noise. It seems more prominant from standstill in 1st gear, but will still do it in 2nd.
Also occasionally when I start the car, it knocks REALLY loudly. Usually just three or four knocks and it stops, so the first few detonations are making it knock for some reason. I am hoping it is an isue with timing or electrical and not something worse.
Im still trying to figure out the issue at this moment.
Winter 2013/2014

As of now, the car is for the most part garaged for the winter. I've been keeping her inside on wet/snowy days and have only driven it once or twice when it was dry.
She did get snowed on once, but I got her inside before they salted anything!

Around Christmas time, the mod bug was biting me. I asked for a trickflow plenum for Christmas and bought myself some 24lb-hr Ford Racing injectors.

And I got the plenum too!

Installing everything was a breeze, really simple overall. I managed to install the injectors without removing the fuel rail because I left my fuel/AC line disconnector tools at my dad's shops. I also did a quick "port and polish" job on the plenum just to smooth it out inside, but I seriously doubt it made any difference. Just peace of mind for my sake.
Progress shot on the install:

Here's the old injectors too, stock 19lbers

And the plenum installed, she's beautiful! Alot better than the old dented up stock one. I opted for the black coated one just to be different. Im not a fan of flashy chrome everywhere in the engine bay.

And that sums everything up for the winter so far. Today I am about to go pick up a set of extra wheels that have Blizzaks on them for the rest of the winter, if I do decide to take the car out of the garage.
I plan to get a couple of videos of the noises the car makes as I described at the end of the Fall 2013 section. I will post them up as soon as I get them.
As usual, thanks a lot for reading and I hope you enjoyed!
02-05-2014, 11:24 PM
#19
2nd Gear Member
Thread Starter
Join Date: Aug 2010
Location: IL
Posts: 173
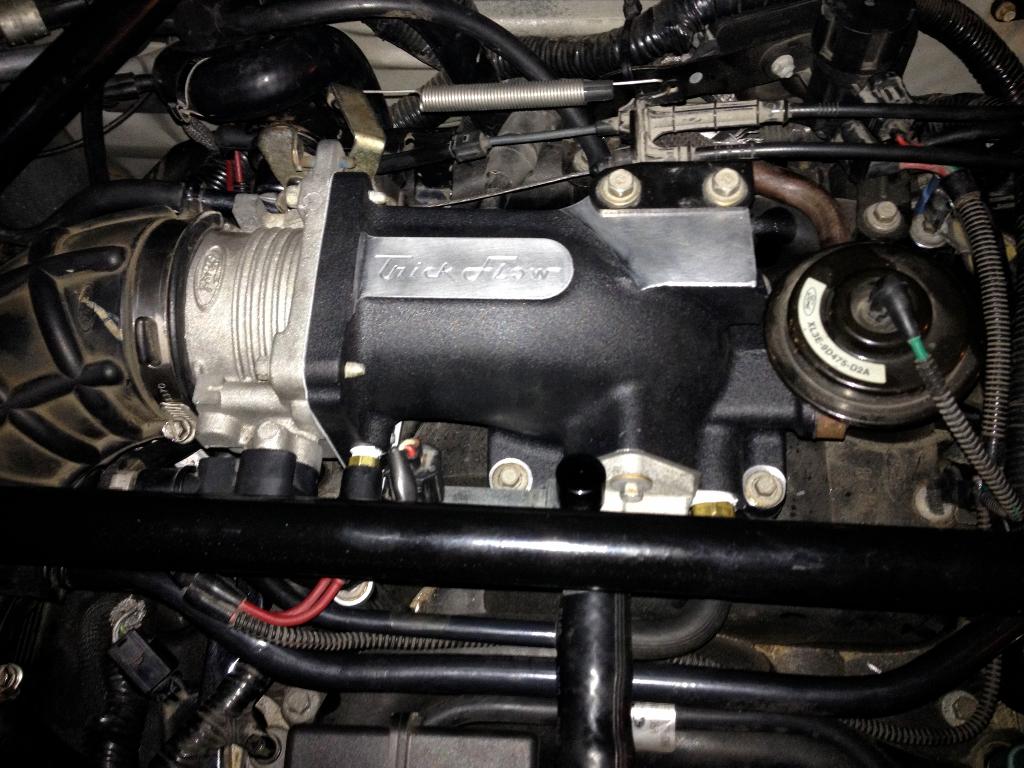
Today I noticed something that really bothered me about the Trickflow plenum. It has this really cool Trickflow logo etched into the top of the plenum, but its the same unfinished aluminum as the surrounding area. This makes it very hard to read from far away...far away being right in front of the car lol.
So today I found some high heat barbecue spray paint (matte black), and decided to fix it!
Pretty simple to do, clean the are with soapy water, and wash off the soap with water. Dry it, mask it off, and make a couple passes making sure to fill in the lettering most importantly. The barbecue paint is meant for bare metal and no primer is needed.
Let it dry, then remove the masking tape. now get some fine grit sand paper, and sand the top of the plenum. Obviously all the paint except for the paint in the indented lettering will be removed from sanding, giving a final product that looks like this:
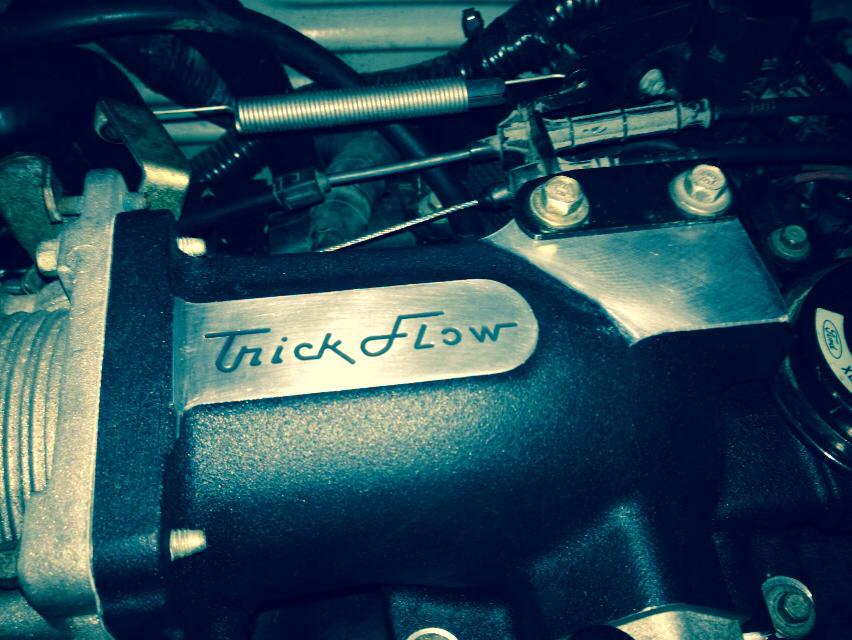
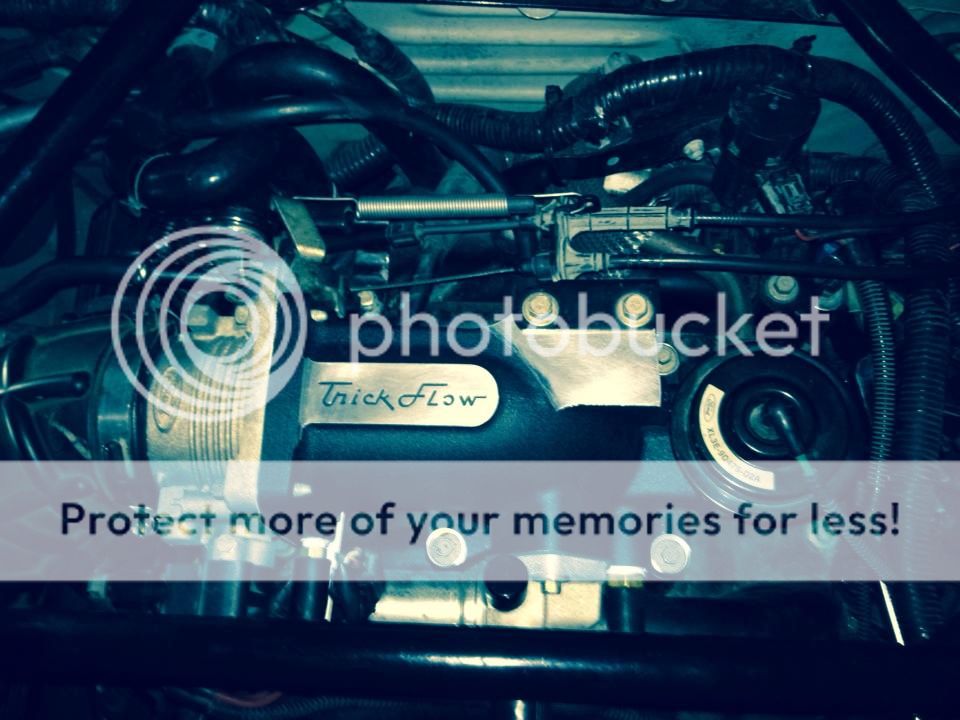
I apologize the pictures aren't the best quality. It was pretty hard to get a clear picture in the dark. But yeah took literally 10 minutes to do not including the drying times. For some reason the black lettering makes all the difference for me...way better now.


Thread
Thread Starter
Forum
Replies
Last Post
92 5.0stang
5.0L (1979-1995) Mustang
4
08-13-2015 06:46 AM
Milan Dragway
Members Rides and Car Show Section
0
08-12-2015 03:43 PM