
PVC question


Thread Starter
Joined: Feb 2015
Posts: 5
From: AZ
I am new here and the proud new owner of a 2007 Shelby GT, with a Kenne Bell 26L supercharger, Granatelli pro series coil packs, running at 9-10 lbs boost. It has 18200 miles currently.
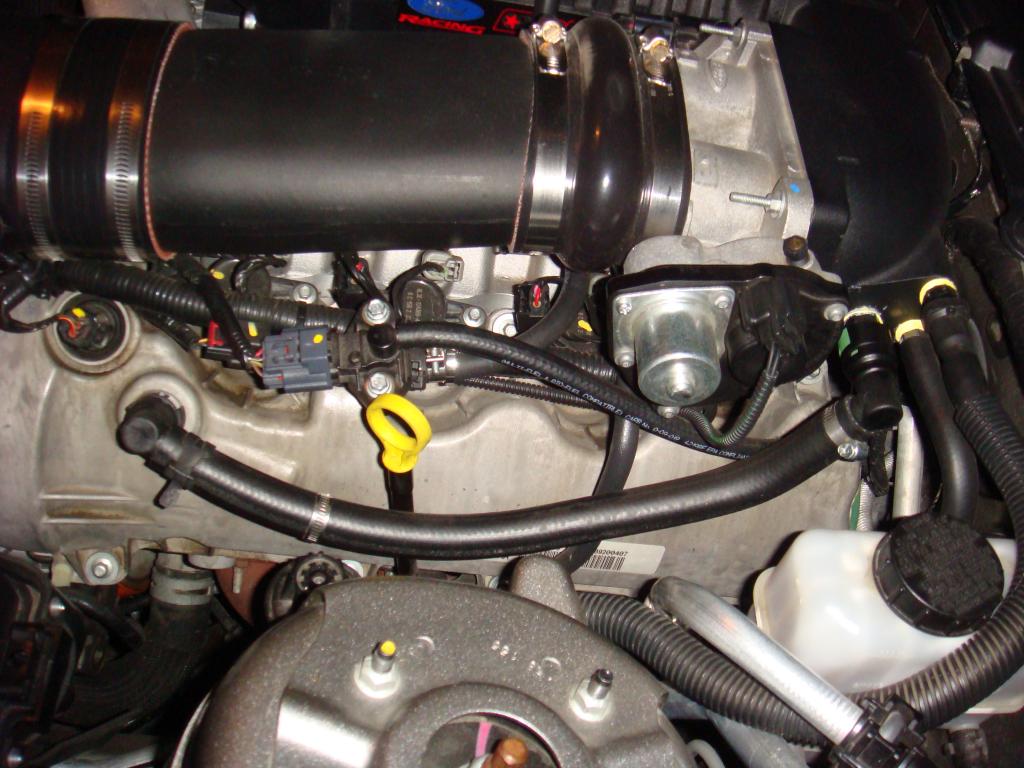
My question... The PVC valve was gone and in it's place, The hose from the valve cover was connected to a air oil separator, like used on and air compressor. It then was plumbed into another small fluid type catch container that was also connected to the dip stick tube. They had brazed into the dip stick tube with a connection for the rubber hose. Then the whole thing was routed to the throttle body or manifold at the normal connection point.
This seemed all wrong to me and did not look like a very professional installation.
I removed all of it and replaced it with a new rubber hose with inline PVC valve, and connected it to the Throttle body or intake manifold. And plugged off the connection at the dip stick tube.
Has anyone seen this type of system before? and did I remove something that is required?
So far I have put about 250 miles on the car and it seems to run great.
Other than a small surge action at cruise speeds. Seems the throttle is very sensitive.
Anybody have any input on this? Thanks, Dennis
3rd Gear Member
Joined: Jun 2010
Posts: 690
From: RI
These cars have the PCV built into the valve cover, so more than likely it was/is still there anyway. What you saw was a jerry-rigged oil separator system, they should never return the oil and gunk back into the engine. I strongly suggest getting a new good one. These cars have a lot of blow by (especially under boost) and the separator will keep the oil mist out of the intake manifold and keep it from gunking things up and diluting your octane.
(I also highly suggest you procure a set of stock COP's and either replace now or keep them handy. Aftermarket COP's almost always fail at some point)
(I also highly suggest you procure a set of stock COP's and either replace now or keep them handy. Aftermarket COP's almost always fail at some point)
Last edited by jpplaw; Feb 10, 2015 at 08:21 AM.
1st Gear Member
Joined: Mar 2009
Posts: 56
From: Alberta, Canada
Here�s what I did for my catch can.
The following parts were required for the install:
Moroso Catch Can � 85477 (comes with a mounting bracket) $129.00
5/8�� Black Fuel rated Hose (NOT water hose)
NPT to 5/8 Barb Fittings (x2) $6
Stock PCV Tube $14
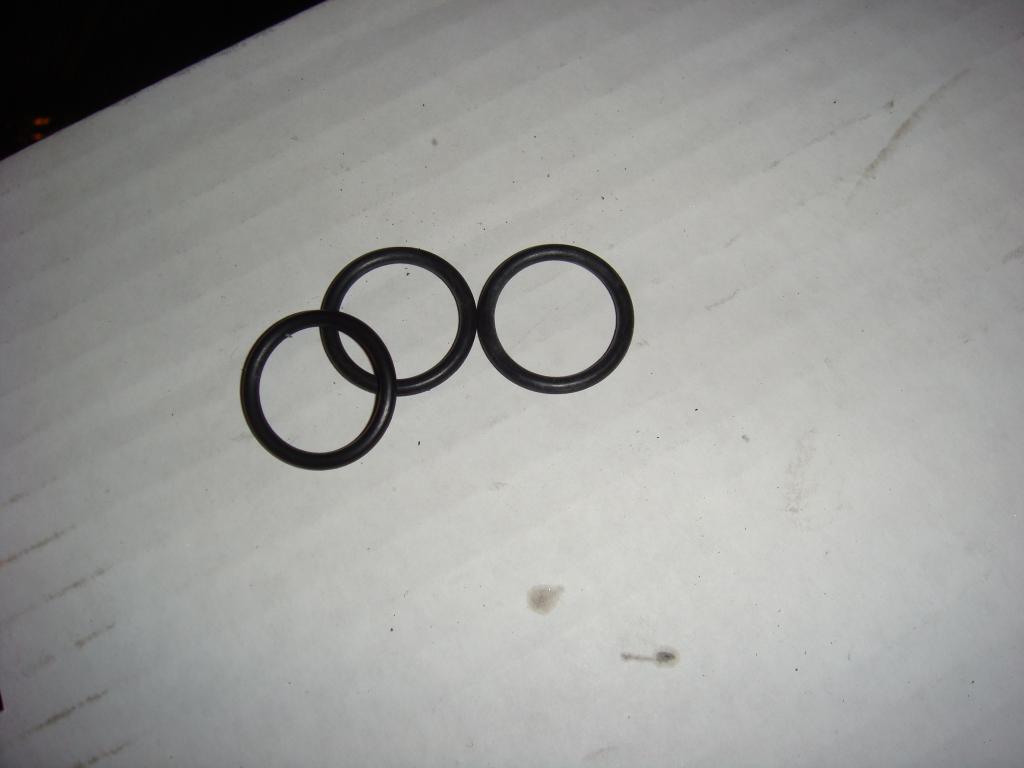
15/16 Corbin style hose clamps (4 required)
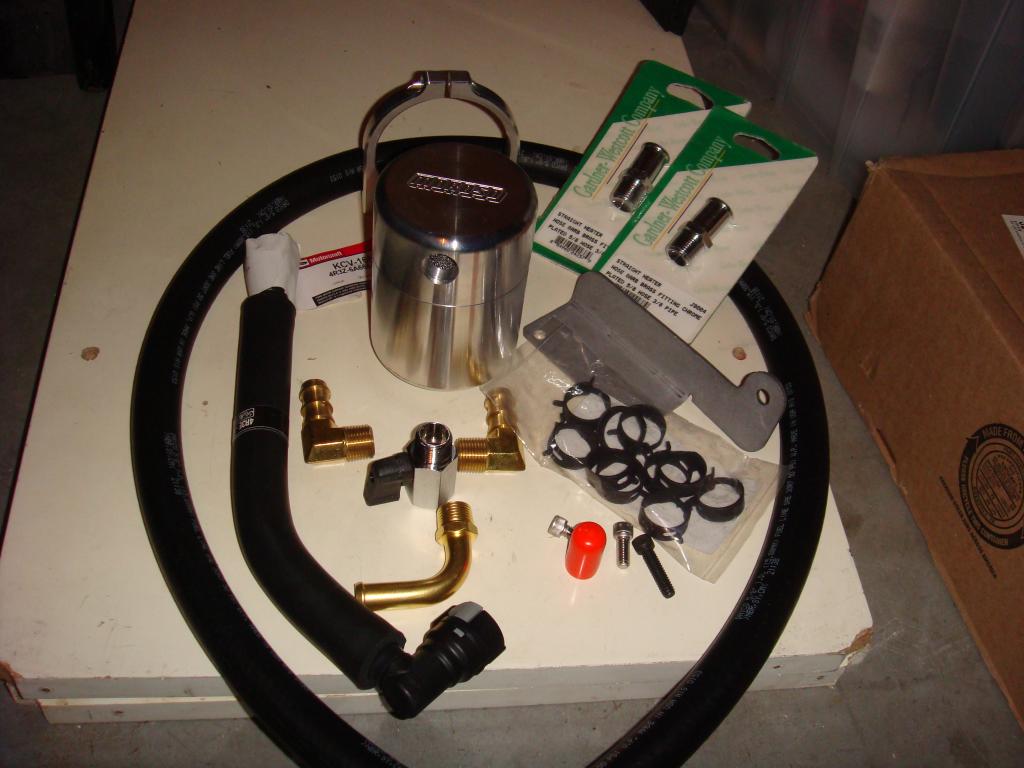
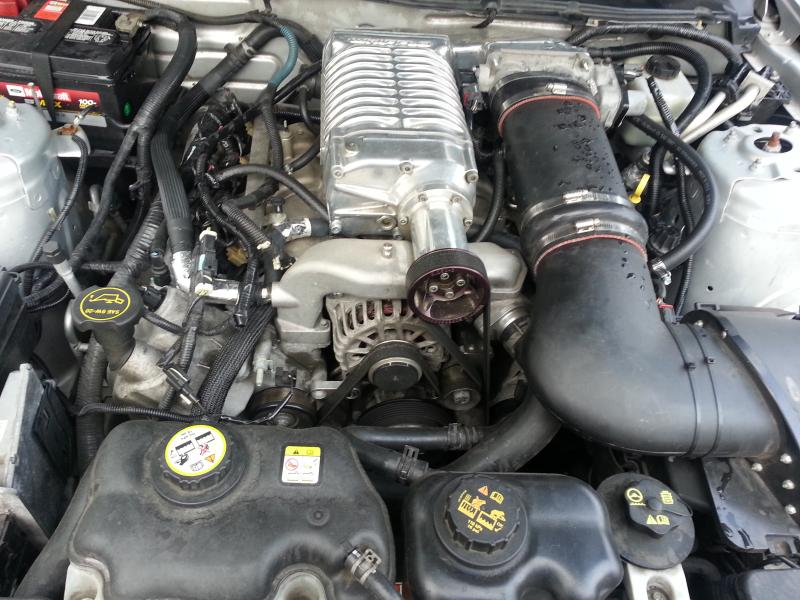
I choose the Moroso catch can because it came with a metal mounting bracket designed specifically for 05-09 Mustangs. The unit has a valve on the bottom that is used to drain any captured oil blow-by. I could have used braided hoses and colourful hose fittings but I wanted to keep the OEM look under the hood.
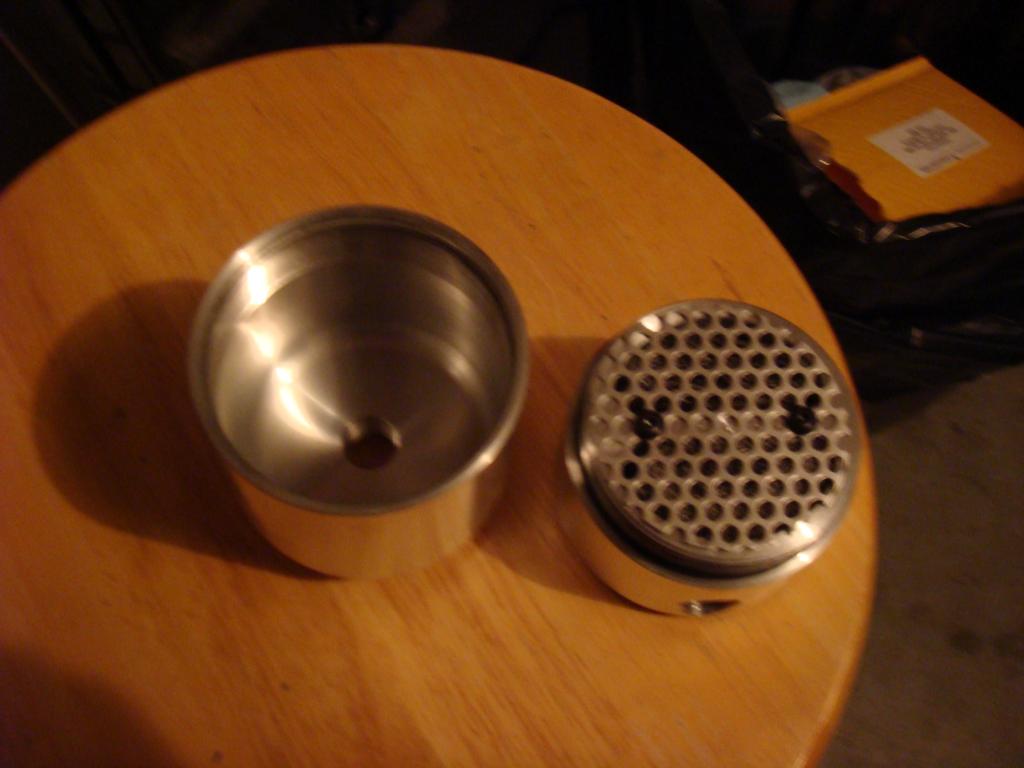
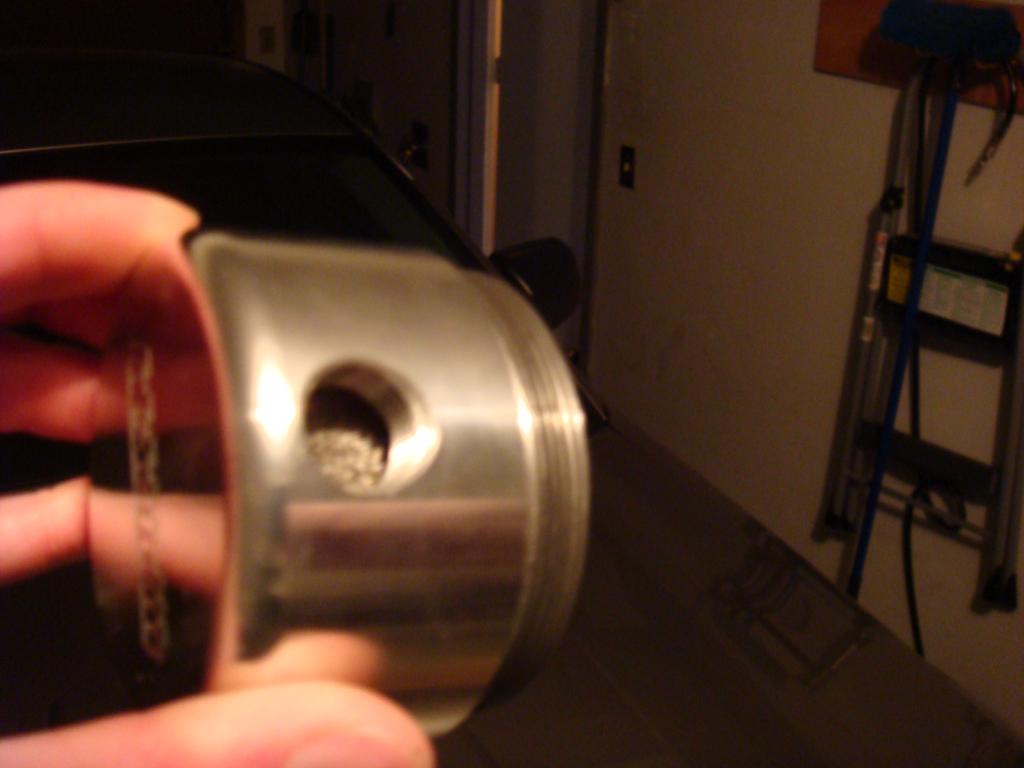
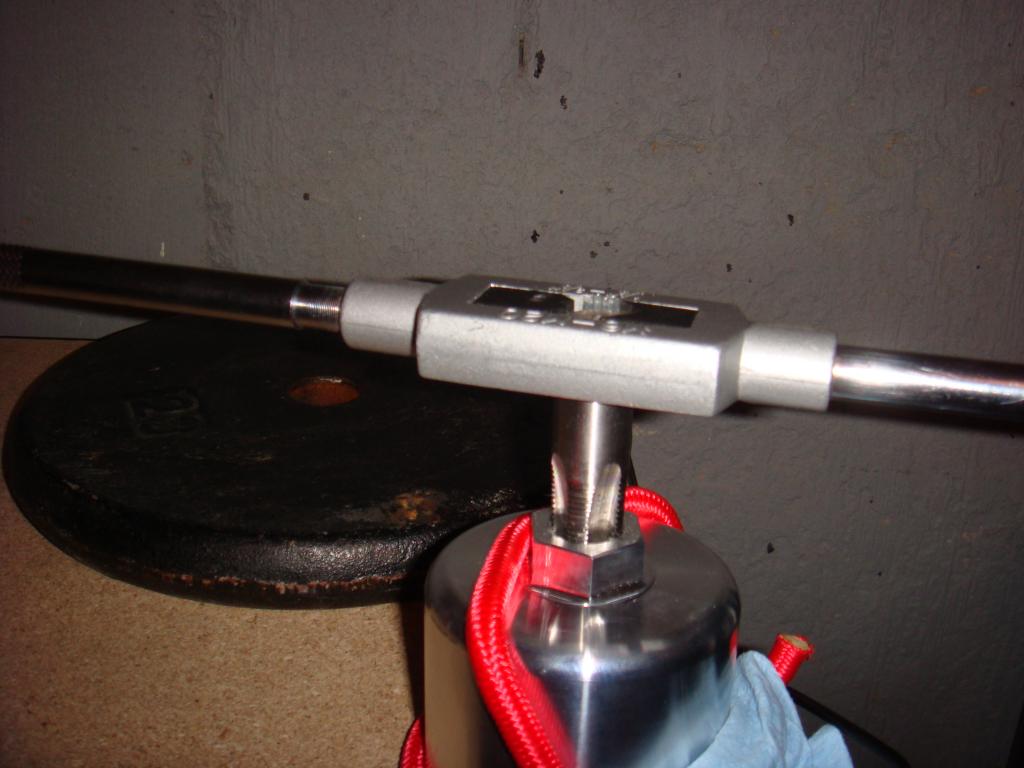
The threads on the catch can were very tight, preventing me from getting the barb fitting adapters threaded very far into the can. So I decided to loosen up the threads on the can using a 3/8-18 NPT pipe tap (previously used to tap a hole in my intake manifold for an IAT sensor relocation project).
I still wasn�t able to get the fittings screwed in far enough for my liking. So I purchased some black rubber o-rings to cover the exposed threads. I coated them with silicon lube to prevent them from drying out or cracking down the road.
Here�s the unit all assembled. I made sure to apply Teflon sealant to all the pipe threads.

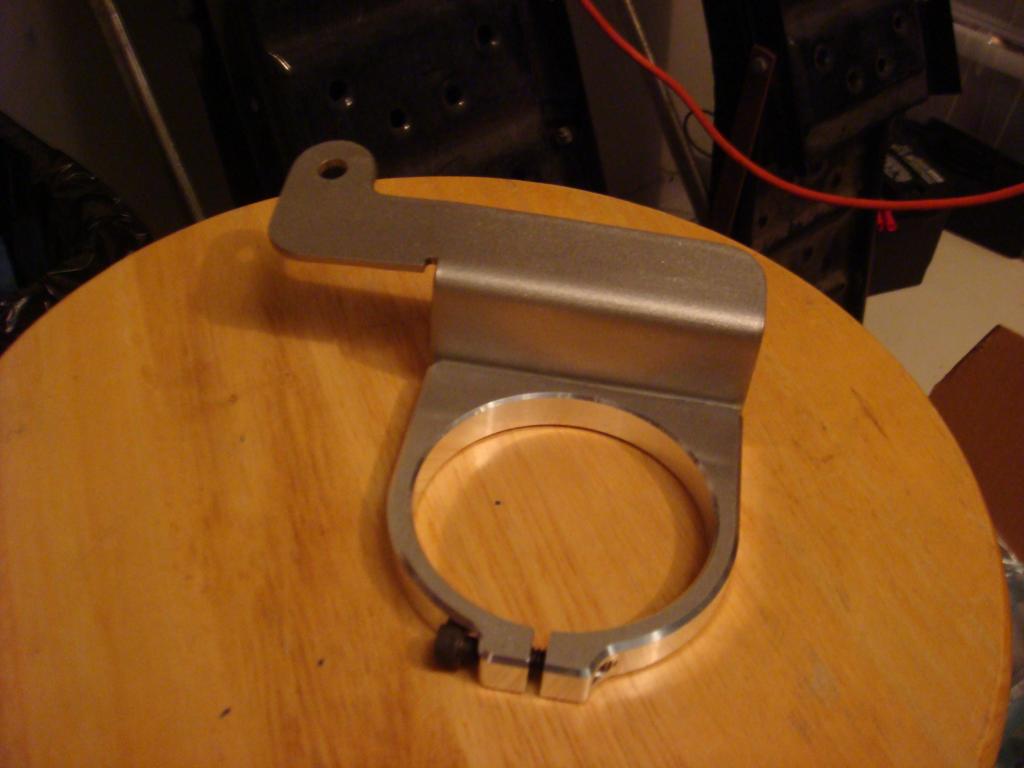
The metal bracket that came with catch can was made of bare unpainted steel and would�ve been a major eye sore. So I painted the bracket with some stainless steel coloured metal paint; that just so happened to match the exterior paint under the hood.
The catch can bracket assembled
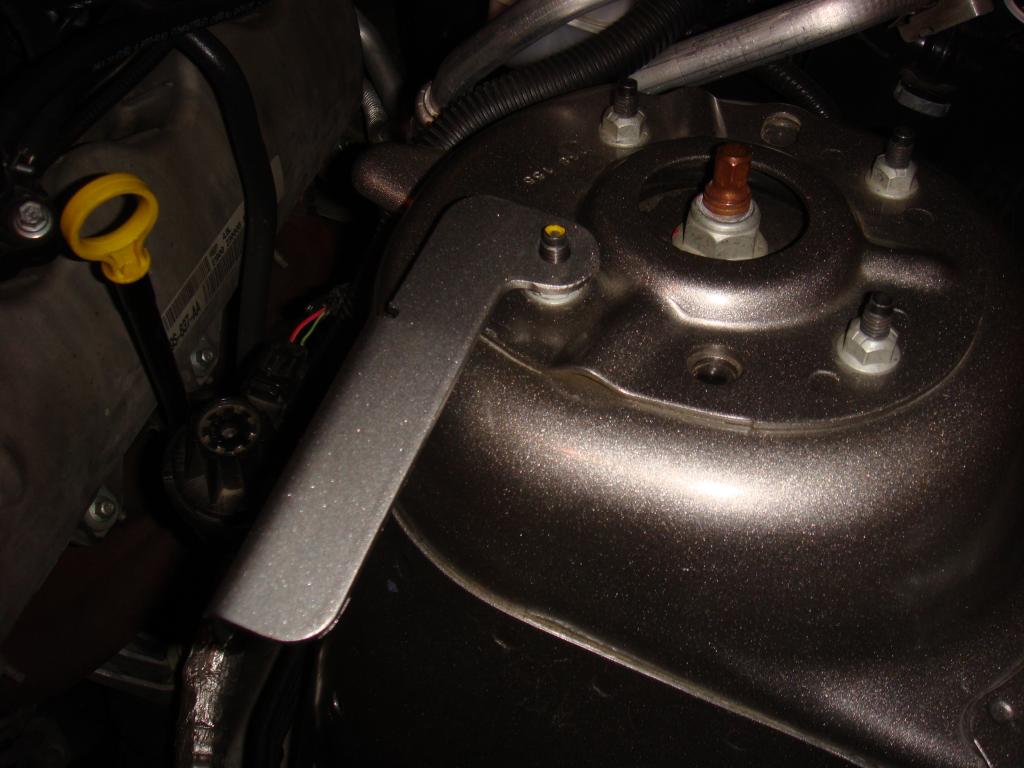
I then attached the bracket to one of the strut tower bolts and re-torqued the bolt to spec.
Here�s the can mounted to the strut tower
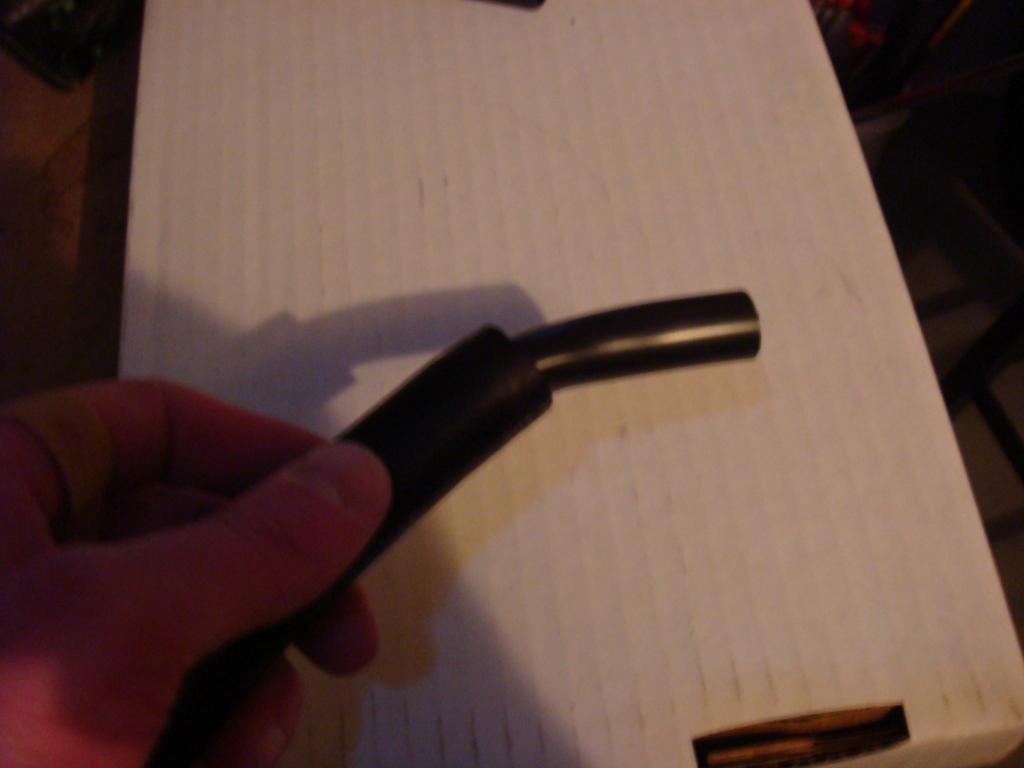
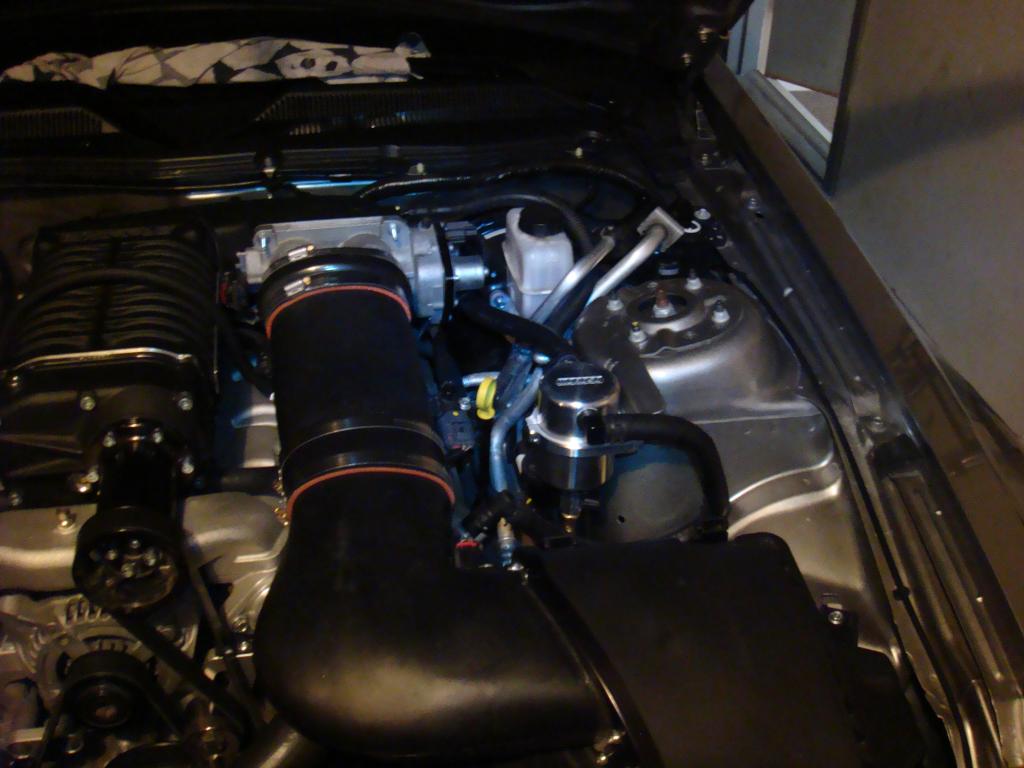
Here�s the modified PCV hose that was added during the supercharger install. The stock PCV hose was much smaller in comparison. The supercharger required a much bigger hose (5/8th) to accommodate for the increased air flow.
And removed
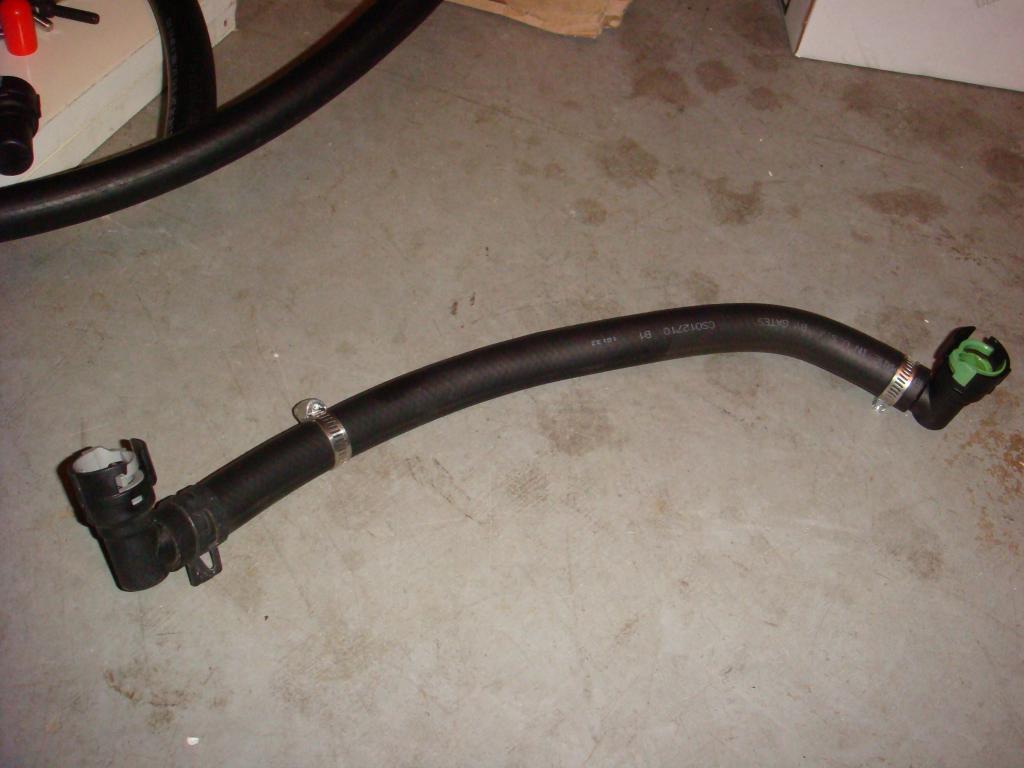
For the hoses I followed the same procedure that I used for the supercharger install. As mentioned the hose diameter was increased to 5/8ths to account for the additional airflow. A black fuel rated hose was used for this purpose. The only issue with using rubber hose is that it can collapse under the heavy vacuum pressure created by the supercharger. The solution was to reinforce the hose with some solid tubing taken from the stock PCV hoses (the same method used in the whipple instructions). The existing reinforced PCV hose would be used to connect one end of the catch can to the intake, but a second hose was required to connect the catch can to the valve cover. So an additional stock PCV was purchased (Motorcraft Part# KVC166) to reinforce the second hose.
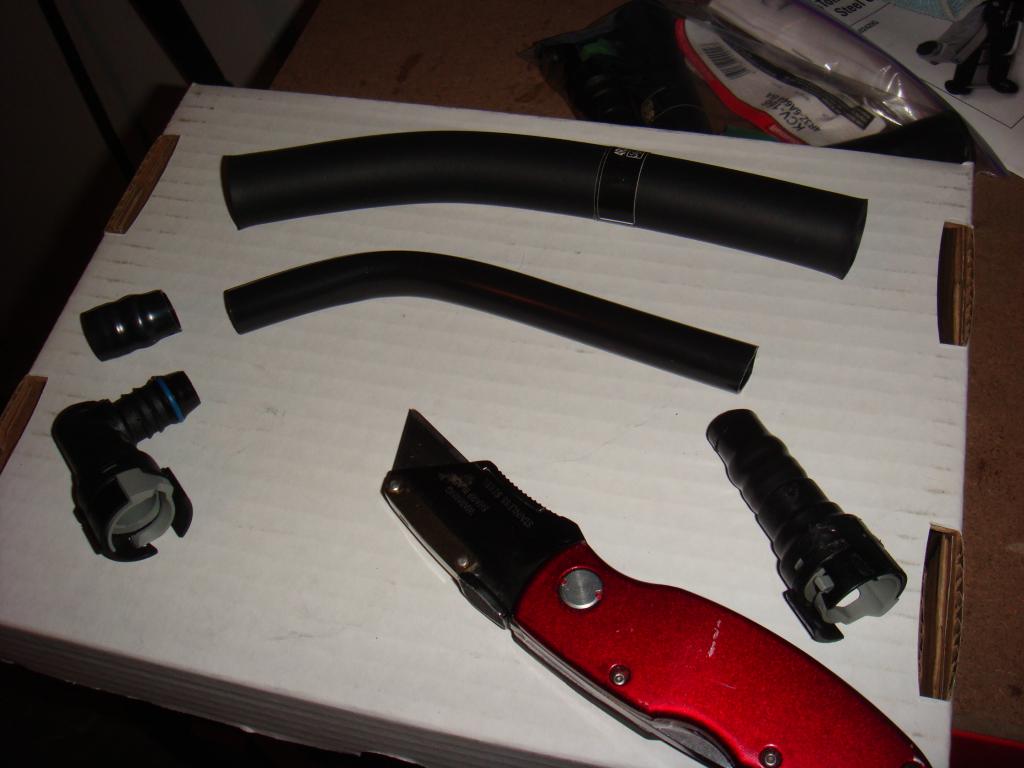
To modify the stock PCV hose I simply cut off the protective sleeve and the quick connect fittings
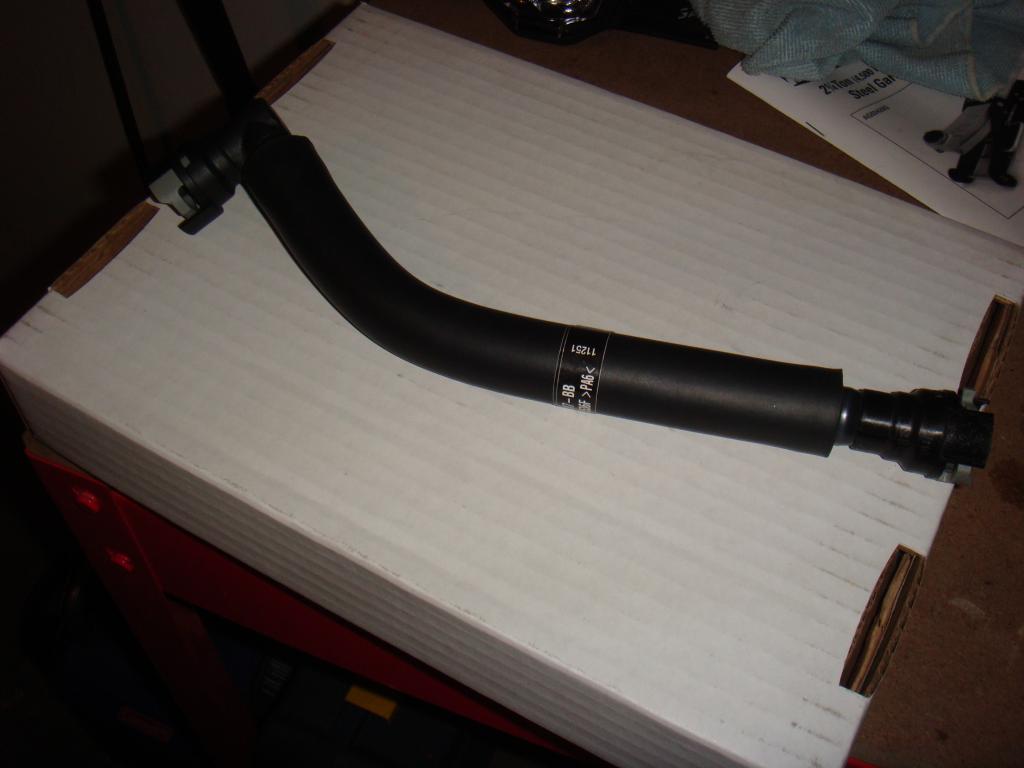
From there I measured out the length of hose required to connect the valve cover to the catch can (approximately 22��). Then I cut the stock PCV tube in two pieces and inserted them into the new 5/8th hose where additional reinforcement was required. The stock PCV tube has a curve in it, so I made sure to position the curved tube where the hose would naturally curve when installed. Inserting the reinforcement tubing into the hose was by far the most difficult part of the install.
As mentioned the existing reinforced PCV hose would be used to connect the catch can to the intake manifold. The hose just needed to be trimmed down a bit (to approximately 11��). From there I just attached the new quick connect fitting that came with the stock PCV tube using a couple 15/16th hose clamps. And that�s it for the hoses.

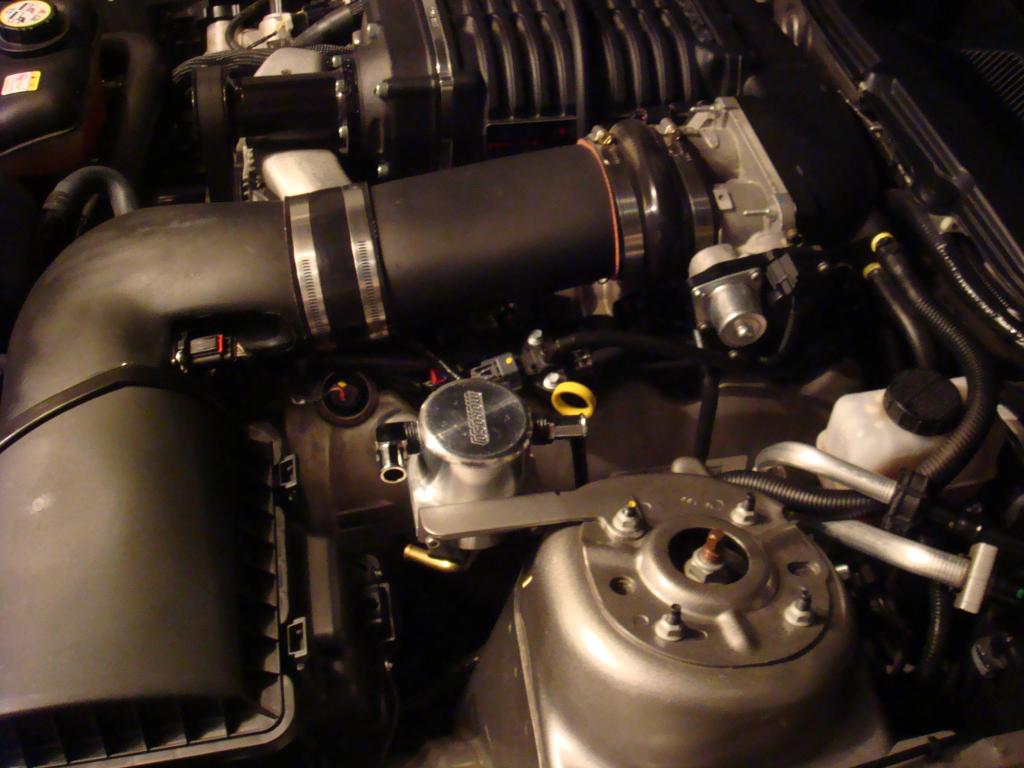
Catch can to Intake (top)
Catch can to Valve cover (bottom)
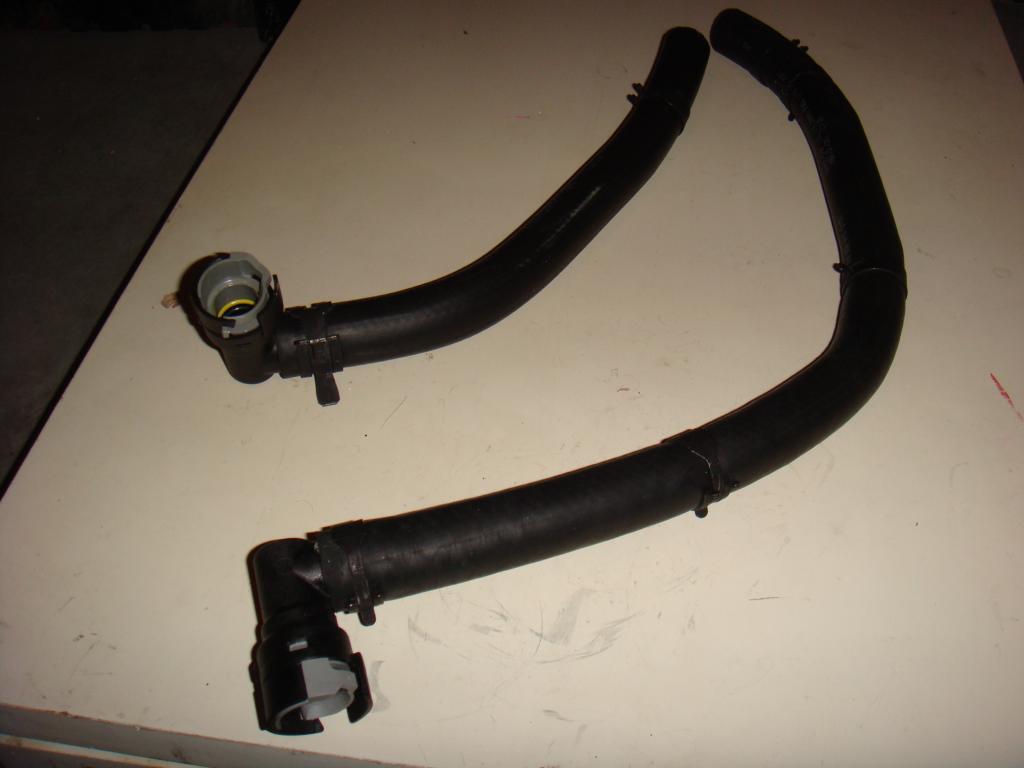
Here�s the original modified PCV hose running from the catch can to the intake manifold
And here�s the new PCV hose running from the catch can to the valve cover. The curved sections of the hose are where the curved PCV tubes were positioned to prevent kinks and to keep the hose from collapsing under heavy vacuum.
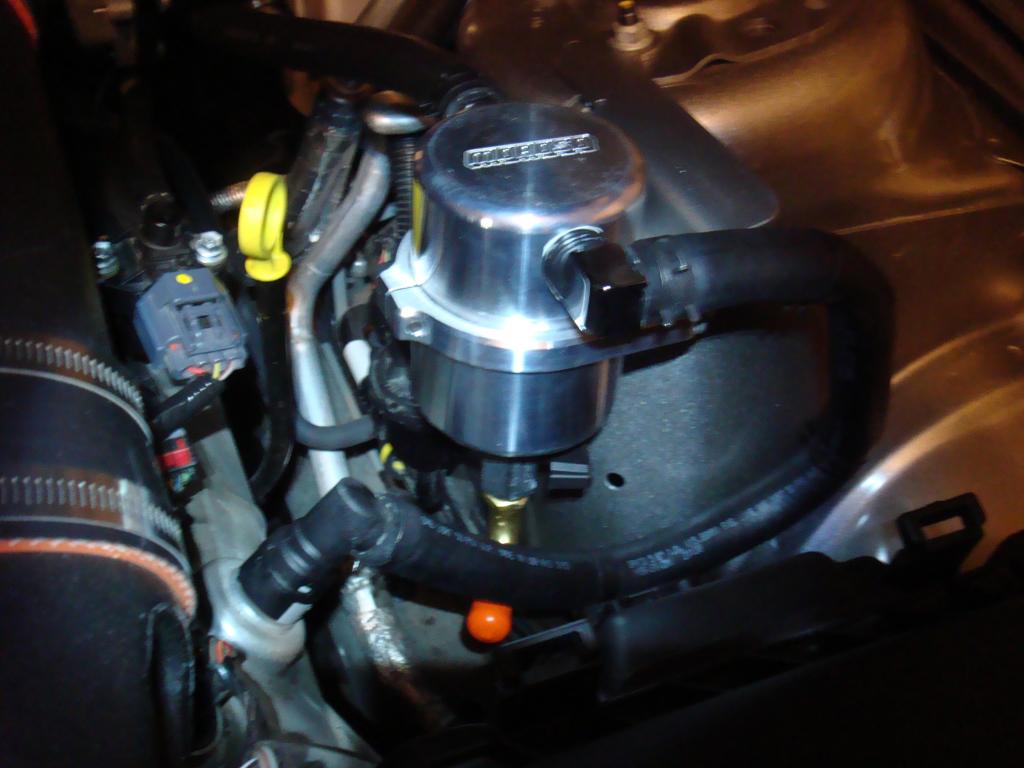
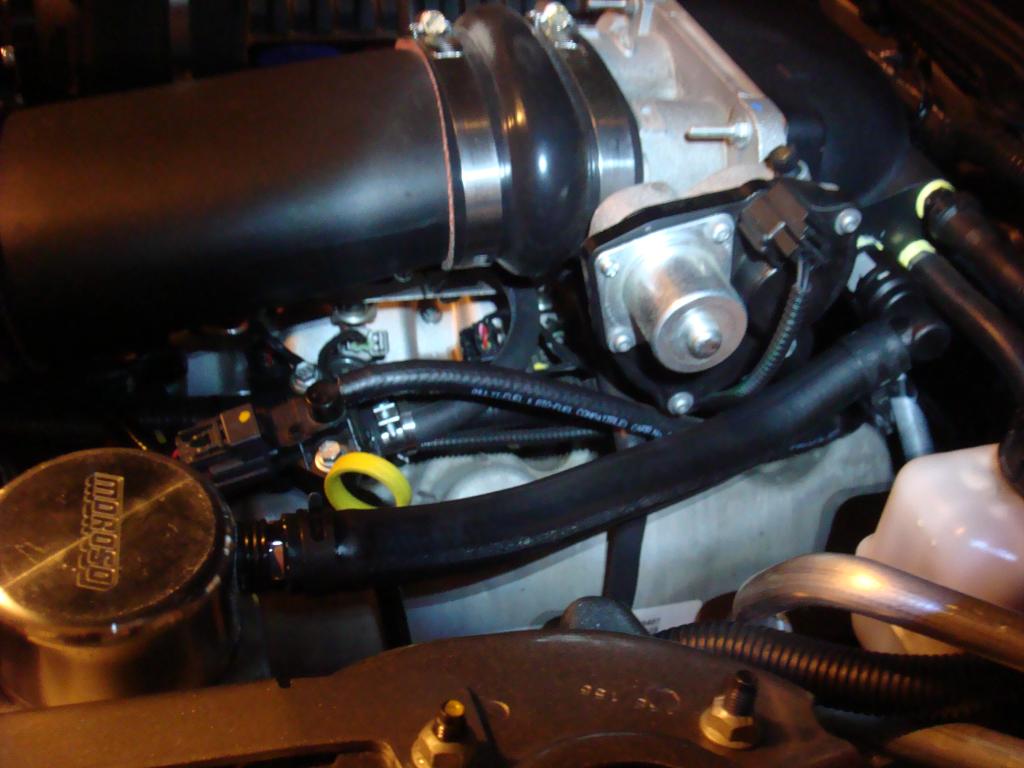
And that�s it. A simple modification that will help keep oil residue from baking onto the intake manifold, the intercooler core and any intake sensors. I drain the can every oil change and get about 1-2 table spoons of oil each time.
Of course the Kenne Bell setup is a little different but the same concept applies. Definitely a good investment if you have a blower.
The following parts were required for the install:
Moroso Catch Can � 85477 (comes with a mounting bracket) $129.00
5/8�� Black Fuel rated Hose (NOT water hose)
NPT to 5/8 Barb Fittings (x2) $6
Stock PCV Tube $14
15/16 Corbin style hose clamps (4 required)

I choose the Moroso catch can because it came with a metal mounting bracket designed specifically for 05-09 Mustangs. The unit has a valve on the bottom that is used to drain any captured oil blow-by. I could have used braided hoses and colourful hose fittings but I wanted to keep the OEM look under the hood.


The threads on the catch can were very tight, preventing me from getting the barb fitting adapters threaded very far into the can. So I decided to loosen up the threads on the can using a 3/8-18 NPT pipe tap (previously used to tap a hole in my intake manifold for an IAT sensor relocation project).

I still wasn�t able to get the fittings screwed in far enough for my liking. So I purchased some black rubber o-rings to cover the exposed threads. I coated them with silicon lube to prevent them from drying out or cracking down the road.

Here�s the unit all assembled. I made sure to apply Teflon sealant to all the pipe threads.

The metal bracket that came with catch can was made of bare unpainted steel and would�ve been a major eye sore. So I painted the bracket with some stainless steel coloured metal paint; that just so happened to match the exterior paint under the hood.

The catch can bracket assembled

I then attached the bracket to one of the strut tower bolts and re-torqued the bolt to spec.
Here�s the can mounted to the strut tower

Here�s the modified PCV hose that was added during the supercharger install. The stock PCV hose was much smaller in comparison. The supercharger required a much bigger hose (5/8th) to accommodate for the increased air flow.

And removed

For the hoses I followed the same procedure that I used for the supercharger install. As mentioned the hose diameter was increased to 5/8ths to account for the additional airflow. A black fuel rated hose was used for this purpose. The only issue with using rubber hose is that it can collapse under the heavy vacuum pressure created by the supercharger. The solution was to reinforce the hose with some solid tubing taken from the stock PCV hoses (the same method used in the whipple instructions). The existing reinforced PCV hose would be used to connect one end of the catch can to the intake, but a second hose was required to connect the catch can to the valve cover. So an additional stock PCV was purchased (Motorcraft Part# KVC166) to reinforce the second hose.

To modify the stock PCV hose I simply cut off the protective sleeve and the quick connect fittings

From there I measured out the length of hose required to connect the valve cover to the catch can (approximately 22��). Then I cut the stock PCV tube in two pieces and inserted them into the new 5/8th hose where additional reinforcement was required. The stock PCV tube has a curve in it, so I made sure to position the curved tube where the hose would naturally curve when installed. Inserting the reinforcement tubing into the hose was by far the most difficult part of the install.
As mentioned the existing reinforced PCV hose would be used to connect the catch can to the intake manifold. The hose just needed to be trimmed down a bit (to approximately 11��). From there I just attached the new quick connect fitting that came with the stock PCV tube using a couple 15/16th hose clamps. And that�s it for the hoses.


Catch can to Intake (top)
Catch can to Valve cover (bottom)

Here�s the original modified PCV hose running from the catch can to the intake manifold

And here�s the new PCV hose running from the catch can to the valve cover. The curved sections of the hose are where the curved PCV tubes were positioned to prevent kinks and to keep the hose from collapsing under heavy vacuum.

And that�s it. A simple modification that will help keep oil residue from baking onto the intake manifold, the intercooler core and any intake sensors. I drain the can every oil change and get about 1-2 table spoons of oil each time.

Of course the Kenne Bell setup is a little different but the same concept applies. Definitely a good investment if you have a blower.
Thread Starter
Joined: Feb 2015
Posts: 5
From: AZ
Thank you gentleman for the reply's..
I will now go to work and fix this right, now that I know it is needed.
Makes sense with the added boost of the supercharger.
As for the coils, it did not come with OEM one's, so will have to run the after market ones for a while and keep my fingers crossed....
Thanks Again for the help....DRK
I will now go to work and fix this right, now that I know it is needed.
Makes sense with the added boost of the supercharger.
As for the coils, it did not come with OEM one's, so will have to run the after market ones for a while and keep my fingers crossed....
Thanks Again for the help....DRK
5th Gear Member
Joined: May 2005
Posts: 2,111
From: Maryland
Still debating the efficacy of catch cans vs breathers... I personally have breathers atm... My whipple install instructions didn't tell me to use the old tubing to reinforce the hose, so mine had collapsed under vacuum... However I haven't noticed anything with the breathers, no leaking around the seals etc (the PCV valve is still in place, just vents direct to the atmosphere)
I will say my TB is nice and clean though
I think I installed my air tube backwards... well the rubber parts anyway, my "bulbed" one was attached to the mid-line as opposed to the TB end...
I will say my TB is nice and clean though
I think I installed my air tube backwards... well the rubber parts anyway, my "bulbed" one was attached to the mid-line as opposed to the TB end...

1st Gear Member
Joined: Mar 2009
Posts: 56
From: Alberta, Canada
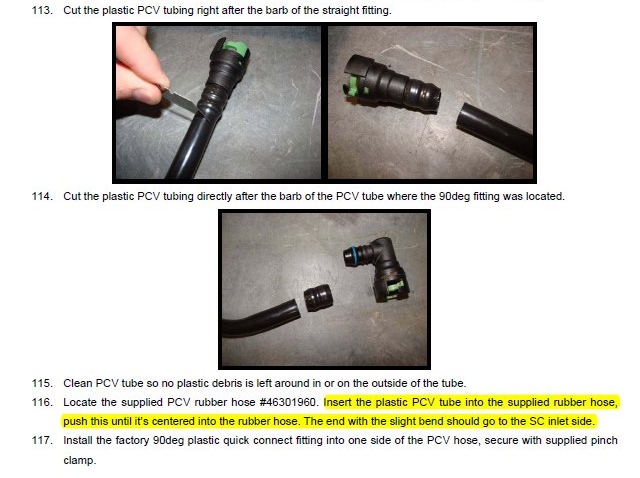
Here are the Whipple instructions about the hose stuffing. Getting that stupid tube inside the hose was the most difficult part of the install for me. Should have gone with braided hose but I don�t mind the black rubber OEM look and it's a little easier to route than the braided stuff.

5th Gear Member
Joined: Jun 2005
Posts: 3,319
From:
Probably the 2 most popular Oil Catch Cans for our cars from from JLT and UPR. I have tried and the UPR can is hands down the best. They work extremely well, look good and are very well made. They come equipped with Ford factory type connectors and installation is super easy. I have one on my '06 GT and I empty it every 2500 miles and it is a little over 1/2 full at that point. I used to get blue smokey startups and they are totally gone. This accessory has to greatly reduce carbon buildup in the engine.
Do yourself (and your car) a favor and get rid of that DIY setup and get a UPR can, the real deal.
Do yourself (and your car) a favor and get rid of that DIY setup and get a UPR can, the real deal.

Thread
Thread Starter
Forum
Replies
Last Post
AMAlexLazarus
AmericanMuscle.com
3
Oct 2, 2015 08:06 AM
AMAlexLazarus
AmericanMuscle.com
0
Oct 1, 2015 09:21 AM
treesloth
New Member Area
4
Sep 28, 2015 07:03 AM