



Classic Mustangs (Tech) Technical discussions about the Mustangs of yester-year.

Hood Pins

Thread Tools
 
Search this Thread
 
Old Dec 13, 2008 | 09:03 PM
  #21  
racin66coupe's Avatar
racin66coupe
5th Gear Member
 
Joined: Dec 2007
Posts: 3,485
From: NH
Default

woohoo he is officially now a classic mod!! :P
Old Dec 13, 2008 | 09:05 PM
  #22  
Carlos Pineiro's Avatar
Carlos Pineiro
Thread Starter
3rd Gear Member
 
Joined: Jul 2008
Posts: 958
From: Santa Monica, Calif.
Default

Originally Posted by mygt500

Carlos the hood pins are great and the engine bay is detailed very nicely. Great job!
Thanks.

CP
Old Dec 13, 2008 | 09:35 PM
  #23  
mygt500's Avatar
mygt500
Multi-Tasking Moderator!
 
Joined: Nov 2006
Posts: 15,618
From: Detroit Rock City!
Default

Originally Posted by racin66coupe
woohoo he is officially now a classic mod!! :P
LOL..... I have done most of it lately behind the scenes!
Old Dec 13, 2008 | 10:07 PM
  #24  
noroof66's Avatar
noroof66
3rd Gear Member
 
Joined: Sep 2006
Posts: 629
From: CA
Default

Looks good, I've always liked the look, especially on the bigger hoods.
Why would you drill from the top and not the bottom? I would have thought the bottom would have been easier.
Old Dec 13, 2008 | 10:18 PM
  #25  
racin66coupe's Avatar
racin66coupe
5th Gear Member
 
Joined: Dec 2007
Posts: 3,485
From: NH
Default

if you drill from the bottom then when it breakes through the hood it will get rough and could mess up the paint, and it also kinda would make a little bump
Old Dec 13, 2008 | 11:50 PM
  #26  
rmodel65's Avatar
rmodel65
Yukon Cornelius
 
Joined: Oct 2005
Posts: 11,812
From: deep in the heart of dixie GEORGIA
Default

i got hood pins too 69-70 are naked without them
Old Dec 14, 2008 | 08:49 AM
  #27  
ThanksDad's Avatar
ThanksDad
3rd Gear Member
 
Joined: Mar 2008
Posts: 585
From: Baltimore MD
Default

When I was a kid we had an old Plymouth and the hood latch broke and the hood ended up on the side of the road. It's no fun being 8 years old and driving around with your mom in a car with no hood for a few weeks. People look at you funny.

Old Dec 14, 2008 | 09:05 AM
  #28  
fakesnakes's Avatar
fakesnakes
4th Gear Member
 
Joined: Sep 2008
Posts: 1,839
From: Connecticut
Default

On the older hoods without the locating stamping, align your hood as perfectly as possible, measure on the core support where you want the pins and transfer to the underside of the hood. Drill a 1/8" hole in the hood from the bottom at your mark and then measure on the top to ensure the holes are where you want them and the same on both sides. Finish drilling from the top. The hood pin plate gives you a little wiggle room and I would drill the hole in the hood slightly larger than the pin hole in the plate, particularly if you are using a thicker than stock fiberglass hood. This gives the pin a little clearance given you are closing the hood at an angle to the pin.
Old Dec 14, 2008 | 09:17 AM
  #29  
67 evil eleanor's Avatar
67 evil eleanor
5th Gear Member
 
Joined: Nov 2006
Posts: 2,106
From:
Default

The pins look great.
Old Dec 14, 2008 | 09:33 AM
  #30  
Carlos Pineiro's Avatar
Carlos Pineiro
Thread Starter
3rd Gear Member
 
Joined: Jul 2008
Posts: 958
From: Santa Monica, Calif.
Default

Originally Posted by fakesnakes
On the older hoods without the locating stamping, align your hood as perfectly as possible, measure on the core support where you want the pins and transfer to the underside of the hood. Drill a 1/8" hole in the hood from the bottom at your mark and then measure on the top to ensure the holes are where you want them and the same on both sides. Finish drilling from the top. The hood pin plate gives you a little wiggle room and I would drill the hole in the hood slightly larger than the pin hole in the plate, particularly if you are using a thicker than stock fiberglass hood. This gives the pin a little clearance given you are closing the hood at an angle to the pin.
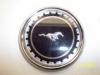
Wow. That's exactly what I did: 1st hole bottom up at the cutout (7/16 bit), then measured and drilled the other side from the top to insure symmetry. The pin bezel hole is 3/4" so after taping the bezels and screwing them down in the exact position, i used a 1/2" bit (biggest one I had) to widen the 7/16" hole, then widened it with a round file. The 2 sided bezel kept the steel from rippling. AFTER all that, THEN I drilled the holes in the crossmember to install the pins. That way I knew they matched up perfectly. If the pins aren't plumb, you can bend them a bit by hand once they're in.

Funny, the entire job took 15 minutes, but if I did any of these steps out of order, something would have messed up.

Thanks snakes. You obviously did this install before.

CP


All times are GMT -5. The time now is 12:29 PM.