
First time for everything... convertible top install

Thread Starter
4th Gear Member
Joined: Mar 2009
Posts: 1,110
From: NJ
Against all better judgement I have started to replace the top on my 67. I have taken some pictures of what I have done so far. Most of the pics were for future reference because my brain is like a colander. I am learning as I go along and any tips would be most welcome. I have no experience with this at all.
The top is a Kee Auto Top. Split glass window from the same company.

Started removal at the front.

Removed screws holding weatherstripping in place

Then the screws holding the strip under the front fold.

With that removed you see about a thousand staples.

Unscrew nuts holding weatherstrip ans remove. There are 3 pieces of weatherstripping on each side.

Tensioning cable slides out of a groove

Other end has a loop that slides over a hook on the frame.

With top peeled away it exposes the pads. There should be screws, but on the driver's side they were replaced with rivets.

Here's the screws.

On the rear bow the trim strip is removed and yes more staples.
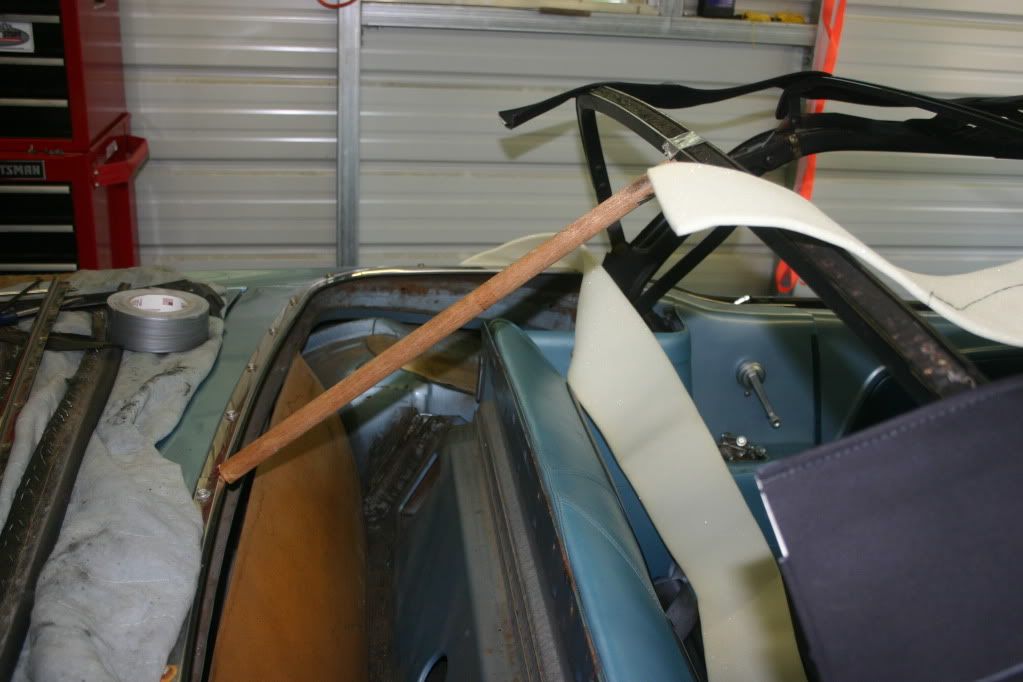
At this point I skipped photos and had removed the well liner and the tack strips as well as the window. This dowel is 21.5" as noted in the instructions with a bungee to hold it.

New passenger side pad screws. The new pad has plastic reinforcement and pre-drilled holes.


Just hanging loosely.

Driver's side with new rivets

Both sides stapled tight. I realize now my staples should go the other way. Does it matter for the pads???


Speaking of staples. These are friggin expensive. Bought the 20 gauge crown stapler at Harbor Freight and that was cheaper than these!!!

Pad along frame.

Top laid out on top of the 66.
That's enough for today!
The top is a Kee Auto Top. Split glass window from the same company.
Started removal at the front.
Removed screws holding weatherstripping in place
Then the screws holding the strip under the front fold.
With that removed you see about a thousand staples.
Unscrew nuts holding weatherstrip ans remove. There are 3 pieces of weatherstripping on each side.
Tensioning cable slides out of a groove
Other end has a loop that slides over a hook on the frame.
With top peeled away it exposes the pads. There should be screws, but on the driver's side they were replaced with rivets.
Here's the screws.
On the rear bow the trim strip is removed and yes more staples.
At this point I skipped photos and had removed the well liner and the tack strips as well as the window. This dowel is 21.5" as noted in the instructions with a bungee to hold it.
New passenger side pad screws. The new pad has plastic reinforcement and pre-drilled holes.
Just hanging loosely.
Driver's side with new rivets
Both sides stapled tight. I realize now my staples should go the other way. Does it matter for the pads???
Speaking of staples. These are friggin expensive. Bought the 20 gauge crown stapler at Harbor Freight and that was cheaper than these!!!
Pad along frame.
Top laid out on top of the 66.
That's enough for today!
Last edited by scootchu; Oct 5, 2011 at 07:45 PM.


Thread Starter
4th Gear Member
Joined: Mar 2009
Posts: 1,110
From: NJ
Tomorrow's agenda is to install the sail panel pads and possibly mount the window. I have read the instructions, read several write ups and how-to's, but it will still take some doing to get rolling.
Any tips or watchouts?
Any tips or watchouts?

2nd Gear Member
Joined: Jan 2010
Posts: 222
From: Georgia
Good call on changing the staple lay out. Funny to think my buddy's 92 convertible has the same latch system as what you pictured in your second shot. I only know this because the pin in the latch kept coming loose on the hot rod power tour and it was a pain to latch her down. Interested in seeing the rest of the job. Post more as you move along!
Thread Starter
4th Gear Member
Joined: Mar 2009
Posts: 1,110
From: NJ
Not a very productive day. Got the window installed and one 1/4 panel pad. Not happy. Also my compressor took a dump. It's just a double tank Porter Cable, but it works with small tools well. The capacitors went south and need replacing. I don't know if you can buy them. I did not see them listed on parts diagrams I quickly looked up. 
Here's the gun I bought for $24 at HF

Window in temporarily


Unbolted the tack strip

Ready for final stapling... if the stapler worked. Actually it quit after I finished that and on panel, but I was so frustrated I stopped pics.
Here's the gun I bought for $24 at HF
Window in temporarily
Unbolted the tack strip
Ready for final stapling... if the stapler worked. Actually it quit after I finished that and on panel, but I was so frustrated I stopped pics.


Thread
Thread Starter
Forum
Replies
Last Post
importsmasher
V6 (1994-2004) Mustangs
4
Oct 9, 2015 04:42 PM
Mustang Sally72
2010-current S197 Appearance Section
10
Aug 11, 2015 07:54 AM