
GPR's build thread

Thread Starter
1st Gear Member
Joined: Jun 2013
Posts: 117
From: Florida
I'm sorry I have forgotten to update this build. It will take me awhile to get you caught up.
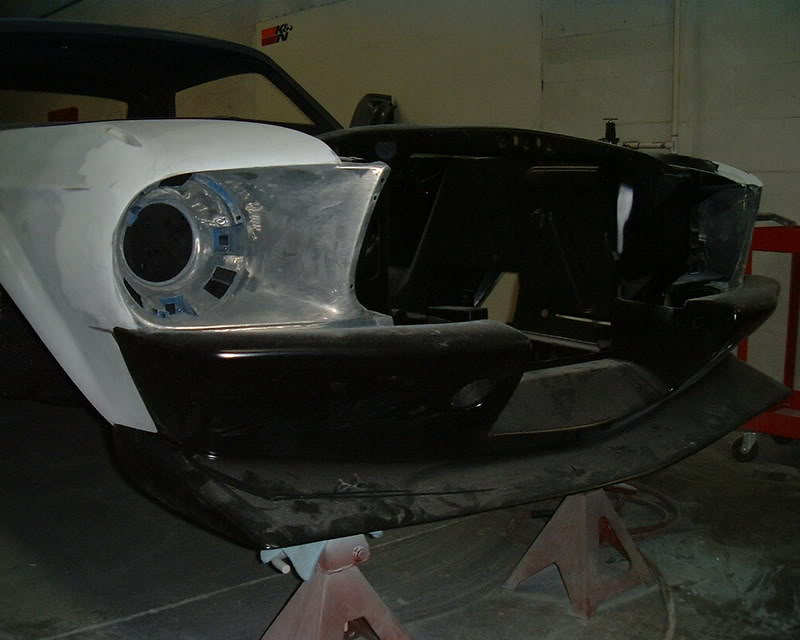
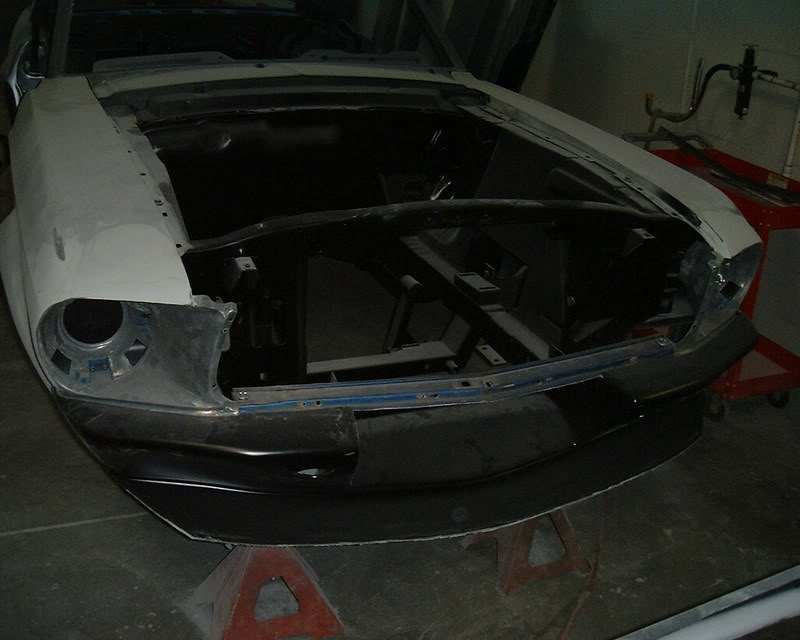
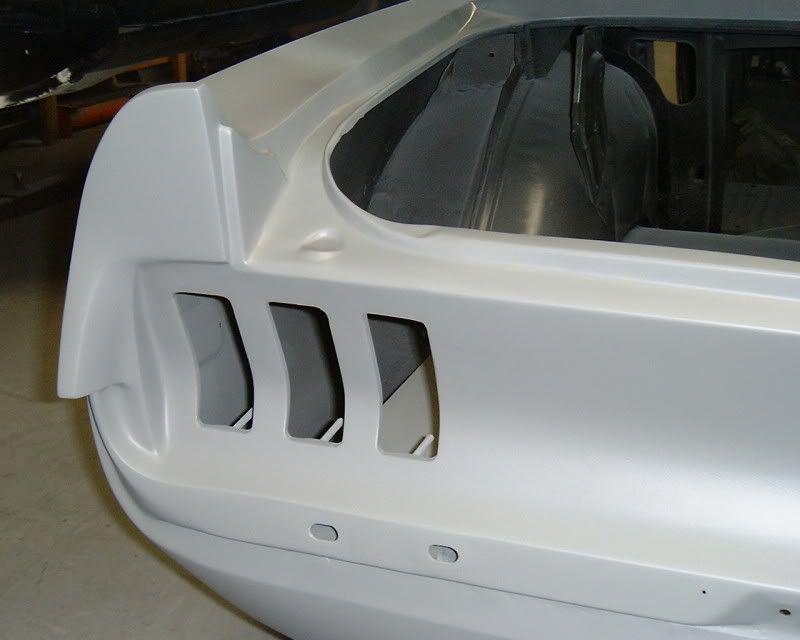
I bought a Maier front apron a couple of years ago and we are in the middle of making it fit and look the way I want.
I also molded in the louvers.
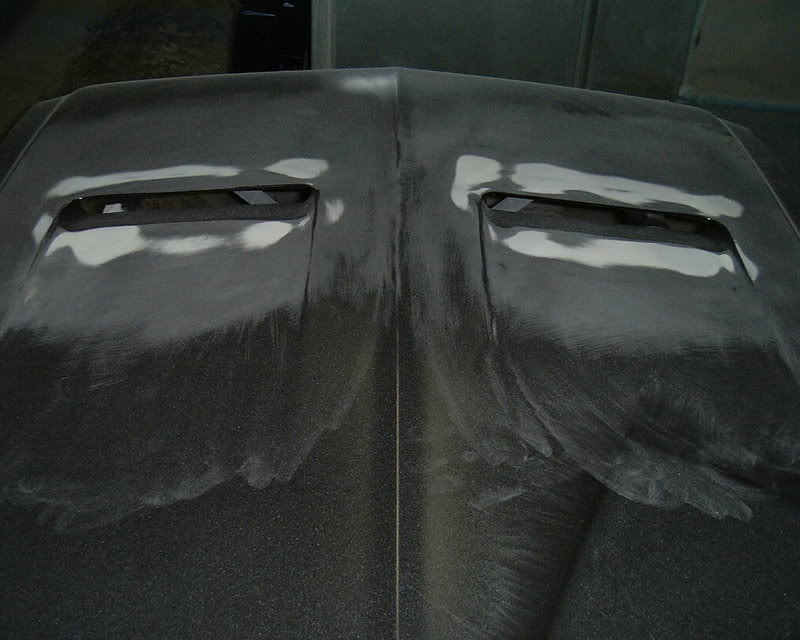
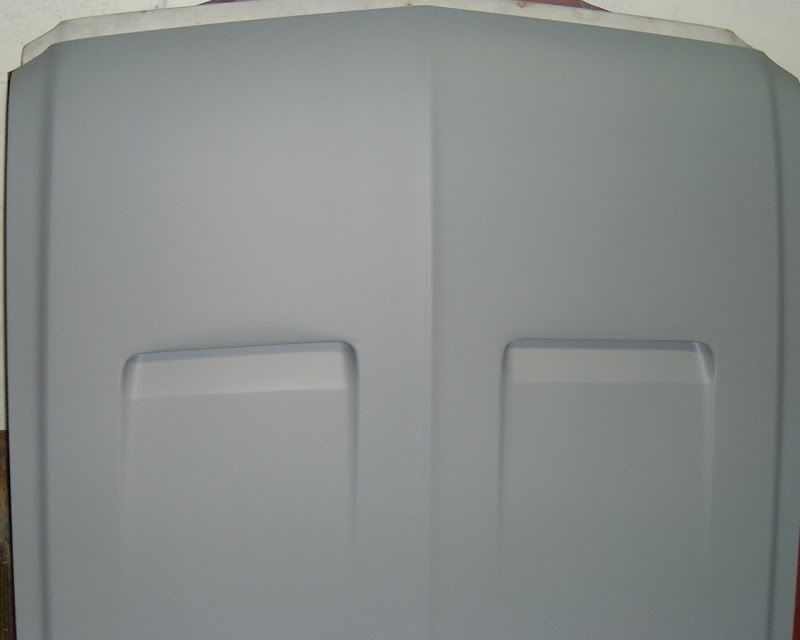
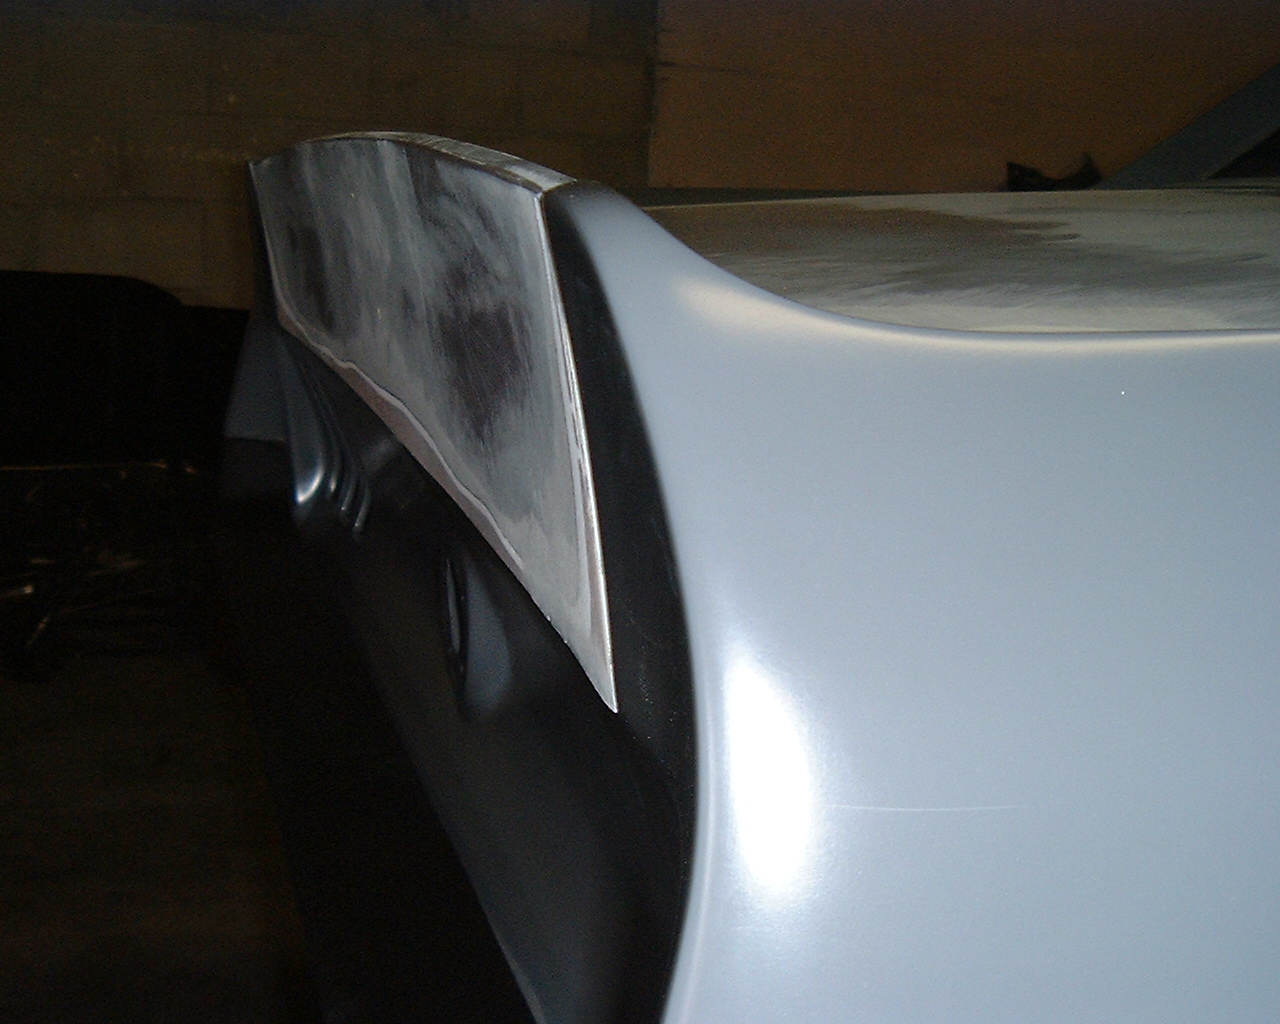
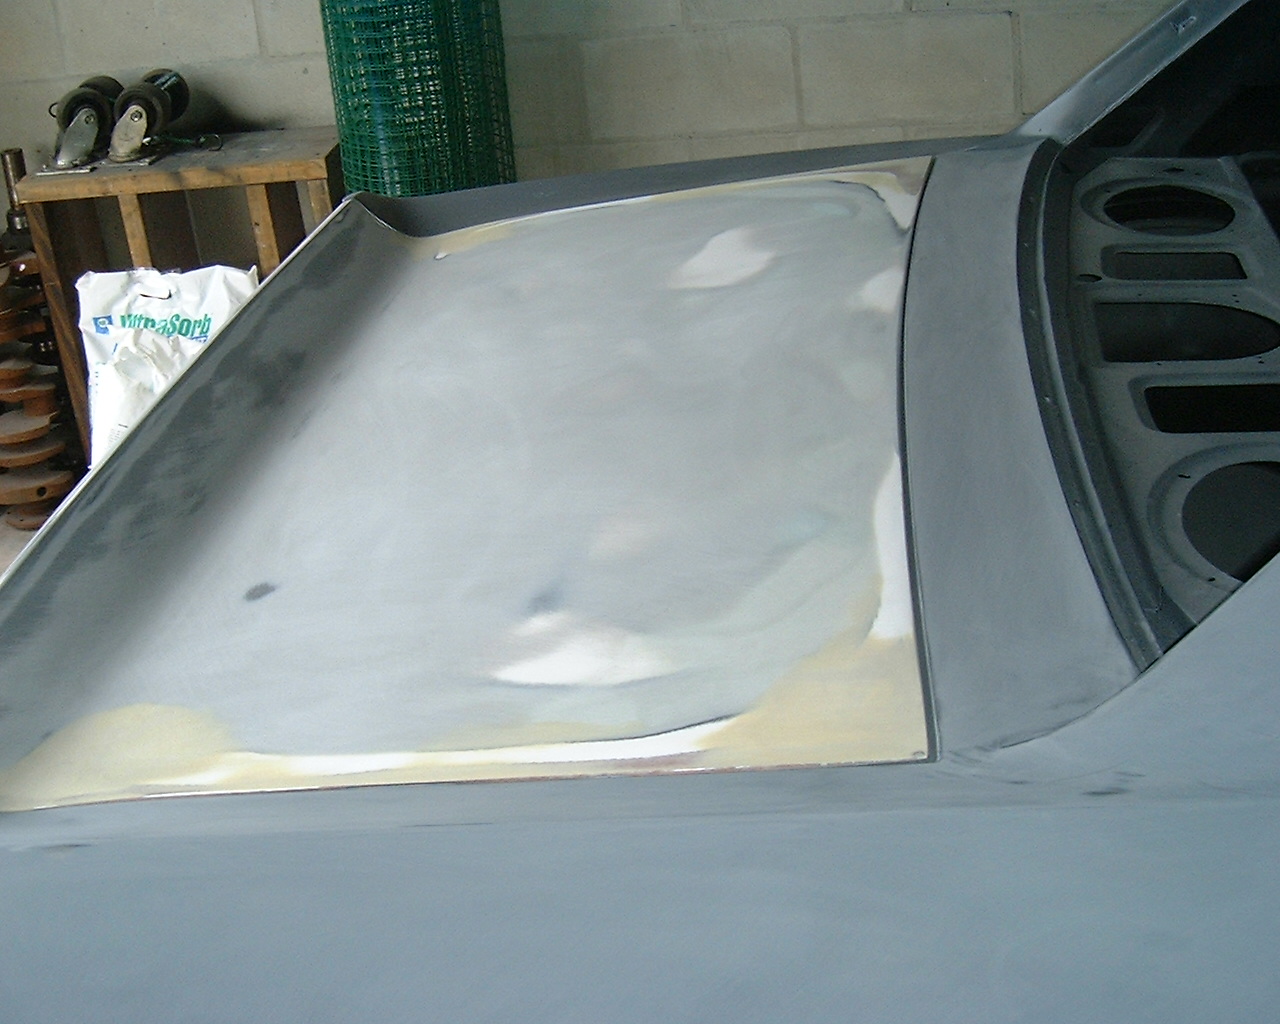
I have the bodywork on the hood finished.
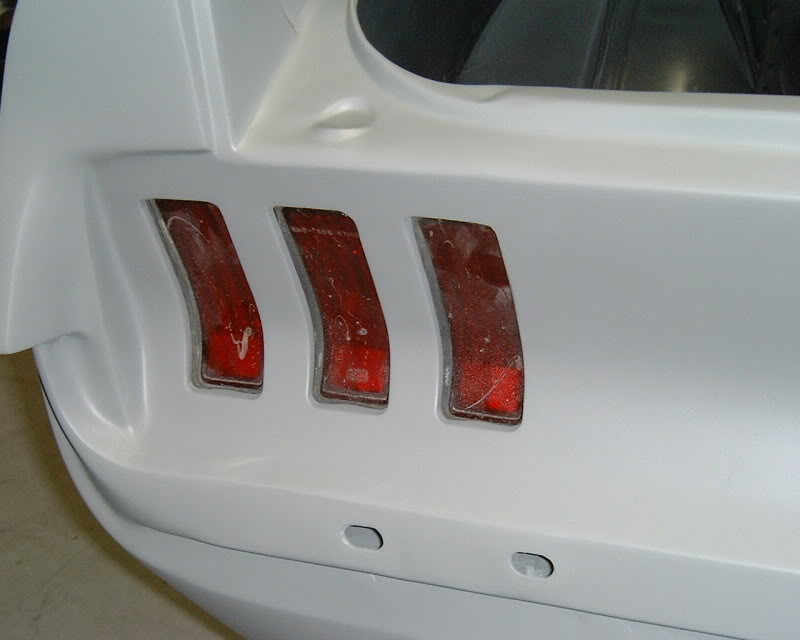
I changed my mind on the taillights. I was going to put a deluxe ribbed taillight panel in and I had cut out the original taillights. Now I have decided to french them in instead. I had put a reproduction taillight panel in our Eleanor project and cut out the original taillight mounting area.
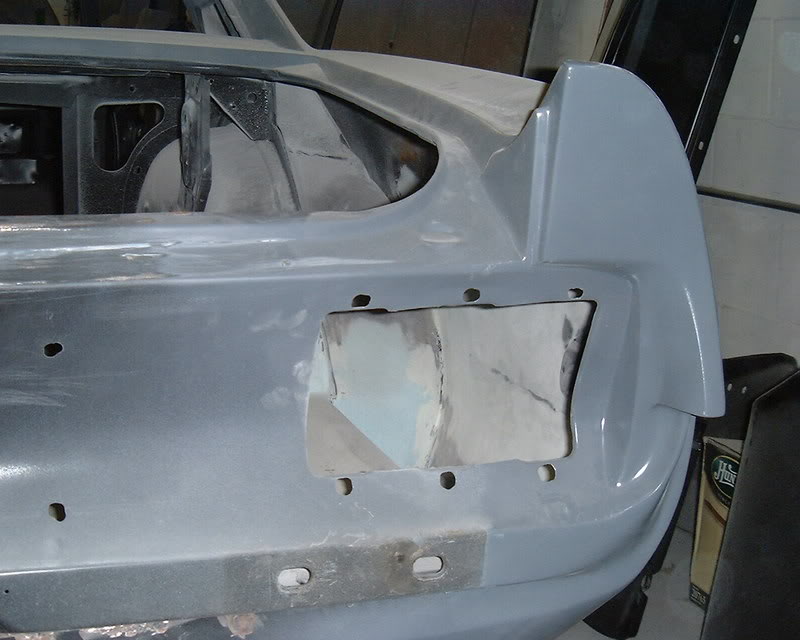
The reproduction taillight mounting area was about 1/4" to big so Brian cut it down and welded studs on it.
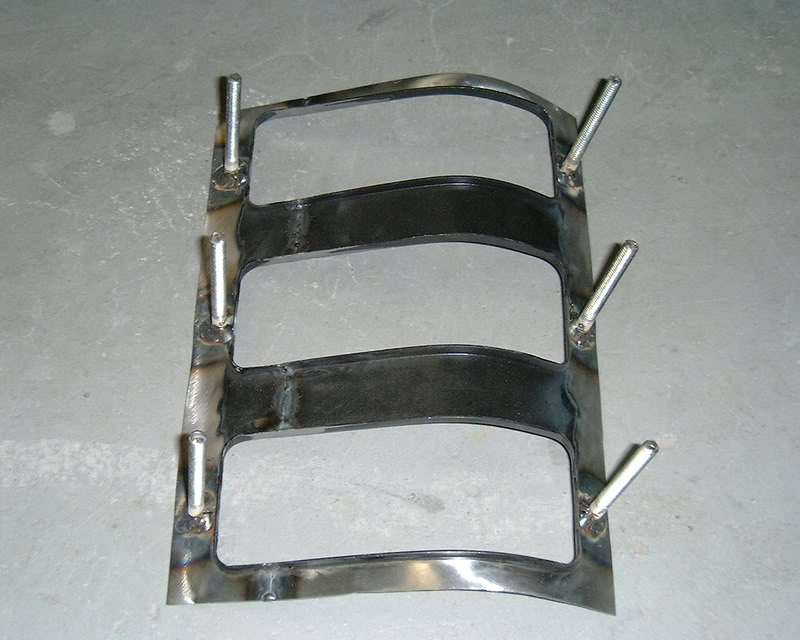
Brian welded it back in and now has to grind the welds.
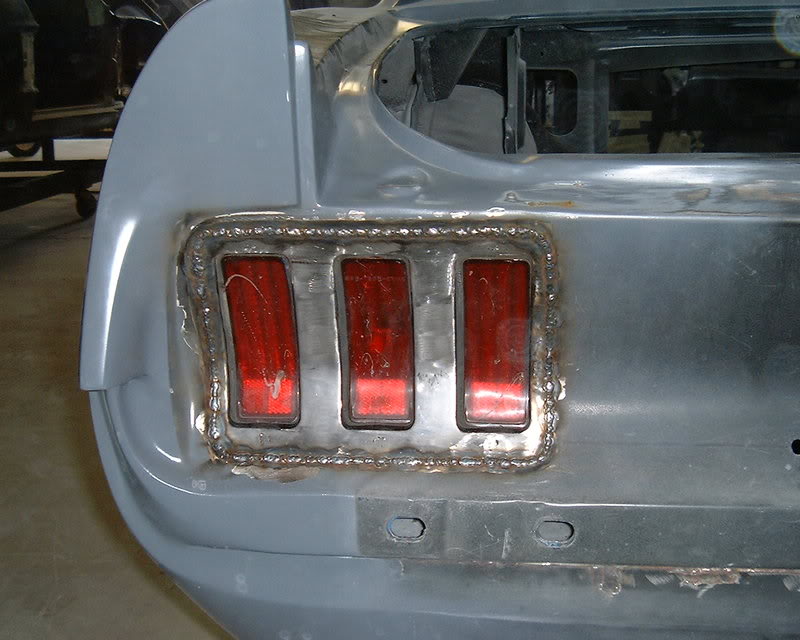
I finished the major bodywork on the taillight panel it still needs to be block sanded and I need new taillights.
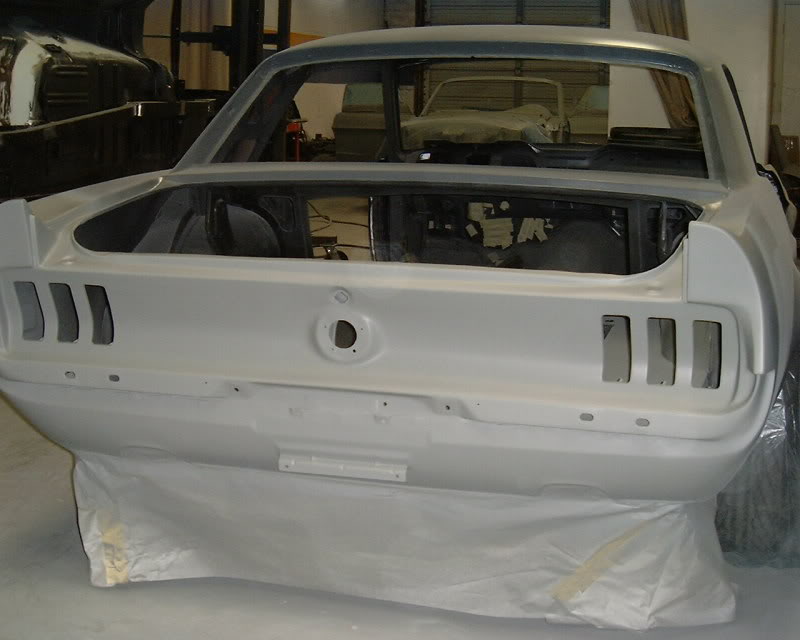
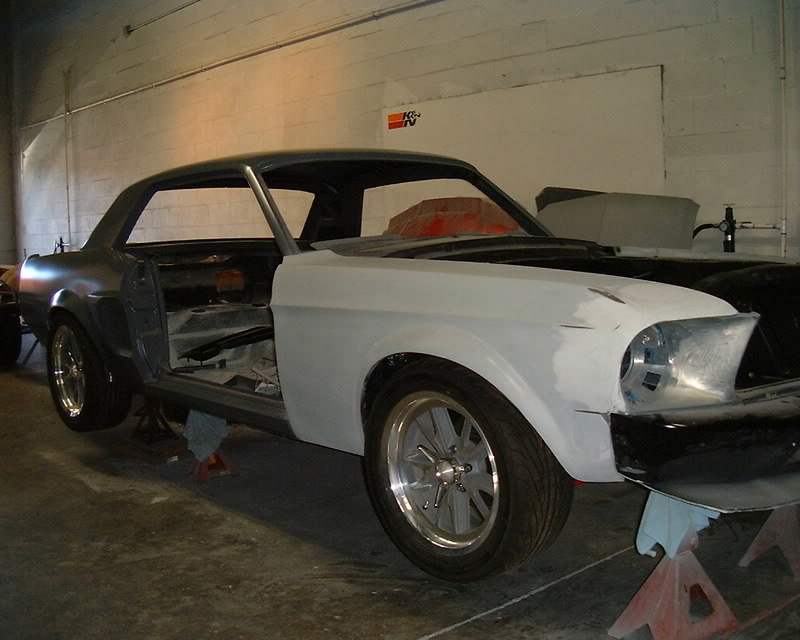
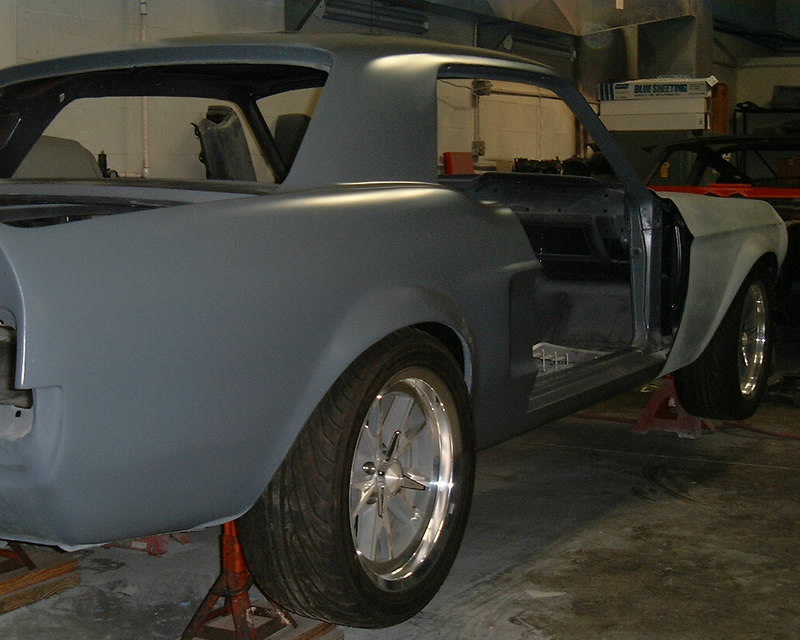
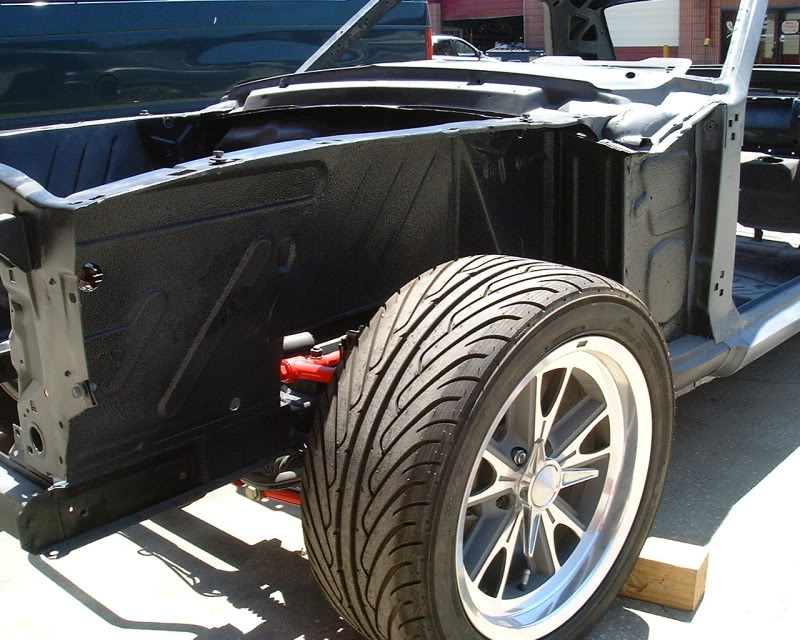
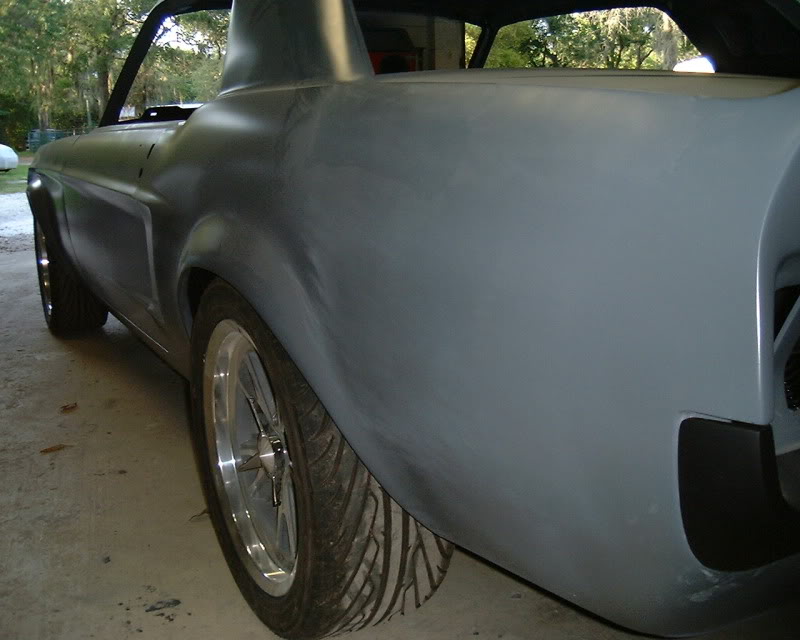
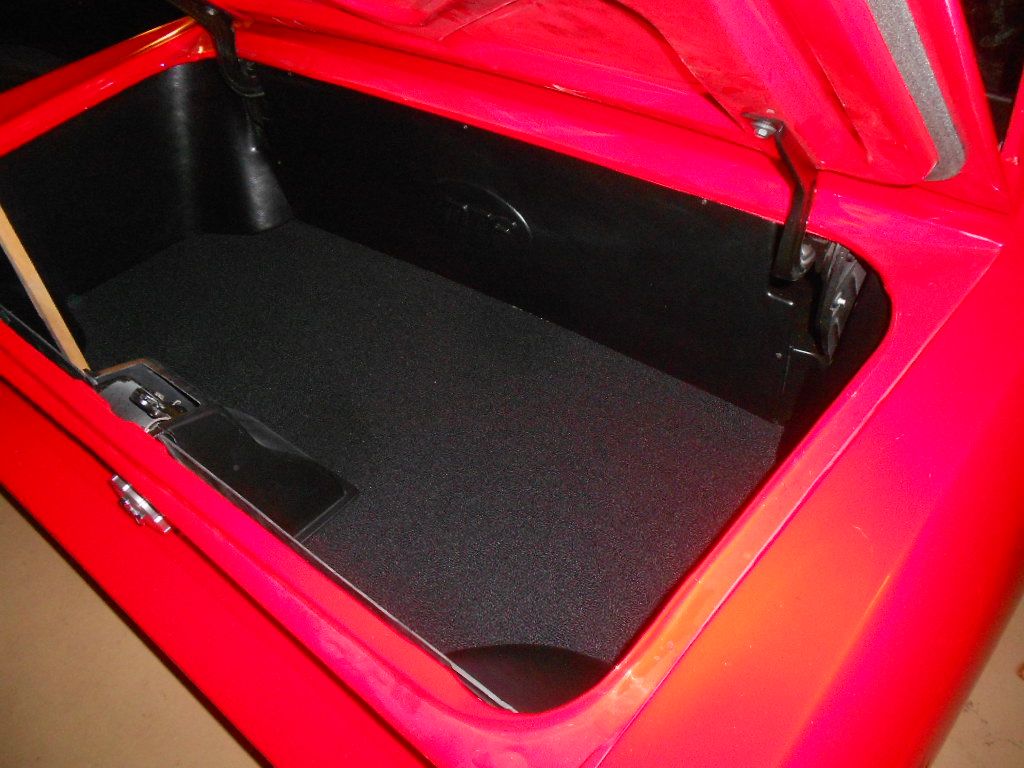
Couple of pictures outside. SPI bedliner on the fender aprons
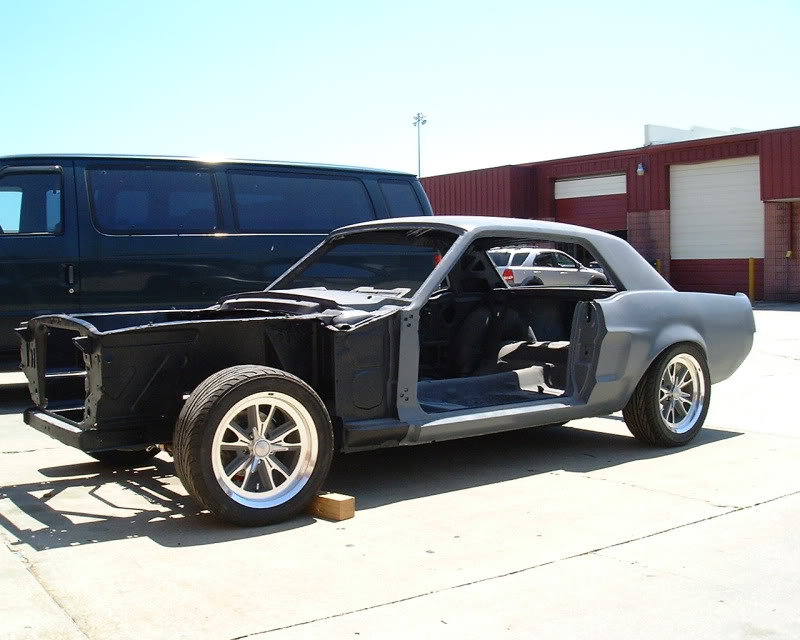
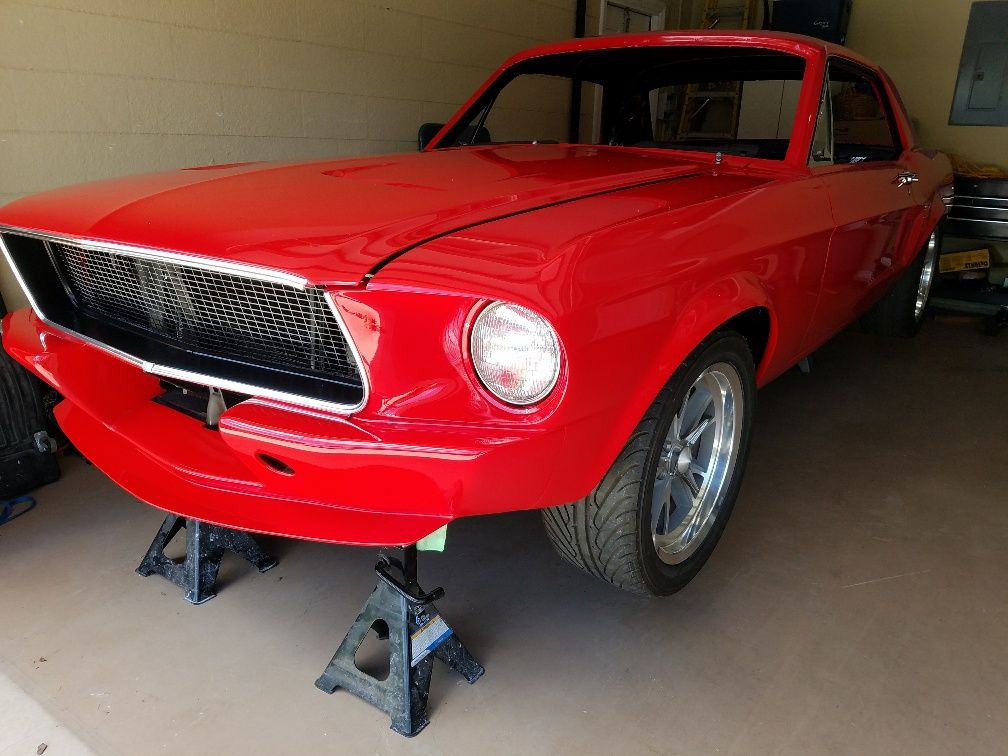
We started lining up the sheet metal. We are having a problem with the bottom of the drivers door sticking out at the bottom. I think we will have to cut it and weld it back up.

We still have to fit the front valance and spoiler
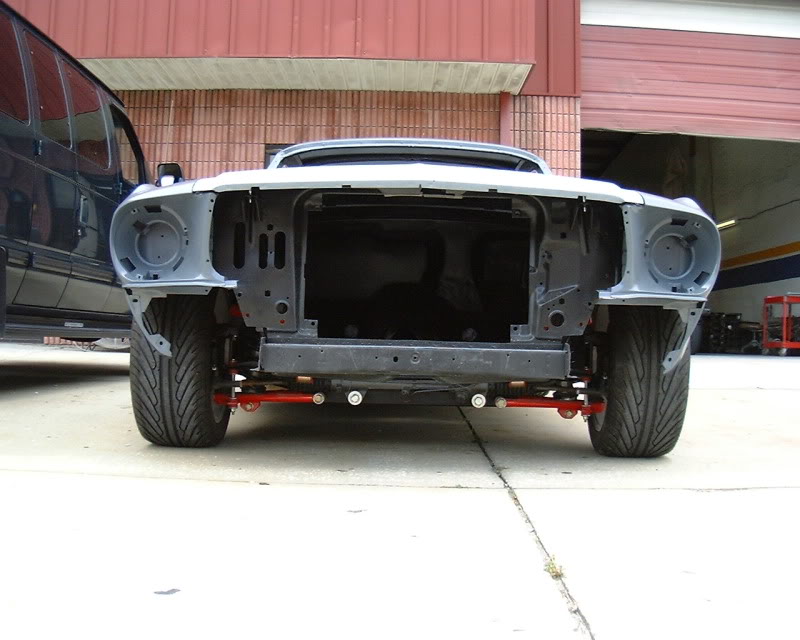
I bought a Maier front apron a couple of years ago and we are in the middle of making it fit and look the way I want.
I also molded in the louvers.
I have the bodywork on the hood finished.
I changed my mind on the taillights. I was going to put a deluxe ribbed taillight panel in and I had cut out the original taillights. Now I have decided to french them in instead. I had put a reproduction taillight panel in our Eleanor project and cut out the original taillight mounting area.
The reproduction taillight mounting area was about 1/4" to big so Brian cut it down and welded studs on it.
Brian welded it back in and now has to grind the welds.
I finished the major bodywork on the taillight panel it still needs to be block sanded and I need new taillights.
Couple of pictures outside. SPI bedliner on the fender aprons
We started lining up the sheet metal. We are having a problem with the bottom of the drivers door sticking out at the bottom. I think we will have to cut it and weld it back up.
We still have to fit the front valance and spoiler
Thread Starter
1st Gear Member
Joined: Jun 2013
Posts: 117
From: Florida
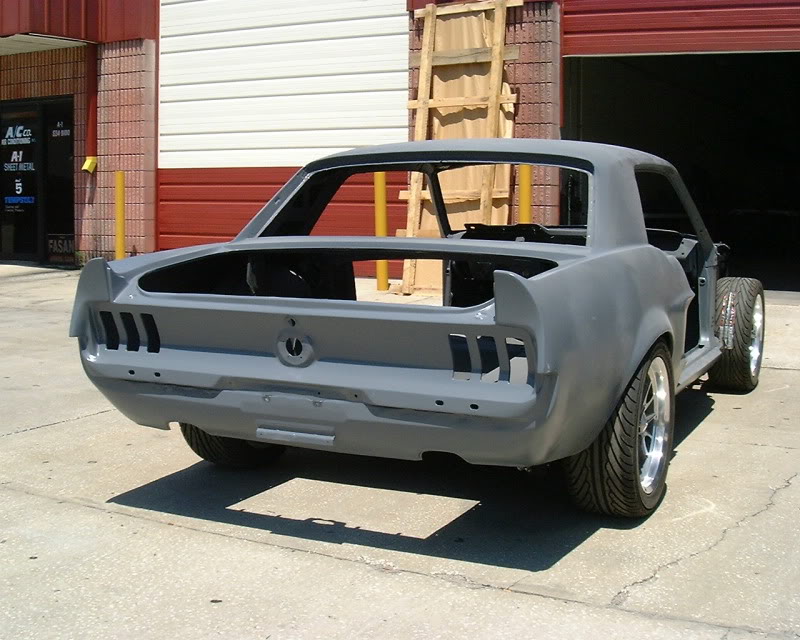
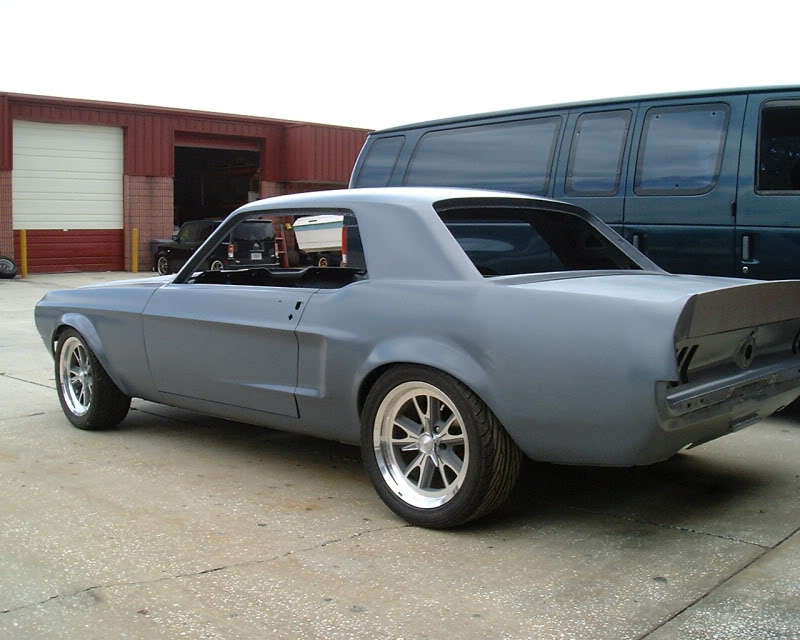
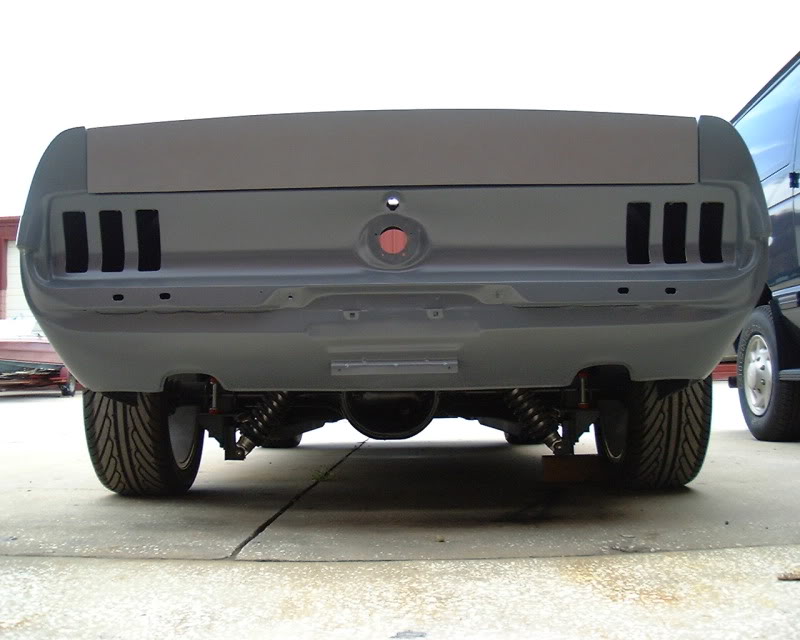
I was not happy with the gaps on the rear bumper and it was to wide. I narrowed it and added material to the ends
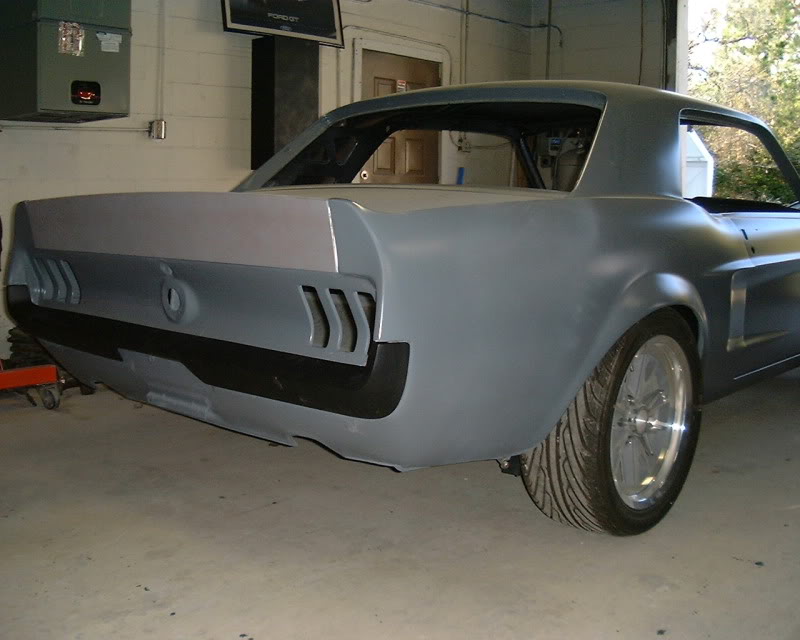
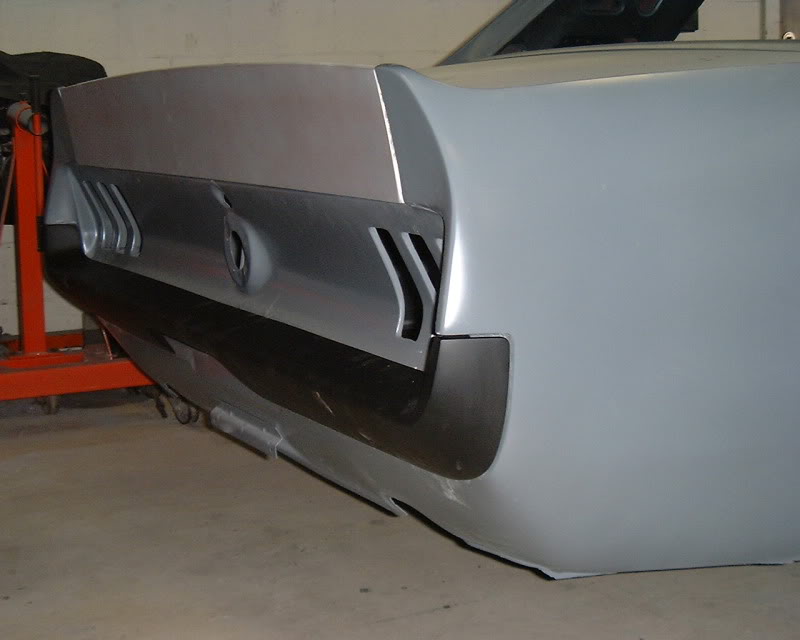
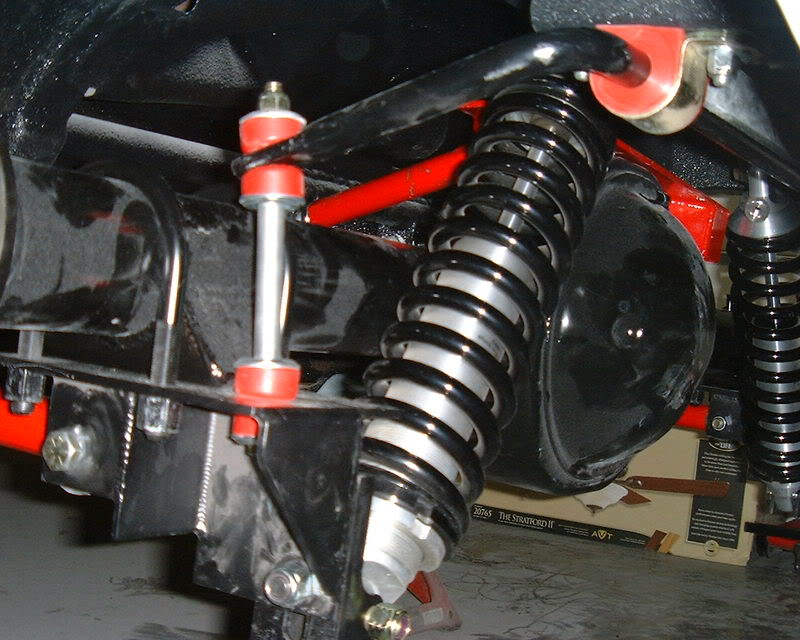
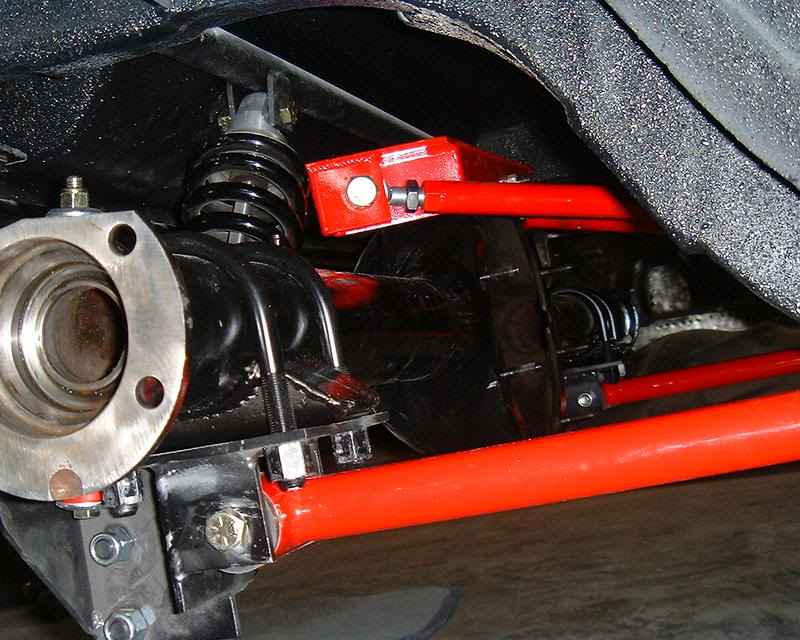
We narrowed the 63 Galaxie 9" to stock Mustang width. There just wasn't enough clearance around the wheel well for the car to sit low.
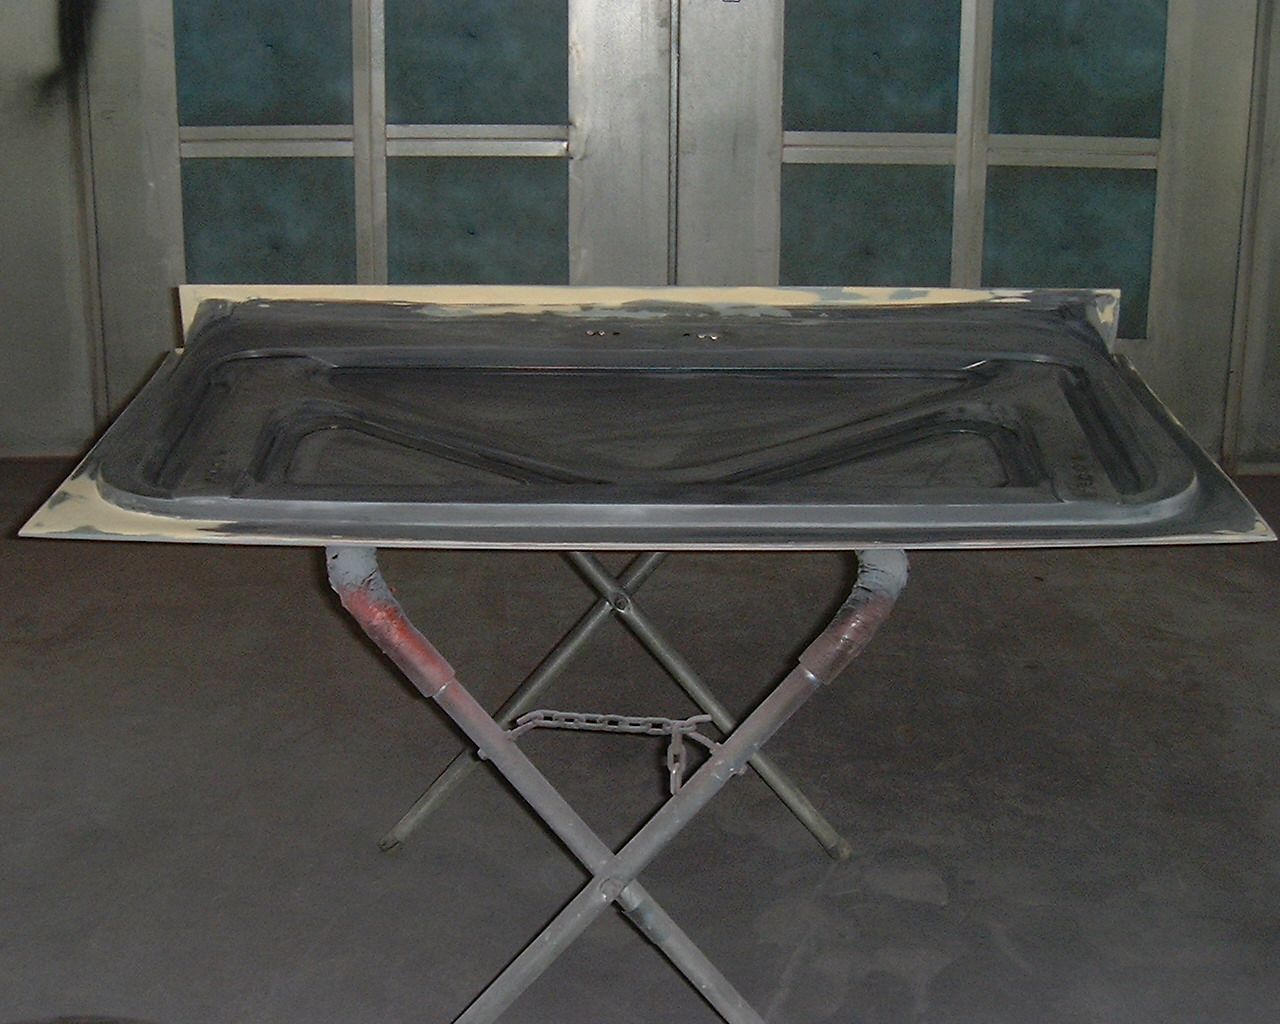
I started reshaping the deck lid. The front corners stick up to high and the left side is really bad. I sanded both sides but had to add material to the bottom of the left side. Also the bottom of the deck lid did not match the taillight panel in the middle so I added material to the inside and than sanded the outside. It also did not line up with the end caps at the bottom so I sanded both sides to match the end caps
As you can see in this photo the bottom of the deck lid sticks out past the quarter and on the bottom it doesn't line up with the taillight panel
I added material to the back and sanded the front
I block sanded the deck lid trying to get it to match the quarters
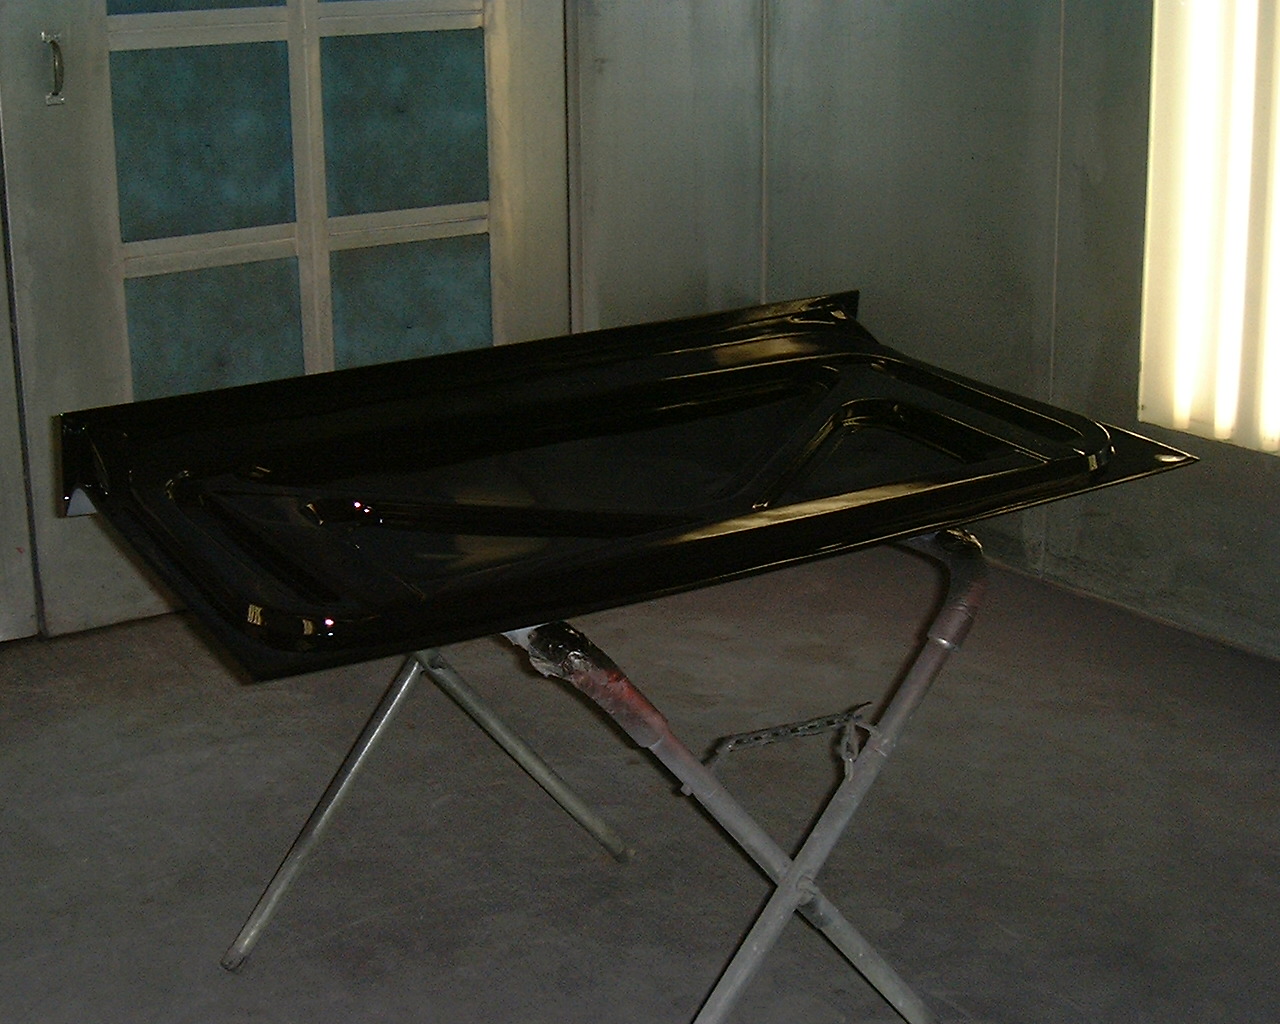
Epoxy primed
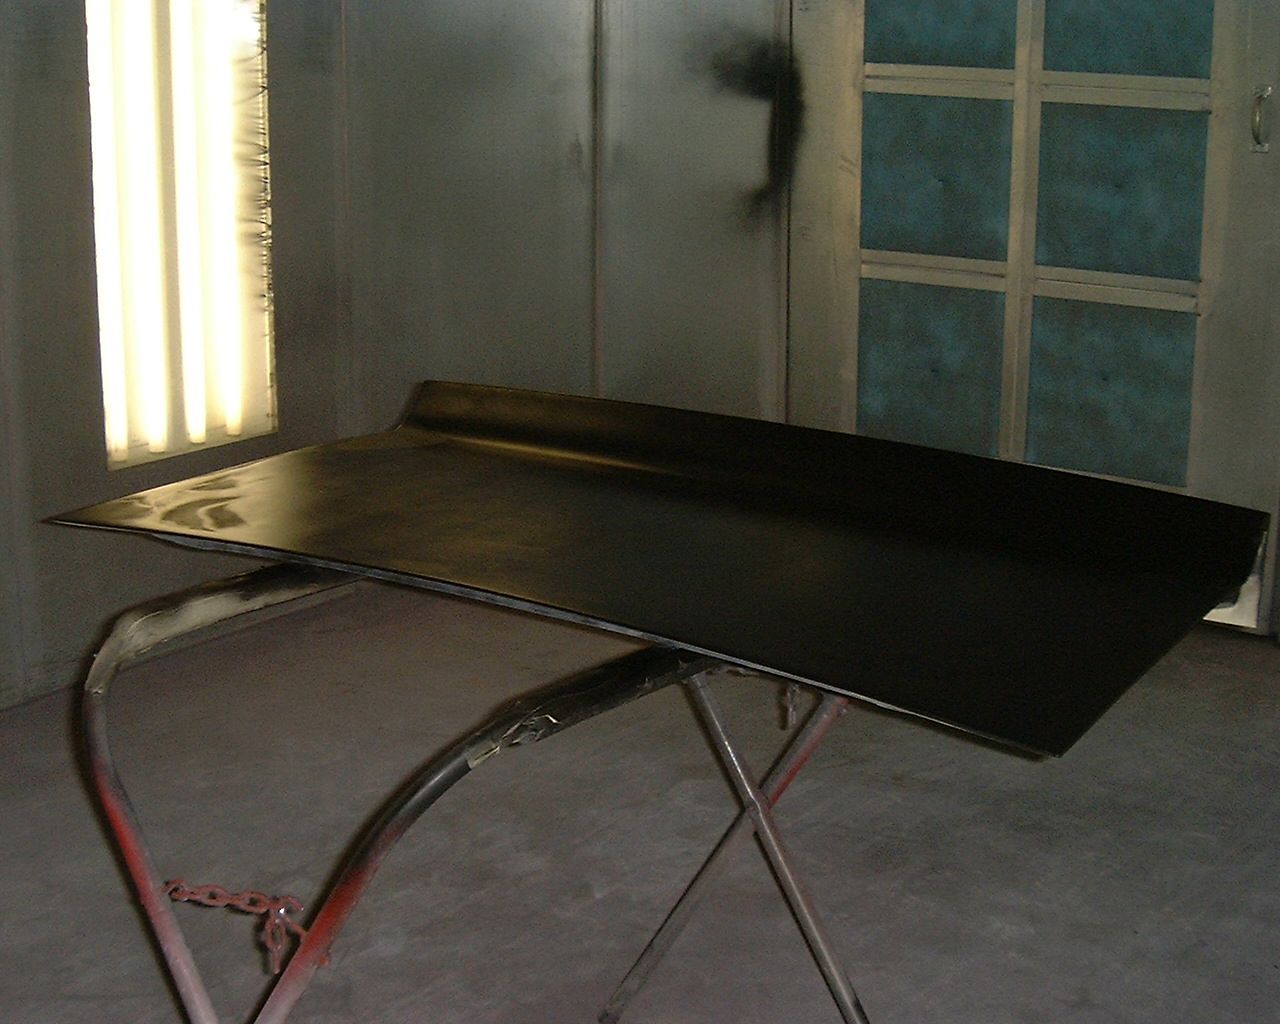
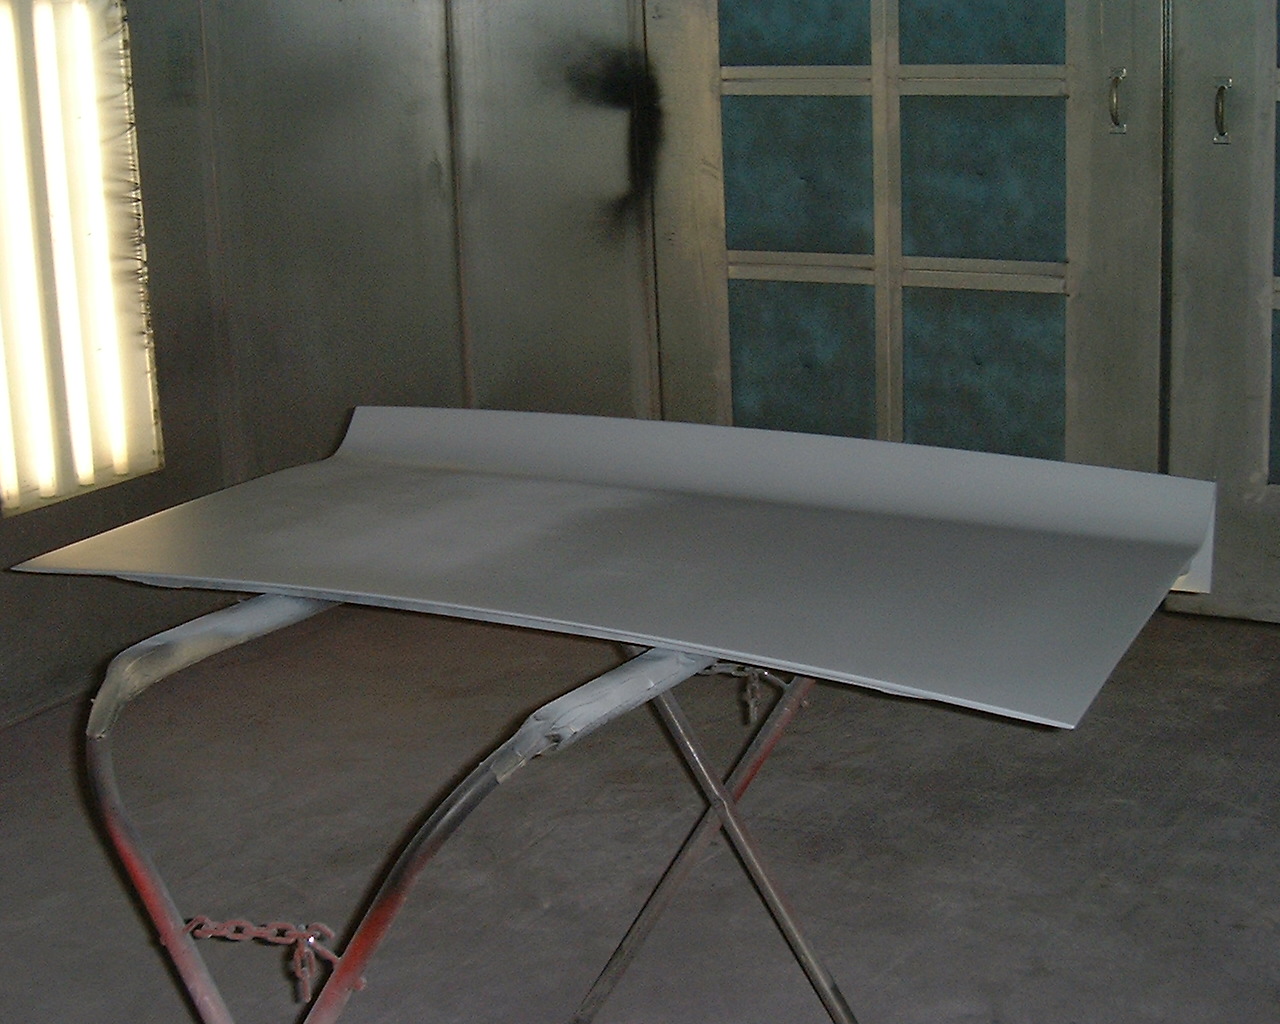
Sprayed SPI Turbo primer
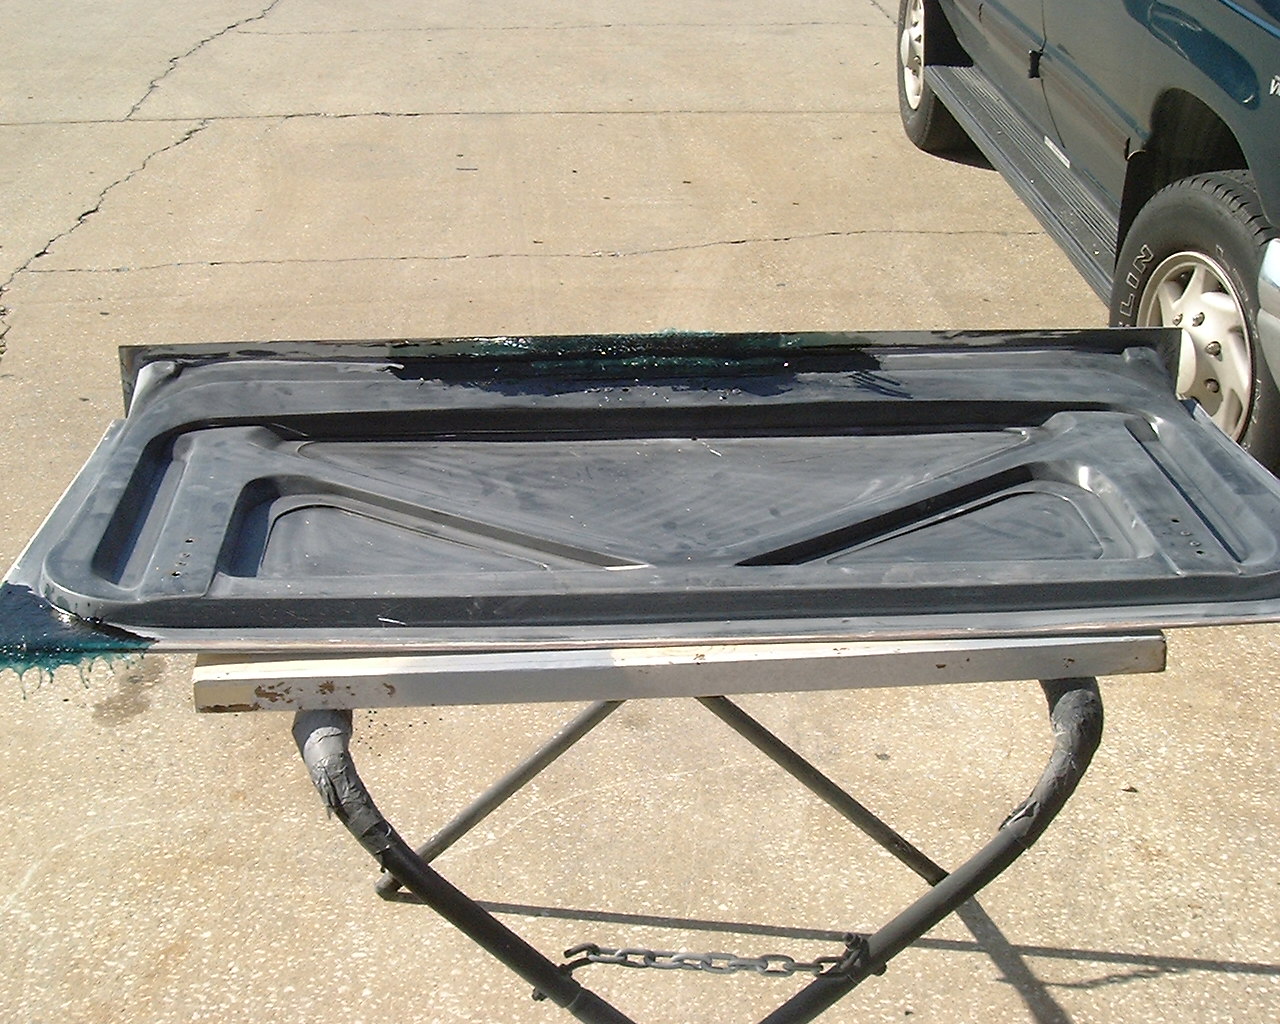
I spent a day working on something that you don't see 95% of the time the back of the deck lid.
I finished sanding and than epoxy primed
We narrowed the 63 Galaxie 9" to stock Mustang width. There just wasn't enough clearance around the wheel well for the car to sit low.
I started reshaping the deck lid. The front corners stick up to high and the left side is really bad. I sanded both sides but had to add material to the bottom of the left side. Also the bottom of the deck lid did not match the taillight panel in the middle so I added material to the inside and than sanded the outside. It also did not line up with the end caps at the bottom so I sanded both sides to match the end caps
As you can see in this photo the bottom of the deck lid sticks out past the quarter and on the bottom it doesn't line up with the taillight panel
I added material to the back and sanded the front
I block sanded the deck lid trying to get it to match the quarters
Epoxy primed
Sprayed SPI Turbo primer
I spent a day working on something that you don't see 95% of the time the back of the deck lid.
I finished sanding and than epoxy primed
Thread Starter
1st Gear Member
Joined: Jun 2013
Posts: 117
From: Florida
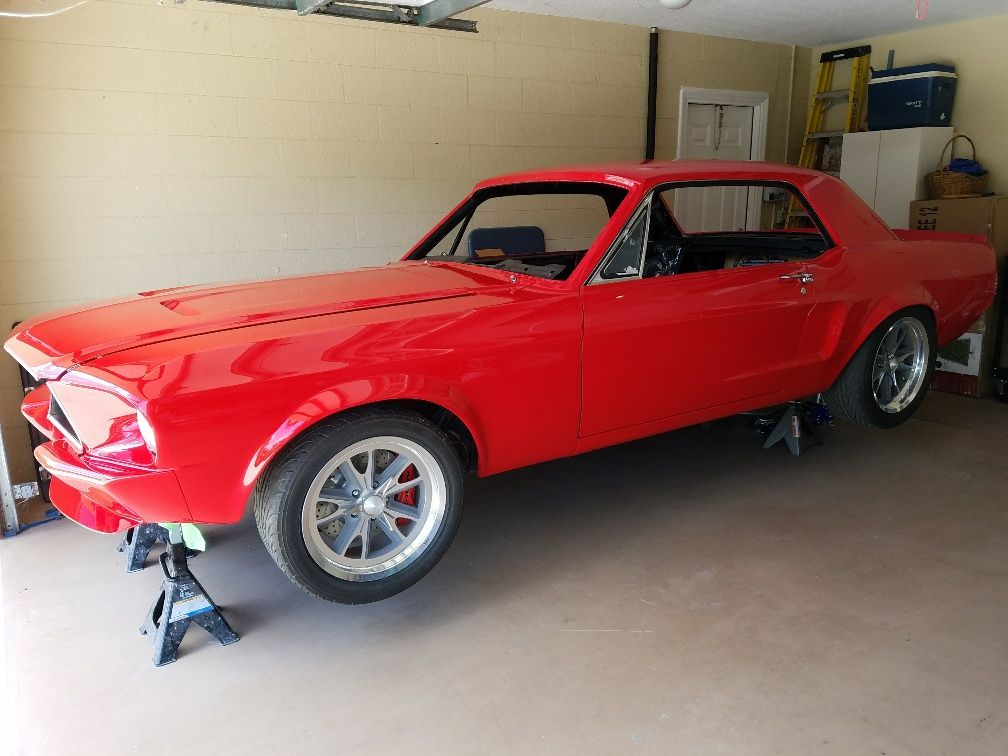
I ran out of room at the shop so I moved this to my house and started working on it again on the weekends.
I had a hard time finding a master cylinder that would clear the cam cover and did a search on line and found this Bronco II master cylinder and it fits.
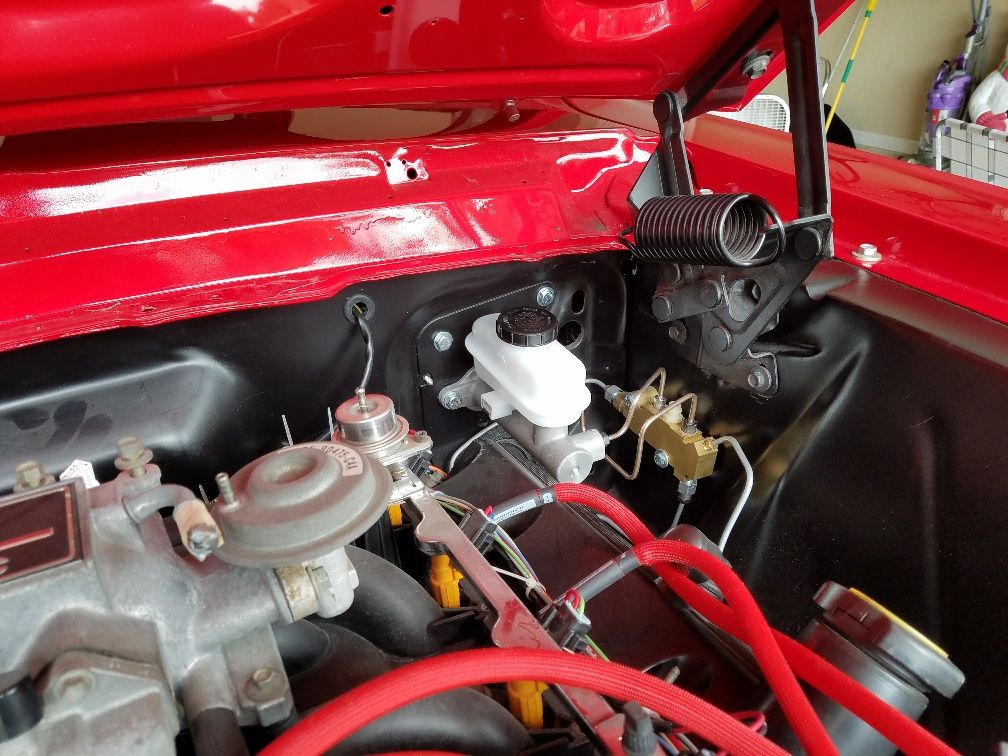
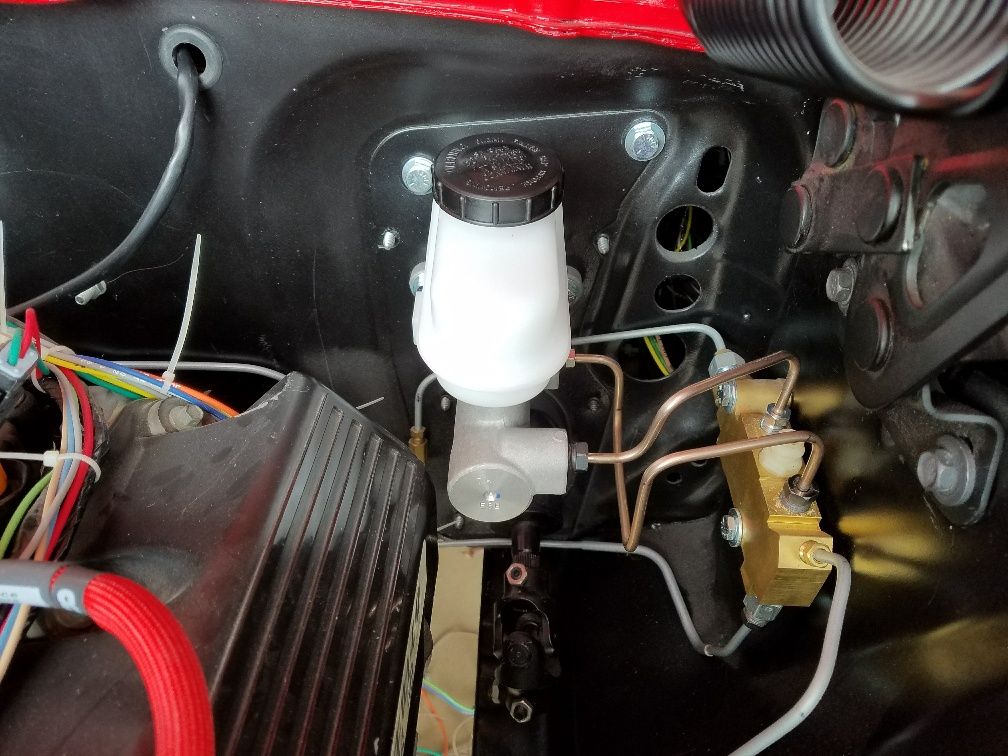
I had a hard time finding a master cylinder that would clear the cam cover and did a search on line and found this Bronco II master cylinder and it fits.
Thread Starter
1st Gear Member
Joined: Jun 2013
Posts: 117
From: Florida
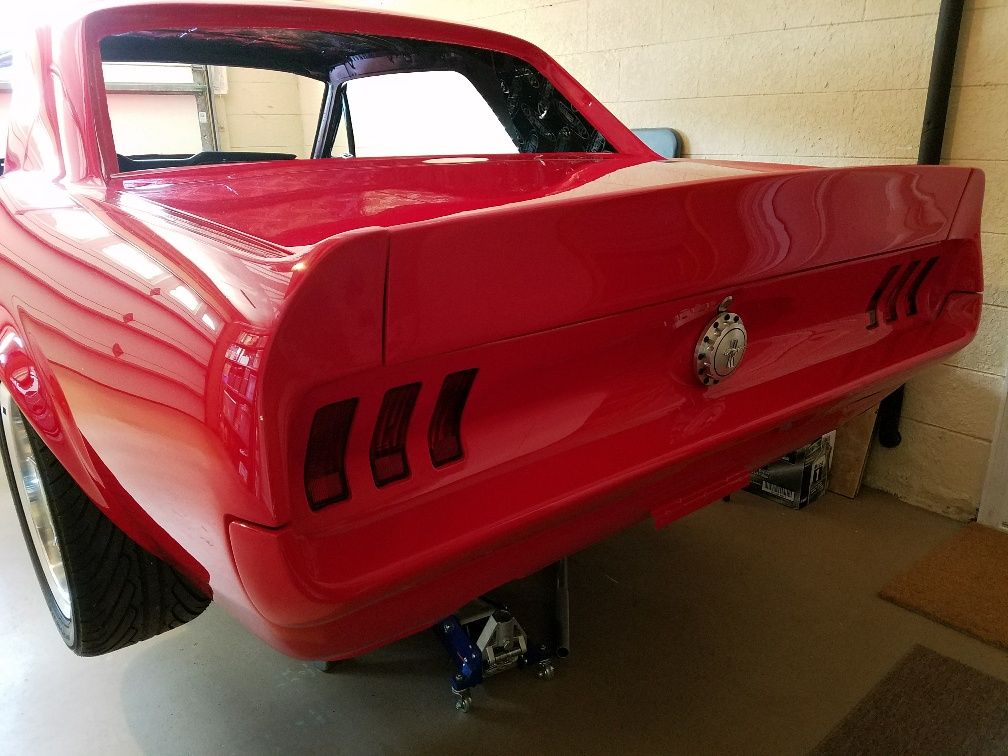
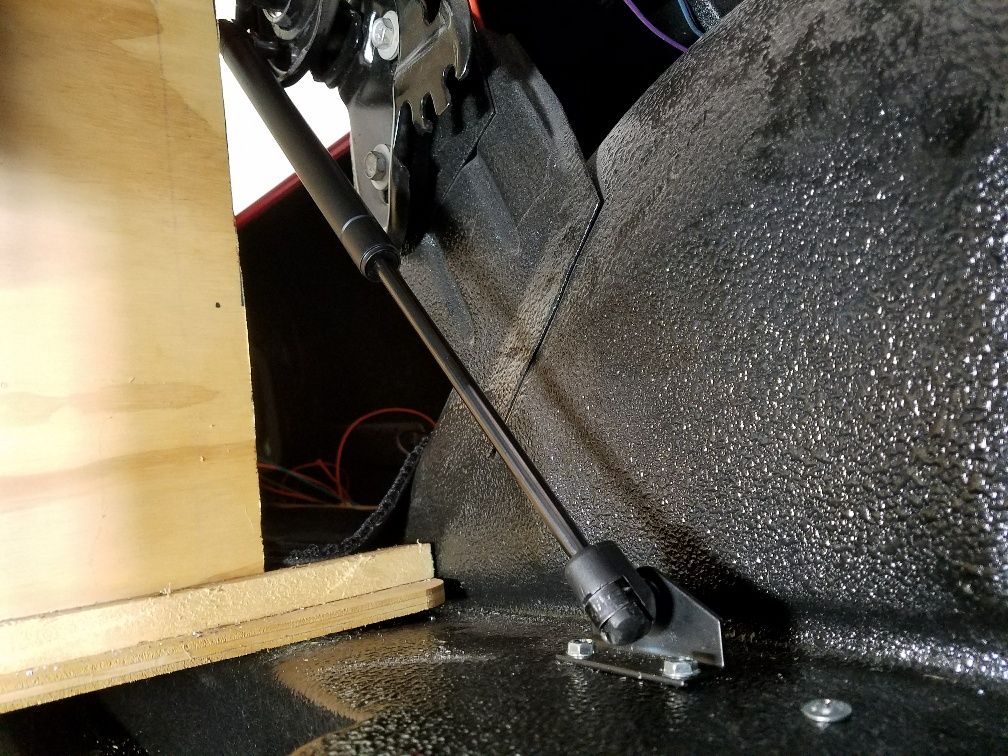
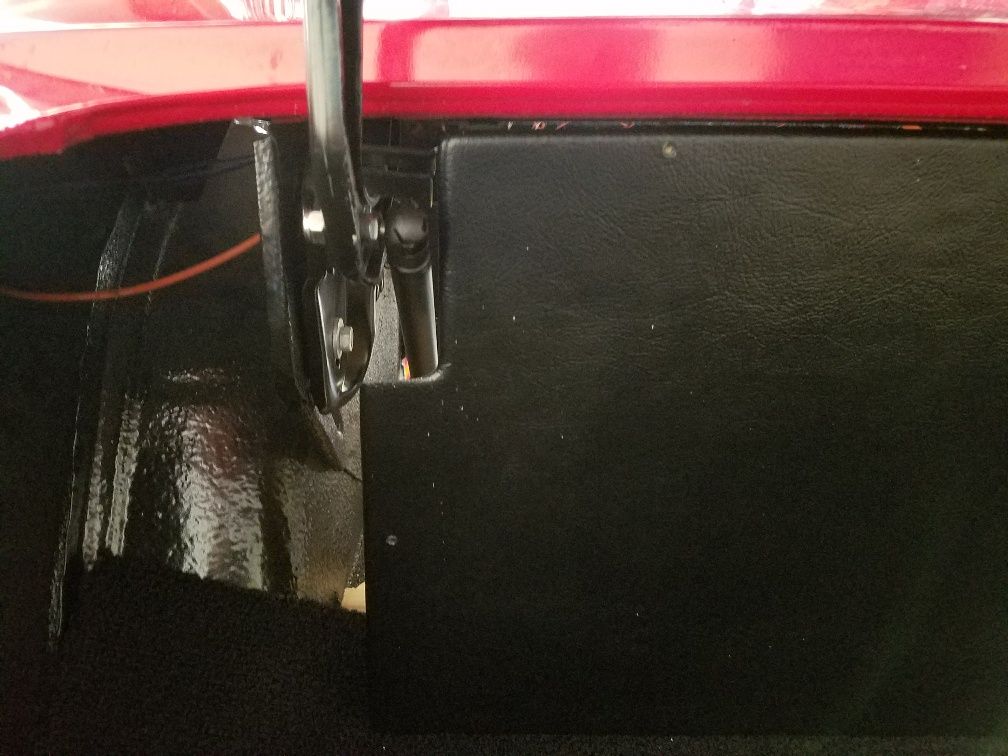
I have been using a board to hold up the deck lid after searching I found these struts from Mustangs Unlimited
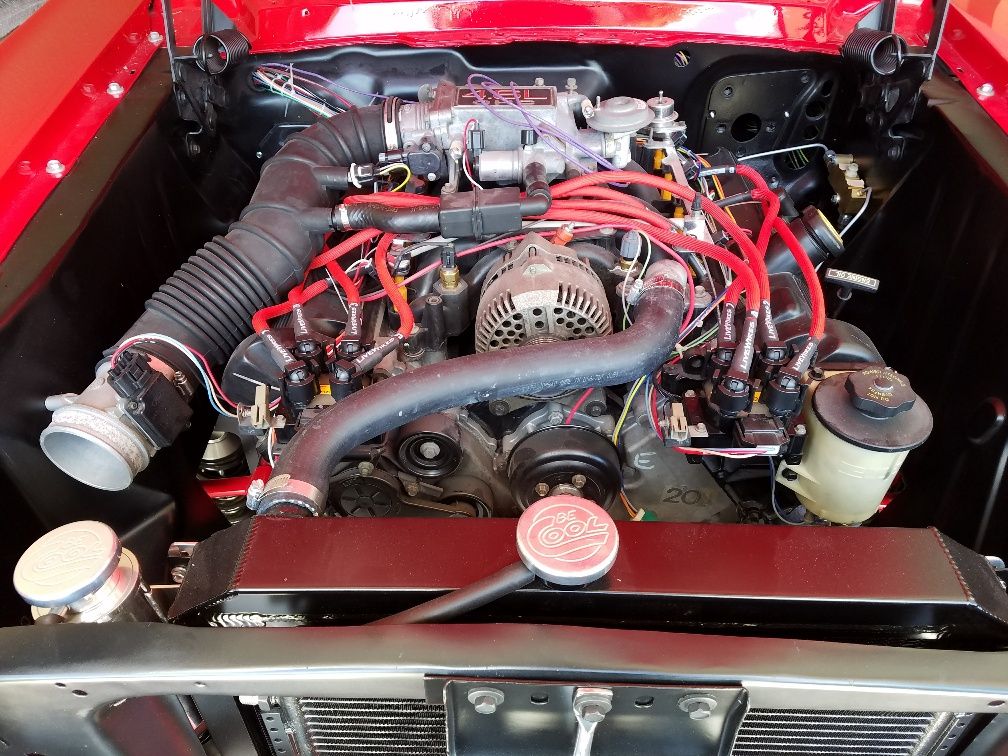
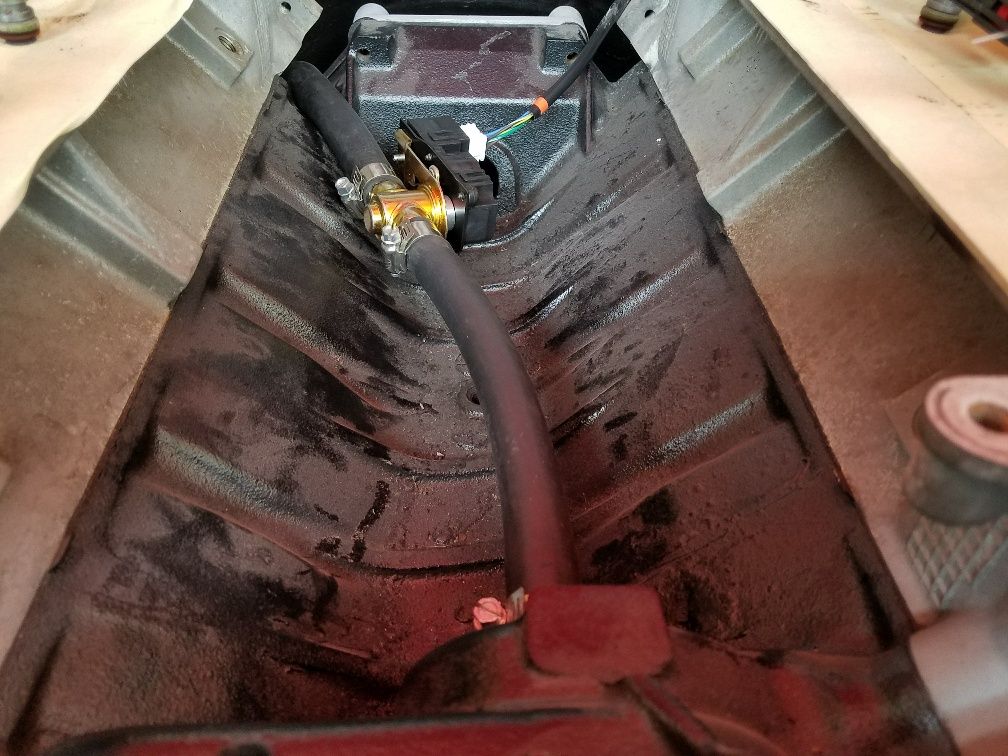
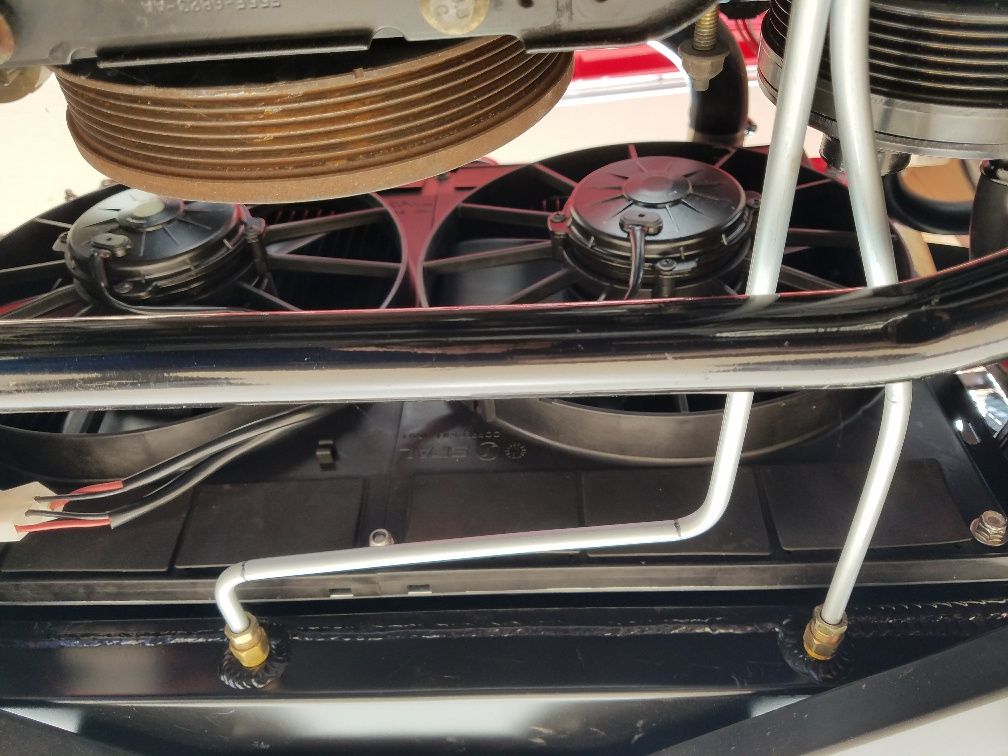
My intake was cracked while I was replacing it I found a good place for the AC valve
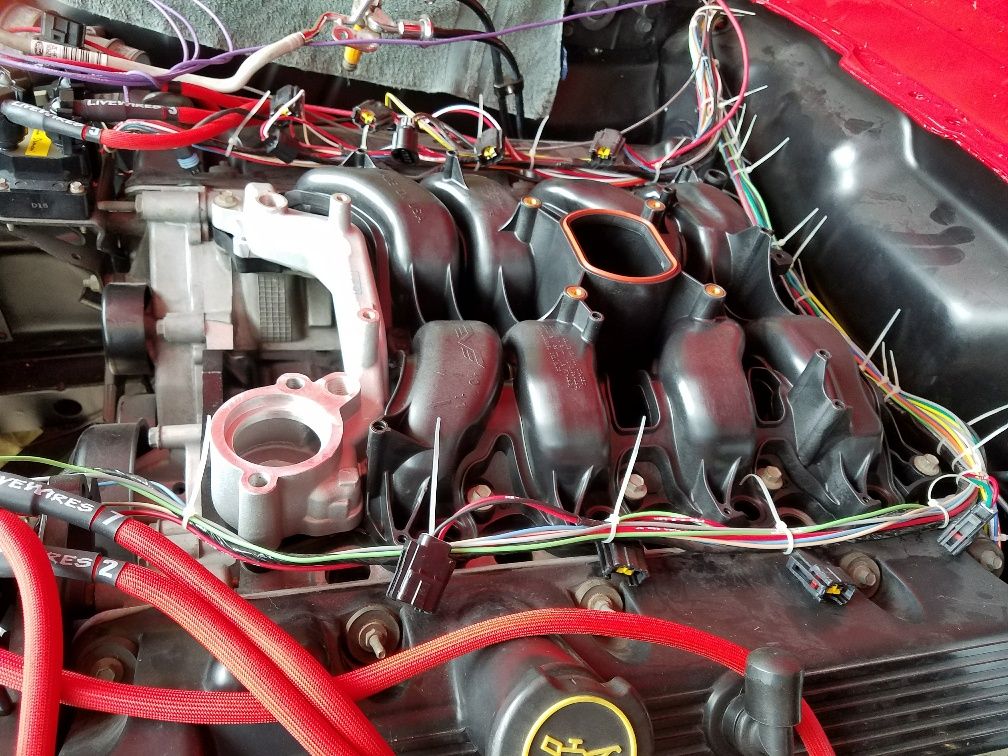
New intake
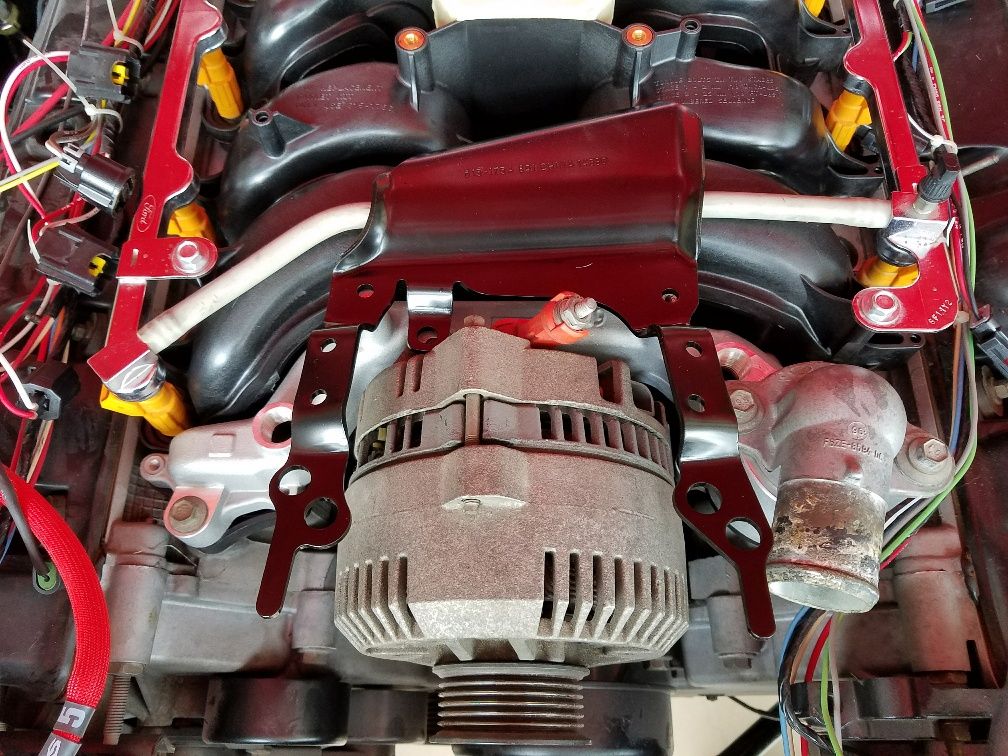
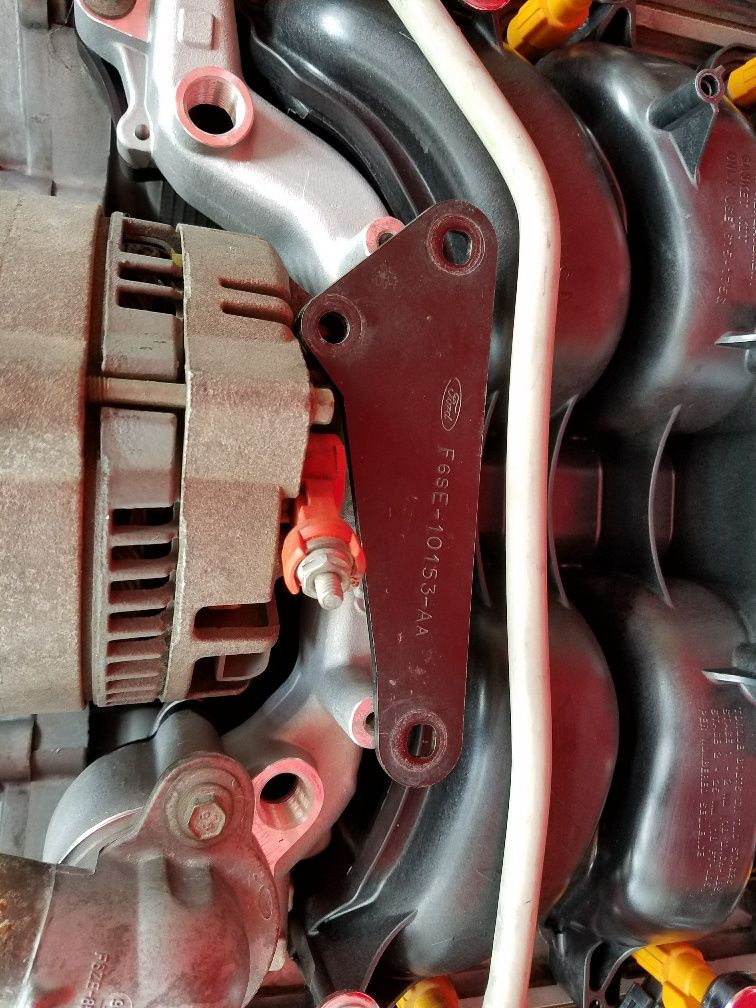
Next problem I had was none of the brackets for the alternator would work so we had to cut and modify the first one to fit. Sorry no photo
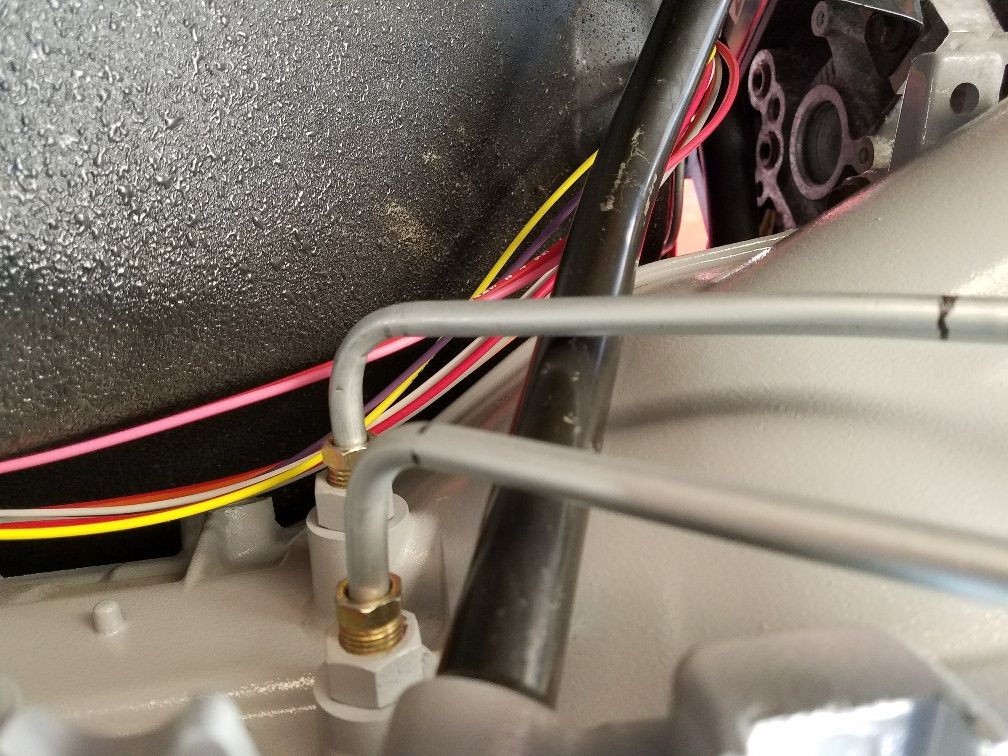
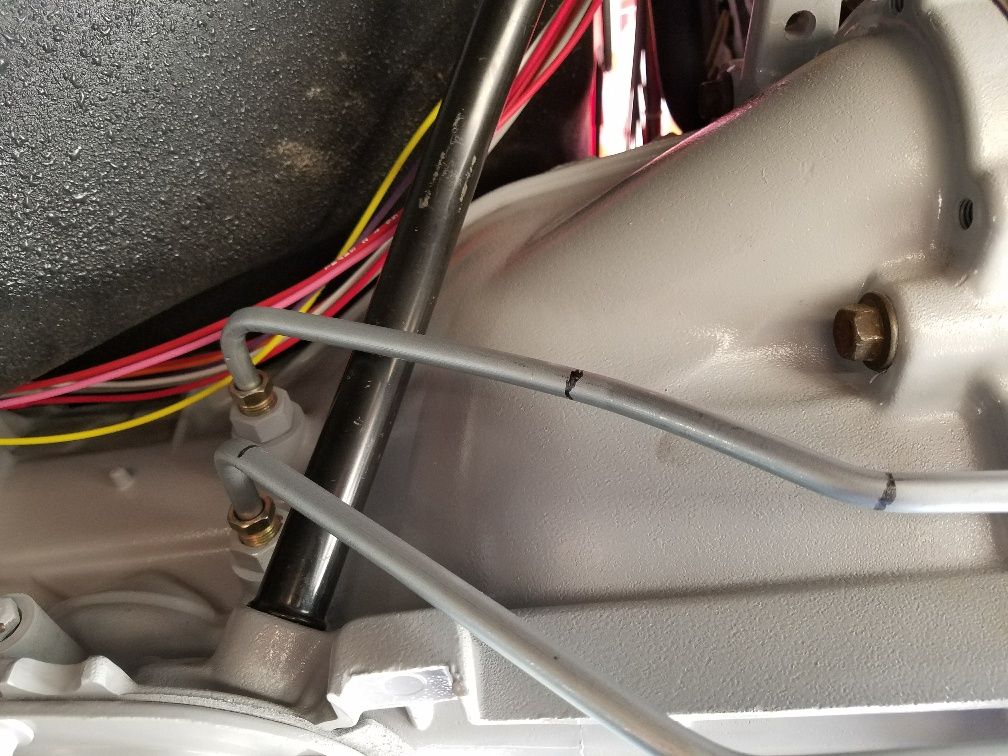
I bought stainless steel transmission cooler lines for the AOD but they didn't fit so I made my own

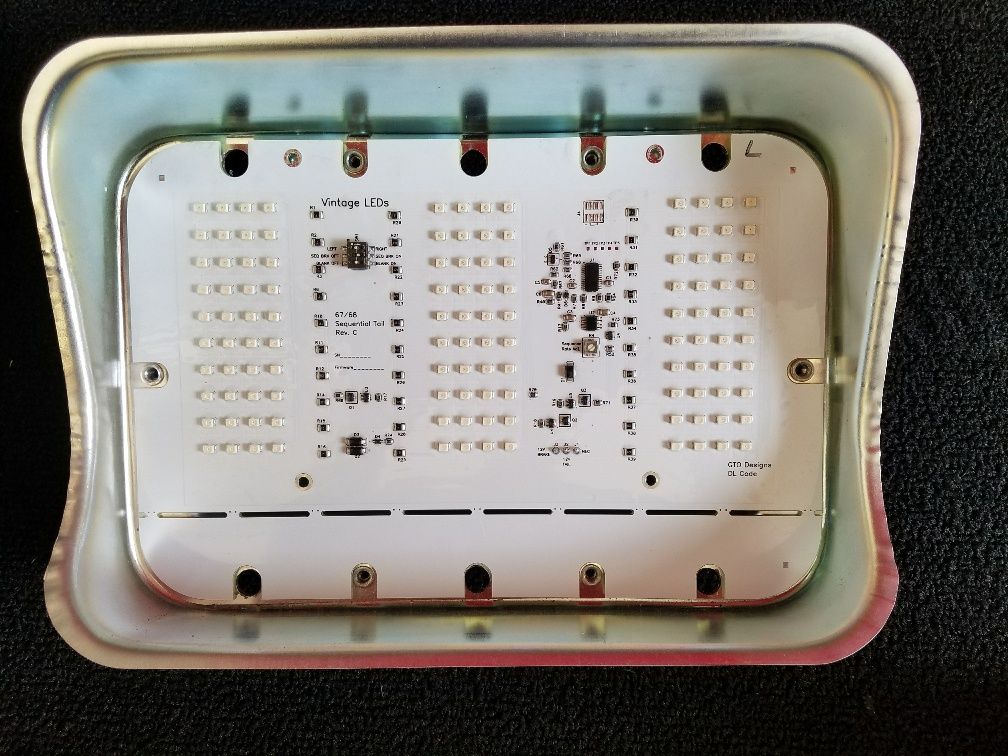
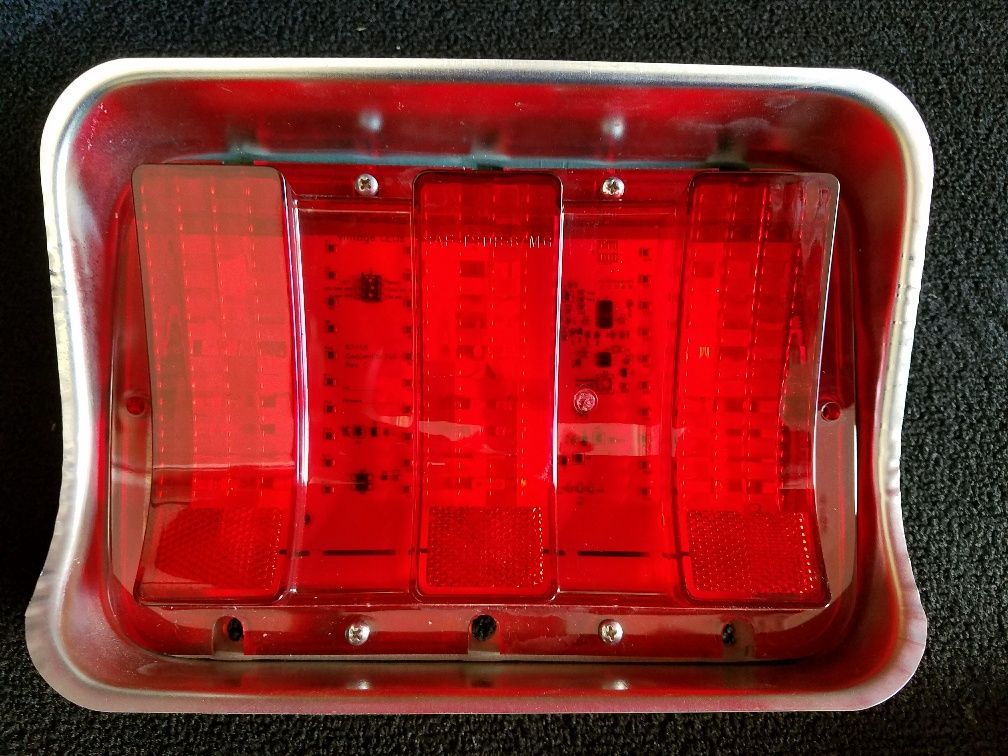
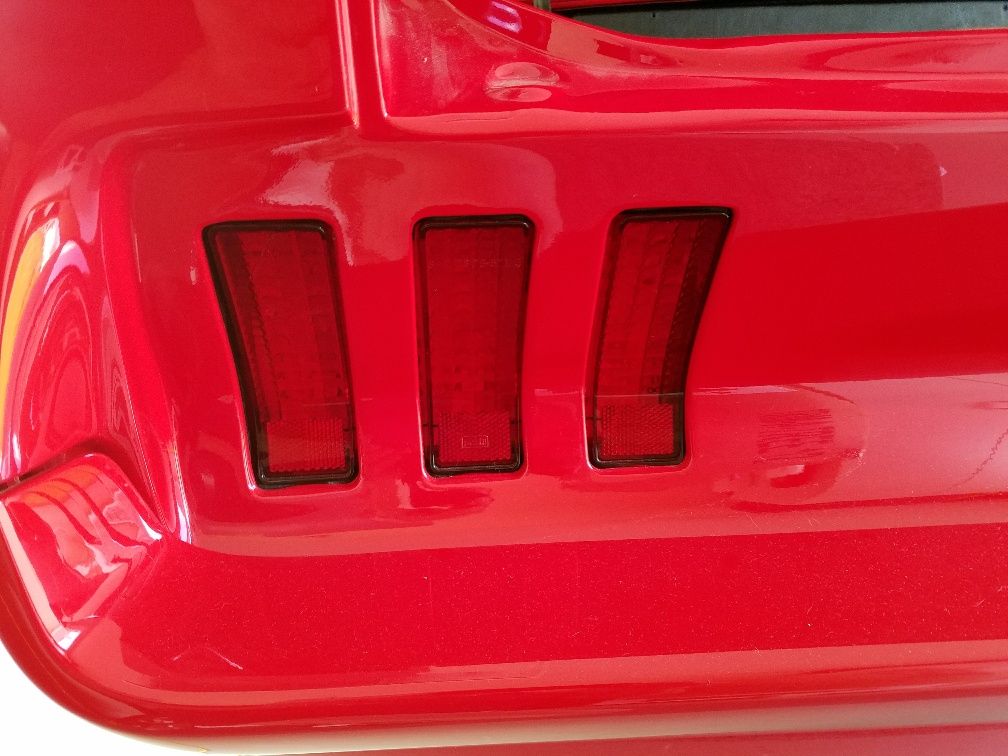
I ordered a set of Vintage LEDs taillights

My intake was cracked while I was replacing it I found a good place for the AC valve
New intake
Next problem I had was none of the brackets for the alternator would work so we had to cut and modify the first one to fit. Sorry no photo
I bought stainless steel transmission cooler lines for the AOD but they didn't fit so I made my own
I ordered a set of Vintage LEDs taillights
3rd Gear Member
Joined: Aug 2009
Posts: 516
From: Michigan
looks awesome!!-
Question on the floor/front rail replacement. If you have to do both(Which my car will need), which do you do first? Do you put in the new floor leaving the frame rail till second? or replace the frame rail first using the floor to align?
Question on the floor/front rail replacement. If you have to do both(Which my car will need), which do you do first? Do you put in the new floor leaving the frame rail till second? or replace the frame rail first using the floor to align?