frpp cam cover install
 02-09-2013, 06:00 PM
#1
6th Gear Member
Thread Starter

Join Date: Sep 2006
Location: Gainesville, FL
Posts: 11,278
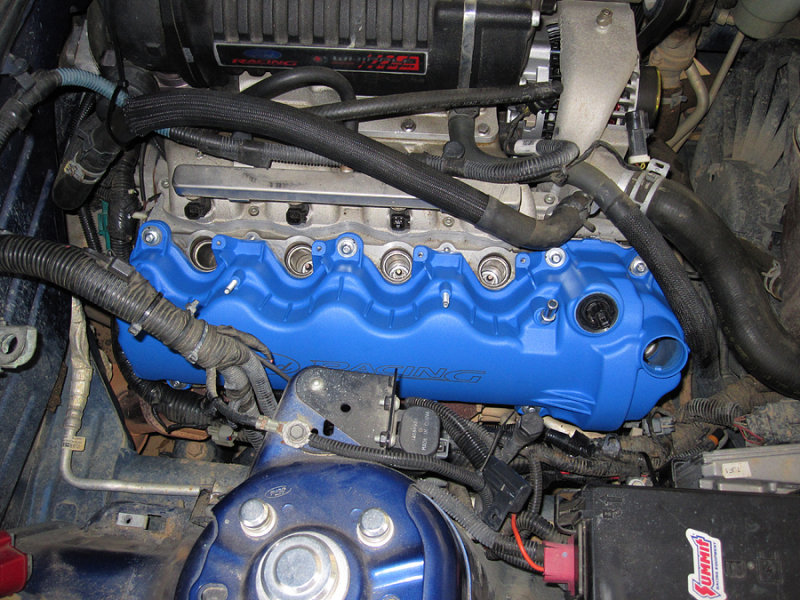
Finally got tired of my cam covers leaking. I spent a lot of time vacuuming and blowing off the covers. I had sand everywhere.
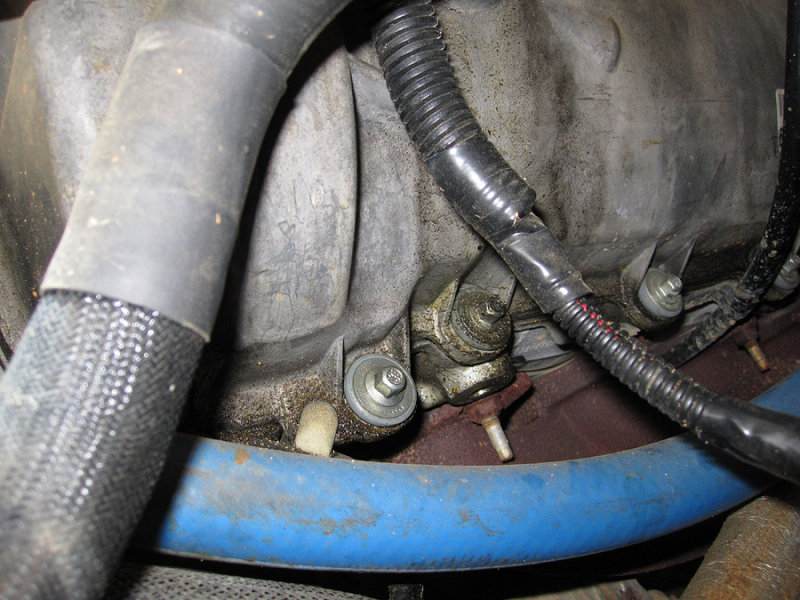
I read some of the how to's and dove right in. I removed all the whipple stuff in the way and disconnected all wiring connectors. You can pull the wiring harness up over the dipstick tube and push it down below the cam covers. I wish i had removed the dipstick tube, but instead I just unbolted it from the block to give a little more wiggle room.
Disconnecting the fuel line would have made it even easier.
When I pulled the old gasket off, the rectangular part of the timing cover gasket came with it, so I used a razor blade to remove the rest.

In Tacobills write up, he just removed the rtv and not the rectangular piece that protrudes from the head/timing cover seam. I put a nice big goob of black rtv, so hopefully I don't have any leaks. After looking at the new gasket, compared to the old gasket, I don't think you should leave that rectangle piece there. I post a pic tomorrow comparing the two gaskets. I still need to do the passenger side.
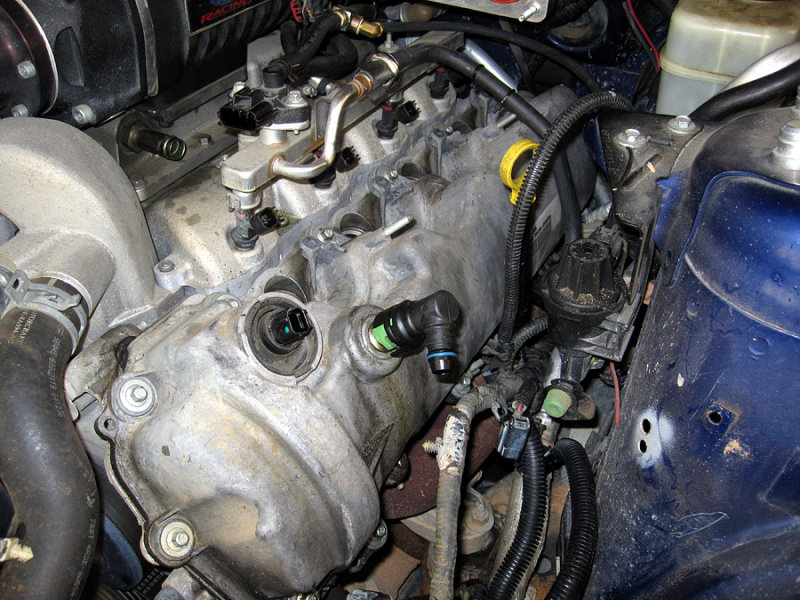
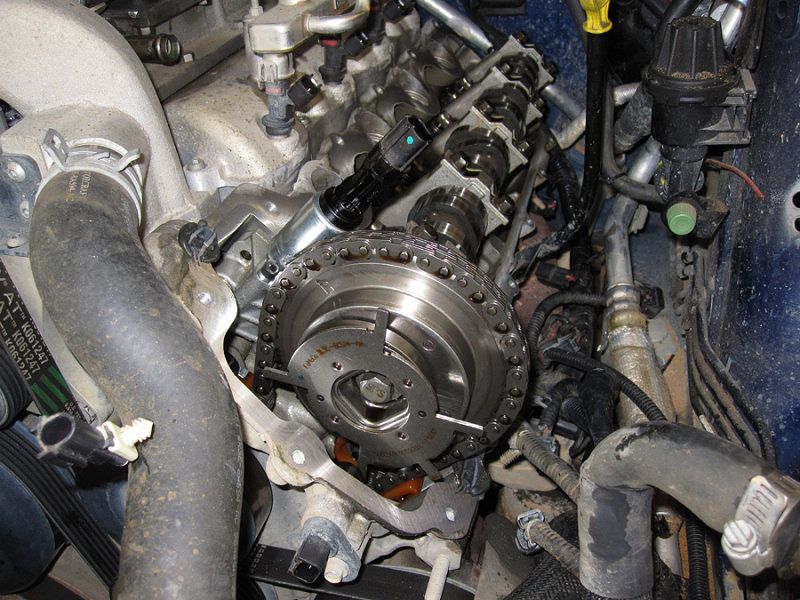
Some random pics with the covers removed.

The frpp covers have a lot less bolts. I new this going in, but I'm still not sure why they did this.

I read some of the how to's and dove right in. I removed all the whipple stuff in the way and disconnected all wiring connectors. You can pull the wiring harness up over the dipstick tube and push it down below the cam covers. I wish i had removed the dipstick tube, but instead I just unbolted it from the block to give a little more wiggle room.
Disconnecting the fuel line would have made it even easier.
When I pulled the old gasket off, the rectangular part of the timing cover gasket came with it, so I used a razor blade to remove the rest.
In Tacobills write up, he just removed the rtv and not the rectangular piece that protrudes from the head/timing cover seam. I put a nice big goob of black rtv, so hopefully I don't have any leaks. After looking at the new gasket, compared to the old gasket, I don't think you should leave that rectangle piece there. I post a pic tomorrow comparing the two gaskets. I still need to do the passenger side.
Some random pics with the covers removed.
The frpp covers have a lot less bolts. I new this going in, but I'm still not sure why they did this.
 02-09-2013, 07:01 PM
#2
3rd Gear Member

Join Date: Nov 2009
Location: Decatur AL
Posts: 823
You really don't think that would add as much to the appearance of the engine bay as it really does. When I had a 4.6 I cleaned, sanded, primed and painted mine. Took a weekend for me to do, but, it gave me something to do. On my 2012 I painted my coil covers instead of paying $80 bucks for them. Now I hate to call a brother out but I am compelled to; CLEAN THAT ENGINE BAY MAN!!!!!
02-09-2013, 08:15 PM
#3
6th Gear Member
Thread Starter
Join Date: Sep 2006
Location: Gainesville, FL
Posts: 11,278
You really don't think that would add as much to the appearance of the engine bay as it really does. When I had a 4.6 I cleaned, sanded, primed and painted mine. Took a weekend for me to do, but, it gave me something to do. On my 2012 I painted my coil covers instead of paying $80 bucks for them. Now I hate to call a brother out but I am compelled to; CLEAN THAT ENGINE BAY MAN!!!!!
02-10-2013, 05:51 PM
#5
6th Gear Member
Thread Starter
Join Date: Sep 2006
Location: Gainesville, FL
Posts: 11,278
Passenger side was much easier as expected. Unplugged cops and injectors and had just enough slack to slide the wiring harness down below the cover.

I removed the battery and tray. It's probably not necessary, but the tray is really close to the cover.

Done! Hopefully i don't find any leaks when i start it tomorrow. I did not get a chance to clean the engine. Tomorrow I will do it and post a pic.
I removed the battery and tray. It's probably not necessary, but the tray is really close to the cover.
Done! Hopefully i don't find any leaks when i start it tomorrow. I did not get a chance to clean the engine. Tomorrow I will do it and post a pic.
02-10-2013, 07:35 PM
#8
6th Gear Member
Thread Starter
Join Date: Sep 2006
Location: Gainesville, FL
Posts: 11,278
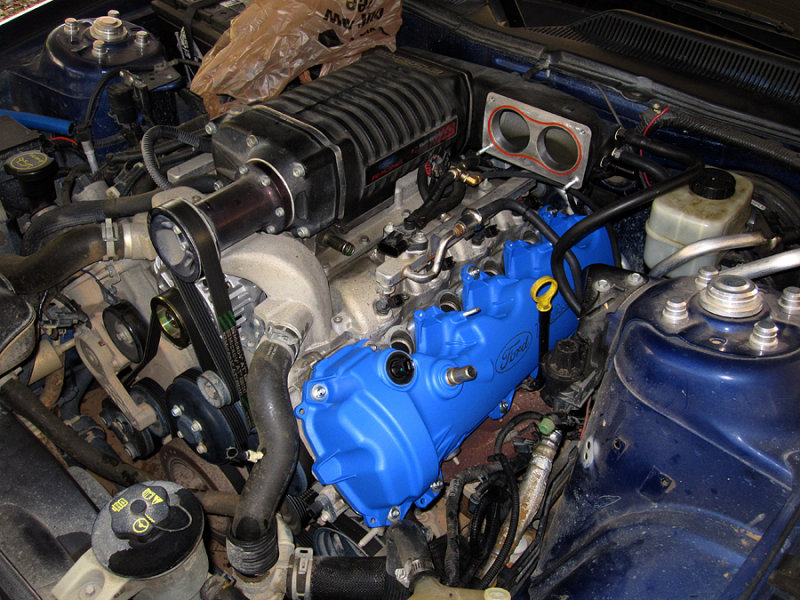
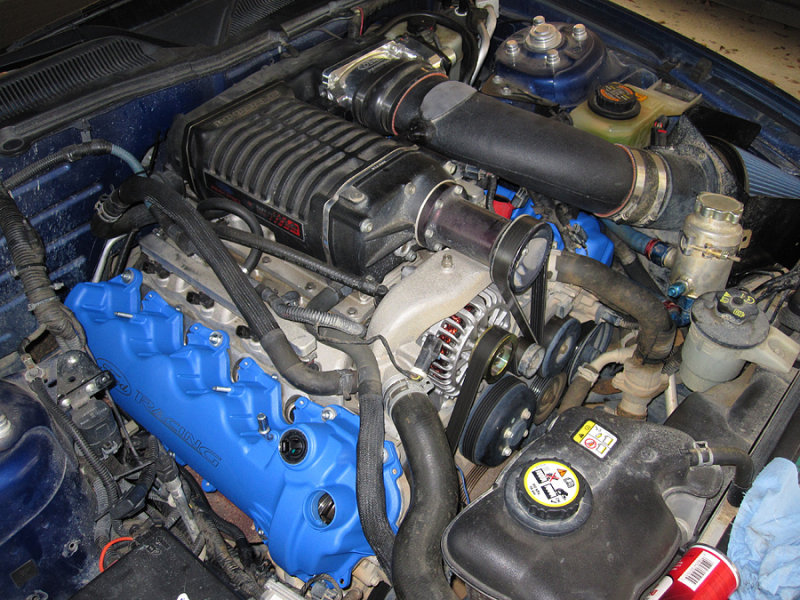
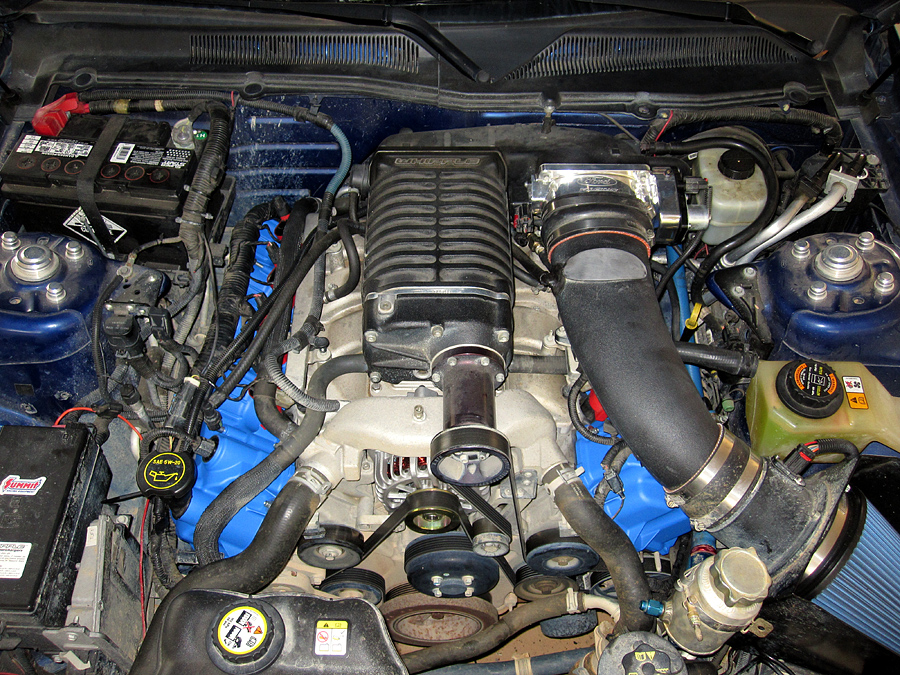
You can't miss these covers when you open the hood, that's for sure.
I forgot to take a pic of the stock gaskets vs. the frpp gaskets in the spot where the timing cover meets the heads. The frpp gasket has a small square indentation in the gasket and the stock ones had a longer rectangular indentation like the piece of timing cover gasket that
protrudes from the seem that.
By the way, when I pulled the gasket off the passenger side, it pulled both of those rubber rectangles of with it.
02-10-2013, 08:01 PM
#9
1st Gear Member
Join Date: Jun 2011
Location: INDIANA
Posts: 149
Nice work! For me I can't decide...Blue or chrome? I have a pristine clean engine bay so the blue would really stand out, but the chrome would be a more traditional old school look any thoughts are appreciated
02-10-2013, 10:10 PM
#10
6th Gear Member
Thread Starter
Join Date: Sep 2006
Location: Gainesville, FL
Posts: 11,278
Obviously I prefer the blue. Chrome will be less obvious IMO, almost invisible.