
Vortech V2-SQ Rebuild

Thread Starter
2nd Gear Member
Joined: Sep 2009
Posts: 311
From: IL
Well, last week the un-thinkable happened. I started my car at lunch time only to discover that sometime between 9am and Noon, the supercharger gremlins attacked and stole one of my bearings! No, really I made that up, but I did have a trashed bearing and the most hideous whine. Towed it home, hit the forums and started looking for answers. I found a pretty decent writeup and figured WTH! Took a few pics along the way.
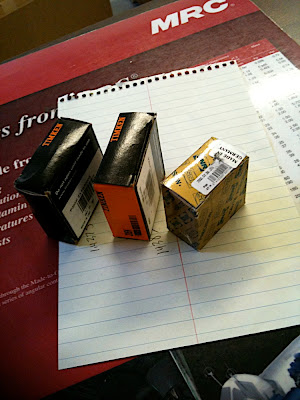
So excited, I took a pic when I picked them up
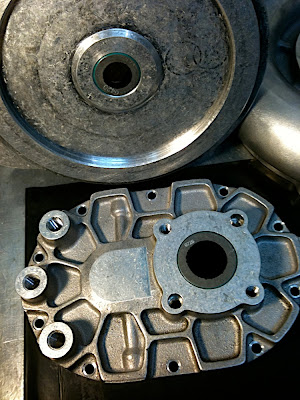
Cracked it open, do I really want to do this?
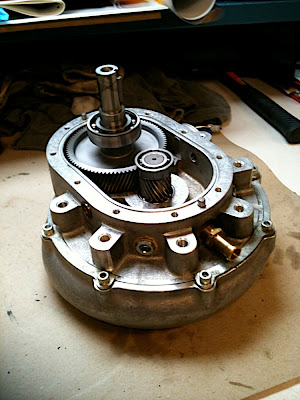
Hmm, yeah, there's the problem. Missing one of them little shiny things.
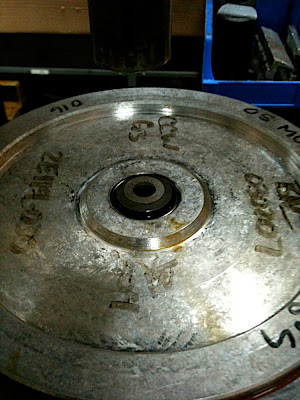
Slept on it and decided I was serious. Used the press at work. This is right after I pressed the impeller shaft out.
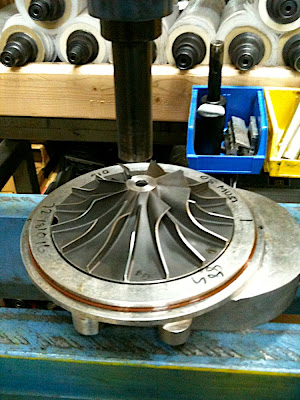
Hidden messages under the impeller. No doubt left by the gremlins.
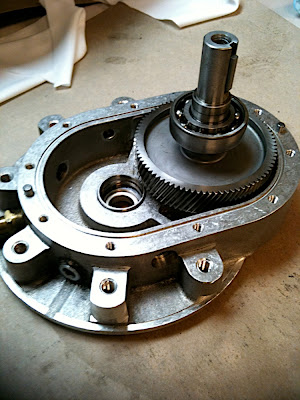
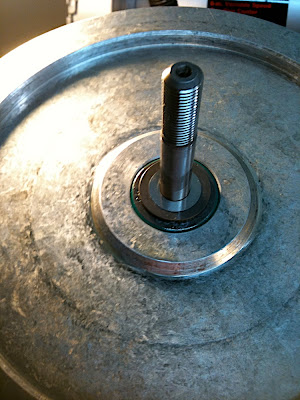
Here's the case minus the output shaft. Note the outer race still stuck in the hole. Took me almost an hour to concoct a plan to press it out without damaging the case.
Output shaft. Yeah I wrecked that bearing taking it out, but I got it... Get it? The shaft?
Jump ahead a few hours... Sorry no pics. I was too nervous, sweaty and greasy to work the camera while pressing the new bearings on. Somehow I managed without destroying anything.
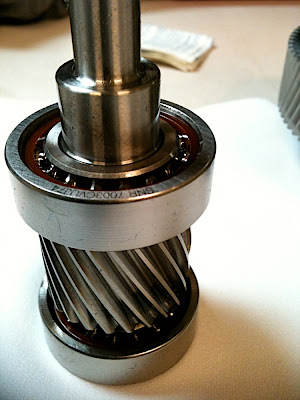
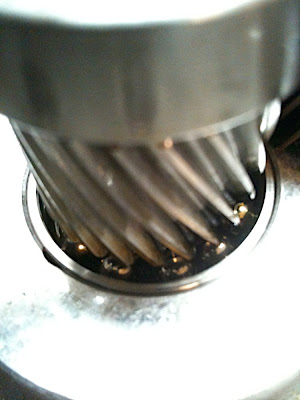
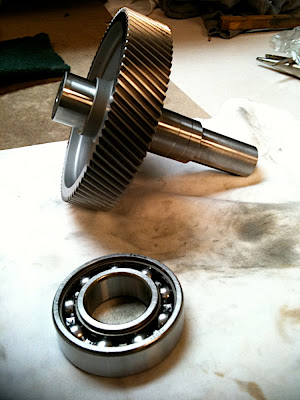
This is the input shaft with the bearings removed. You have no idea the inner turmoil I went through before this. It was like the little angel and devil on my shoulders. Angel whispers, "You found the problem already. These bearings appear fine. Put it back together." The Devil was all like, "You haven't wrecked anything yet. Keep going. Besides, these will fail tomorrow if you don't."
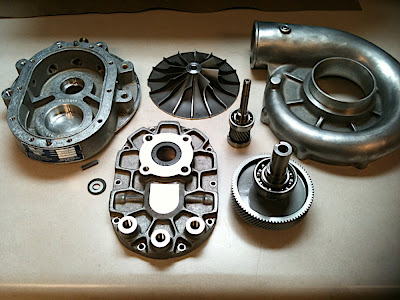
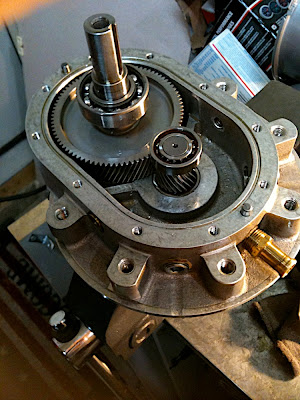
And here it is in my moment of triumph! I totally slayed and disemboweled my blower. Your not so tough now, are ya?
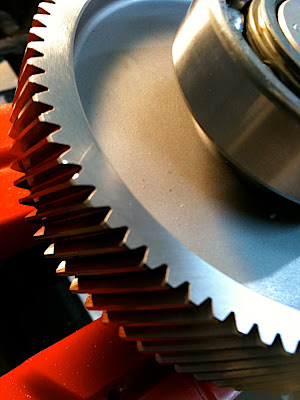
Whoops. Turns out in my inexperience I managed to nick the input gear. The tolerances between these two gears are so close even the slightest imperfection can be felt. If you look closely, the two little highlights are where I BARELY ground down the bump I somehow managed to create.
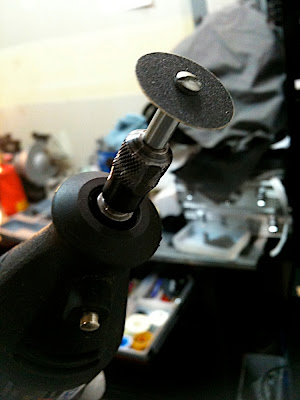
Here's what I used to smooth the edge of the tooth.
Don't even think about doing this and not replacing the seals too. They are cheap and pop out really easily. Some guys tap them in with a hammer. I never used a press before so naturally I had to use it for everything I could.
Just a test fitting here. Checking out my grind job. You can't feel the bump anymore. At least not on the gears. :P
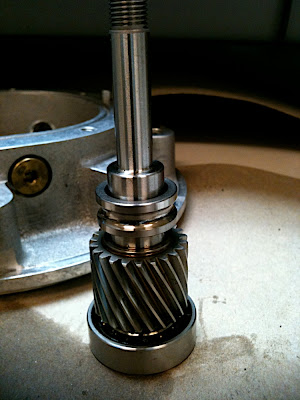
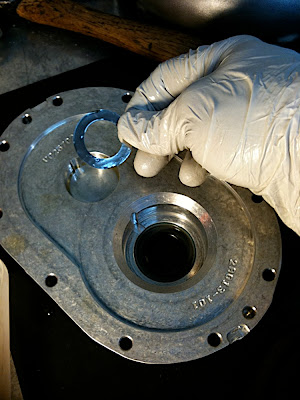
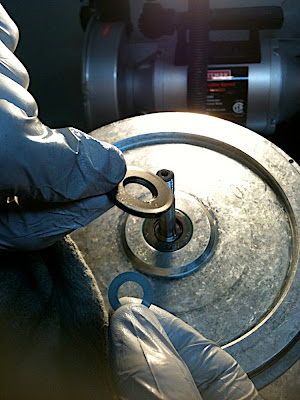
There's two wave washers to take up the play in the shafts. This one is for the output shaft. There is also a paper thin metal one that goes in first.
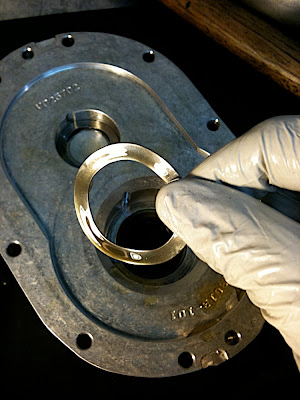
The larger one is for the input shaft. No thin metal liner thingy under this one.
Two washer type thingies under the impeller. Thick one first, then the thin one. Note the thicker one has a scalloped area on one side. I made sure I payed attention taking it apart. It goes on facing DOWN! Or was that up? J.K. It goes down.
Almost finished and here's where I got too oily to work the iPhone and take any more pics. It was just another hour or so of swearing while trying to get that friggin' case lined up right and the output shaft through the oil seal without trashing it.
I bet right about now your going, is this guy serious? He's cracking jokes while he's tearing apart a really expensive, precision device like this. Hear me now, I was scared shiftless while I was doing this. It took me all of 14 hours across 4 days to do all this. I worked slow and thought about everything 3-4 hundred times before actually doing it. I still made a lot of mistakes and got lucky more than a few times. I had something to prove to myself and I can honestly say, "I never want to do this again!"
So far I have put about 100 miles on it and everything seems to be working. Time will tell if I made the right decision...
Here's a before
http://www.youtube.com/watch?v=WXto9FpasNg
and after
http://www.youtube.com/watch?v=aU_Zn7Z9UIs
So excited, I took a pic when I picked them up
Cracked it open, do I really want to do this?
Hmm, yeah, there's the problem. Missing one of them little shiny things.
Slept on it and decided I was serious. Used the press at work. This is right after I pressed the impeller shaft out.
Hidden messages under the impeller. No doubt left by the gremlins.
Here's the case minus the output shaft. Note the outer race still stuck in the hole. Took me almost an hour to concoct a plan to press it out without damaging the case.
Output shaft. Yeah I wrecked that bearing taking it out, but I got it... Get it? The shaft?
Jump ahead a few hours... Sorry no pics. I was too nervous, sweaty and greasy to work the camera while pressing the new bearings on. Somehow I managed without destroying anything.
This is the input shaft with the bearings removed. You have no idea the inner turmoil I went through before this. It was like the little angel and devil on my shoulders. Angel whispers, "You found the problem already. These bearings appear fine. Put it back together." The Devil was all like, "You haven't wrecked anything yet. Keep going. Besides, these will fail tomorrow if you don't."
And here it is in my moment of triumph! I totally slayed and disemboweled my blower. Your not so tough now, are ya?
Whoops. Turns out in my inexperience I managed to nick the input gear. The tolerances between these two gears are so close even the slightest imperfection can be felt. If you look closely, the two little highlights are where I BARELY ground down the bump I somehow managed to create.
Here's what I used to smooth the edge of the tooth.
Don't even think about doing this and not replacing the seals too. They are cheap and pop out really easily. Some guys tap them in with a hammer. I never used a press before so naturally I had to use it for everything I could.
Just a test fitting here. Checking out my grind job. You can't feel the bump anymore. At least not on the gears. :P
There's two wave washers to take up the play in the shafts. This one is for the output shaft. There is also a paper thin metal one that goes in first.
The larger one is for the input shaft. No thin metal liner thingy under this one.
Two washer type thingies under the impeller. Thick one first, then the thin one. Note the thicker one has a scalloped area on one side. I made sure I payed attention taking it apart. It goes on facing DOWN! Or was that up? J.K. It goes down.
Almost finished and here's where I got too oily to work the iPhone and take any more pics. It was just another hour or so of swearing while trying to get that friggin' case lined up right and the output shaft through the oil seal without trashing it.
I bet right about now your going, is this guy serious? He's cracking jokes while he's tearing apart a really expensive, precision device like this. Hear me now, I was scared shiftless while I was doing this. It took me all of 14 hours across 4 days to do all this. I worked slow and thought about everything 3-4 hundred times before actually doing it. I still made a lot of mistakes and got lucky more than a few times. I had something to prove to myself and I can honestly say, "I never want to do this again!"
So far I have put about 100 miles on it and everything seems to be working. Time will tell if I made the right decision...
Here's a before
http://www.youtube.com/watch?v=WXto9FpasNg
and after
http://www.youtube.com/watch?v=aU_Zn7Z9UIs

5th Gear Member
Joined: Aug 2007
Posts: 3,189
From:
nice job. the tearing apart i don't mind because worst comes to worst send it to vortech and have them reassemble it (so long as nothing was damaged). its the putting it back together that always gets me on edge. mind posting the link to the how-to you followed?
Thread Starter
2nd Gear Member
Joined: Sep 2009
Posts: 311
From: IL
I'm not so sure that Vortech would even touch it after you crack the case open. They definitely don't want anyone servicing these themselves. I've been burned by the "Pros" so many times that I am reluctant to let anyone service anything I own. Besides, I learned a lot on this project. Here's the link to the info I used. There should be a PDF linked in that thread somewhere which was a pretty good reference too. And yeah, things usually come apart so much easier than they go back together, why is that? LOL!

Thread
Thread Starter
Forum
Replies
Last Post
tj@steeda
Steeda Autosports
0
Sep 16, 2015 07:53 PM