Please Help - Oil Catch Can - 2000 Mustang V6 - What side of motor?

 01-13-2014, 09:40 AM
#14
2nd Gear Member
Thread Starter

Join Date: Oct 2013
Location: Alberta
Posts: 170
BabyGT: Thanks again for the advice and the pictures my friend. They are MUCH appreciated!!! Can you advise for me if the parts listed in that write up are the same size (the fittings, etc were 3/8's I believe for example) for our cars?
warthogdriver: PM sent... :-)
warthogdriver: PM sent... :-)
01-13-2014, 11:24 AM
#16
2nd Gear Member
Thread Starter
Join Date: Oct 2013
Location: Alberta
Posts: 170
So then you just connect a new piece of hose to the actual PCV valve to the catch can and LEAVE the PCV valve in its place and then from the can to the plenum as in your pics and then you're good to go correct? Sorry for the repetitive question(s) but I just want to make sure I do it right the FIRST time... LOL!!!
Also... The can I am planning to build at the end of it all will be "filter less" as the instructions in the write up state to remove the filter piece that comes in the "generic" Husky brand filter bowl / can (I think its actually a water filter of some sort). That being said, should it still work ok? From what I've read / seen it does but thought Id ask someone who has one on his car. Yours HAS a filter element inside it I believe... Correct?
01-14-2014, 10:04 AM
#18
1st Gear Member

Join Date: Dec 2013
Location: TX
Posts: 113
Look at your upper manifold where my braided line connects. Pull that plastic tube out of the rubber grommet, trim the tube so a bit of it sticks out of the grommet when you push it back it, this will have your new line clamped to it, run the new line to the "catch can", pull the other end of the line off of the PCV, now connect a new line from the PCV to the other side of the "catch can". Make sure you have the catch can oriented so the vapor from the valve cover goes into the canister of the can before it exits through the filter in the can.
I used a bit more expensive parts for mine than in that list but basically the same thing. I was worried that the under hood temps would be a bit much for something not designed for an engine bay so I bought a metal and glass moisture seperator.
I used a bit more expensive parts for mine than in that list but basically the same thing. I was worried that the under hood temps would be a bit much for something not designed for an engine bay so I bought a metal and glass moisture seperator.
would you mind posting the parts list and where you bought?
01-14-2014, 10:09 AM
#19
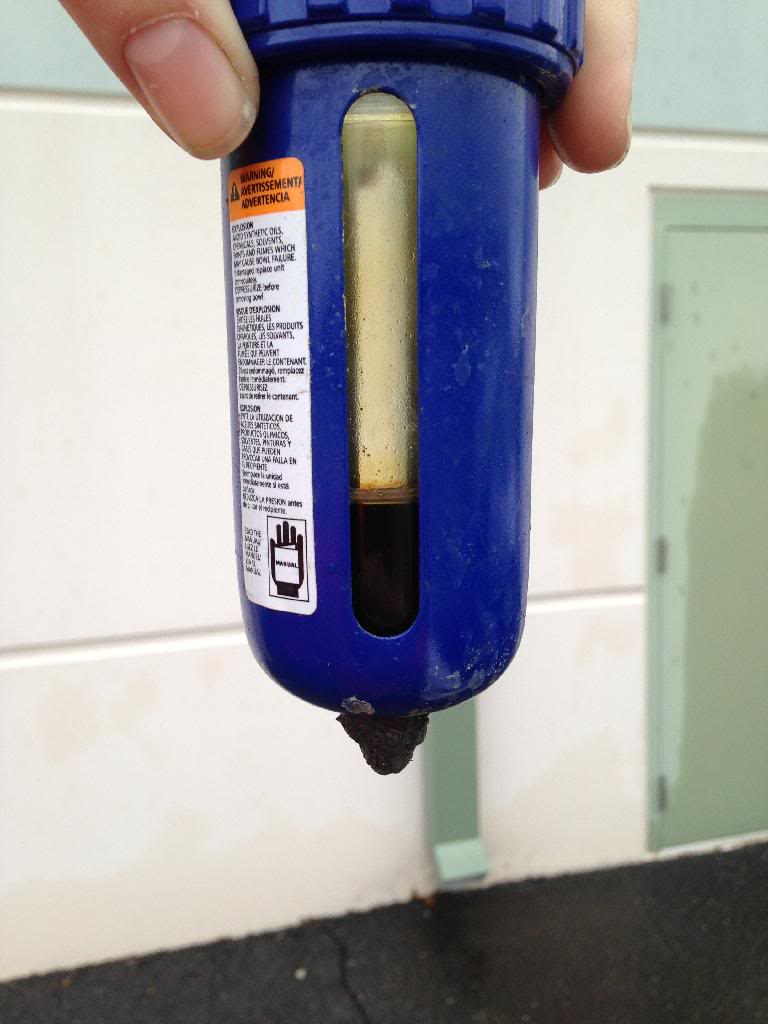
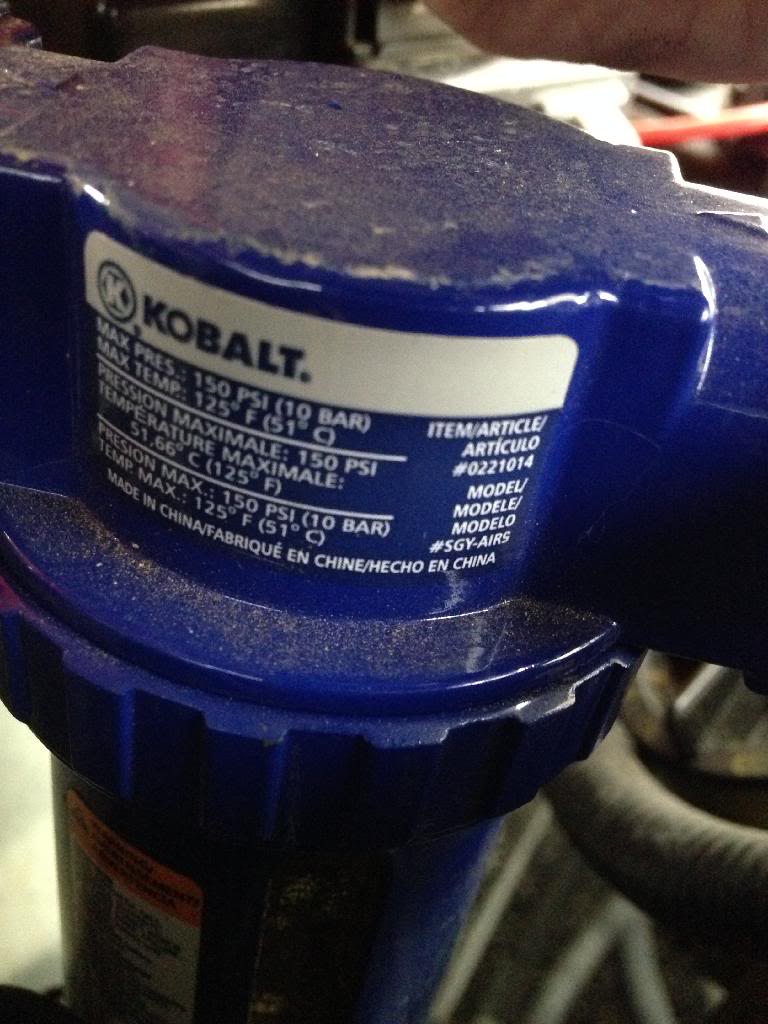
I bought a kobalt moisture separator made for air compressors from lowes, I also bought brass fittings from lowes and had the fuel line already. That's it!
And I left the filter in the can, I figured it can't hurt anything, also kinda defeats the purpose of it in my mind.
I did a bit of research before hand. A lot of people recommended putting some steel wool in the can to give the oil vapor something to cling to. I figure that filter does the same thing
Last edited by BabyGT; 01-14-2014 at 10:13 AM.
01-14-2014, 10:43 AM
#20
I forgot to mention I did remove the drain valve from the bottom of the bulb, as this is designed for a pressurized system and it is a vacuum system on a vehicle. I slathered a bolt in rtv and bolted it through the hole from the valve.
Pics!!!
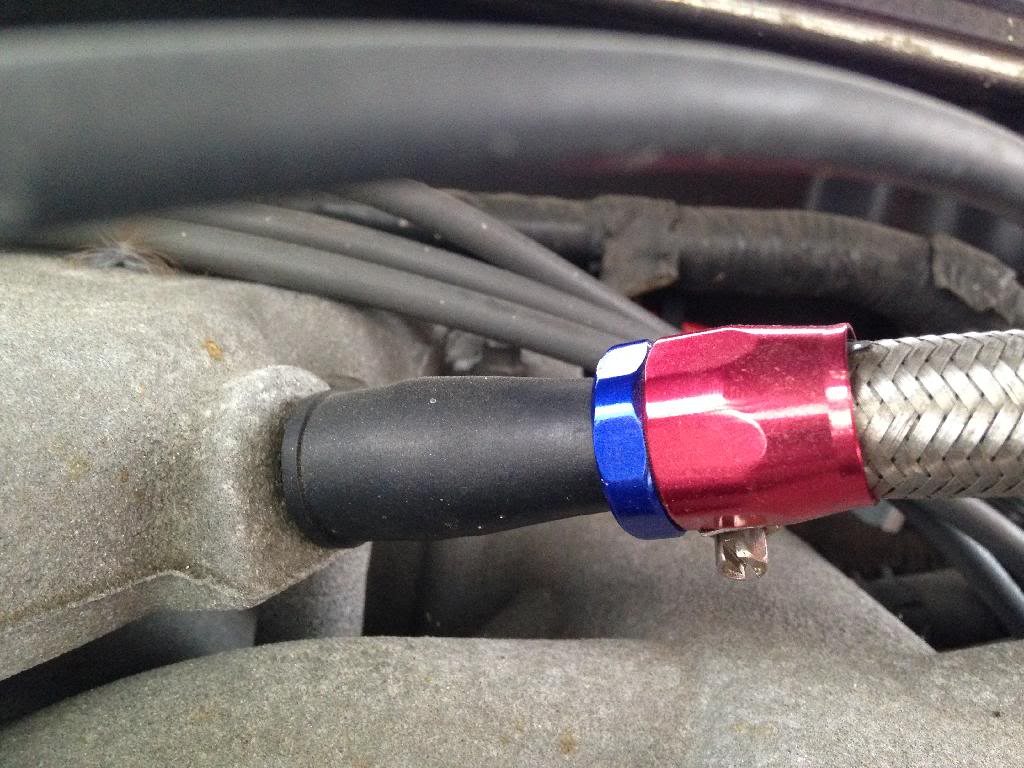
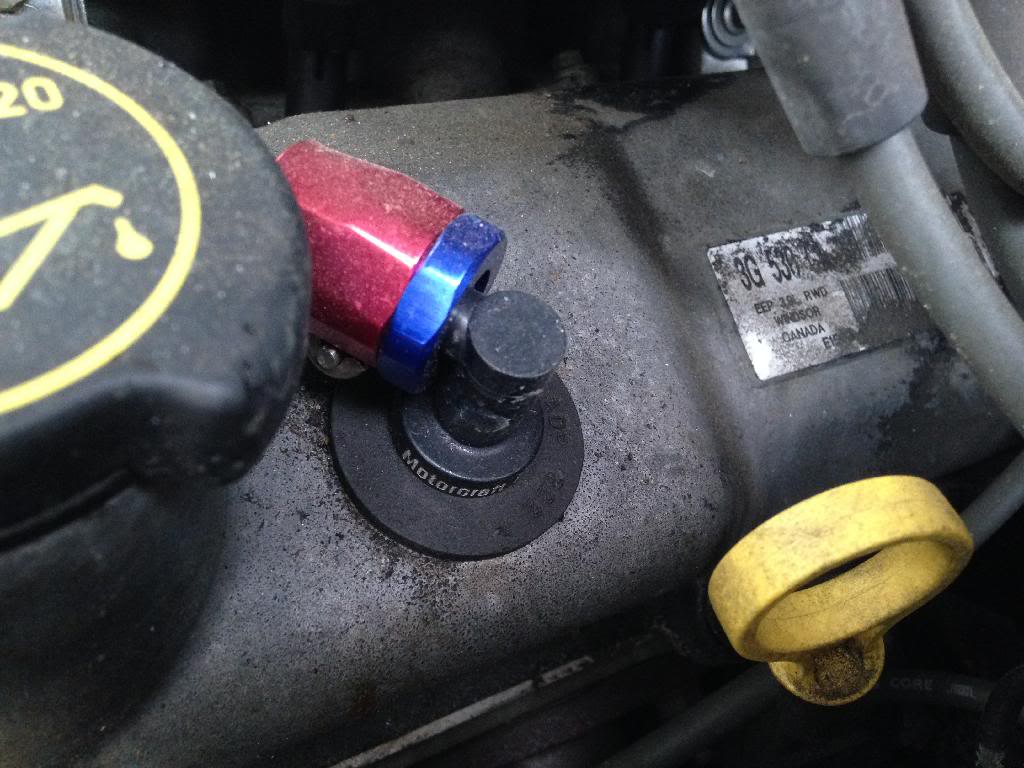
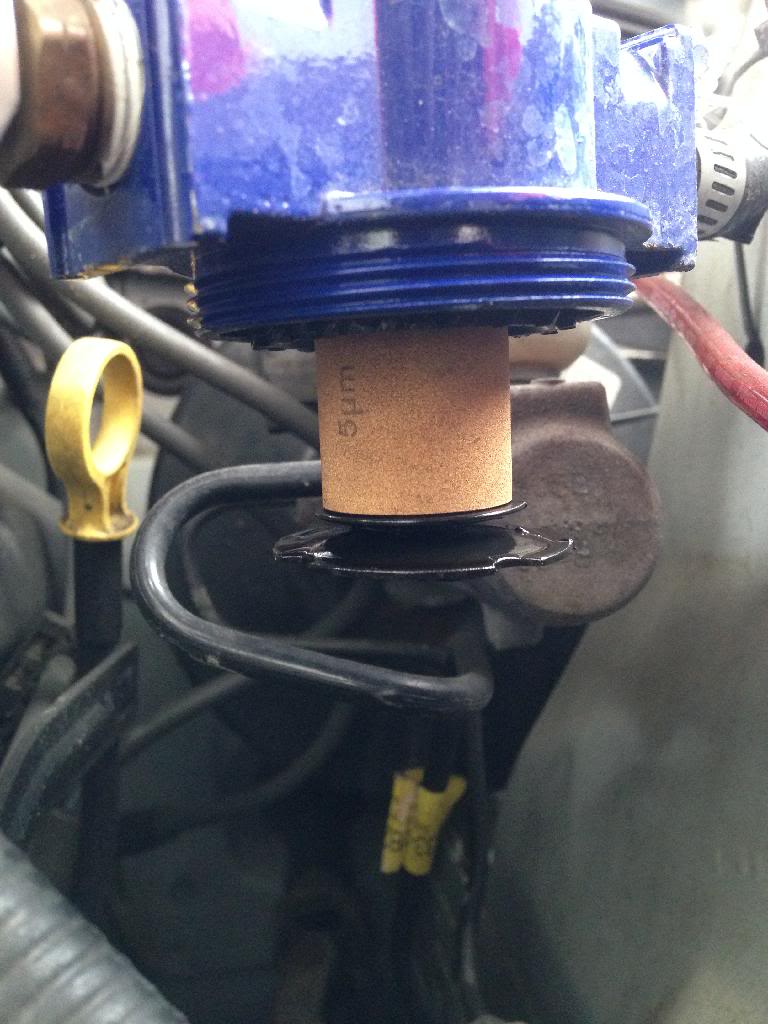
You can see I left the PCV in place and clamped the hose straight to it.
Also you can see where the hose connects to the intake, I trimmed a bit off the plastic tube that inserts into the rubber piece and clamped it into the new line and stuck it back in.
Pics!!!


You can see I left the PCV in place and clamped the hose straight to it.
Also you can see where the hose connects to the intake, I trimmed a bit off the plastic tube that inserts into the rubber piece and clamped it into the new line and stuck it back in.