Ford Mustang V6 1994-2014: How to Repair and Replace Parking Brake
The parking brake on this generation of Mustang was actuated by a cable. Here's what to do when it decides to snap on you.
This article applies to the Ford Mustang (1994-2004).
To keep things simple and easy, Ford decided to utilize a cable actuated parking brake for your Mustang. It works with the rear brake caliper, so that when you pull the handle, which has a cable attached to it, it engages the rear brake caliper and provides parking as well as emergency brake capability. It is also self-adjusting, which makes this setup very low maintenance and only requiring replacement of the cable if it decides to snap on you. This seems to actually be quite an issue after some time in this generation of Mustang. So here is what to do if the cable decides to go on your Mustang.


Materials Needed
- Steel gauge pin
- Needle nose pliers
- Small flat head screwdriver or scribe
- Phillips head screwdriver
- 8mm socket
- Ratchet
- 12" extension
- Jack and jacks stands
- Assistant
This car is equipped with a parking brake cable that is essentially split up into two sections. There is the front cable that attaches to the parking brake lever, runs through the body of the car, and then attaches to the equalizer. Then there are two rear cables on each rear wheel that run from the equalizer.
Keep in mind that if you are replacing the parking brake cable because it snapped, the best thing to do first is figure out which section of cable has snapped. This might simplify things by only requiring you to replace one section of cable and save yourself some time.
First, we will go over how to disengage and remove the front cable. Then we will go over how to disengage and remove the rear cables.
If you only need to replace the rear cables, then skip down to the Rear Cable section. You can remove and install each cable section independently of each other.
Front Cable
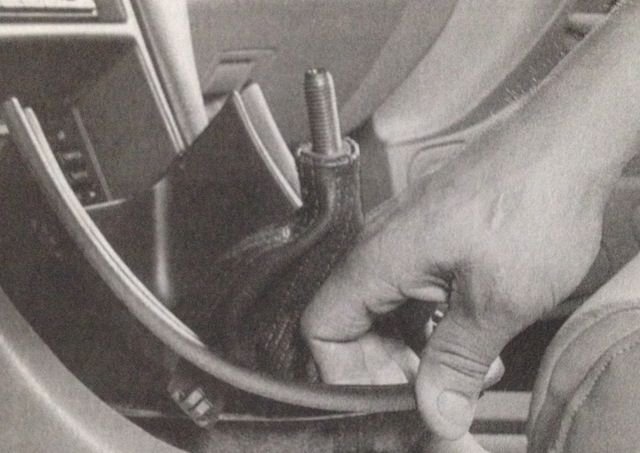
Step 1 – Remove the center console
- Disconnect the negative (black) battery cable, and then the positive battery cable.
- Pry out the gear selector trim bezel. If you have a manual transmission, you will need to also remove the shift knob in order to get the bezel completely removed.
- Detach retaining screws securing front half of the console.

- Pry out rubber bumpers located in console glove box, then detach the retaining screws and remove the glove box.
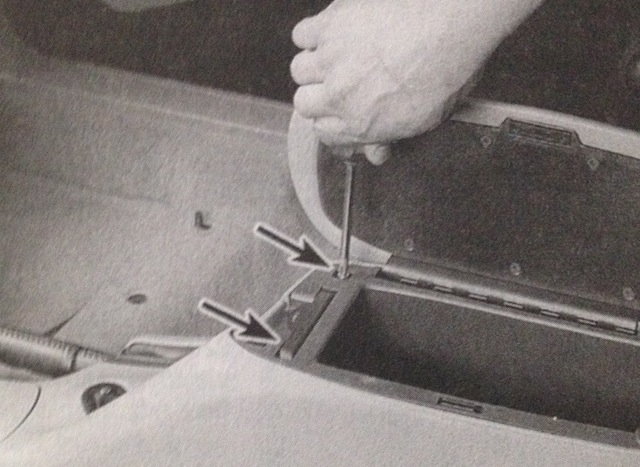
- Detach retaining screws securing the rear half of the console.

- Apply the parking brake, then move gear selector towards rear of vehicle.
- Lift the console up and over the shift lever.
- Disconnect any electrical connectors attached to console.
Step 2 – Release the parking brake lever completely
In removing the center console, you had to apply the parking brake. Now in order to remove the parking brake cables, you will need to release the parking brake lever, which will take any tension that was applied to the parking brake cables off.
Step 3 – Raise the vehicle and support it on jack stands
You will need to have the vehicle raised off the ground in order to gain access to the part of the parking brake cable that runs underneath the car.
Step 4 – Rotate the self-adjusting reel counterclockwise
This is the part where you will need an assistant to help. One of you will need to be inside the vehicle, and the other will need to be under the vehicle to pull the parking brake equalizer to the rear about 2-1/2" to rotate it.
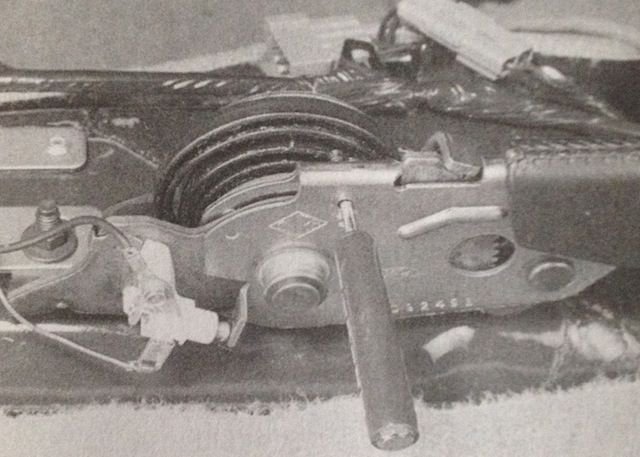
Step 5 – Insert tool to keep adjuster reel from rotating
Insert a steel gauge pin, drill bit, or other similar tool through the holes in the parking brake lever, the lever base assembly, and the adjuster reel. Leave the tools in this place until the parking brake cable is reinstalled. Failure to do so will allow the adjuster reel to unwind and the entire parking brake lever assembly will have to be removed in order to rewind the adjuster mechanism.
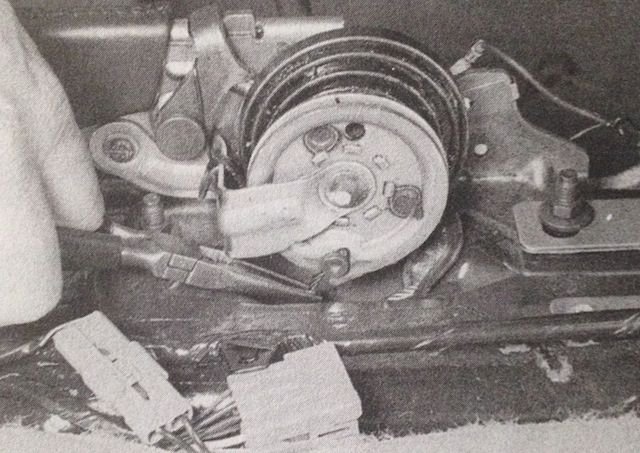
Step 6 – Disengage cable from adjuster reel
Now that the adjuster reel is locked in place and all of the tension is removed from the cable, you can use needle nose pliers to disengage it from the adjuster reel.
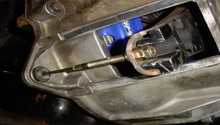
Step 7 – Disengage cable equalizer from the two rear cables
The cable that was attached to the parking brake lever runs through the body of the vehicle and then attaches to a cable equalizer, which is what pulls both rear cables—one attached to each rear wheel, at the same time. This equalizer ensures that equal pressure it applied to each parking brake cable on each wheel at the same time. Now is the time that you will disengage the equalizer from the two rear cables.

Step 8 – Pull cable down through grommet in floorpan
The front cable should be disengaged from where it was engaged before, and can now be pulled down through the grommet in the floorpan to be removed.
If you only needed to replace the front cable, then this would be where you start the installation of the new front cable. The installation is the reverse as removal.
- With the new cable installed, route it through the equalizer.
- Thread it into the reel.
- Wind the cable through the reel.
- Run the cable across the chassis, back towards the cabin.
- connect the cable to the mechanism.
- Reassemble the interior.
Rear Cable
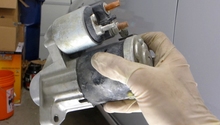
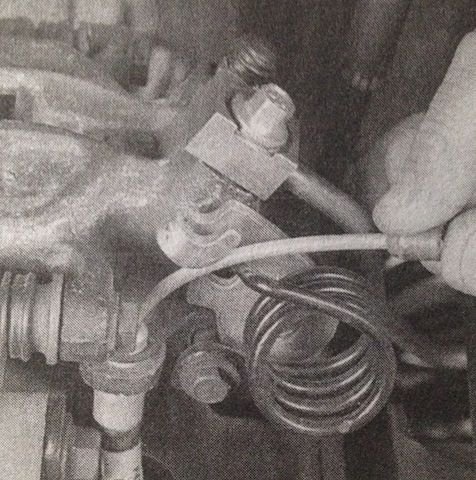
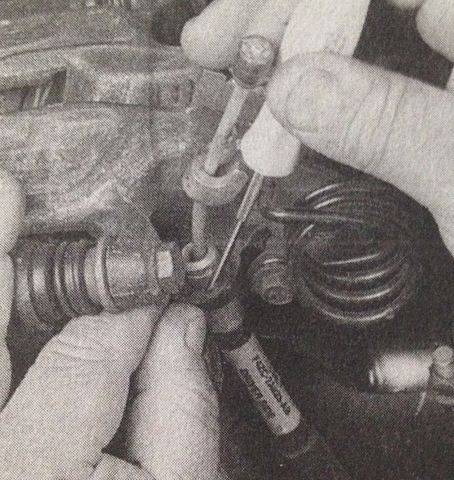
Step 1 – Disengage cable from the caliper lever
The cable, when pulled, actuates a lever on the caliper. With the tension released from the cable, you can disengage the end of the cable from the lever on the caliper.
Step 2 – Remove c-clip from cable boss
The cable boss is retained on a bracket attached to the caliper. To remove the cable boss from the bracket, you will need to remove the c-clip that keeps the cable boss from sliding out of the bracket.
Step 3 – Remove cable brackets
There are two brackets that hold the rear cables in place. There is one on the lower suspension arm and one on the underside of the pan. Remove the bolts that secure the brackets in place.
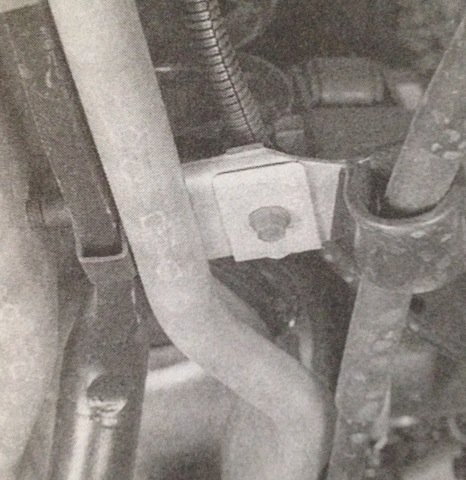
Figure 11. Lower suspension arm cable bracket. 
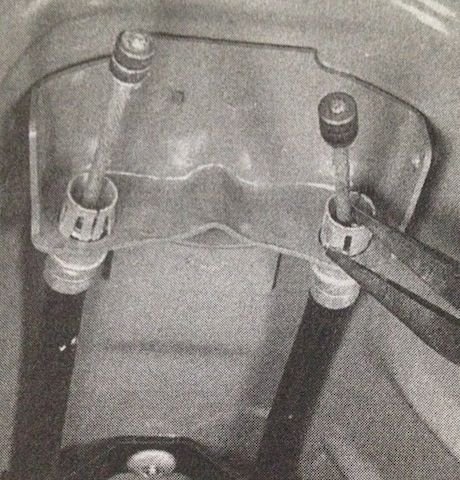
Figure 12. Underside of pan bracket.
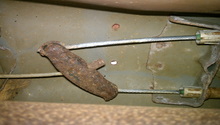
Step 4 – Disengage rear cables from body bracket
At this point the only thing securing the rear cables to the vehicle are the tangs at the end of the cable housing that hold them to the bracket on the body of the vehicle. Using needle nose pliers and squeezing the tangs, you can disengage the cable from this bracket. You can then remove the cable from the vehicle.
At this point you can install the new cables back onto the vehicle and connect them. Installation of the cables is the reverse of removal.
- Insert the new cables through the brackets.
- Reinstall the cable support brackets.
- Line up the brake caliper c-clips for the new cable.
- Install the cable onto the rear of the caliper.
Related Discussions
- Good, My Parking Brake Broke - MustangForums.com
- How Can I Change the E-Brake Cable? - MustangForums.com
- How to Adjust E-Brake - MustangForums.com
- Parking Brake Stuck - MustangForums.com