
DiMora's Battery Relocation Thread

Thread Starter
Joined: Sep 2009
Posts: 46
From: GA
I decided to move my battery to the trunk.
There are a few reasons why:
1) This car is nose heavy and lacks rear weight, and therefore rear-end traction. Anything you can do to move the weight bias rearward will help handling and drag-strip launching.
2) The last time I had the battery out, I was surprised how heavy it is. I looked it up: It is 43.5 pounds, to be exact (Optima Yellow Top).
Number one coupled with number two looks like a win to me...but I also have more ideas for this mod:
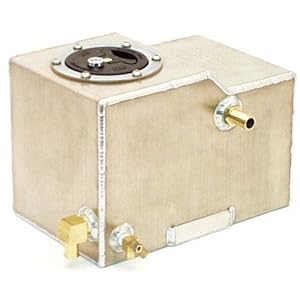
3) I have my eye on a big aluminum intercooler fluid tank. The more fluid you can add to your system, the better it cools - however, one must remember that water weighs 8 pounds a gallon, so it is a partial trade-off.
Something like this Canton model number 80-235; about $170 or so, looks pretty sweet to me:
Anyway, onto the battery relocation project...
First, I procured the relocation kit from Jegs. It is made by Taylor. You can get cables in a couple different choices; I chose two gauge welding cable. Welding cable is a bit more flexible, and also has a double shield - an outer red rubber type shield, then a tougher white inner shield.
For a junction, I went with a StreetWires four-way junction block and a 1/0 gauge ring terminal. The four outputs can handle four gauge cable.
First, I jacked up the right front of the car and removed the right front wheel and inner fender splash-guard. All that is needed is a phillips screwdriver and a panel popper tool to remove the plastic plugs:
Before (Optima yellow-top, StreetWires terminals, and the side terminal is for my subwoofer power):

Splash guard removal:


See that big rubber grommet with wires coming through it in the above pic?
See this little nipple? This little rubber teet?

CUT THAT TEET OFF!
AAAAHHHHHHHHHHHHHHH

OK, OK...simmer down now...regroup...focus...
Back to the trunk:
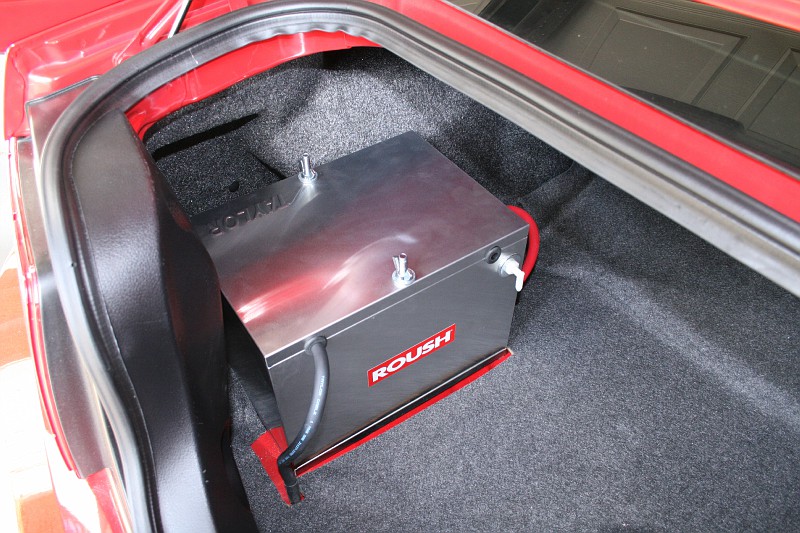
I mounted my box like this. Make sure you know where your threaded rods will go and don't drill something you may regret.

I ran the black ground cable to the upper lip of the spare tire area, right by my KB Boost-A-Pump. I cleaned the metal off really well with sandpaper till it was shiny and bare to insure a perfect ground. I added a ROUSH sticker for extra panache:

You can also see in the above shot that I ran my cable forward on the driver's side to the seat, then cut straight across to the passenger side. From there, I ran it in the interior under the carpet on the passenger side and up to that big rubber grommet.
Remember the teet I cut off?
Here is why:

Split-loom that little bizzle for protection:

Add junction block....and...Voila! Success!:

The two gauge feeds:
1) Alternator
2) Underhood fuse box
3) Subwoofer amps (fused 4 gauge 0 you can see the clear fuse holder)
4) Starter
Note my ground cable: 4 gauge ring terminal mounted to strut tower...I used the OEM ground location:

I'll be adding a "PUSH OFF" switch for drag racing later on, and I already have the trunk liner / carpet re-installed, but it was dark when I finished so I didn't take pictures yet, but will do so soon.
I put it on the driver's side since I have a sub box on the passenger side.
There are a few reasons why:
1) This car is nose heavy and lacks rear weight, and therefore rear-end traction. Anything you can do to move the weight bias rearward will help handling and drag-strip launching.
2) The last time I had the battery out, I was surprised how heavy it is. I looked it up: It is 43.5 pounds, to be exact (Optima Yellow Top).
Number one coupled with number two looks like a win to me...but I also have more ideas for this mod:
3) I have my eye on a big aluminum intercooler fluid tank. The more fluid you can add to your system, the better it cools - however, one must remember that water weighs 8 pounds a gallon, so it is a partial trade-off.
Something like this Canton model number 80-235; about $170 or so, looks pretty sweet to me:
Anyway, onto the battery relocation project...
First, I procured the relocation kit from Jegs. It is made by Taylor. You can get cables in a couple different choices; I chose two gauge welding cable. Welding cable is a bit more flexible, and also has a double shield - an outer red rubber type shield, then a tougher white inner shield.
For a junction, I went with a StreetWires four-way junction block and a 1/0 gauge ring terminal. The four outputs can handle four gauge cable.
First, I jacked up the right front of the car and removed the right front wheel and inner fender splash-guard. All that is needed is a phillips screwdriver and a panel popper tool to remove the plastic plugs:
Before (Optima yellow-top, StreetWires terminals, and the side terminal is for my subwoofer power):
Splash guard removal:
See that big rubber grommet with wires coming through it in the above pic?
See this little nipple? This little rubber teet?
CUT THAT TEET OFF!
AAAAHHHHHHHHHHHHHHH
OK, OK...simmer down now...regroup...focus...
Back to the trunk:
I mounted my box like this. Make sure you know where your threaded rods will go and don't drill something you may regret.
I ran the black ground cable to the upper lip of the spare tire area, right by my KB Boost-A-Pump. I cleaned the metal off really well with sandpaper till it was shiny and bare to insure a perfect ground. I added a ROUSH sticker for extra panache:
You can also see in the above shot that I ran my cable forward on the driver's side to the seat, then cut straight across to the passenger side. From there, I ran it in the interior under the carpet on the passenger side and up to that big rubber grommet.
Remember the teet I cut off?
Here is why:
Split-loom that little bizzle for protection:
Add junction block....and...Voila! Success!:
The two gauge feeds:
1) Alternator
2) Underhood fuse box
3) Subwoofer amps (fused 4 gauge 0 you can see the clear fuse holder)
4) Starter
Note my ground cable: 4 gauge ring terminal mounted to strut tower...I used the OEM ground location:
I'll be adding a "PUSH OFF" switch for drag racing later on, and I already have the trunk liner / carpet re-installed, but it was dark when I finished so I didn't take pictures yet, but will do so soon.
I put it on the driver's side since I have a sub box on the passenger side.

6th Gear Member
Joined: Jul 2008
Posts: 12,259
From: Acworth, GA
Thread Starter
Joined: Sep 2009
Posts: 46
From: GA

Thread Starter
Joined: Sep 2009
Posts: 46
From: GA
Steeda Billet; actual brace will no longer fit due to TVS blower / hood clearance issues.
Back on topic...Sorry it took so long to add final shots...been very busy.
Final outcome for now until I add a cutoff switch:


 [/QUOTE]
Back on topic...Sorry it took so long to add final shots...been very busy.
Final outcome for now until I add a cutoff switch:
[/QUOTE]

Thread Starter
Joined: Sep 2009
Posts: 46
From: GA
Alright, 200 amp Stinger car audio-grade circuit breaker added.
I re-located the positive cable to the back of the box to make the wire routing a little better.
I used a hole-saw I had lying around that was a perfect diameter to match what the boxes stock holes were, and I de-burred with a file. I'll add some split-loom for extra measure tomorrow morning before I call the job done.
Positive battery terminal is now a Stinger as well. It has a plastic insulating cover on it that is hard to see. I have a negative terminal that matches, but I need some more 1/0 gauge ring terminals.
My buddy holding the box so I can shoot an image of the new hole:

The positive terminal has clear heat-shrink covering all exposed metal, and then I added some 3M foam body tape and left the top backing on it where it crosses the battery securing bar for extra insulation. A single zip-tie holds the breaker to the securing bar.
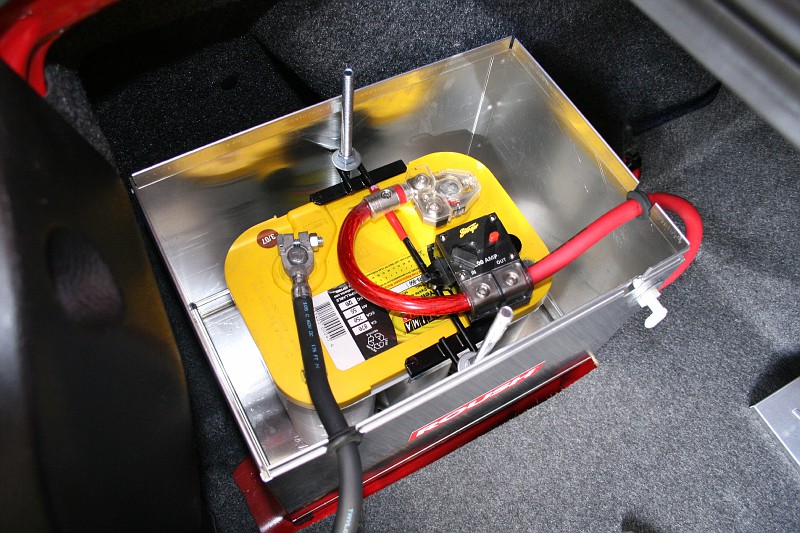
Finished for now until I split-loom all exposed wires and add zip ties:
I re-located the positive cable to the back of the box to make the wire routing a little better.
I used a hole-saw I had lying around that was a perfect diameter to match what the boxes stock holes were, and I de-burred with a file. I'll add some split-loom for extra measure tomorrow morning before I call the job done.
Positive battery terminal is now a Stinger as well. It has a plastic insulating cover on it that is hard to see. I have a negative terminal that matches, but I need some more 1/0 gauge ring terminals.
My buddy holding the box so I can shoot an image of the new hole:
The positive terminal has clear heat-shrink covering all exposed metal, and then I added some 3M foam body tape and left the top backing on it where it crosses the battery securing bar for extra insulation. A single zip-tie holds the breaker to the securing bar.
Finished for now until I split-loom all exposed wires and add zip ties:

Thread
Thread Starter
Forum
Replies
Last Post
KingRando
2005-2014 Mustangs
5
Oct 2, 2015 08:06 AM