
Charlene

2nd Gear Member
Joined: Jul 2009
Posts: 459
From: az
Here is the underside without the piece in question-notice the bracing to keep the front end in place

here is the bracket on the floor, it was tacked in place on the car

here is the new connector that mates the front subframe to the rear. The rear portion is still missing some straps to tie it to the rear end.

here is the bracket on the floor, it was tacked in place on the car
here is the new connector that mates the front subframe to the rear. The rear portion is still missing some straps to tie it to the rear end.
Thread Starter
3rd Gear Member
Joined: Jul 2005
Posts: 630
From: El Paso, TX
That's a good looking set-up man! Will have to keep that in mind for the wife's car or if I get another car.
Got the other floor support out and the new one put in place, and got it lined up using the subframe connector. Before I start laying down my crappy welds, I installed the x-brace to pull the floor supports together to make sure there are no gaps between the subframe connectors and the x-brace. I was blown away by how well the x-brace bolted it. Usually, everything I have ordered for this car has required extensive massaging to fit properly. Tomorrow I will tighten everything up, start laying down some welds, and get back on track with the torque boxes.
Driver side floor support with subframe connector and x-brace

Rear Section

Little bit better picture

The flat piece is where the driveshaft safety loop will be mounted.

Front view

Fred
Got the other floor support out and the new one put in place, and got it lined up using the subframe connector. Before I start laying down my crappy welds, I installed the x-brace to pull the floor supports together to make sure there are no gaps between the subframe connectors and the x-brace. I was blown away by how well the x-brace bolted it. Usually, everything I have ordered for this car has required extensive massaging to fit properly. Tomorrow I will tighten everything up, start laying down some welds, and get back on track with the torque boxes.
Driver side floor support with subframe connector and x-brace
Rear Section
Little bit better picture
The flat piece is where the driveshaft safety loop will be mounted.
Front view
Fred
Thread Starter
3rd Gear Member
Joined: Jul 2005
Posts: 630
From: El Paso, TX
I've really been neglecting this project for a while but I was down at the shop doing some winter cleaning and decided to wrench on it some at the end of the day. I had forgotten I even had this part for the car. This is a Cobra Automotive Trans Am crossmember like the ones constructed and used in the 70's Trans Am racing series. I have to take my hat off to CA on fitment. I swear they used my car as a jig. This piece ties the lower control arm pivots to the chassis.


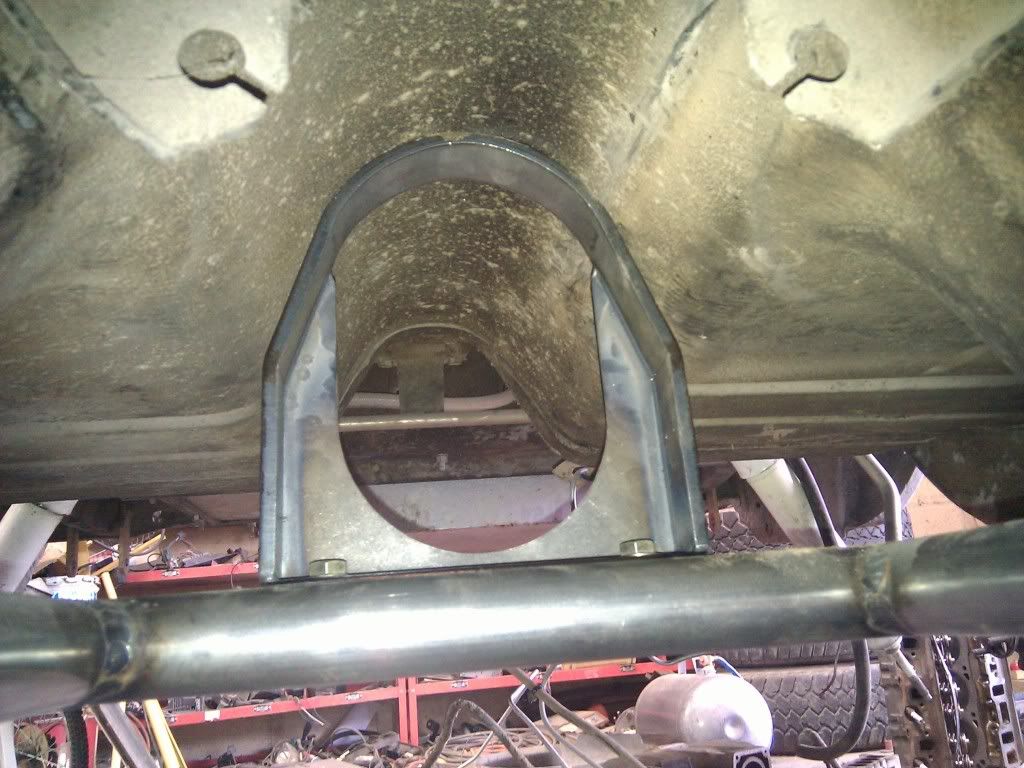
Also got the driveshaft loop in place.
The new poly eye bushings on the leaf springs are a tad bit too wide now so I have to shave them down a bit to get them to fit.

Fred
Also got the driveshaft loop in place.
The new poly eye bushings on the leaf springs are a tad bit too wide now so I have to shave them down a bit to get them to fit.
Fred
Thread Starter
3rd Gear Member
Joined: Jul 2005
Posts: 630
From: El Paso, TX
Picked these tires up locally for my auto-x outings and maybe a visit to the ASR road course one of these days.


Suspension set-up almost complete. All that is left is some strut rods.

The adjustable export brace and monte carlo bar were turning out to be more of a head ache than anything else so I decided to scrap it and use the parts for a later project. Since I had ordered the tubular lower control arms, I received a $60 gift card from CJPony so I ordered up a Scott Drake stamped export bar. Originally, I had my doubts about a stamped steel export brace preventing flex but once I got this piece in.... WOW! This thing is beefy! Best part of all, it dropped right into place. Lucky me.


Fred
Suspension set-up almost complete. All that is left is some strut rods.
The adjustable export brace and monte carlo bar were turning out to be more of a head ache than anything else so I decided to scrap it and use the parts for a later project. Since I had ordered the tubular lower control arms, I received a $60 gift card from CJPony so I ordered up a Scott Drake stamped export bar. Originally, I had my doubts about a stamped steel export brace preventing flex but once I got this piece in.... WOW! This thing is beefy! Best part of all, it dropped right into place. Lucky me.
Fred


Thread Starter
3rd Gear Member
Joined: Jul 2005
Posts: 630
From: El Paso, TX
Yes. I found they work better this way. LOL I was just mocking up the crossmember in place so I dropped the arms in there to make sure it would line up since it ties the lower control arms in.
6th Gear Member
Joined: Feb 2007
Posts: 7,635
From: state of confusion
The adjustable export brace and monte carlo bar were turning out to be more of a head ache than anything else so I decided to scrap it and use the parts for a later project. Since I had ordered the tubular lower control arms, I received a $60 gift card from CJPony so I ordered up a Scott Drake stamped export bar. Originally, I had my doubts about a stamped steel export brace preventing flex but once I got this piece in.... WOW! This thing is beefy! Best part of all, it dropped right into place. Lucky me.
Fred
Fred
Looking good, and I see a few things in this thread to file away for my own future reference. Thanks.
Norm
Thread Starter
3rd Gear Member
Joined: Jul 2005
Posts: 630
From: El Paso, TX
Wow it only took me one whole year to get one torque box done. Can you says skills? Last time I worked on this car was a year ago. Was finally able to get down to the shop and get some more wrenching in on this thing.
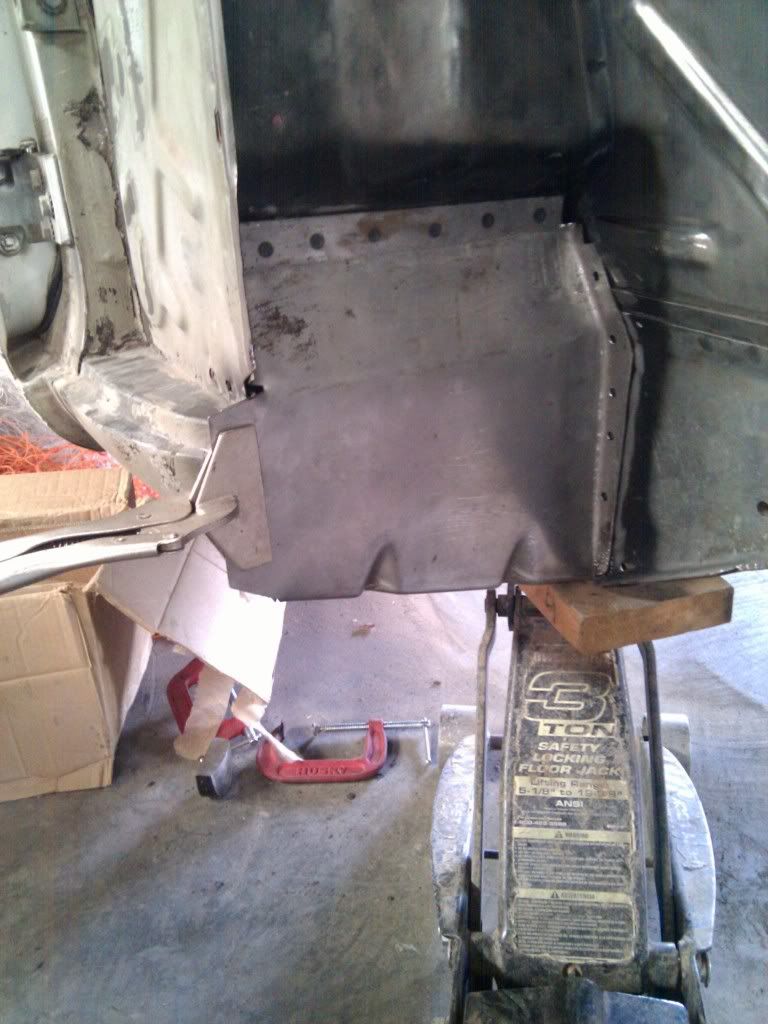
Sheet metal replacement sucks *****. Lots of trimming, reshaping, crying, more trimming, etc. and I got it fitted.

To make sure I got all the gaps out I placed a jack under the bottom piece.
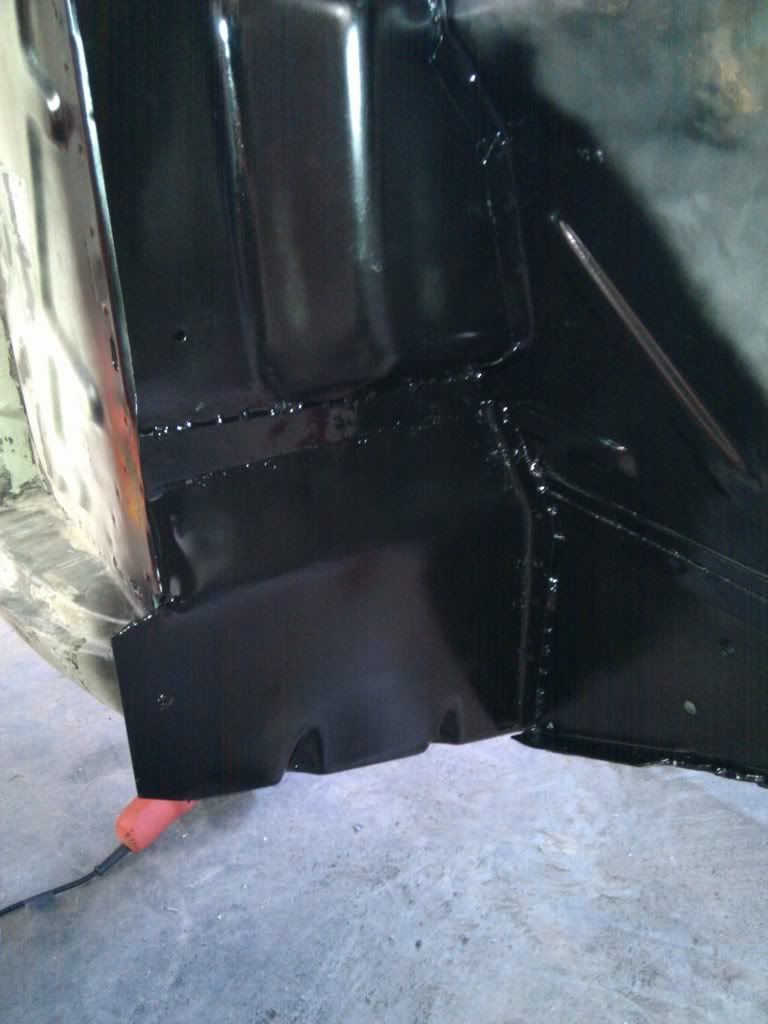
Welded it in.

Brushed off the welds and laid some some rattle can rust preventer until the undercoating goes on.
Actually spent the last two days getting this done. Should hopefully have the other side done by sometime next week then I can start on the strut rod mounts.
Fred
Sheet metal replacement sucks *****. Lots of trimming, reshaping, crying, more trimming, etc. and I got it fitted.
To make sure I got all the gaps out I placed a jack under the bottom piece.
Welded it in.
Brushed off the welds and laid some some rattle can rust preventer until the undercoating goes on.
Actually spent the last two days getting this done. Should hopefully have the other side done by sometime next week then I can start on the strut rod mounts.
Fred