
Charlene

Thread Starter
3rd Gear Member
Joined: Jul 2005
Posts: 630
From: El Paso, TX
I actually went with a very cheap Harbor Freight set-up and it does decent. I'm not building show quality stuff just want it to look decent. What takes me so long is that I pay a lot of attention to detail so I spend a lot of time cleaning stuff up and making it look presentable. I hate looking under a beautiful car to find out its nothing but a nice paint job and nice wheels and everything that matters has been ignored or spray painted over. More pics to come after Saturday, hopefully.
5th Gear Member
Joined: Aug 2007
Posts: 2,035
From: Delaware(US) & Nova Scotia(Canada)
Amen! Its that detail you put into it that really makes it stand out and gives you the personal satisfaction. I hate "good enough" although it does have its places. lol
I'm planning the next car now which will be for myself and it'll not have the detail that went into the car in my sig which we did for my wife. I'm looking for a driver that gets worked on now and then. Stock mostly to start then progress upwards to handle the power I wanna have in the end. Could care less about its looks this time and more for its handling. I wanna be able to tear down old country/dirt roads and back wood mountain roads not giving a hoot about the paint job.
A cheapish powdercoat setup is all I'm looking for to protect things from rust and have a durable finish.
Thread Starter
3rd Gear Member
Joined: Jul 2005
Posts: 630
From: El Paso, TX
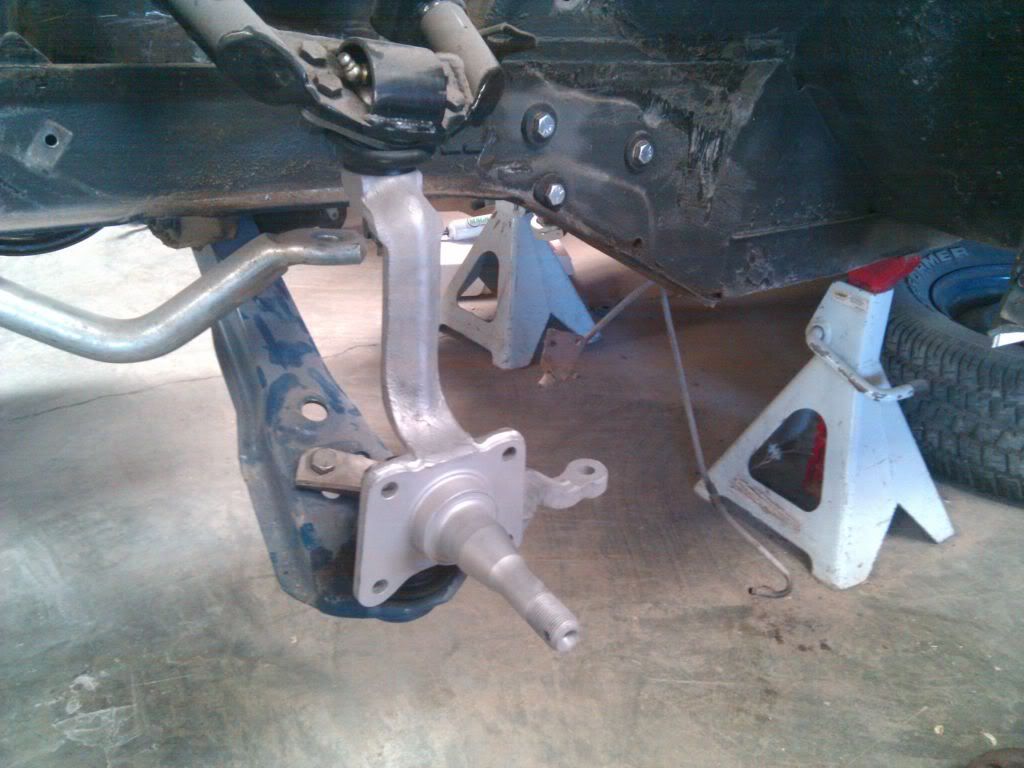
Brake install


Cleaned Up


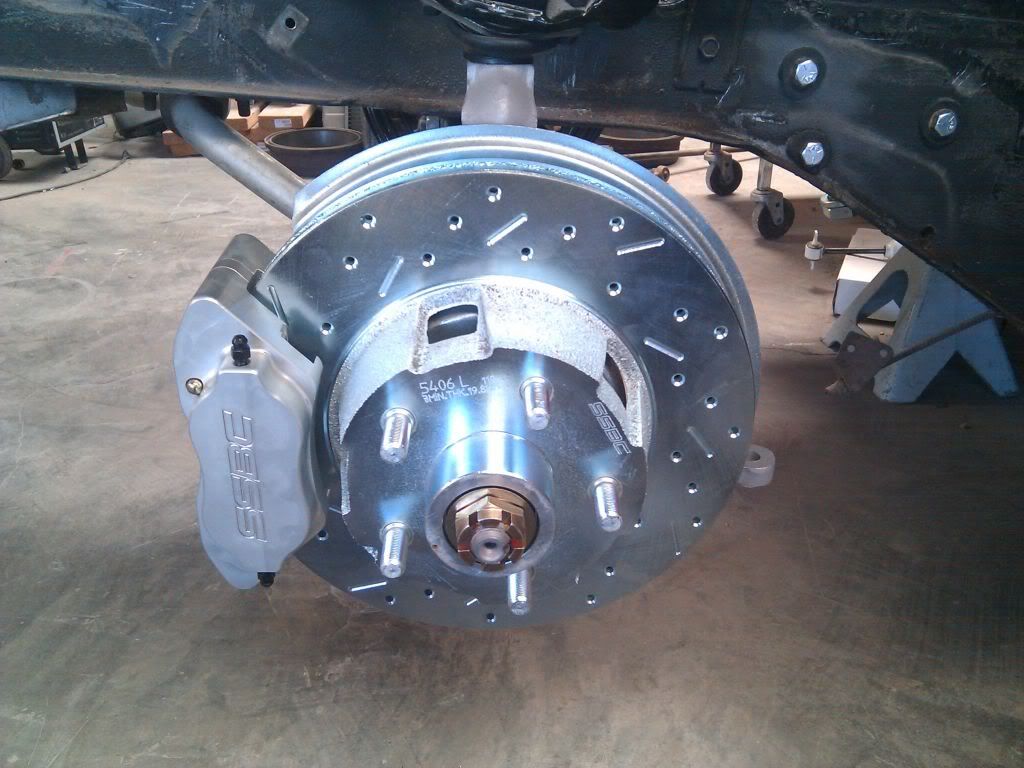


Brake Pads in

Wheels on


By far one of the easiest installations I have ever done in my life. What took the longest was cleaning up the spindles and getting all that old paint and grime off of them. More work next Saturday.
Cleaned Up
Brake Pads in
Wheels on
By far one of the easiest installations I have ever done in my life. What took the longest was cleaning up the spindles and getting all that old paint and grime off of them. More work next Saturday.
Thread Starter
3rd Gear Member
Joined: Jul 2005
Posts: 630
From: El Paso, TX
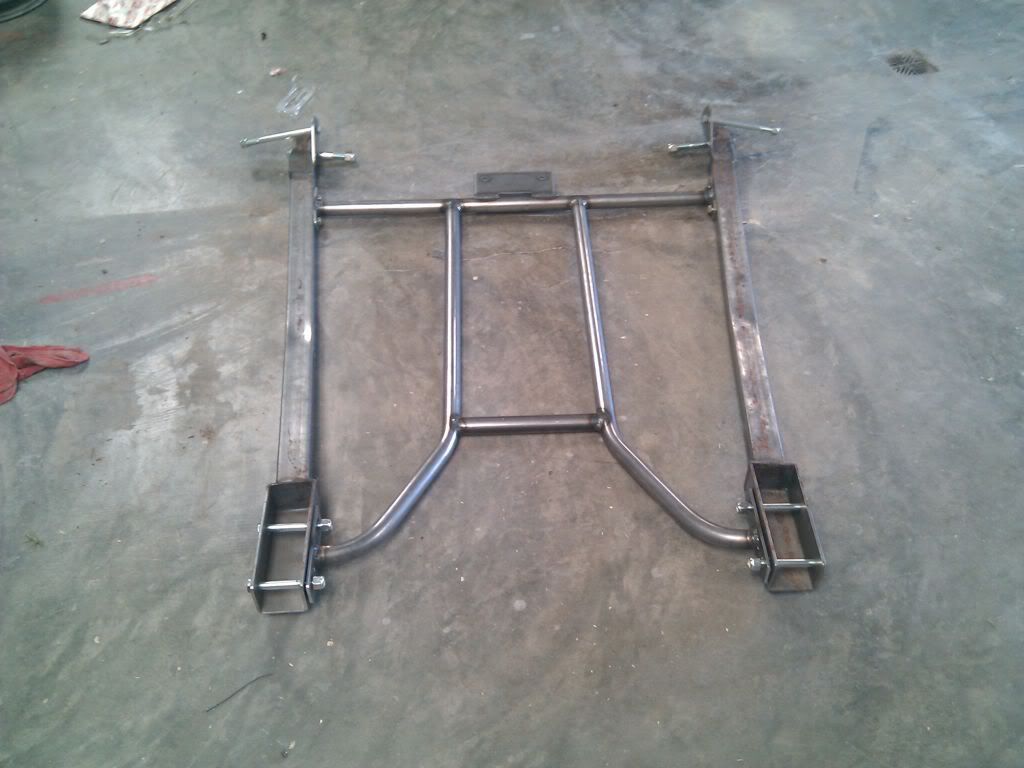
I got the rest of the chassis stiffener in last Friday.
Out of the box:

Together with the subframe connectors:

Also got around to fitting the steering box. There is a bit more to the installation of this box than I initially anticipated.
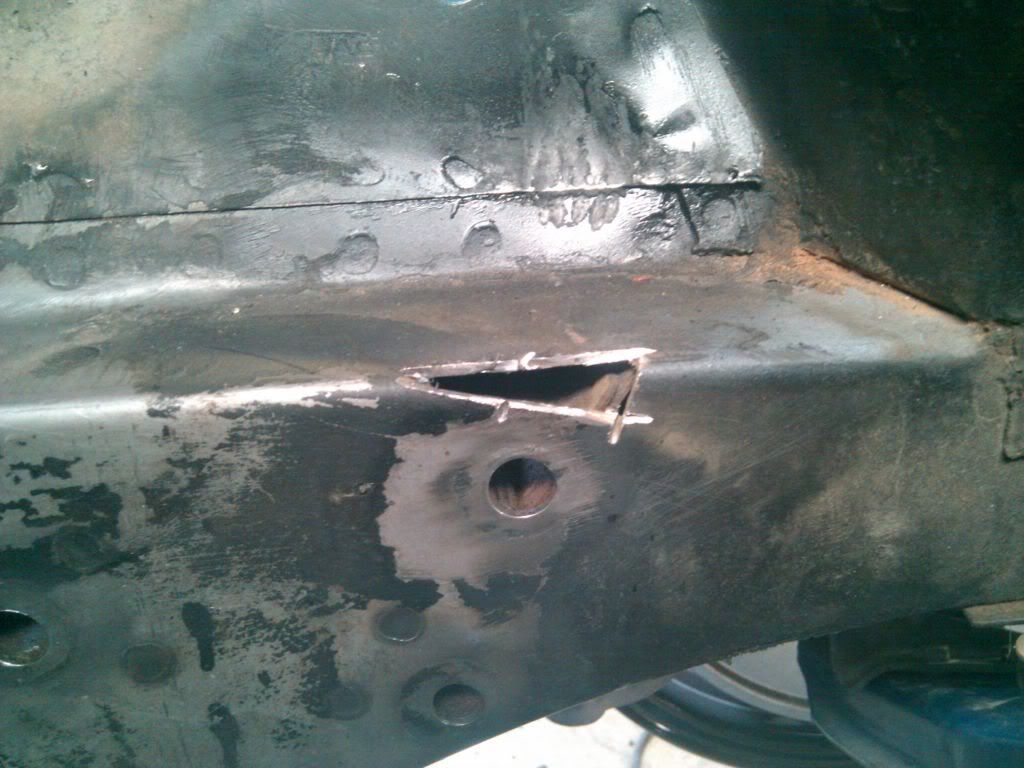
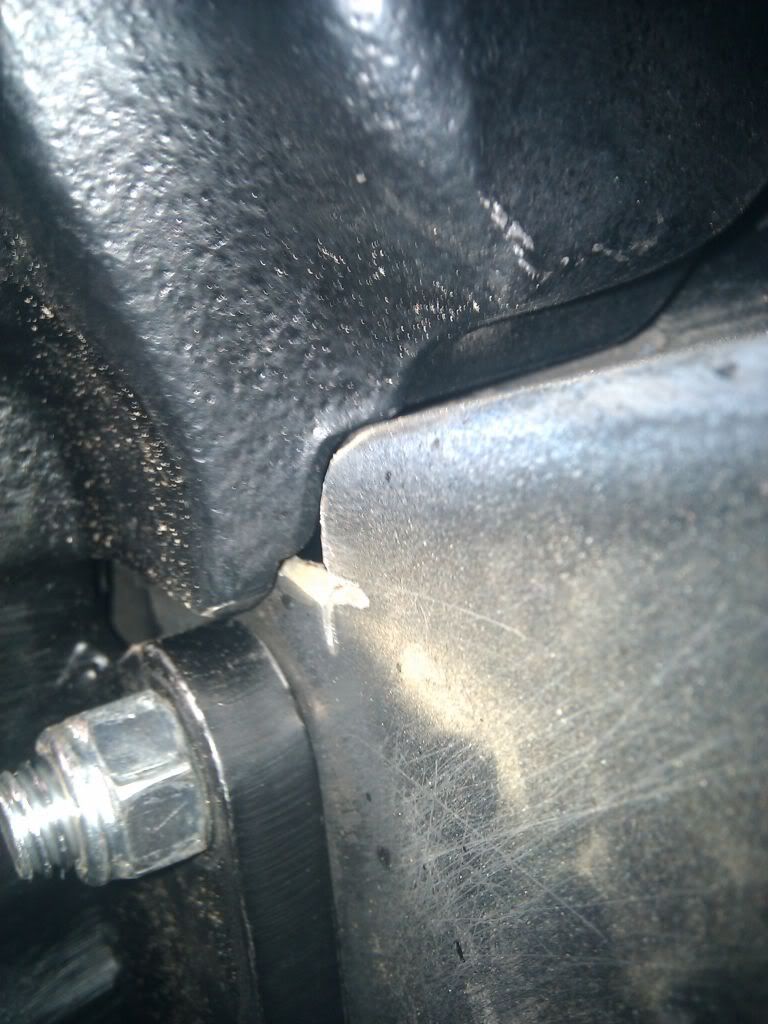
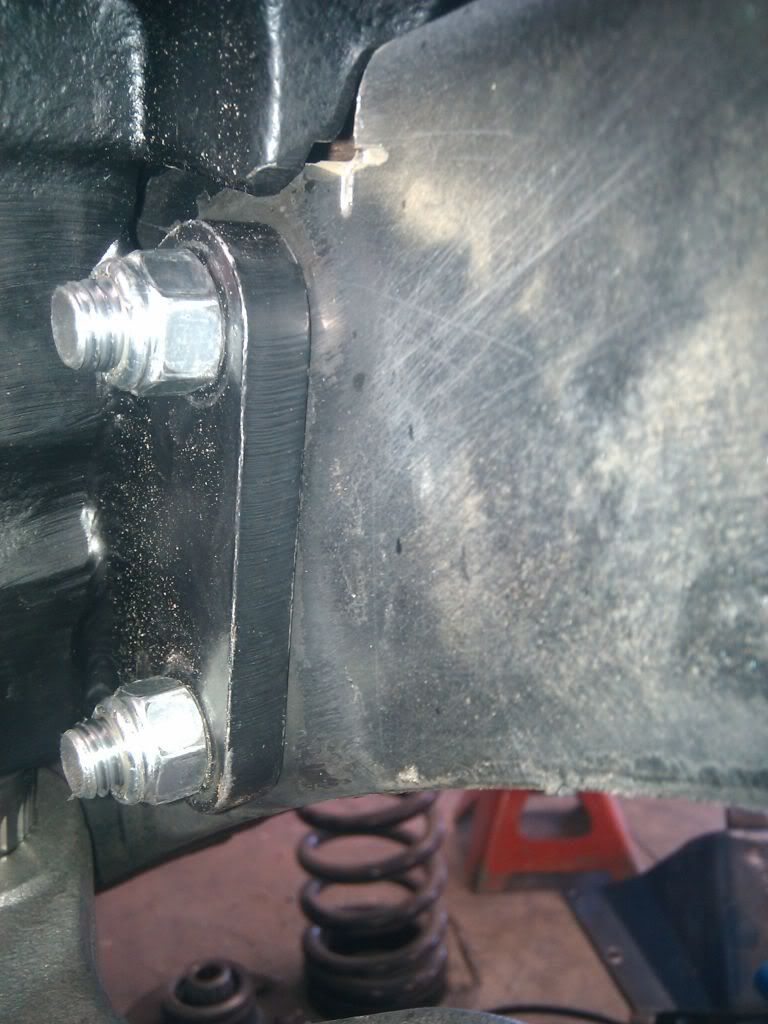
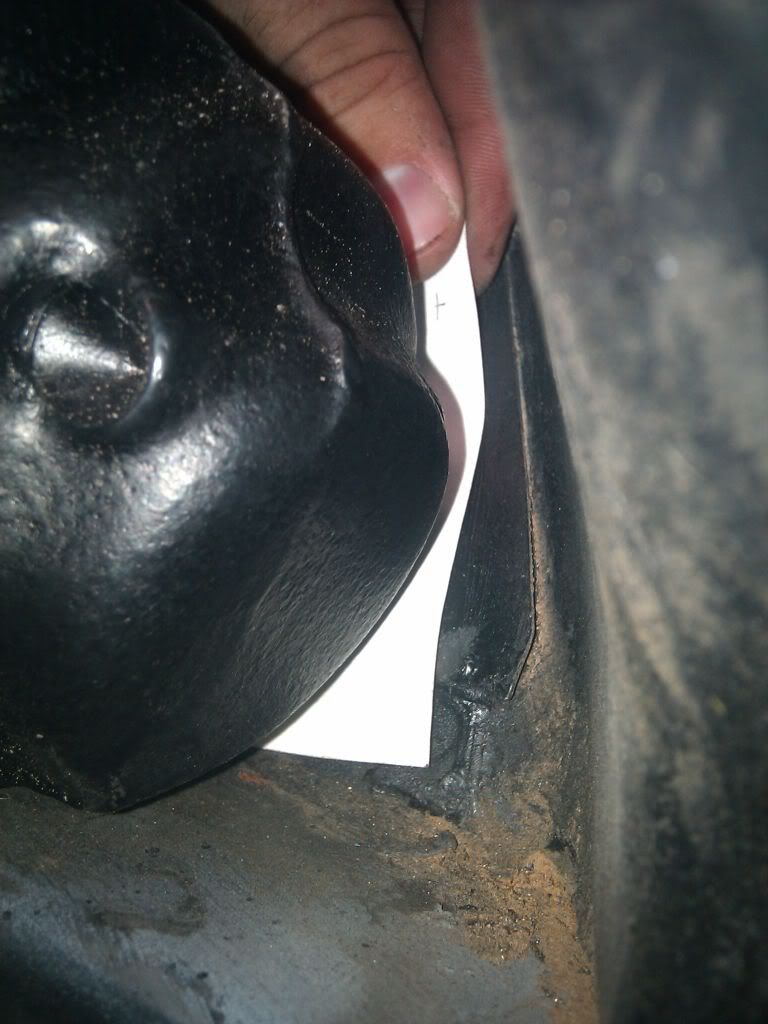
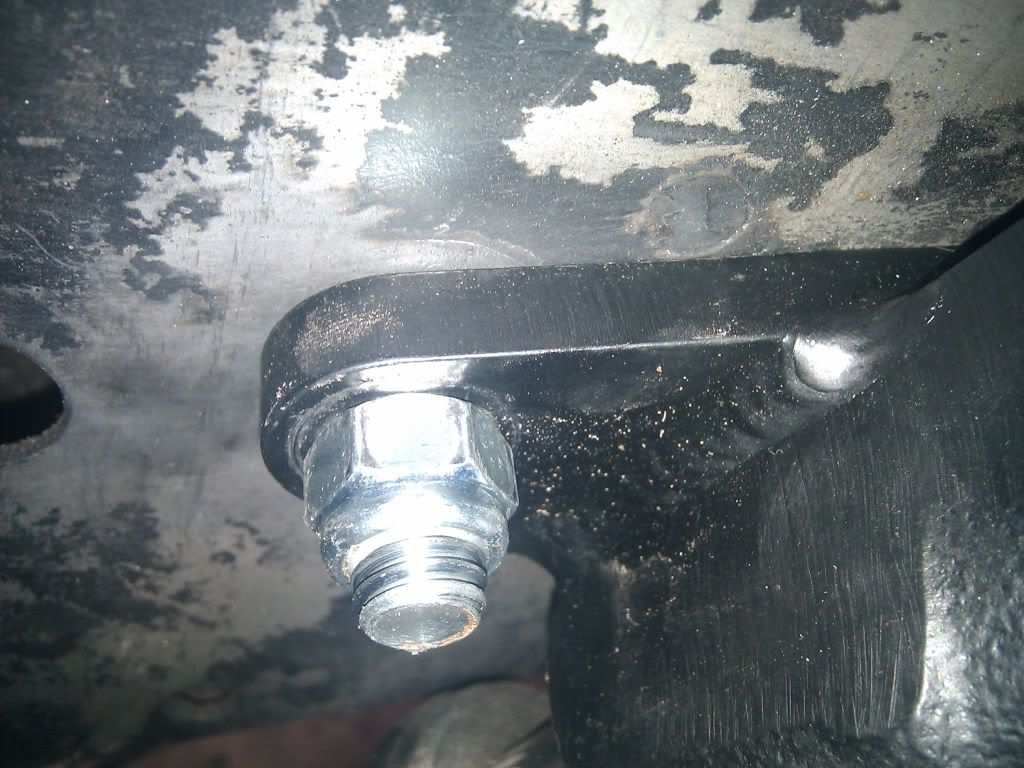
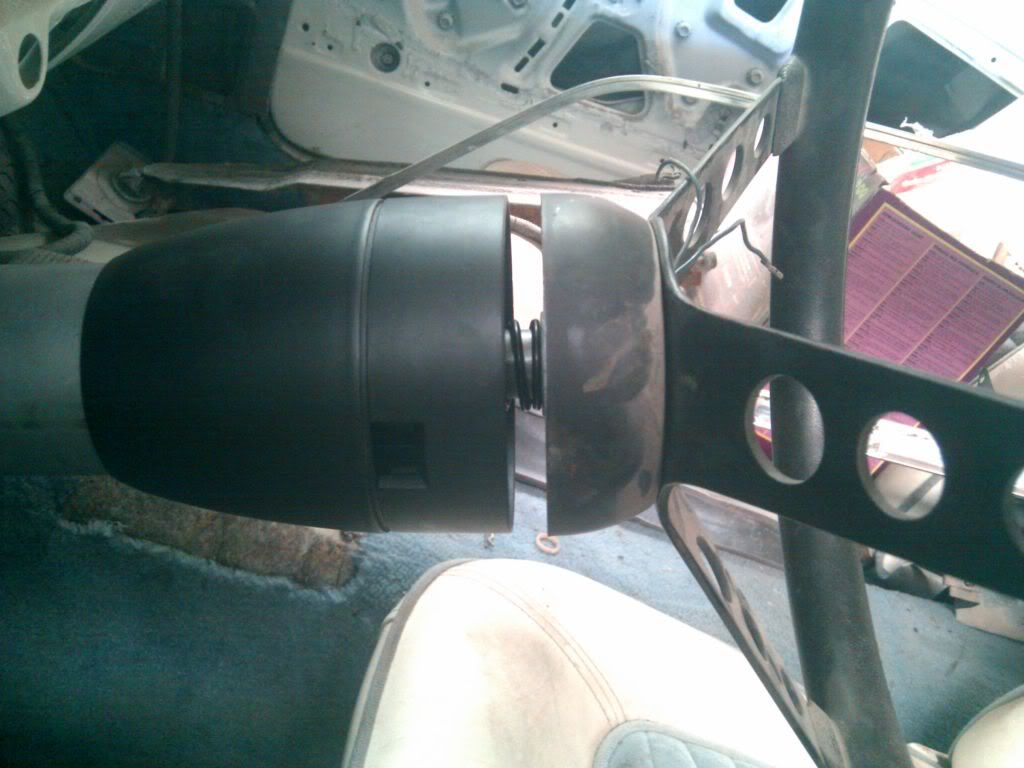
When I bolted up the box in place, it would not sit flush on the frame rail. I found the problem to be lack of clearance in multiple places. First place I could see was the frame rail. I had to notch a small piece of the frame and will need to fill it down the road before I get the car on the road. After that, the box was better still not sitting flush but it was no longer at the frame. I slipped a sheet of paper behind the box and the fender apron and there was also a lack of clearance. I broke out the BFH and some dimple dollies and went to work. I spray painted the fender apron to see exactly where the extra space was needed, bolted up the box, and moved it around to see where paint was missing, then went to work. Finally got it sitting flush, but I ran into another issue with the steering wheel location relative to the column. The pictures tell the story a bit better.
Frame Notch
Fender Apron
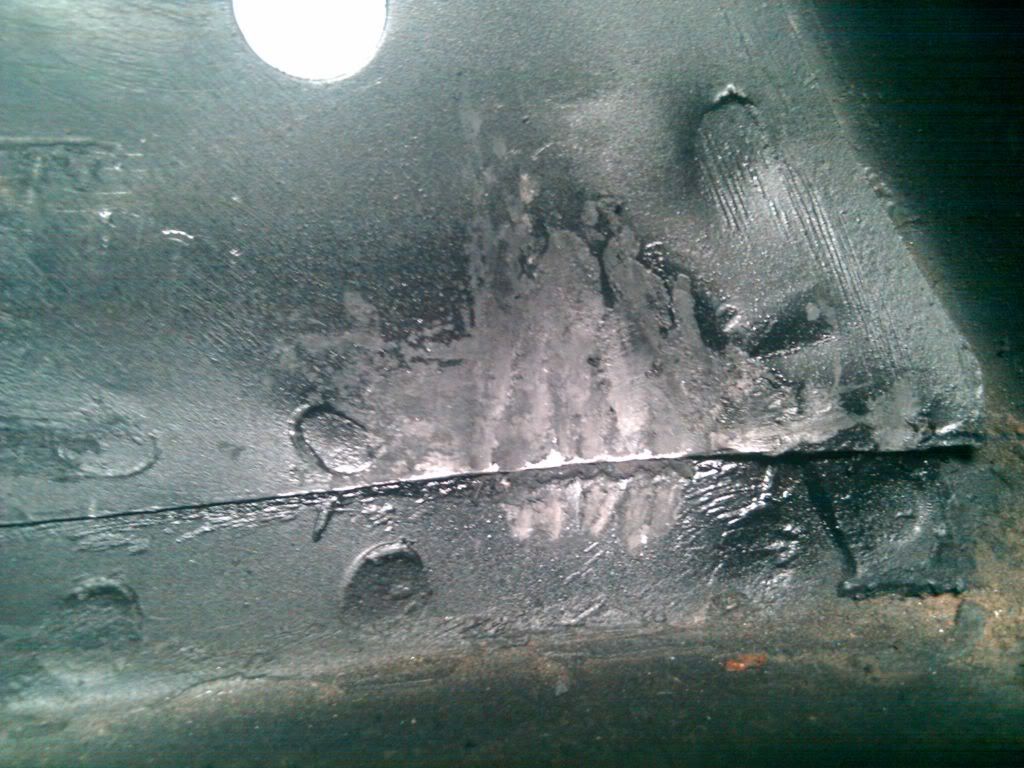
Clearance
Sitting Flush Finally
My new problem. Any suggestions?
Fred
Out of the box:
Together with the subframe connectors:
Also got around to fitting the steering box. There is a bit more to the installation of this box than I initially anticipated.
When I bolted up the box in place, it would not sit flush on the frame rail. I found the problem to be lack of clearance in multiple places. First place I could see was the frame rail. I had to notch a small piece of the frame and will need to fill it down the road before I get the car on the road. After that, the box was better still not sitting flush but it was no longer at the frame. I slipped a sheet of paper behind the box and the fender apron and there was also a lack of clearance. I broke out the BFH and some dimple dollies and went to work. I spray painted the fender apron to see exactly where the extra space was needed, bolted up the box, and moved it around to see where paint was missing, then went to work. Finally got it sitting flush, but I ran into another issue with the steering wheel location relative to the column. The pictures tell the story a bit better.
Frame Notch
Fender Apron
Clearance
Sitting Flush Finally
My new problem. Any suggestions?
Fred
Thread Starter
3rd Gear Member
Joined: Jul 2005
Posts: 630
From: El Paso, TX
First things first, do something about this pesky steering column problem. Took a very close look at the column bracket and the slot in the column. Everything looked right but it appeared that if I were to install the column bracket 180 degrees in the other direction, it would allow the column to slide up further, so I gave it a shot. Placed some cardboard between the column and the steering wheel to make sure I had enough clearance, then tightened up the bracket to hold the column in its final place. Presto!

Other than filling up the notch in the frame rail, the steering is finally all buttoned up and ready for disassembly so that I can give the engine bay its final prep work. Shelby quick steer pitman and idler arms w/ roller idler bearing and all the other goodies.

But first, I need to move the '65 so that I can move the '81 in place to remove the motor. Most of the suspension and steering is already on the car, might as well get the last couple of parts on to get the car rolling.


The old swap-a-roo.


Then tear all back apart again. Seems like I always keep getting back to this point.


Then started taking a wire wheel and spatula to the undercoating. Hell of a lot of work and dirty too.

Looks like once the engine is in, and the car is at its final ride height, the upper control arm should be almost perfectly parallel to the ground.

Once all the old undercoating is cleaned off, I plan to start welding up the shock towers and some of the seams where weight bearing sheetmetal meets. Then purdy paint. But still, nowhere near close to being finished.
Fred
Other than filling up the notch in the frame rail, the steering is finally all buttoned up and ready for disassembly so that I can give the engine bay its final prep work. Shelby quick steer pitman and idler arms w/ roller idler bearing and all the other goodies.
But first, I need to move the '65 so that I can move the '81 in place to remove the motor. Most of the suspension and steering is already on the car, might as well get the last couple of parts on to get the car rolling.
The old swap-a-roo.
Then tear all back apart again. Seems like I always keep getting back to this point.
Then started taking a wire wheel and spatula to the undercoating. Hell of a lot of work and dirty too.
Looks like once the engine is in, and the car is at its final ride height, the upper control arm should be almost perfectly parallel to the ground.
Once all the old undercoating is cleaned off, I plan to start welding up the shock towers and some of the seams where weight bearing sheetmetal meets. Then purdy paint. But still, nowhere near close to being finished.
Fred
Thread Starter
3rd Gear Member
Joined: Jul 2005
Posts: 630
From: El Paso, TX
Torque Boxes
Holy crap! What did I get myself into?!
Figured this would be a perfect time to start on the torque boxes I had picked up a while back since the underside of the car is being cleaned-up and welded up.

There is absolutely no way to get these in in one piece so I started by drilling out the spot welds.


After several hours of grinding, cutting, and fitting the first piece in place, I was finally happy with the fit.

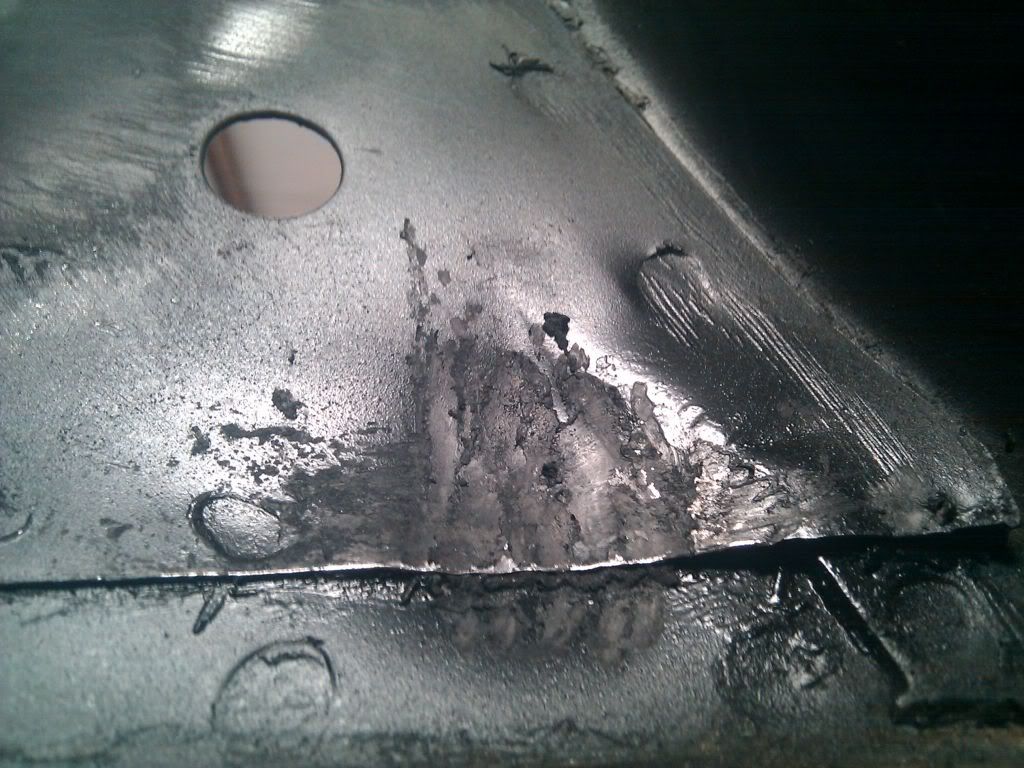
In preparation of welding these in place, I decided to drill some holes in this piece to give me more point to weld and make sure these really do stiffen up the car.

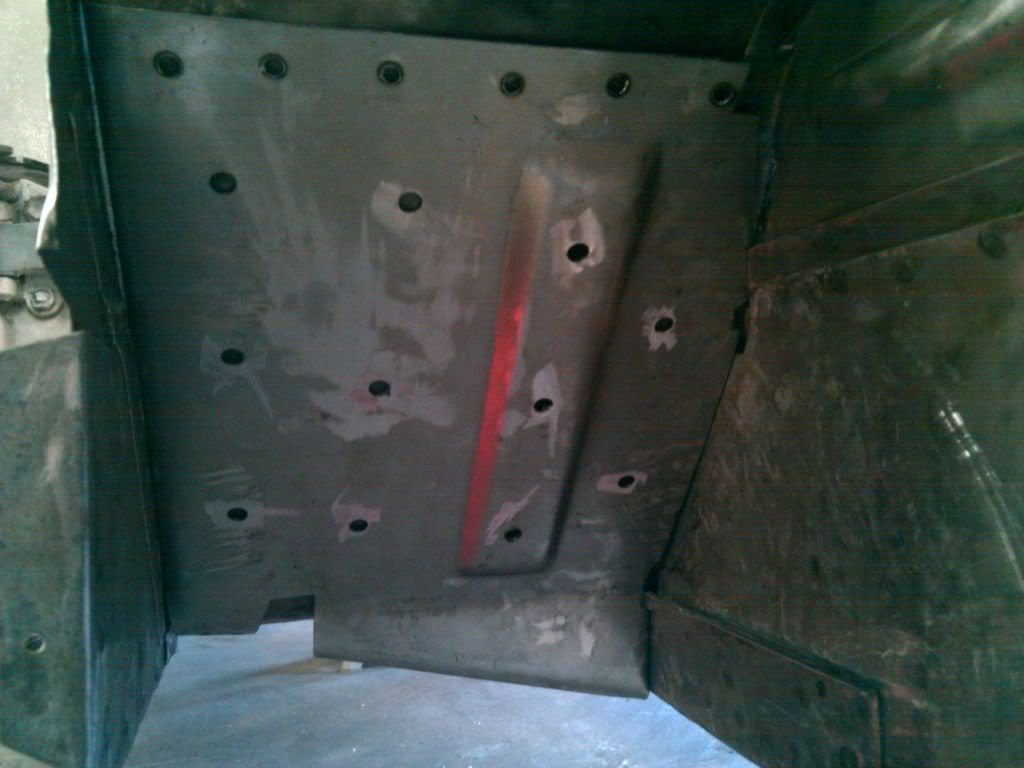
It was at this point that I realized I have to replace the floor supports before I can move any further in the torque box install.
I have never done anything like this before, but I feel confident I am moving in the right direction. Needless to say, this did take me all day but I would much rather take my time and do it right the first time. I ask that you all pray for me and this project. LOL
Fred
Holy crap! What did I get myself into?!
Figured this would be a perfect time to start on the torque boxes I had picked up a while back since the underside of the car is being cleaned-up and welded up.
There is absolutely no way to get these in in one piece so I started by drilling out the spot welds.
After several hours of grinding, cutting, and fitting the first piece in place, I was finally happy with the fit.
In preparation of welding these in place, I decided to drill some holes in this piece to give me more point to weld and make sure these really do stiffen up the car.
It was at this point that I realized I have to replace the floor supports before I can move any further in the torque box install.
I have never done anything like this before, but I feel confident I am moving in the right direction. Needless to say, this did take me all day but I would much rather take my time and do it right the first time. I ask that you all pray for me and this project. LOL
Fred
Thread Starter
3rd Gear Member
Joined: Jul 2005
Posts: 630
From: El Paso, TX
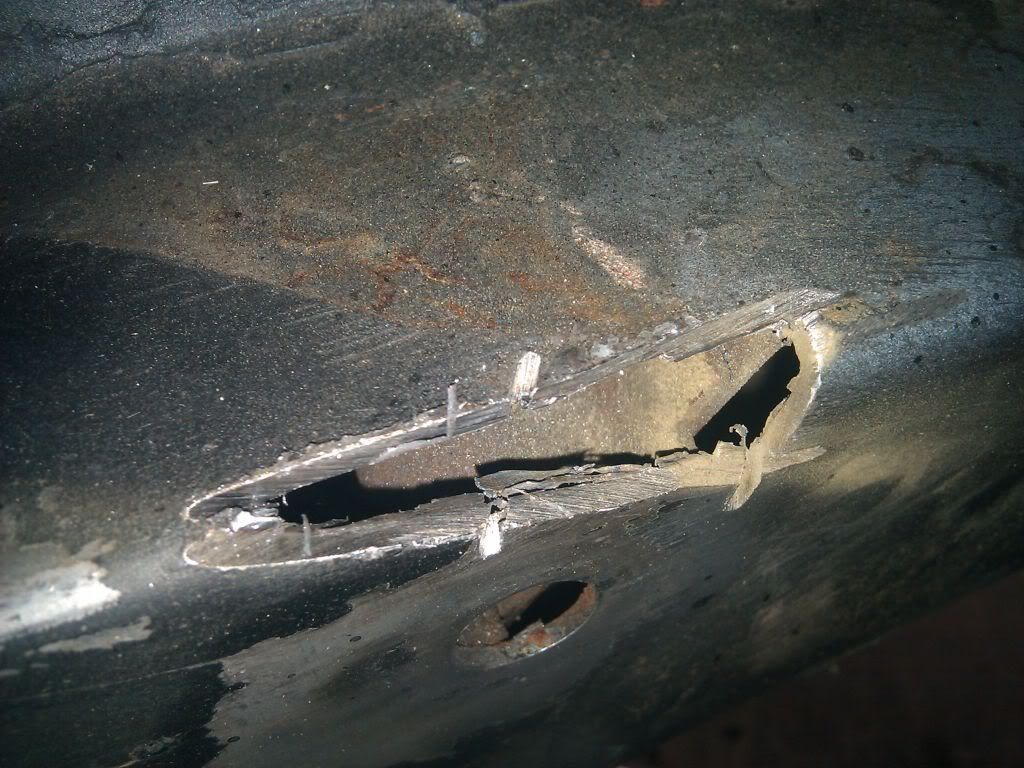
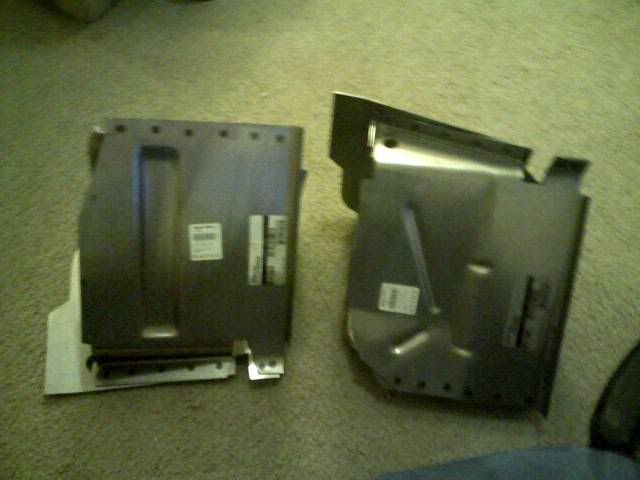
So here is a big problem with my '65. The floor supports are mangled beyond repair. Although they work just fine the way they are, they do not allow the subframe connectors to slip over.
I ordered new ones and before I can continue on the torque box install, these need to be replaced first. I had no idea what I got myslef into, but now I have a pretty good idea. Sweet lord!
Mangled floor supports


Started by pulling up the carpet and drilling out the spot welds.


Then, after hours of drilling, grinding, cutting, prying, cursing, bleeding, crying, and praying; one of these sons-a-bitches finally came out. Piece of cake. :bang:


Anyone need a set of slightly used floor supports off a '65 Mustang?


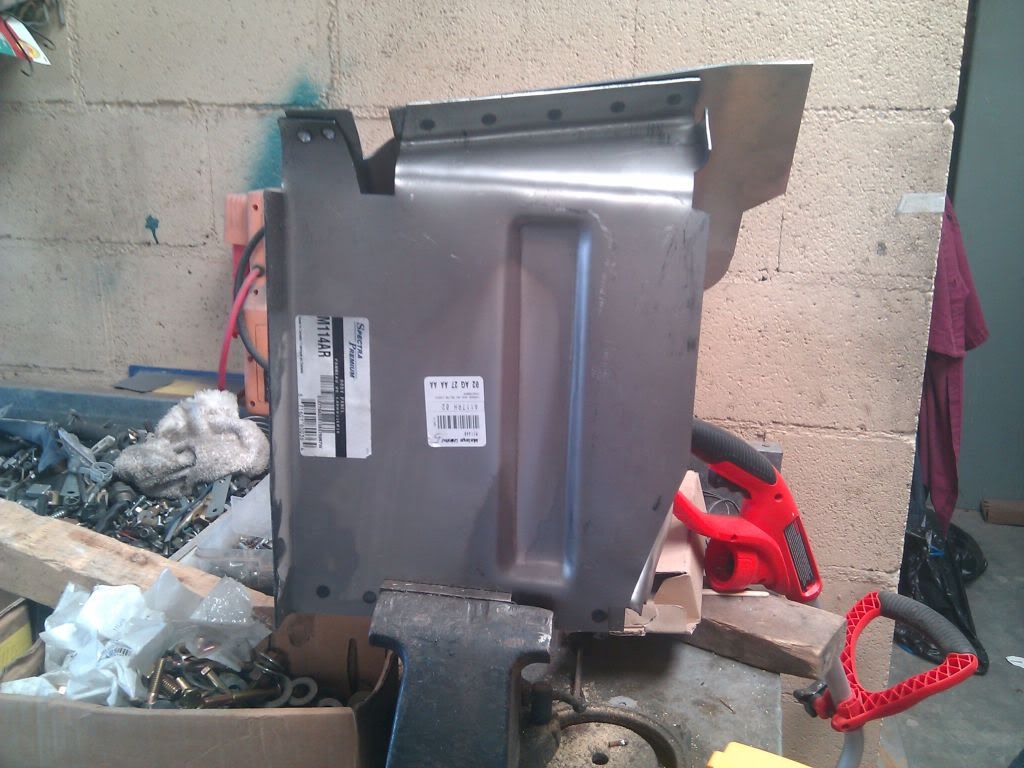
Replacement

Need to straighten out the sheetmetal and clean it off for welding. But that is another battle for another day.


Fred
I ordered new ones and before I can continue on the torque box install, these need to be replaced first. I had no idea what I got myslef into, but now I have a pretty good idea. Sweet lord!
Mangled floor supports
Started by pulling up the carpet and drilling out the spot welds.
Then, after hours of drilling, grinding, cutting, prying, cursing, bleeding, crying, and praying; one of these sons-a-bitches finally came out. Piece of cake. :bang:
Anyone need a set of slightly used floor supports off a '65 Mustang?
Replacement
Need to straighten out the sheetmetal and clean it off for welding. But that is another battle for another day.
Fred
2nd Gear Member
Joined: Jul 2009
Posts: 459
From: az
It may be too late but...
I have seen the same thing on many mustangs. Mangled jack supports/front subframe to floor ties. This piece is very important. It keeps the front subframe from raising by pulling on the floor pans. The export brace keeps the top in place by bracing against the firewall and cowl. All the aftermarket ties the front subframe connectors there, which makes sense. But, this piece is weak sheet metal in my opinion. So...
What I have started was making my own piece from 2.5" x 2.5" x 1/8" square tube steel. It replaces that piece and ties into the rear subframe. It almost makes it a framed car. I made my own subframe connectors from this material like the aftermarket companies on my coupe. I am now going from front to rear on the FB I am currently working on.
I'll try and get some pictures up this evening.
This way they will never get mangled again.
Last edited by OCHOHILL; Jun 16, 2010 at 01:17 PM.
