How to: Stainless Steel Brake Lines Non ABS
 09-06-2012, 11:16 PM
#1
3rd Gear Member
Thread Starter
Join Date: Jul 2009
Location: Garner NC
Posts: 765
For those of you who lack ABS, it can be a pain to find out that no company makes stainless steel lines for the Non ABS V6's. With the help of another forum member I dared myself to try this simple, but tricky endeavor. First I purchased a set of stainless steel lines from Russell Performance.
The set of tools you will need for this are:
13mm flare nut wrench
3/8 flare nut wrench
18mm wrench: holds the stainless nut when tightening the flare nut
10mm socket to remove the bolt holding the brake line bracket
Double Flaring tool, I used the Ridgid 345 with the 3/16 double flare button
Pipe cutter
File
Brake fluid
Few feet of 3/16 brake line
2 - 3/16 tees
8 - 3/16 inverted flare nuts
Patience, Patience
First off, jack the car up on all 4, it's easier to bounce from one tire to the other without having to jack up each one as you go. Remove all 4 tires and get them out of the way, then start by disconnecting the brake lines from the calipers, make sure you have a container to catch the brake fluid, the driver's side front will drain most of the brake fluid in the car, so make sure the container is big enough. (I removed the calipers to paint them red so they are not included in the pictures)Once all the fluid is drained you can disconnect the brake lines, the passenger front and back lines are direct swaps, no modifications needed. Just undo the flare nut and bracket and put them in. It's the same for front and back.
(Starting with the front) This is the tricky part of the job, the driver's sides have tee blocks, but the brake line is part of the block so you cant use it. Start by removing the lines and the brake line bracket, remove the flare nuts first and then the bracket. Once this is done you should be able to pull the line out of the way, from here it is time to cut the lines, slide the flare nut down the line and place your cutter right on the other side of the flare. Tighten the cutter down and turn away, keep tightening the cutter when it starts to get loose, eventually the line break off, be careful not to over tighten as this may crush the opening. Once both lines are cut, you want to clean the edges up with a file to remove any burrs that might be on the line. I encountered a little problem at this point, the 3/16 flare nut's don't slide on the car brake lines because of the protective coating they have, however I took a propane torch, being very careful of where the flame was directed, I melted this coating off just far enough to where I can get the flare nut and the flaring tool on the lines (Some flare nuts may slide right over the protective coating, however mine wouldn't). (Wait for the lines to cool down then).
Once you have this done slide the flare nut on the line in the right direction then grab your flaring tool. It can be a hassle trying to work with the tool on the car like this. Line up your brake line through the 3/16 part of the block making sure it's roughly flush with the outside of the block. (Make sure you oiled the tip of the flare head, I used brake fluid)Then it's easier to place the double flare button on then slide the flaring part of the tool on to the block. Tighten the flaring part of the tool to the block, then start tightening the flaring tool down, keep tightening until its hand tight then back off and remove just the button, once the button is out tighten it down again until its hand tight. Back it off and remove the flaring part from the block and separate the block from the line. You should have a pretty decent looking flare. Do this for the other in car line. Once you completed this you can bend your lines and connect them to the tee. The lines will bend pretty easily by hand, just don't pinch the lines anywhere. Now you have to make the line going from the tee to the stainless line. I bought 5 feet of line from Napa, there stuff is pretty good, it has the protective coating on it and it bends fairly easy. You can get yourself started by making a flare on this line and place a nut on there. Once you do that take that line and attach it to the tee, bend it and see where you need to exactly cut it at. Cut the line and clean the burrs up well. Make sure you place your flare nut on there(you should have two on this line). Once again make a flare, once the flare is made take it to the car and install the line, at this point I tightened down all the lines. Once finished here gather your tools and move to the driver's side rear.
It's pretty much the same thing here except the block is a little more difficult to get to. Undo the flare nuts, and then the brake line bracket. Slide the flare nuts back and cut the lines, clean the burrs up, (once again I had to heat the lines up to remove the protective coating). Once cooled down slide your nut on there followed by the tool, and start making your flares. Once done with the two in car lines, you will have to make another line, just like before make a flare on this line and put a nut on it, then take it to the car and see how much line you will need then cut. Put your flare nut on there (you should have two on this line), then make your last flare. Take the line to the car and connect it to the block and stainless line. Tighten down your lines and that should be it for the hard part.
Now you have to fill up the brake reservoir with fluid and bleed the brakes, remember the order for bleeding is: driver's side front, then passenger's side front, then driver's side rear, and last passenger's side rear. Once you have finished bleeding the brakes. Put the tires on and torque them down(if you removed anything else, take care of that first). Once done go test those lines out.
Key stuff to remember: Be careful with brake fluid, it can remove a cars finish. Take your time, I actually stopped in between and ate dinner and then didn't finish until 11 p.m. Make sure to keep the flare point oiled.
How to use a double flare tool:
I actually haven't tested the lines out yet as I am awaiting the calipers to finish drying; I went ahead and finished up the rest under the impression that everything should go smoothly when I wake up later today. Also, I will not be held responsible for any damages that make occur upon someone trying to use these instructions. This is intended for guidance and it is the responsibility of the vehicle owner to ensure that there vehicle is safe to be driven with this modification.
I have pictures, however I can not get them uploaded into this post, they only show up as 498X250 size photos (as seen below). Does anyone know how to make them bigger?
 09-07-2012, 01:21 AM
#2
Nice write up. i did this about a year ago. and it was the largest pain in the *** I have ever dealt with in terms of working on any car.
however, i dont recommend people do this themselves at home...
Instead, this is a much cheaper, easier alternative:
I have a NON ABS 2008 mustang with SS brake lines.
I was able to make stoptec SS brake lines work using some adapters from Fedhill USA. The passenger side lines on a non abs car are the same as an abs car so installation is no problem. The drivers side is where it is different. There is no abs distribution block so two lines come from the master cylinder and go to the front drivers side and rear drivers side. From there, the top of the front drivers brake line had a block on the top of it where a line splits off and goes to the passenger side,
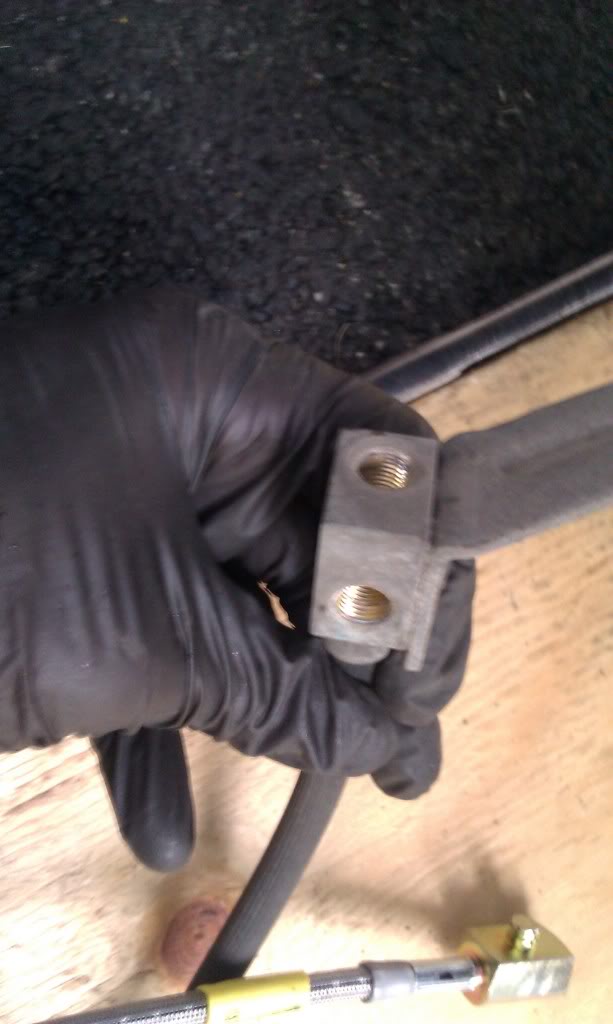
(the side port it from the master and the top port goes to the passenger side)
where no modification is needed to install the SS brake line. It's the same for the rear. To make everything fit, you need to replicate this block.
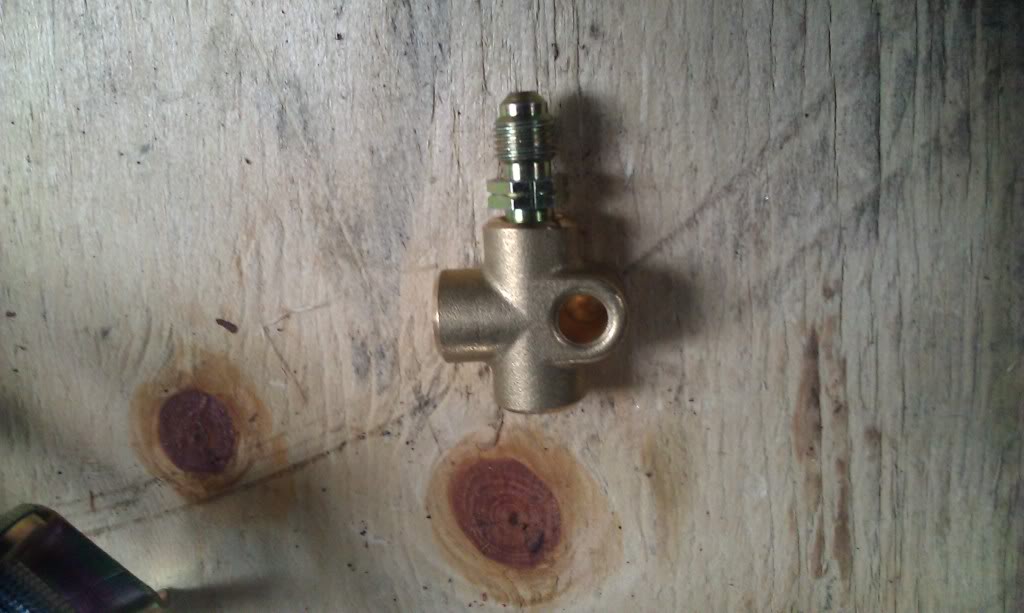
The parts you need:
FedHill USA: 10mmx10.0 3 way Female Tee NEED 2, front and rear.
FedHill USA: 10mmx1.0 Union Need 2, one for each Tee
and some bolts/washers/nuts of your choice to mount the Tee.

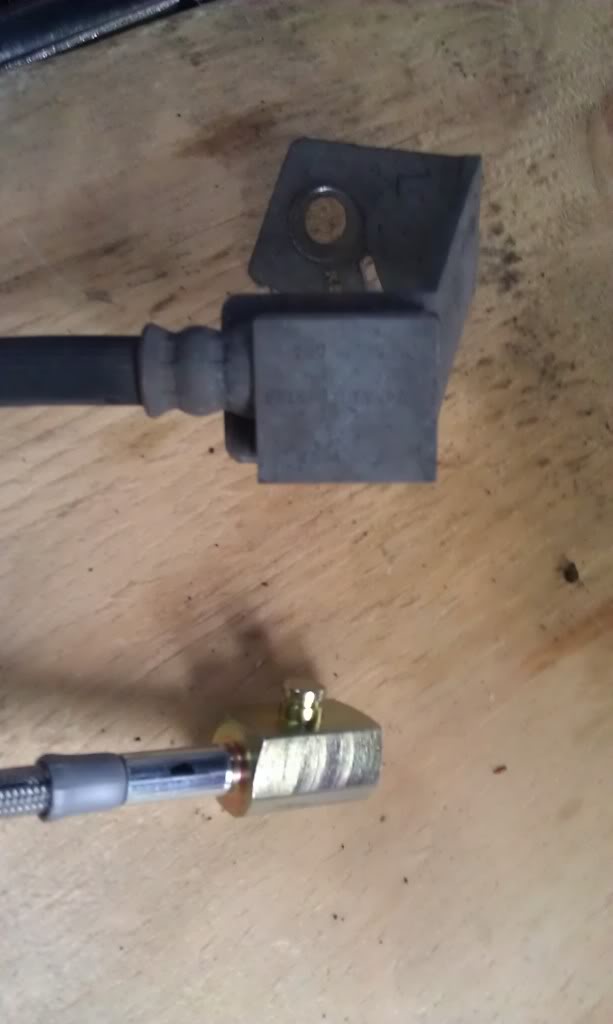
Finished product, its the same for the rear all that is different is you need to trim one of the line mounts to clear the Tee.
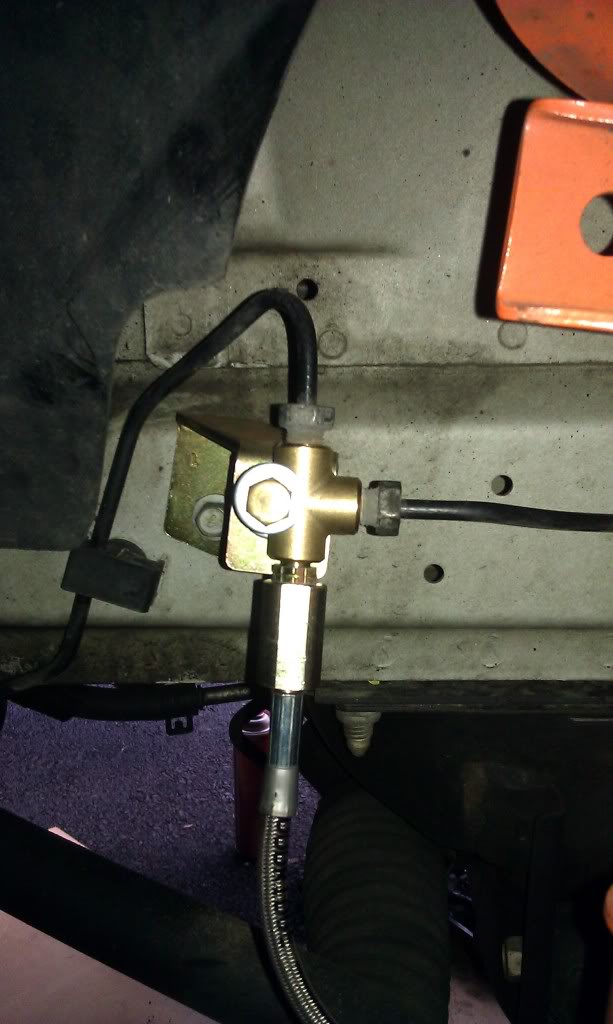
Again...Both ideas will work, just this is a way for people to accomplish the same task a bit easier or for those not wanting to cut brake lines.
however, i dont recommend people do this themselves at home...
Instead, this is a much cheaper, easier alternative:
I have a NON ABS 2008 mustang with SS brake lines.
I was able to make stoptec SS brake lines work using some adapters from Fedhill USA. The passenger side lines on a non abs car are the same as an abs car so installation is no problem. The drivers side is where it is different. There is no abs distribution block so two lines come from the master cylinder and go to the front drivers side and rear drivers side. From there, the top of the front drivers brake line had a block on the top of it where a line splits off and goes to the passenger side,
(the side port it from the master and the top port goes to the passenger side)
where no modification is needed to install the SS brake line. It's the same for the rear. To make everything fit, you need to replicate this block.
The parts you need:
FedHill USA: 10mmx10.0 3 way Female Tee NEED 2, front and rear.
FedHill USA: 10mmx1.0 Union Need 2, one for each Tee
and some bolts/washers/nuts of your choice to mount the Tee.
Finished product, its the same for the rear all that is different is you need to trim one of the line mounts to clear the Tee.
Again...Both ideas will work, just this is a way for people to accomplish the same task a bit easier or for those not wanting to cut brake lines.


Thread
Thread Starter
Forum
Replies
Last Post
tj@steeda
Steeda Autosports
0
09-10-2015 08:39 PM
Boostaddict
Lethal Performance
2
09-08-2015 09:56 PM